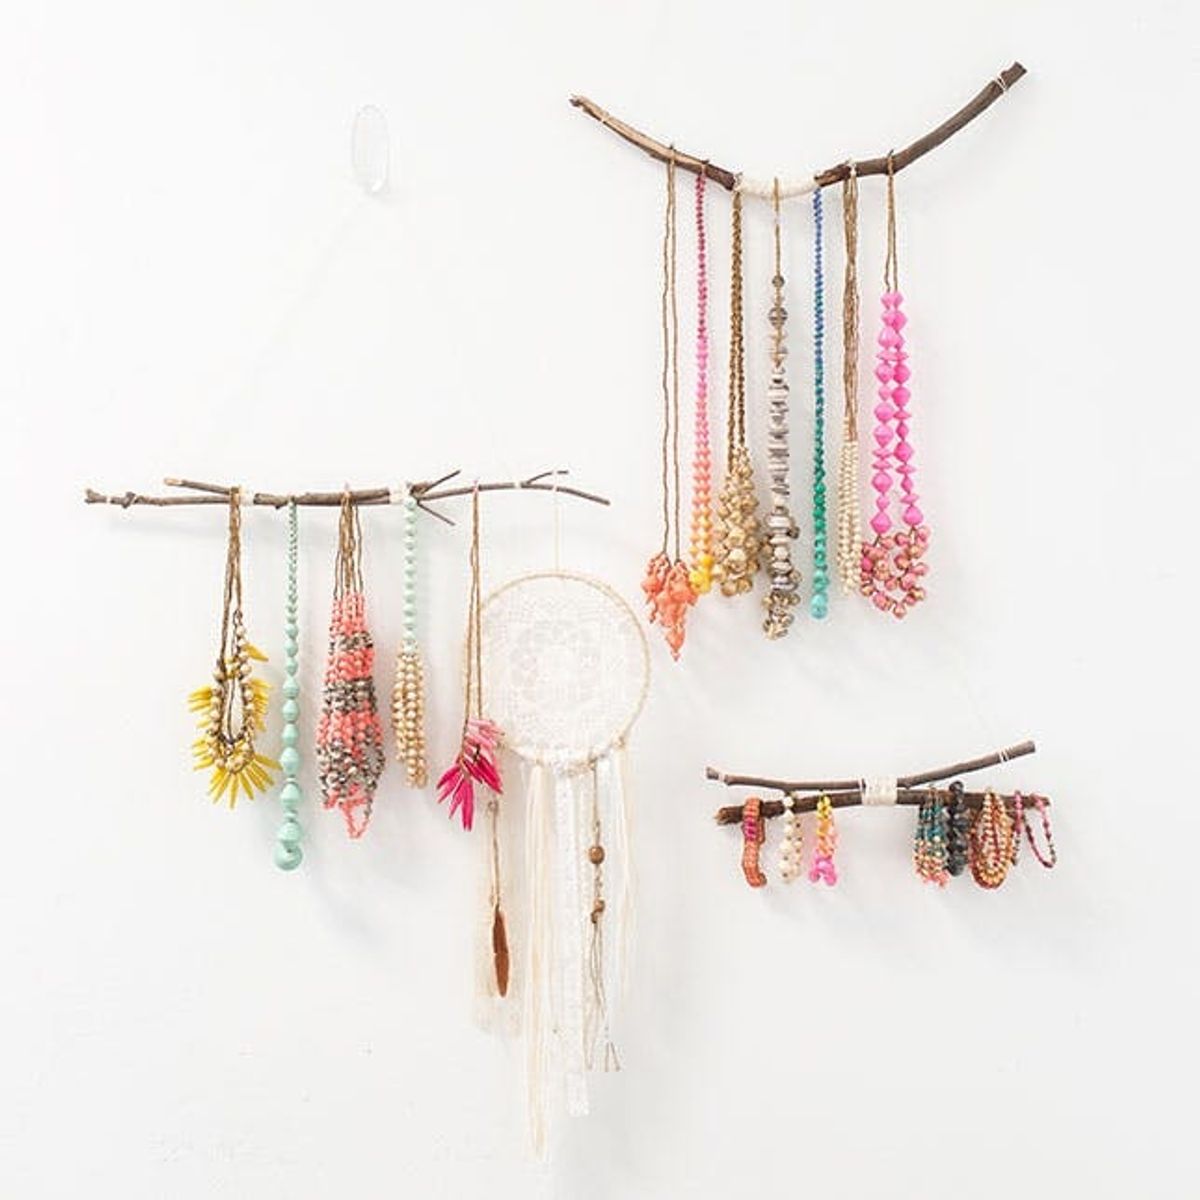
With beautiful jewelry hanging from their hooks, these organizers might be your new favorite wall art.
These Are the Jewelry Organizers You’ve Been Dreaming About

We’re always looking for new ways to organize our jewelry, and when it’s as colorful as 31 Bits jewelry, the organizer needs to show off the accessories! 31 Bits jewelry is hand rolled out of recycled paper by artisans in Northern Uganda. Through 31 Bits, the artisans are receiving employment and education that empowers them to rise above poverty. We are fully on board with supporting their business and are excited to share two amazing DIYs from their team. And now on to the tutorials! We’re making two different organizers that not only hold your precious jewels, but also double as wall art.

Reclaimed Wood Organizer

Not only can this wood jewelry organizer hold your necklaces, but it can also keep your hats or coats off the floor!
Materials:

– an old piece of wood (the thicker the better). If you don’t have a slab of wood lying around, use a piece from a wood pallet.
– an assortment of knobs (try to find knobs with a shorter stem).
– hemp yarn
– circular felt adhesive pads (optional)
Tools:
– drill
– hammer
– nails
Instructions:

1. Depending on the size of the wood, determine how many knobs you want to use. Play around with the layout before you drill holes. Once you have finalized your pattern, mark the wood with a pencil.
2. Use a drill to make a small hole where you wish to insert the knob. The size of the drilled hole must be smaller than the width of the screw on the back of the knob. Be careful not to go through the back of the board!
3. Once you have a small hole, twist the knob into the hole until it feels snug.
4. Cut two pieces of yarn at least two feet long. These will be used to hang your wood.
5. Tie a piece of yarn around each end of the wood. Then tie them together at the top to the desired length.
6. Put a nail into a stud on your wall to hang the jewelry organizer. If any of your knobs stick out in the back, you can back the wood with circular felt adhesive pads.
Decide how many knobs you want to put on your wood. Play around with a design, then mark the wood with a pencil.

Next, drill small holes where you’ve made your marks. Make sure the holes are smaller than the screws on the back of the knobs.

Add your knobs by twisting them into the holes.

Cut two pieces of yarn (at least two feet long), and tie one on each side of the board. Then tie them together at the top. Place a nail in your wall, making sure it’s in a stud, and hang your new organizer. That’s it!

Put 31 Bits on display in your home by hosting a 31 Bits house party! You, too, can empower artisans to rise above poverty (and get some cute jewelry while you’re at it). Learn how to host a house party with 31 Bits here.

Displaying and organizing jewelry doesn’t have to be expensive. 31 Bits created this next decorative jewelry organizer out of simple materials like found branches and string.
Materials:
Branch Organizer

– branches — whatever size you wish!
– string of your choice (hemp yarn, embroidery thread, etc)
– hemp yarn
– nail for hanging
Tools:
– hammer
– scissors
Instructions:

1. Determine how you want to arrange the branches. We did two hangers with two branches each and one hanger with one branch. If you want to make a hanger with one branch, be sure you choose the strongest branch.
2. When using two branches, tie the string around the branches tightly to hold them together. Make sure you tie enough string around the branches to ensure they stay together. Not only will the string serve as your “glue,” but the string also adds fun texture to the final product.
3. For a single branch hanger, tie the string around different parts of the branch to give it some character.
4. Cut two pieces of hemp yarn for each branch, at least two feet long. These will be used to hang your branches.
5. Tie a piece of yarn around each end of the branch, then tie together at the top to the desired length.
6. Hang your branches from a nail on the wall.
Determine how you want to arrange the branches. We did two hangers with two branches each and one hanger with one branch. If you want to make a hanger with one branch, be sure you choose the strongest branch. You can tie two weaker branches together to increase strength. When using two branches, tie the string around the branches tightly to hold them together. Make sure you tie enough string around the branches to ensure they stay together. Not only will the string serve as your “glue,” but the string also adds fun texture to the final product!

For a single-branch hanger, tie the string around different parts of the branch to give it some character.

Cut two pieces of hemp yarn for each branch, at least two feet long. These will be used to hang your branches.

Tie a piece of yarn around each end of the branch, then tie together at the top to the desired length.

Hang your branches from a nail on the wall. We just love how these turned out!


