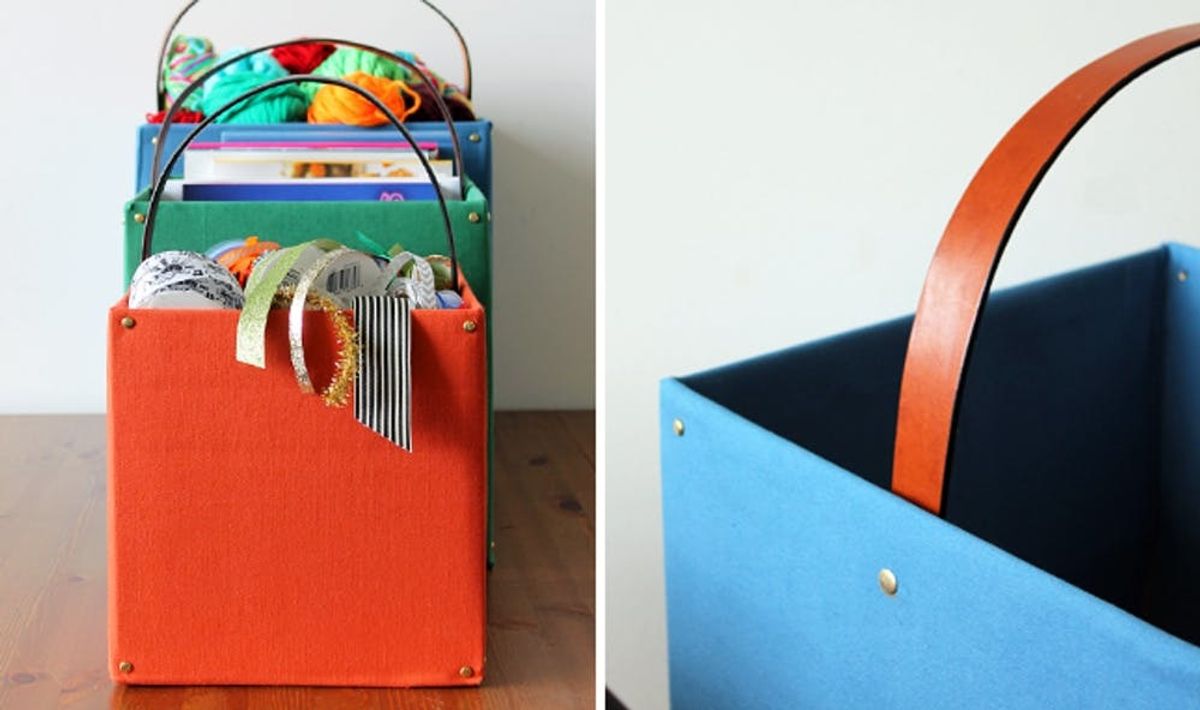
Get Organized with DIY Belted Storage Totes

While forging ahead with spring cleaning here at Brit HQ, we found ourselves with a lot of empty boxes and a lot of little things that needed to be stored. Clearly, it’s time for yet another organization hack. The solution seemed obvious, but how does one make a cardboard box actually look stylish and less… boxy? Cover the boxes with sturdy fabrics and add belts, of course!
Supplies:
– 3 square boxes (sizes: 14 inch, 12 inch, and 10 inch)
– 3 colors of fabric (The 10 inch and 12 inch box need 2 yards of fabric each, and the 14 inch box needs 3 yards)
– spray adhesive
– 3 old belts (we found ours at a thrift store!)
– 48 brads
– 6 screw bolts
– gold paint pen
Tools:
– ruler
– fabric scissors
– little sewing scissors
– drill
This project is so easy you could adapt it to any size box you already have, but we decided to use 3 standard sizes that would nest inside each other for easy storage. To start out, we are going to walk you through making a tote using a 10 inch square box.
We recommend ironing the fabric you intend to use so it goes on your box as smooth as possible.
Measure out a rectangle that is 26 inches x 42 1/2 inches.
Cut it out (insert us mimicking Joey Gladstone’s signature hand gesture).Pro Tip: If you have a table with a line down the middle, line up your fabric and use that as a guide to cut the perfect straight line.
Now fold over 1 inch of the longer horizontal side that is 42 1/2 inches, and crease by ironing it while folded. Now, with the longer side still laid out horizontally, place the box in the middle with the open side facing away from you. Use a ruler to place it 5 inches from the bottom of the fabric.
Apply spray adhesive to the right side and the top (we recommend spraying outside or in a well-ventilated area). Wrap the fabric fairly tight and smooth out any air bubbles with your hands. This is almost like wrapping a present – pretty easy, huh?
Roll the box 180 degrees to the left so the side that was facing up is now facing down. Spray the left side and what is now the top with the spray adhesive and wrap the fabric around it as well. Repeat the pressing and smoothing of the fabric. Now fold the extra fabric that is facing you like a present and use the spray adhesive to hold it in place.
Now flip the box so the open part of it is facing you. Cut the fabric to the corner of each side of the box as shown in the photo (you should have made 4 cuts). Turn the box with the open part facing up, spray the insides of the box with the spray adhesive, and fold the flaps in. Press and smooth fabric into place.
Next up, hold the belt in place where you want it to end up and mark so you know where to cut it. Then cut the belt (fabric scissors will work on this, really!) where you marked it.
Now mark 1 inch from the top of the open side of the box where you want the belt to be attached – make sure you don’t attach the belt on the side with the fabric seam. Use a drill to drill a hole in the box on your mark. Then drill a hole in the belt. Attach the belt using the screw bolts.
Wow, it’s looking good! Now mark a 1/2 inch from each corner so you know where the brads will go.
Use your mini sewing scissors (cuticle scissors would work too) to create a hole at each of those marks. Push the brads through to create a professional upholstered look.
To take this tote to a whole other level, paint the screw bolts with the gold paint pen. This unifies the design and completes the look.
We liked the first one so much, we went on to make one in a 12 inch and 14 inch size! We used a different belt on each one because we just couldn’t resist experimenting with the different colors leather belts come in.
*Measurements for the 12 inch square box:
Cut fabric to be 31 inches by 50 inches. Follow the same steps as above, except this time we allowed 6 inches of fabric to cover the bottom instead of the 5 inches used in the box described above.
*Measurements for the 14 inch square box:
Cut fabric to be 36 inches by 58 inches. This time allow 7 inches of fabric to cover the bottom.
Now fill your totes with whatever your heart desires; or whatever needs picked up and stashed!
We filled ours with ribbon, yarn, and books. But we also made extra totes to take home and plan to fill them with blankets, towels, hair supplies, magazines, and firewood.
What did you organize and store with your totes? Did you try any different colors or maybe even fabric with patterns? Talk to us in the comments in the below!


