You’ve seen those cute chalkboard cheese trays all over Pinterest. Now it’s time to make your own in a few easy steps. We’ve even thrown in some ideas for how to stage your next cheese tasting party.
DIY Basics: Chalkboard Cheese Trays

You’ve seen those cute chalkboard cheese trays all over Pinterest. Now it’s time to make your own in a few easy steps! We’ve even thrown in some ideas for how to stage your next cheese tasting party.
Materials:
– Basswood small country round by Walnut Hollow (5″ – 7″ diameter)
– Basswood medium country round by Walnut Hollow (7″ – 9″ diameter)
– Walnut Hollow clipped corner plaque (11″ x 14″)
– Walnut Hollow chippendale tray (12″ x 16″)
– Chalk Ink 6mm white marker
– Chalk Ink reusable tags
– Chalk
Start by gathering your materials, all of which can be easily found online or purchased through our sidebar.
Begin by painting your small country round followed by your medium country round. Completely cover the surface leaving a small border around the edge. Let dry and repeat with a second coat.
Repeat the process with your clipped corner plaque, painting all the way to the edge. You may want to use some painter’s tape if you have trouble coloring within the lines.
Last but not least, paint your Chippendale tray. You might want to use painters tape with this one as well.
Use Chalk Ink to write names or numbers on your chalkboard tags. FYI – After the party you can wipe the Chalk Ink clean with a wet towel and reuse the tags for another party or purpose (like wrapping gifts). Genius!
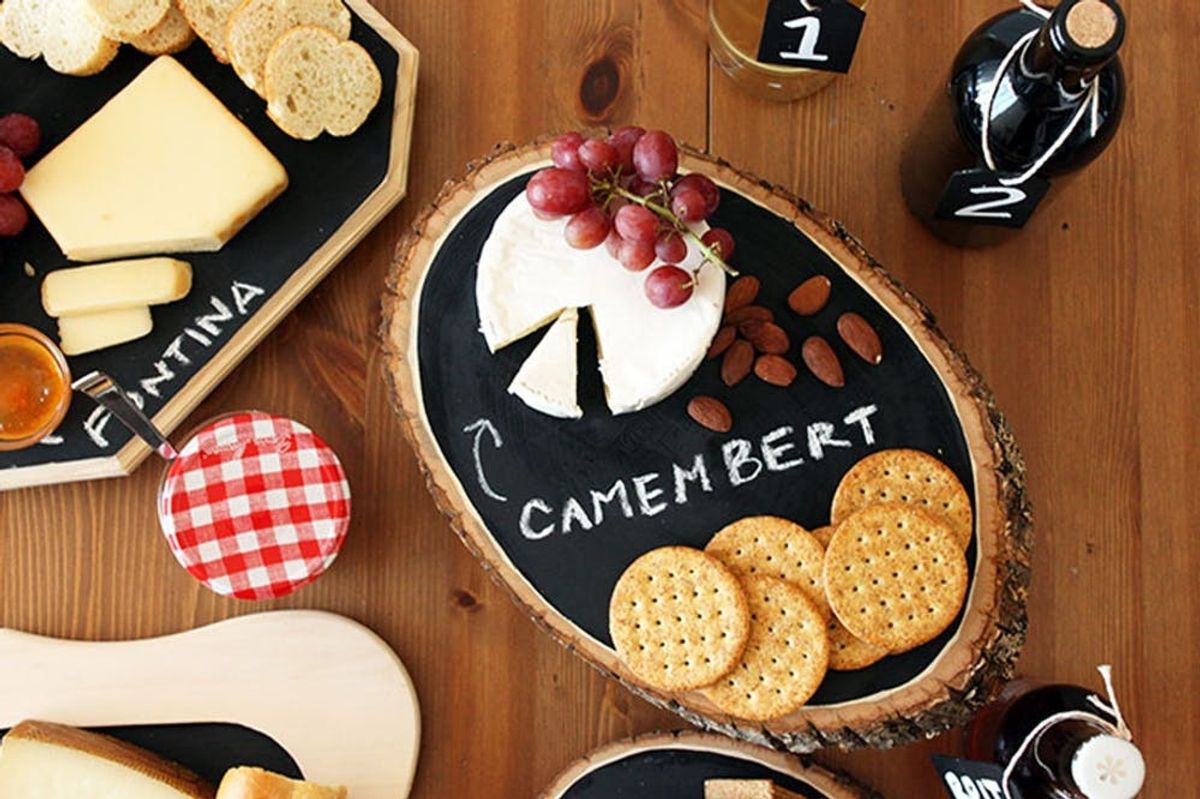
After all of your trays and tags are dry, practice staging your party. Write cheese names on your trays with chalk (the Chalk Ink might leave a mark).
Here’s an example of our staged party. We chose to add a wine tasting element by removing the wine labels and adding numbered tags.
And now for some cheese tray close-ups to help you nail down the details of your party. Note: It’s helpful to put some wax paper under the cheese before serving.
For the actual party, we staged everything on our dining table. As you might imagine, the Brit + Co. team was really happy about this DIY post.
We had a blast making these trays and throwing our cheese tasting party, and we think you will too.


