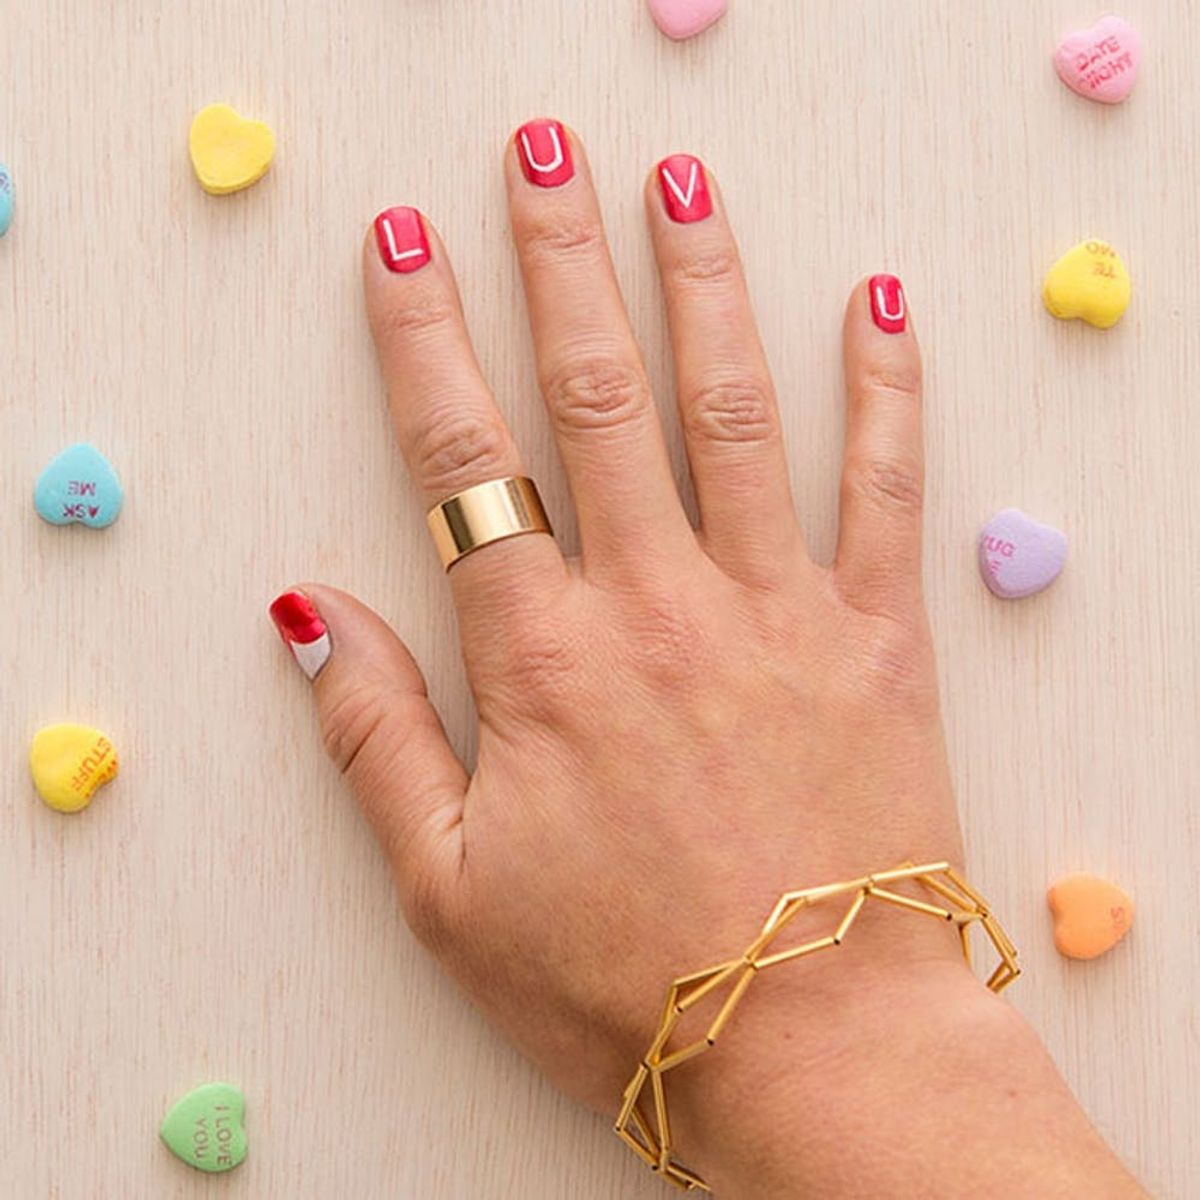
When your words fail, let your nails do the talking!
This DIY Valentine’s Manicure Works Whether You’re Swiping Right OR Left

Valentine’s Day is fast approaching! You may already have the cutest pink and red outfit picked out, but do you know what you’ll wear on your nails? For this holiday, we wanted to create a set of nails that are as sweet as candy. This conversation heart-inspired tutorial includes two fun designs, perfect for the gal who can’t quite make up her mind when it comes to nail art… or who she wants as her date for the evening (along those lines, make sure to put “LUV U” on your right hand and “CU L8R” on the left hand so you don’t get confused while you’re swiping left and right ;) Whether or not you find your perfect match this February 14, this super playful nail art is sure to make a statement. Grab your polishes, and let’s have fun, sweets!
Products:
– base coat like OPI Natural Base Coat ($8)
– pale pink polish, Teddy Girl by Butter London ($15) is a favorite
– candy pink polish, Señorita Rose-alita by OPI ($6) is a great color
– red polish, we used Gangsta Boo by Floss Gloss ($8)
– white polish, we used Alpine Snow by OPI ($7)
– topcoat like Seche Vite Fast Dry Topcoat ($9)
Tools:
– thin nail art brush
Start by applying a base coat on your nails. Apply a thin coat of pale pink polish to your thumbs, and a thin coat of the candy pink polish to the rest of your fingers. Once your first layer is dry, add a second thin coat of polish to your nails. Using thin coats will help prevent your nails from chipping later.
Dip your thin nail art brush in the white polish to start painting your letters (pro tip: I take the brushes out of the Stripe Rite bottles). I like to paint simple letters that are made of mostly straight lines (trust me, it’s easier!) or have basic curves like the letters in our first very ’90s-feeling phrase “CU L8R.” To keep your lines thin, make sure you clean your brush in 100% acetone nail polish remover between each letter. Then draw away!
Switch hands and start writing your second phrase: here we’re feeling a little more love-y, so we wrote the phrase “LUV U.” Feel free to paint on any short festive phrases you like, “AMOUR,” “LOVE” and even “I <3 U” all work. Just know you might have to double up on letters. When giving yourself nail art that includes text, I recommend not painting letters on your thumbs because it’s harder to see a full phrase or word when the thumb is included.
Once you’re done with the letters, move on to your thumbs to create a heart gradient. With your clean thin brush and the candy pink polish, paint two curved lines that start on the middle edges of the nail. The lines should meet in the middle to create the top of heart. Continue painting towards the tip of the nail, but don’t worry about painting it all the way to the tip. Clean your nail art brush, and use the red polish to create the same heart shape in the bottom third of your nail. Paint the rest of the nail to the tip in red.
Since this is a layered look, make sure to give the polish plenty of time to dry. Then top it all off with your favorite topcoat!
Whether you’re planning a romantic night with your S.O. or are spending the holiday with your friends, these feisty nails are just so much fun. The gradient hearts look gorgeous as accent nails — or even decked out on every single nail — and the text nails are a great way to express yourself. When your words fail, let your nails do the talking!
Though you can always get some help from your paper Valentines too.
Wearing: DIY Geometric Bracelet ($35 for kit), Gigglosophy Wide Gold Band Ring ($12), Gigglosophy Heart Ring ($19), Gigglosophy Midi Band Ring ($8)
How are you DIY-ing your nails this Valentine’s Day? Tell us about your fave nail art trends in the comments below.


