DIY Basics: Halloween Party Edition!
We started to get in the Halloween spirit last week with some no-carve pumpkins, high-tech pumpkins, pumpkin seed recipes, and more. This week we’re kicking off our five-week Halloween party series! Now through October 18th, we’ll be bringing you everything you need for five distinctly different—but all totally do-able—Halloween parties. So whether you want to have a classic party with candy corn and jack-o’-lanterns, a chic party with a bit of a metallic touch, or even a party that glows in the dark, we have plenty of ideas for you. The best part? These DIYs are all available in our Halloween pop-up shop! Purchase today and have these DIYs delivered to your door.
This burlap bunting is incredibly simple, and the texture is reminiscent of a scarecrow. We chose to spell out “Happy Halloween” but you could you put any number of spooky sayings on your banner. Check out these additional burlap themed Halloween ideas as well, and pick up the Burlap Bunting Kit in our shop!
Materials + Tools (or buy the kit!):
– burlap
– letter stencils
– acrylic paint
– paint brush
– baker’s twine
– needle
– ruler
– glue gun + glue sticks
Instructions:
1.Cut 14 rectangles measuring 7 inches tall and 4 1/2 inches wide out of your burlap.
2. Using the letter stencils, paint each letter of the phrase, we chose Happy Halloween, on the burlap rectangles. Let the paint dry fully.
3.Place a thin line of hot glue across the top edge of the rectangle, then fold over about 1 inch to create a seam. Repeat with remaining rectangles. Let the glue dry completely.
4. Thread the baker’s twine through your needle, and then thread through the top of each square.
5. Hang on the wall using tape or thumbtacks.
We chose to do rectangles for our bunting, but you could also measure out triangle pennants or other spooky shapes.
Hold the stencils steady to make sure each letter is clear. You’ll want to have newsprint or scrap paper under each letter (and use a fresh sheet each time) to prevent the paint from bleeding.
Create the seam right above the letter, and try to make them as even as possible. You can measure if you want, but it’s easy enough to just eyeball.
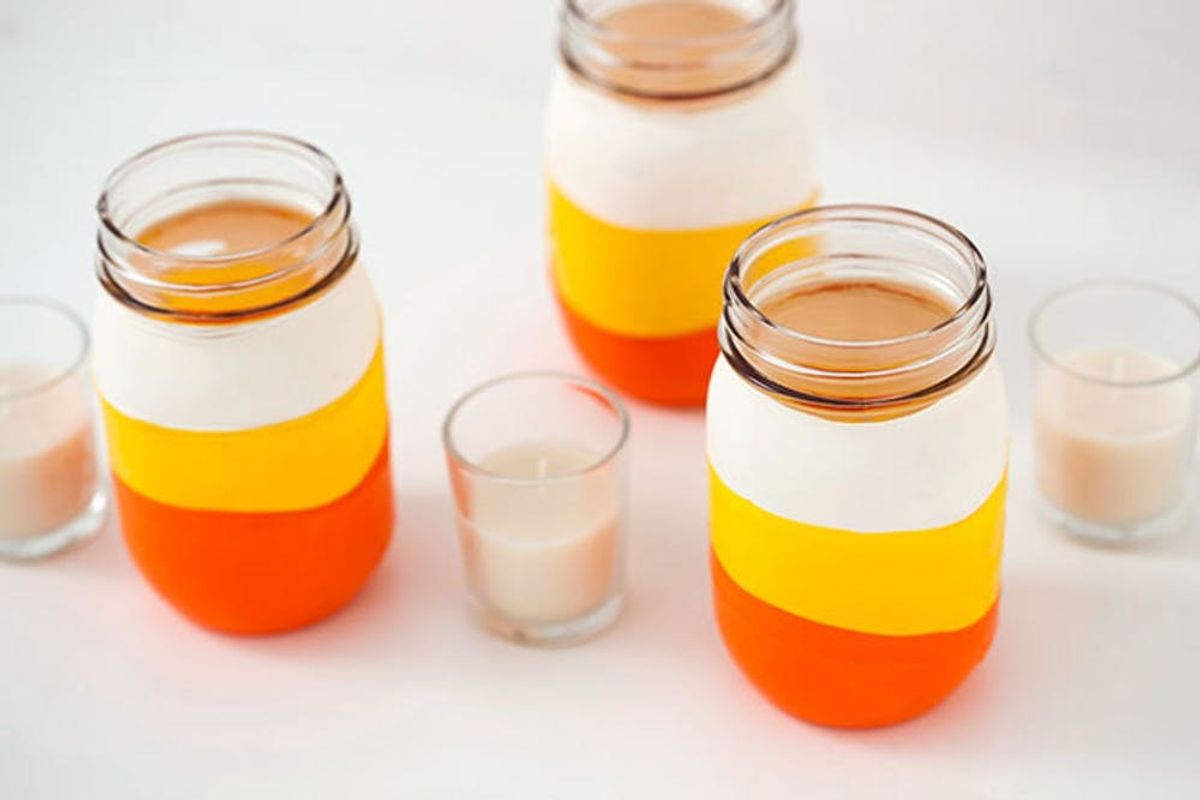
Remember our balloon-dipped mason jars? We decided to give them a candy corn makeover! And instead of using them as drinking glasses, we’ll be putting votives inside to light up our table. Wondering how you can get your hands on these? Guess what? They’re available as a kit in our shop!
Materials + Tools:
– mason jars
– white, yellow, and orange balloons
– scissors
Instructions:
1. Cut off the skinny “stem” of the balloons.
2. For the white and yellow balloons, also cut off the rounded end. For the orange balloon leave the round end intact.
3. Pull over your mason jar so that white is on top, yellow is in the middle, and orange is on the bottom, just like a candy corn!
Only trim a little bit off of the ends. You want to have as much wiggle room as possible with the balloons, and the colors should overlap.
Leave the bottom of the orange balloon intact so it fully covers the jar.
No Brit + Co. party would be complete without a few washi tape drink stirrers! We rounded up the spookiest washi designs we could find for this party!
Materials + Tools:
– assorted washi tape
– drink stirrers
– scissors
Instructions:
1. Cut a piece of washi tape about 2” long.
2. Wrap washi tape around the tops of the stirrers.
3. Trim ends into pennants.
Cut the washi tape a bit longer than you want your pennant to be. That way you can trim it cleanly.
The designs and layers for theses pennants are seemingly endless!
Candles are an essential at any Halloween party, and to stay on theme with the classic party we went for simple green, purple, and orange candle sticks. Get ready to spray paint!
Materials + Tools (or buy the kit!):
– six candlesticks, which make up two sets of one large and two small candlesticks
– orange spray paint
– green spray paint
– purple spray paint
– rubber gloves (optional)
Instructions:
1. Hold each candlestick at about arms length and spray paint until fully covered. Let dry completely.
2. Arrange in two separate clusters of one tall and two small candlesticks.
We’re guessing you’re all pros at spray paint by now! Just remember to spray in thin coats and let the candlesticks dry completely. It’s always better to have to spray an additional coat than to have drips.
That wraps up our basics for our Classic Halloween Party, check back tomorrow for our delicious dessert! And tell us in the comments whether or not you’ll be hosting a Halloween soiree this year!

