This is *so* cool.
How to DIY a Valentine’s Day Embroidered Engineer Print

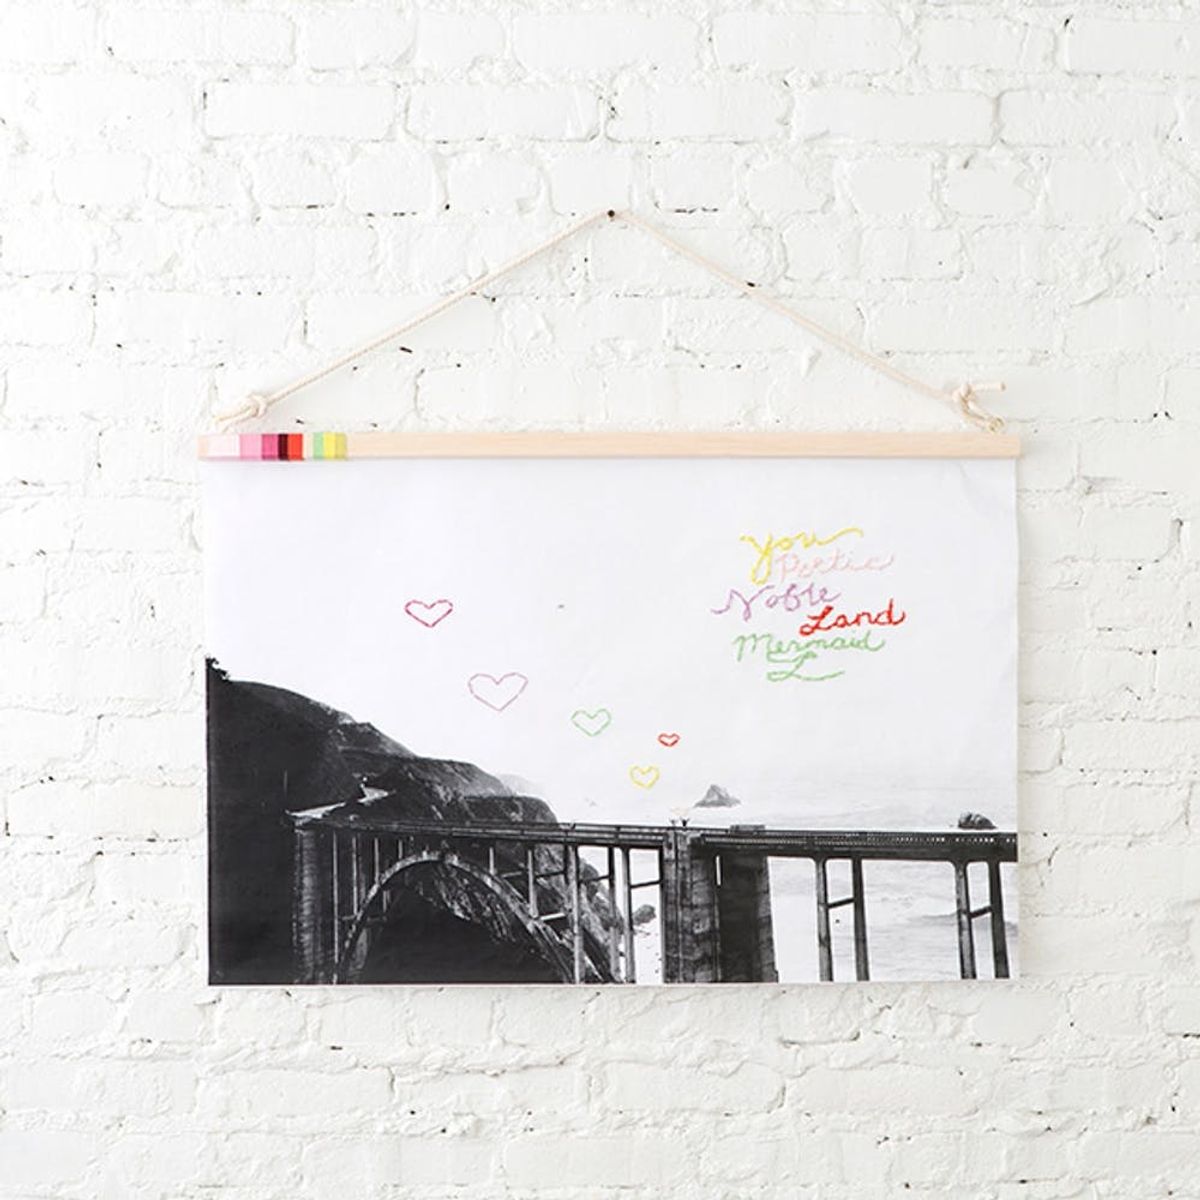
We are all about gift giving here at Brit + Co, especially ones we can customize for all the amazingly different personalities in our lives! This is a super fun Valentine’s Day gift that can hang all year long — and it’s affordable to boot! The secret — or maybe not so secret — is a Kinko’s hack: large scale engineer prints. These inexpensive prints can be printed right on the spot and cost about $5-$7. We dressed ours up by embroidering our favorite words and made a simple Balsa wood and rope fixture to hang it on the wall.

There are so many variations — this work of art can be gifted to loved ones, gal pals, moms, dads and more!

Materials and Tools:
- — engineer prints (we printed a few to have more options)
- — balsa wood (can generally be found at art supply stores)
- — stapler
- — pencil
- — hanging rope
- — hook screws
- — scissors
- — embroidery floss (various colors)
- — threading needle
- — hot glue gun
- — measuring tape or ruler

We saved our images (at least 200 dpi) to a thumb drive and headed to Kinkos. Some of our photos were small iPhone photos, but the resolution is forgiving since engineer paper will always be a bit pixelated. Pro tip: Convert your images to black and white to adjust the contrast before saving on the thumb drive. That way you will know what to expect when printing.
We wanted to print on the larger side, so we settled for 24 x 36 inches. Depending on how they’re printed, you may need to do some trimming.
Lightly sketch your favorite words, quotes, lines or figures with your pencil.

String your embroidery floss through your needle (it’s easier to use a thicker needle) and tie a simple knot at the end.

Pro tip: Puncture holes along your sketched lines to give yourself guidelines as you stitch. Here are 10 types of stitches you can use if you’re feeling stuck!
This is the longest step, but we found it super relaxing to put on a great podcast or album (um, Adele all day) while we threaded the type!

When you get to the end of a piece of thread or would like to switch colors, simply thread your last stitch through so that the needle is on the backside of the paper, then tie a single knot and cut with scissors.
Once you’ve completed your threading, take your Balsa wood and measure it against your print. You may need to trim it, in which case you can take your utility knife (an X-ACTO knife could work as well) and saw the Balsa wood down.

To jazz up our Balsa wood, we wrapped embroidery thread around it in various colors. Hot glue the beginning and end of each color.


Next, measure an inch from each end of the Balsa wood and mark with a pencil. This is where your hook screw will go. Your hook screw needs to be at the top of your wood piece, and your hot-glued embroidery thread should be facing the backside (where your print will be stapled).
Gently screw your hook screw in place. The great thing about Balsa wood is that it is light and easy to puncture.

Repeat on the other side.

Once the screws are in, lay your Balsa wood down with the hot glue-side up (this is your backside). Take your print and lay it over the back of your Balsa wood and staple your print onto the wood. We did about 5-6 staples across the print.

Now tie it all together (pun intended!) by taking your rope and tying a double knot to latch onto your hook screw. Repeat on the other side, adjust the length of your rope if need be and then trim the end of that knot with scissors. Your custom work of art is complete!

Here is our take on a wonderful Ann Perkins/Leslie Knope compliment. We’re such huge fans of Parks + Recreation that we’ve even created printables of these wonderful sayings for your favorite gal pal.
Instagram your lovely creation with the hashtag #britsagram so we can admire your awesome embroidery skills!


