It’s hard to keep up with hair trends these days—from bold hair accessories to high fashion styles, it seems like something new is always coming out of the woodwork. But sometimes, we here at Brit + Co. think it’s best to keep it simple, and that’s just what we’re doing with this project: accessorizing a basic pony with four DIY hair cuffs made from just two materials—metal rings and faux leather scraps! And believe this: they take just as much time to make as they do to slip onto your mane. This is one, well, four hair hacks you should not pass up!
Tie One On: 2 Materials, 4 DIY Hair Cuffs

It’s hard to keep up with hair trends these days—from bold hair accessories to high fashion styles, it seems like something new is always coming out of the woodwork. But sometimes, we here at Brit + Co. think it’s best to keep it simple, and that’s just what we’re doing with this project: accessorizing a basic pony with four DIY hair cuffs made from just two materials—metal rings and faux leather scraps! And believe this: they take just as much time to make as they do to slip onto your mane. This is one, well, four hair hacks you should not pass up!
Materials:
– metal rings (we used one adjustable brass ring and one 1 inch copper pipe)
– faux leather scraps (we used faux leather notebooks from the dollar bins at Target)
– hair ties
Tools:
– glue gun + glue
– ruler
– box cutter or utility knife
– pipe cutter (optional)
– bolt cutter (optional)
– 2 pairs of pliers (optional, not shown)
Instructions:
1. Cut fabric or metal to desired size. Cut out design if applicable.
2. Glue fabric or metal cuff to hair tie.
3. Put your hair in a ponytail using the hair cuff.
Brass Ring Hair Cuff
First, pry open your adjustable brass ring. Next, using your glue gun, glue your hair tie to the inside of your adjustable ring.
Finally, tie your hair up into a ponytail using your new hair cuff! Strawberry-blonde babes out there—this is the wow-worthy hair cuff for you!
Copper Pipe Hair Cuff
Just a note to start: we have the tools on hand to cut and slice our copper pipe, but incase you don’t, your local hardware store should be able to do this for you no problem. Cool? Okay, so if you do have a pipe cutter handy, cut the pipe to your desired length (we cut ours to about 3/4 inches—but you could leave it totally intact if you want to go for a super modern-minimalist look, too!). Next, slice open the copper pipe with a bolt cutter, then pry it open, just like you did with the pre-cut brass ring above—you can use pliers or your hands if you’re ready to hulk out. Then, glue your hair tie to the inside of your copper pipe.
Now you can tie your hair up just as you would normally with a hair tie, except look WAY cooler doing it ;)
Faux Leather Cutout Hair Cuff
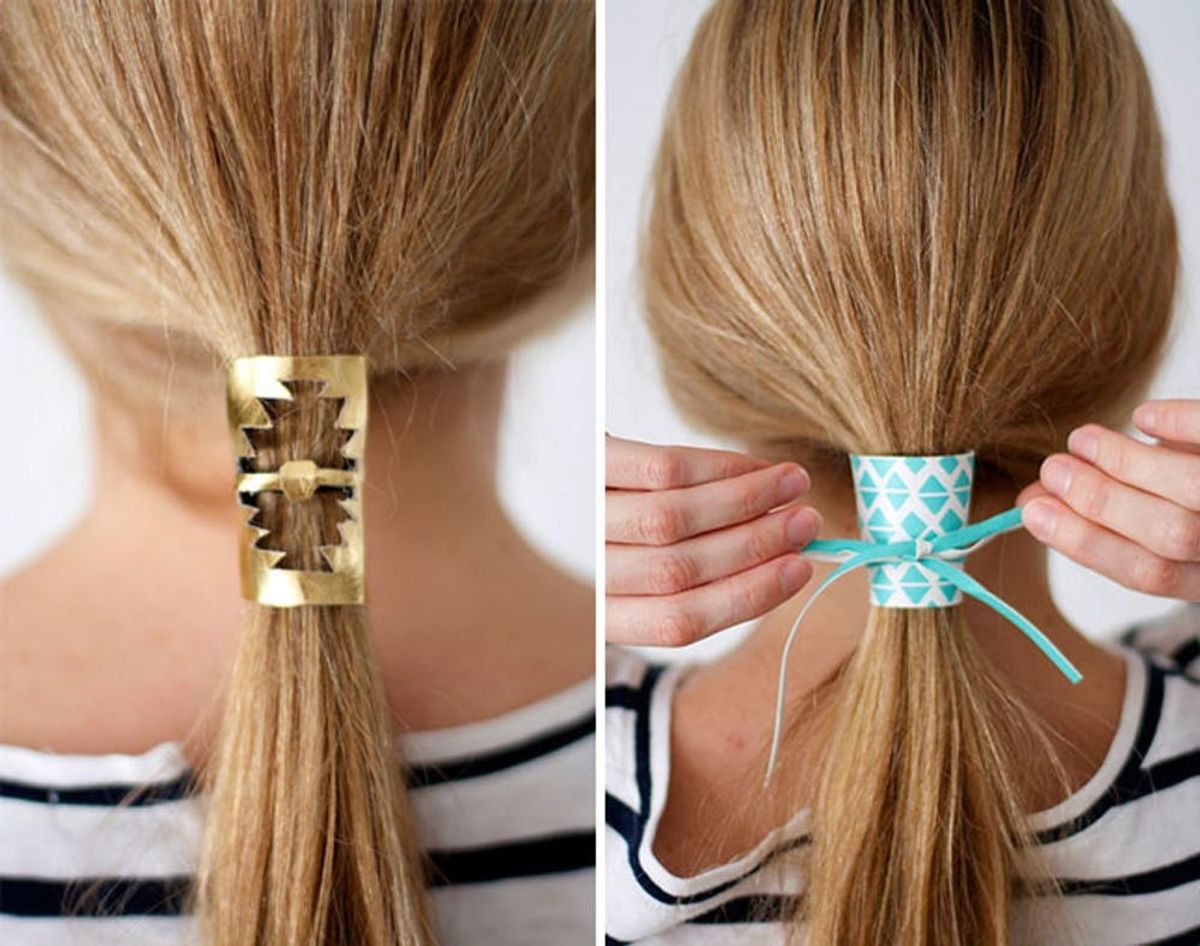
Start by cutting a piece of faux leather to size—we’re using the cover of a faux leather notebook we got from Target in this stunning metallic gold, but you can use any scraps you may have laying around. My hair is relatively thin, so I cut this to about 2 by 3 inches. If you have thicker hair, you may need to cut it slightly wider. Then using your box cutter or utility knife, cut out your desired pattern. We’re obsessed with tribal-inspired designs, so we drew our inspo from this dope Free People cuff. Whatever you decide to carve, make sure to leave a strip of faux leather in the center large enough to camoflauge your hair tie, which you’ll glue right in place.
Now toss your hair up! This hand-carved cuff might be our fave of the bunch.
Patterned Faux Leather Hair Cuff
For this last cuff, we used geo patterned faux leather to make a thick hair cuff just like the one above, minus the cutout (though, it would be cool to cut out some of these triangle shapes and leave others fully in tact, too!). So cut the faux leather to size—again, ours is about 2 by 3 inches, but be sure to cut it wider if your hair is thick. Then, glue your hair tie to your cuff, and you’re almost done! We’re just adding one more frill—a bow made from the notebook’s faux leather tie. Resourceful, huh?
To attach, just knot the leather tie around your patterned cuff, and you and your pretty pony are ready to go!
Would you make these hair cuffs to amp up your basic pony? What other materials have you transformed into wearable hair accessories? Tell us in the comments below.


