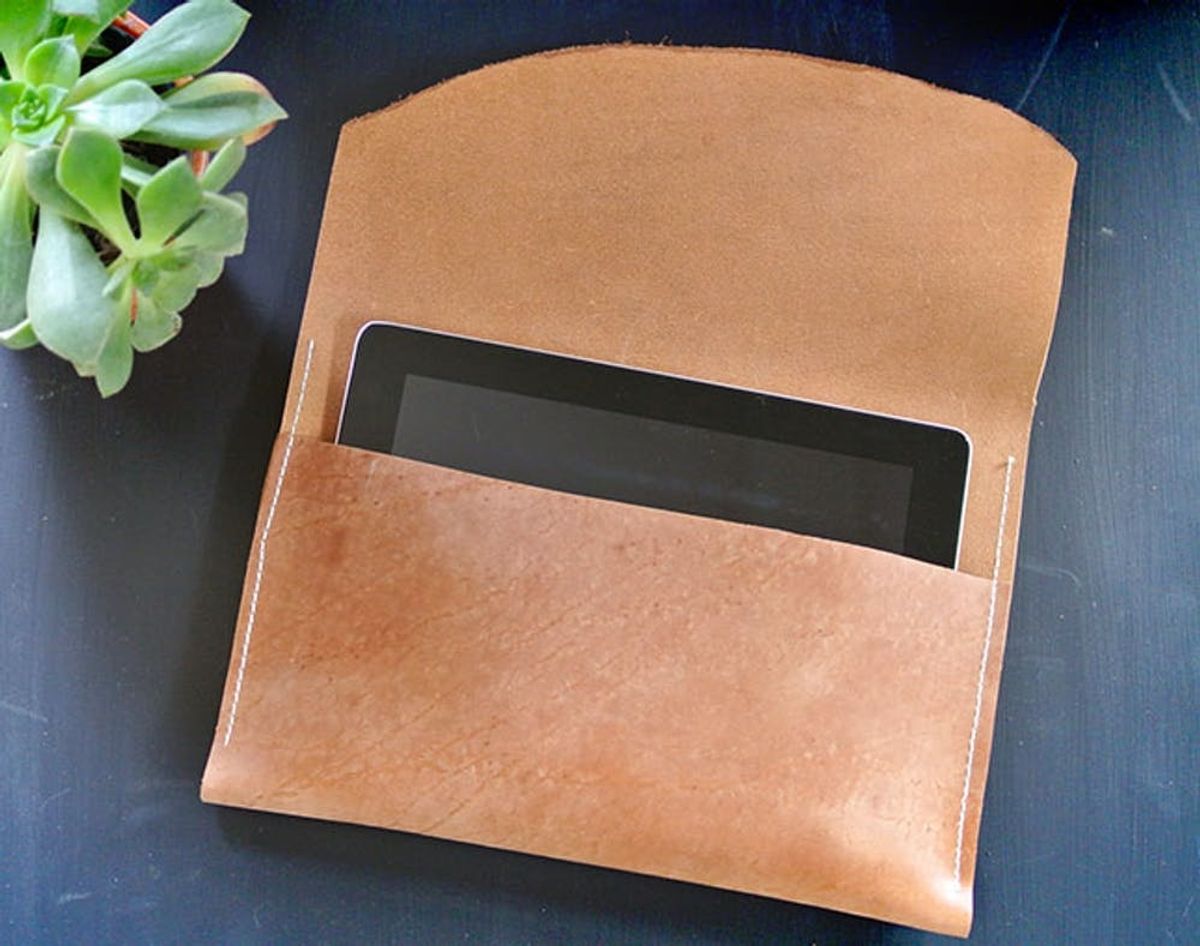
DIY a Leather Tablet Case for WAY Less Than You’d Think

If you just lose it over leather tech accessories, we get you: they're soft, tanned, luxurious-levels of swanky perfection, but are sometimes too serious of a splurge to consider. Especially after you just threw down for a $500 tablet. Not so if you DIY your own case out of leather scraps! Our 12×24 inch piece only cost a thrifty $12 — that's WAY less expensive than you'd ever pay for the pre-made tech-cessory in store! — and it only requires basic sewing skills to put it together. Trust us, the material is much easier to work with than it may seem. The same goes for vinyl, which is a perfect vegan substitute.
Materials:
– leather (or vinyl)
– yarn, ribbon, or twine for the finish wrap
Tools:
– sewing machine (though you can hand sew if necessary)
– scissors or a rotary cutter
– heavy duty sewing machine needle
– heavy duty hand needle
– pins or clips
– measuring tape or ruler
Instructions:
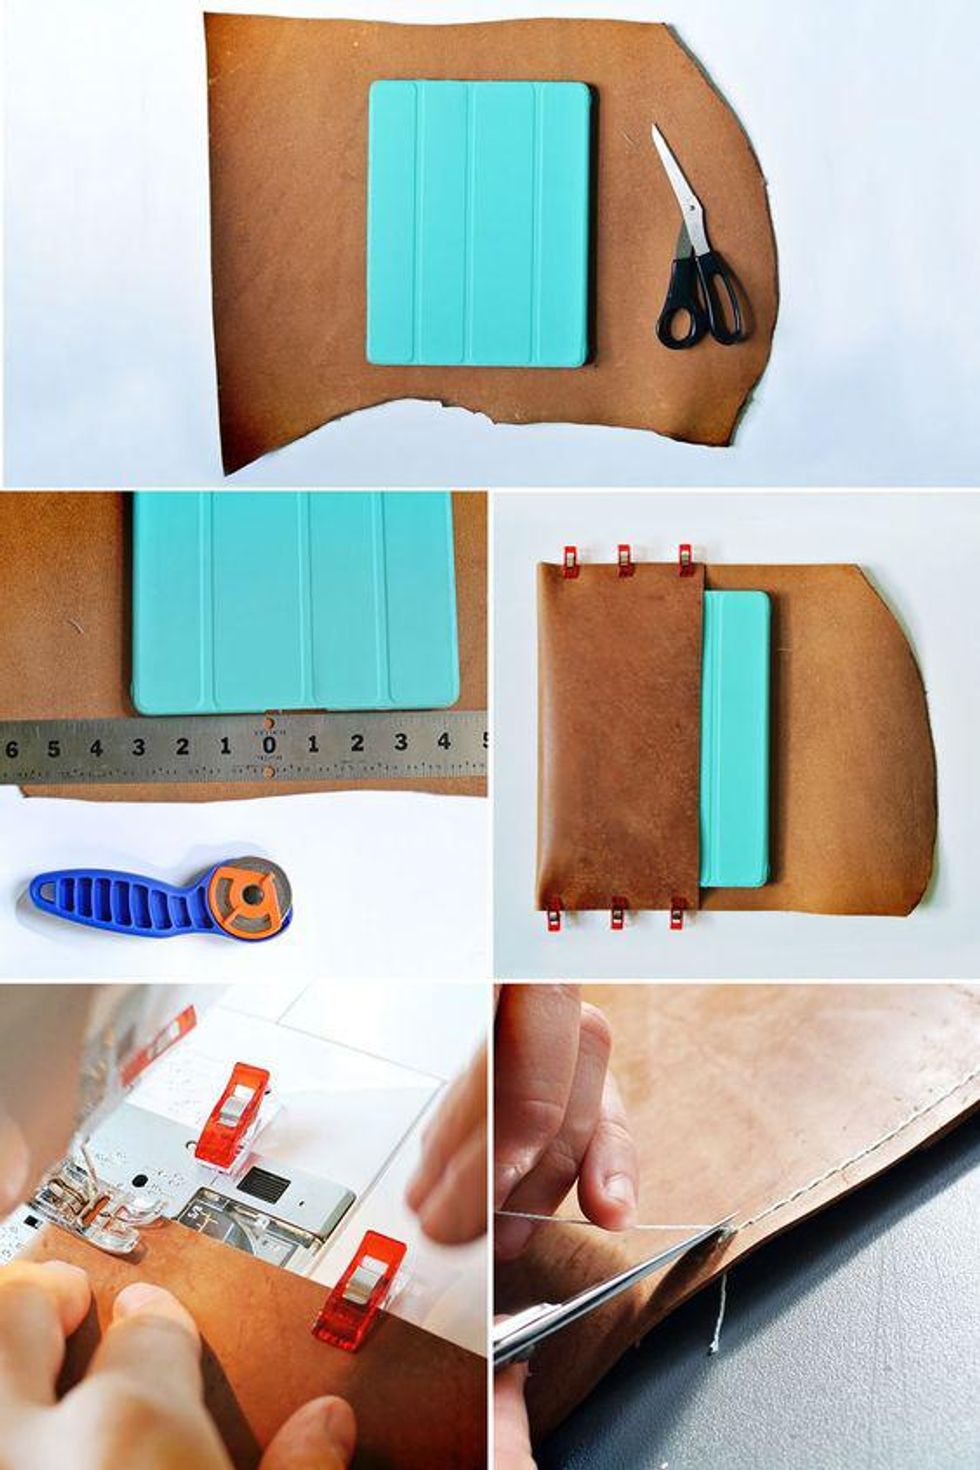
1. Lay the tablet in the center of your leather. Measure and cut the material to form an envelope case pattern around your tablet, leaving about an inch on either side for the seams.
2. Clip or pin the pouch part of the envelope case together.
3. Sew the sides of the pouch together using heavy duty thread and a heavy duty needle in your sewing machine.
4. Flip over the envelope case and hand sew a loop in the back center of the case with a piece of double looped thread — this will act as the case's closure.
5. Loop a long piece of thread, ribbon or twine through the loop and around the case to close. Then take your tablet out for a spin!
If you're starting with an extra large leather piece, cut it down to a more manageable size before you measure the dimensions you need for the device of your choice — large enough to make an envelope template around your tech with about an inch of space on either side. Here, we used the natural curve of the leather as the envelope fold and clipped the remainder of the material together to create the pouch.
Pro tip: add an extra clip past the fold over seam to mark where you should stop sewing. Once your machine is tricked out with a heavy duty needle and thread, sew each side together and trim the threads to finish.


Gorgeous, right? And WAY easier than you thought, too? All that's left to do is add a simple closure.
Flip your case over. Using a small piece of double looped thread, sew a small loop in the center. Then, grab a long strand of ribbon, twine or yarn like we used and thread it through to create a cool wrap closure.
And you're done! Get ready for non-stop "where DID you get that"-s from the local cafe crowd. How good will it feel to say "I made it"?
Stylish, protective and wallet-friendly. Pull your iPad out of its case and share THAT with your FB friends!
What DIY ways have you dressed up your tech? Tell us @BritandCo!


