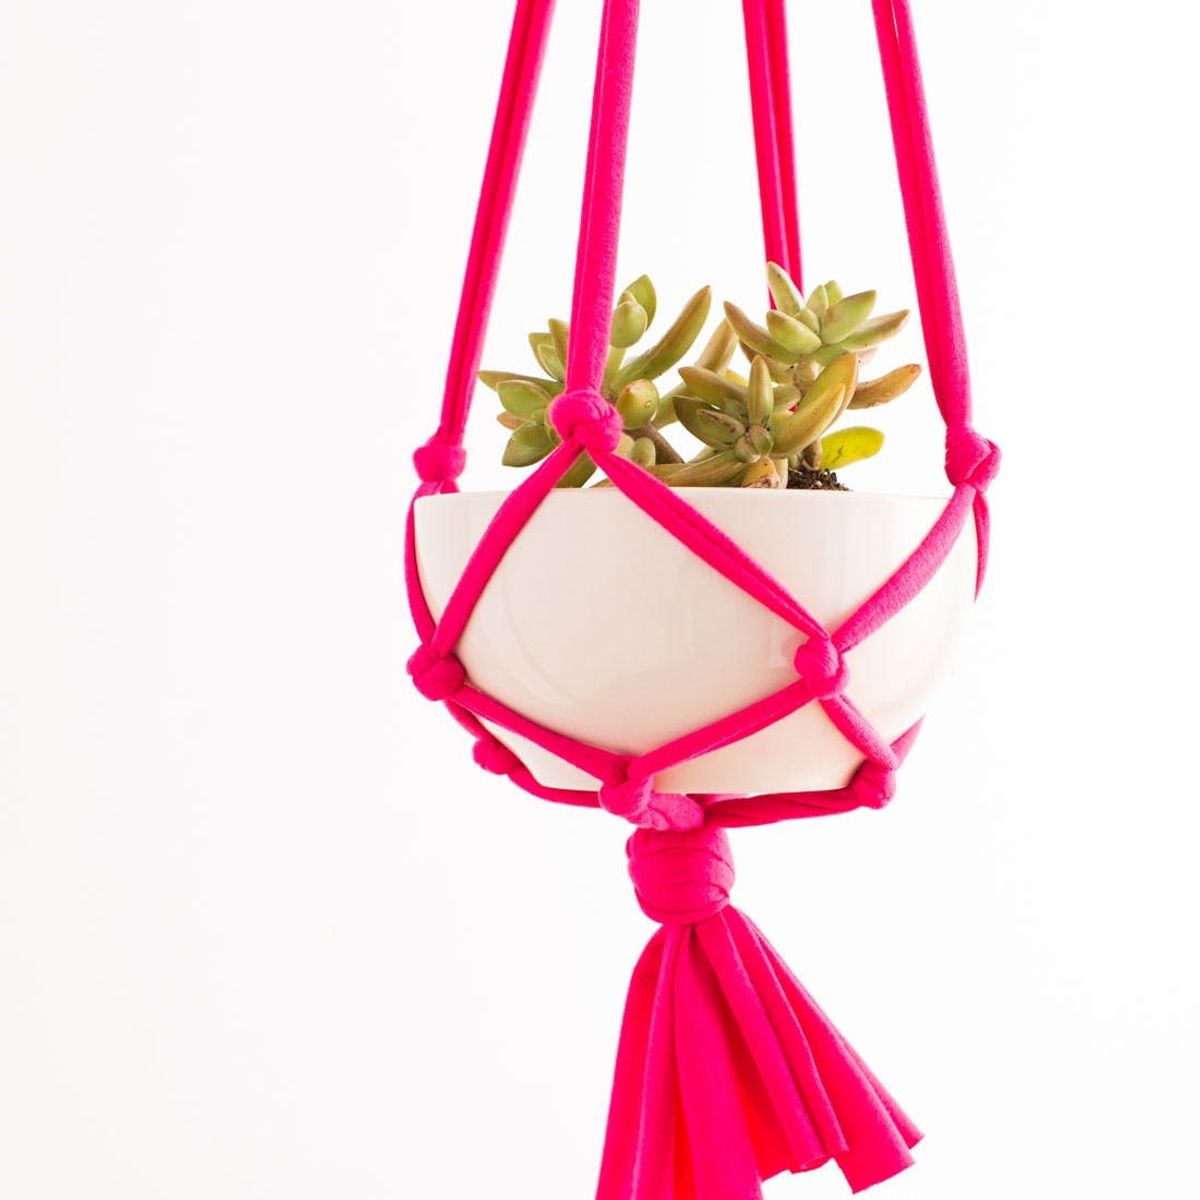
Get knotty with these macrame hanging planters.
Make These Macrame Hanging Planters in 30 Minutes!

Lately we’ve been sprucing up every corner of our homes with cozy pillows, giant wall clocks and frosty glasswares. So this round, we wanted to add something lighter, brighter, and alive to our home decor! We created these Macrame Hanging Planter Kits that are a snap to put together and are now available for $25 in the B+C shop!

This DIY project is one of many that are illustrated in our book, Homemakers, due to release next month. Pre-order one for yourself to unlock over 50 of our favorite projects for the modern home, complete with step-by-step instructions.

Materials:
– Jersey Knit Fabric
– Ceramic Planter
– Tape Measure
– Hook Screw
Additional Tools (not included):
– Scissors
Instructions:
1. Cut your fabric length-wise into 8 total 1.5-inch strips.
2. Then stretch each fabric strip into round cords.
3. Tie all 8 cords together in one big knot, about 4 inches or so from the ends, and pull tight to secure.
4. Group your cords into 4 sets of 2 and tie a knot in each set, approximately 2 inches away.
5. Now separate these sets into new sets of 2 and tie them together approximately 1.5 inches away.
6. Repeat for a third time and tie each new set of cords together 1.5 inches away from the previous.
7. Stretch over your planter and tighten your knots to adjust.
8. Tie all 8 cords together at the top to finish.
9. Plant a succulent or two in your planter and hang up using a hook screw.
Less than 10 steps to these swingin’ beauties? Lets get cracking.

Grab a pair of sharp scissors and lay out your jersey fabric on a clean, flat surface.

Cut 1.5-inch strips lengthwise across your whole piece of fabric. Keep cutting equal strips until you have 8 total.

Your strips don’t have to be perfect here because the edges are going to roll inwards.

Go ahead and stretch out all those strips! Don’t forget to stretch out the ends as well.

Now that you’ve made 8 jersey cords its time to get knotty with it ;)

Grab all your cords at one end and tie a big knot securing them all together. Pull this knot as tight as you can, as it’s going to be supporting the weight of the whole planter.

Separate your cords into 4 sets of 2, and tie a knot in each set at approximately 2 inches away from your large center knot.

We suggest not tightening these all the way yet, so that you have some room to adjust them when you add in the ceramic planter.

Separate your cords into new sets of 2 that attach in the middle to form a diamond. Tie all 4 of these second-tier knots approximately 1.5 inches away from the previous knots. Don’t quite tighten these all the way so you can adjust them later.

Repeat this step once more for the third tier of knots, also tied approximately 1.5 inches from the previous knots.

When you’re done it should look like this – with a large knot at the bottom and three tiers of small knots.

Stretch your macrame hanger over the ceramic planter bowl and grab all your cords at the top. Take the time here to adjust and tighten all your knots so that the three tiers sit at the bottom edge, middle, and top edge of the bowl.

Hold your cords straight and tie a knot at the top end, making sure that each set of cords is even and that the planter hangs straight. Then tighten this knot as hard as you can to secure.

We’ve included a large hook screw in our kit, but make sure to check what tools and hardware you may need for your specific type of ceiling before hanging.

Fill up your planter with potting soil and a few plants and you’re good to go! Succulents work well for these planters as their roots grow fairly shallow.

We added Mint and Navy color options as well as this vibrant Magenta. So grab a kit and get making!

What other macrame creations are you looking to DIY? Tell us by tagging @britandco on Instagram.


