Make These Cases for Your Laptop and Tablet

If you haven’t heard, B+C has teamed up with Cotton Incorporated, and we are smitten. For this DIY we are focusing on our tech side, creating cases to keep our electronics safe as we head back to school (or work) this fall. Working on DIYs day after day, I find myself using cotton fabrics more and more due to the versatility of the material. Cotton can cover old dining room chairs, be woven into jewelry and even be turned into an extremely cute crop top. The strength and colors of cotton help make my job as a DIYer a whole lot easier :) Now let’s get making!

Materials:
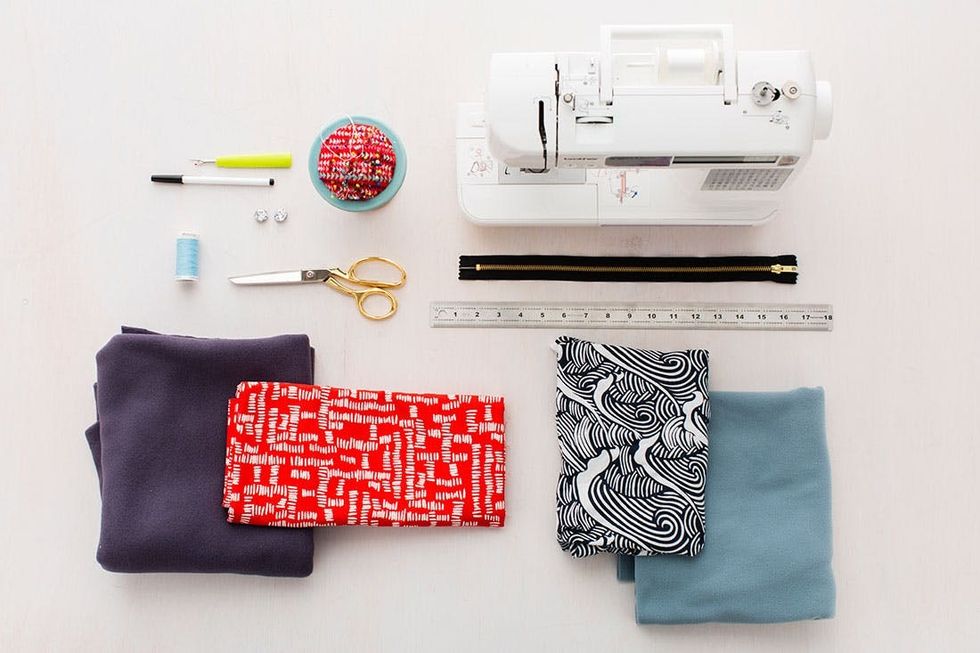
– cotton fabric
– cotton fleece
– 13-inch zipper
– 2 buttons
– needle + thread
Tools:
– sewing machine
– ruler
– fabric scissors
– pen
– pins
– seam ripper
Cotton Laptop Case
Instructions:
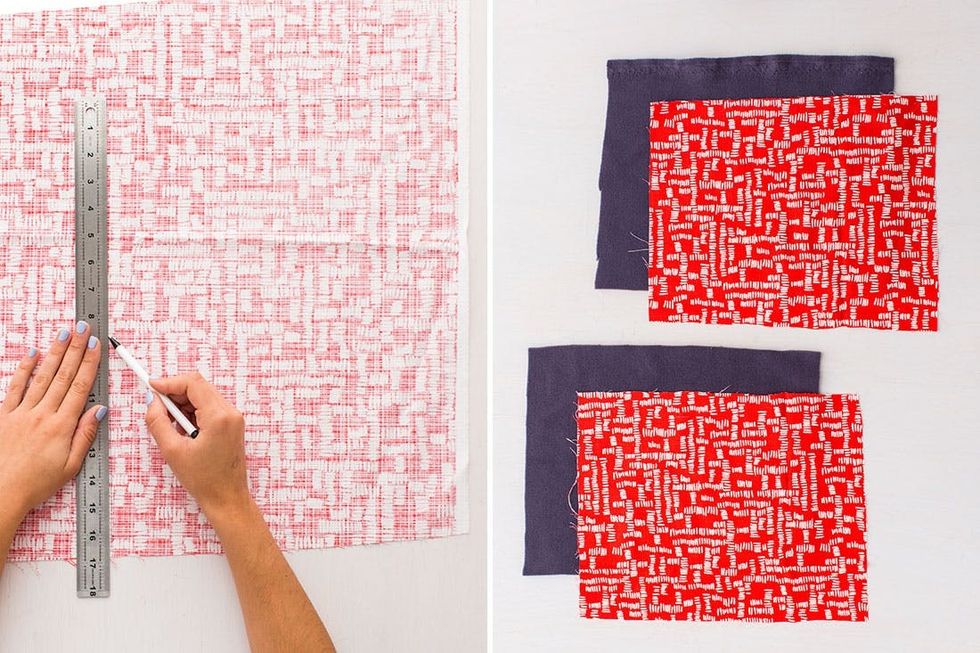
1. Measure and cut out four 13 x 16-inch rectangles from your various cotton fabrics.
2. Lay your zipper face up on the cotton fleece, add your patterned fabric on top (pattern-side down) and then pin in place. Carefully sew these three pieces together.
3. Fold back your first layer of fabric to reveal the zipper, and lay it on top of your second piece of fleece. Pin the patterned fabric on top and then sew.
4. Pair each type of fabric with its match, pin and sew. Sew each side separately. Leave an opening on the inner fleece fabric so you can reach your hand in and turn the case right side out.
5. Turn the case right side out, pin the hole and sew closed. Finally, fit the lining into the outer shell of the case and zip closed.
Measure four rectangles of cotton fabric. We made a case for a 13-inch MacBook Pro and used the measurement 13 x 16 inches for our rectangles.
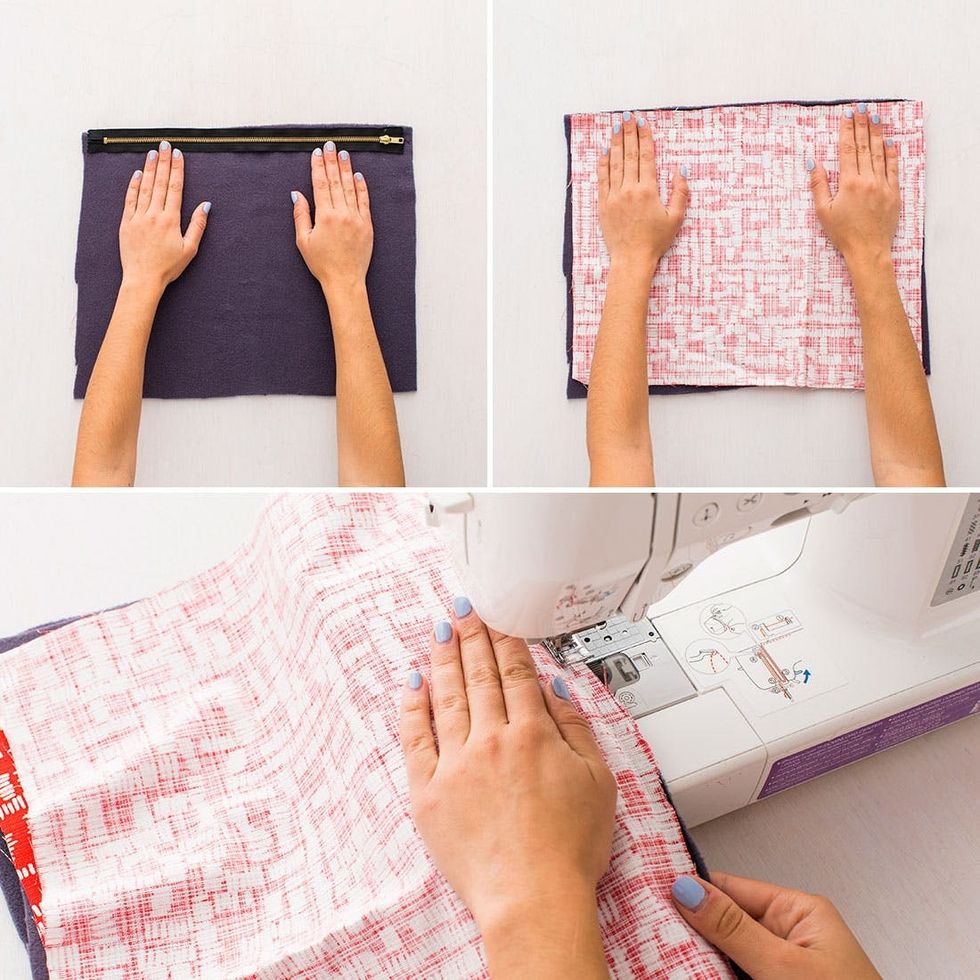
Time to sandwich the zipper in between two layers of fabric. Place the zipper facing up on the cotton fleece, and then lay the patterned fabric face down on the zipper. Pin and sew in place.
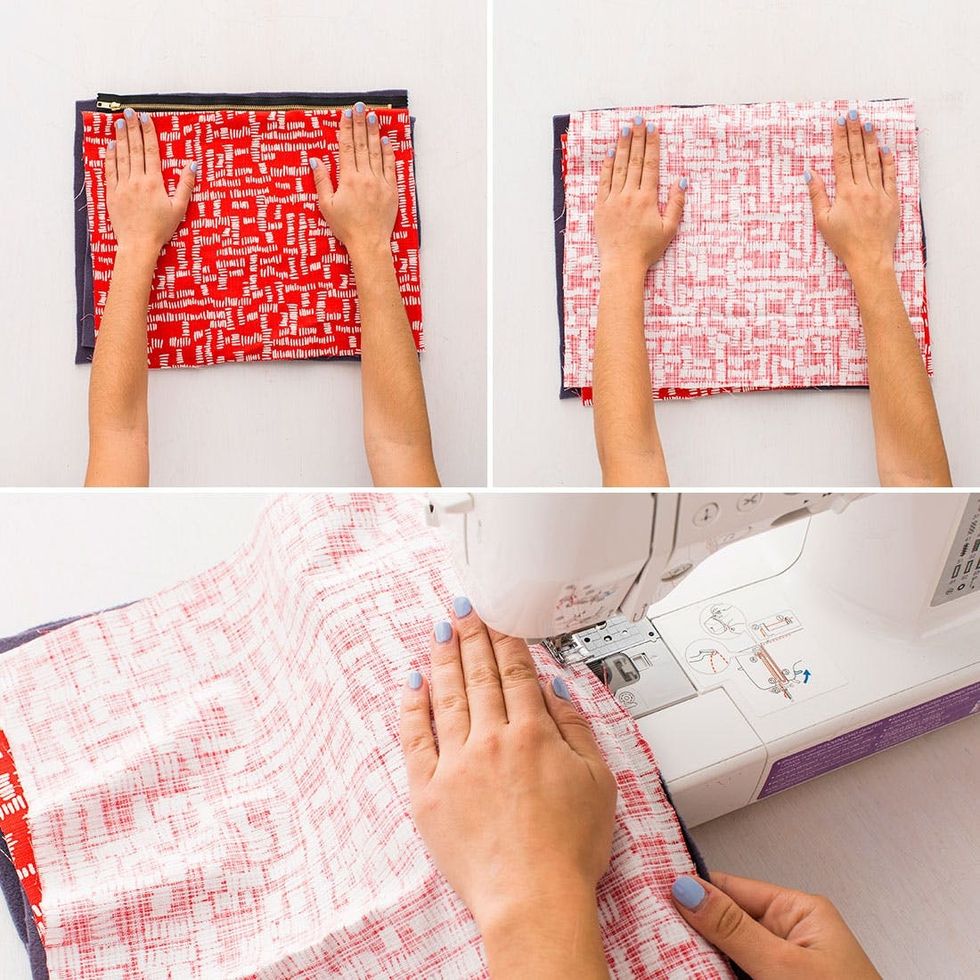
Fold back your newly attached fabric to reveal the zipper and lay this piece (with the patterned fabric face up) on your second piece of cotton fleece. Place your second piece of patterned fabric face down on top of the other patterned piece, pin and sew into place.
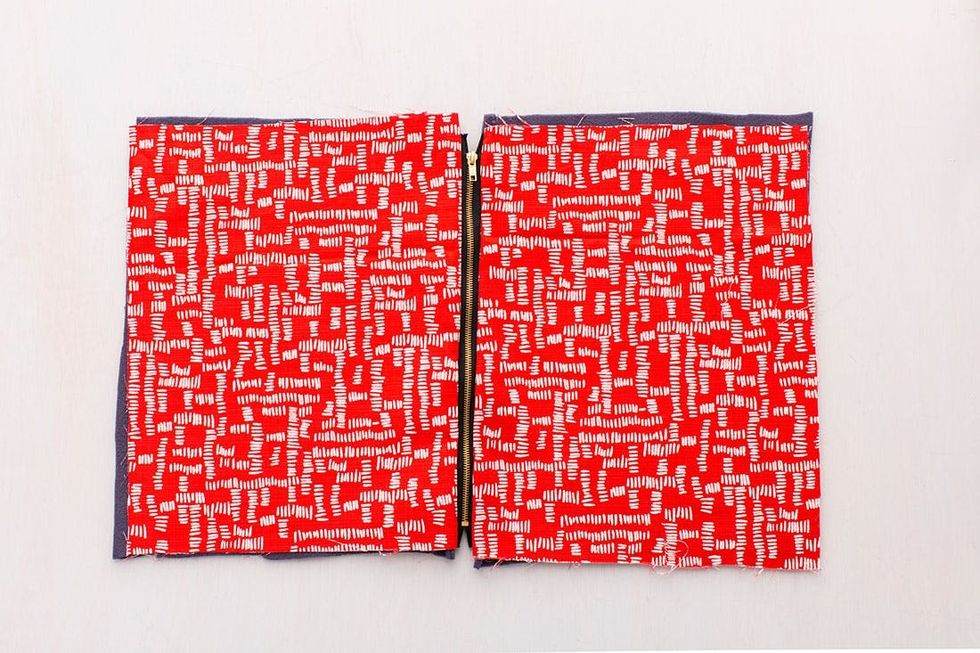
BTW, your pieces should be attached like this.
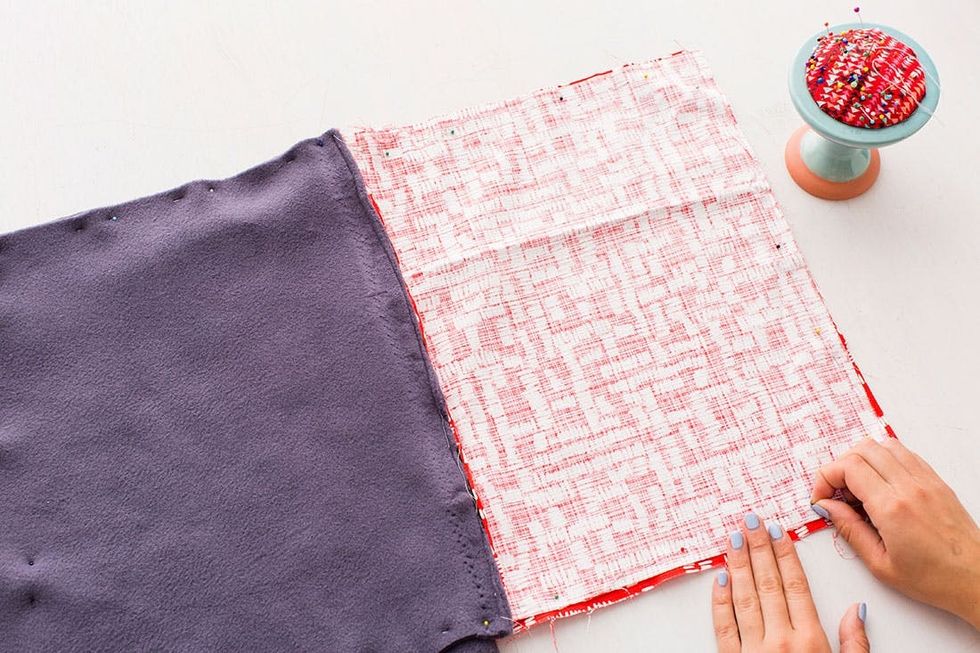
Fold your fabric over so it is paired up with its match, then pin in place.
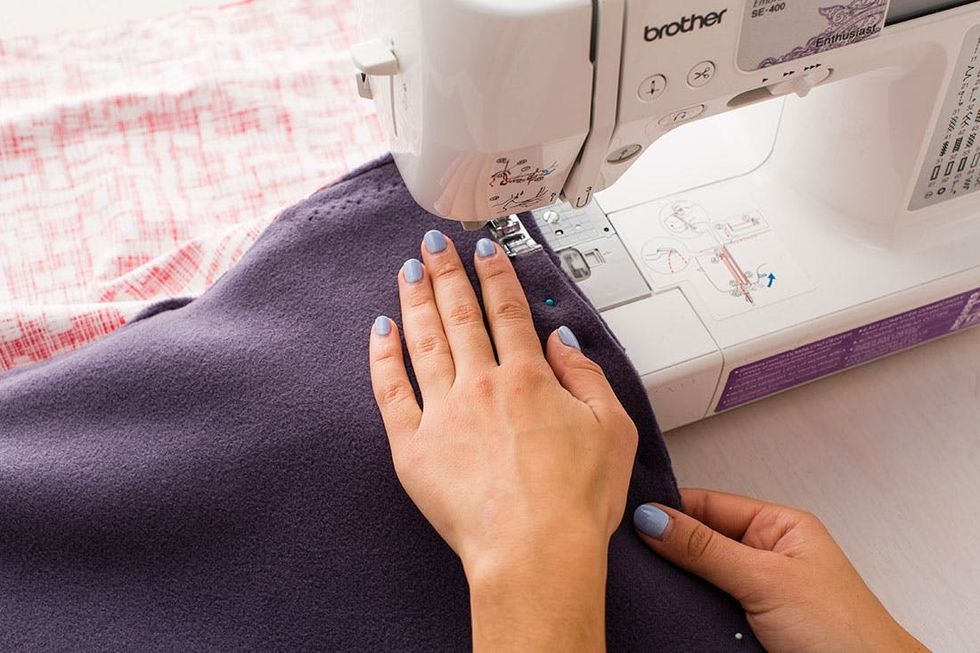
Sew each side of the case separately. You will only sew three sides since the fourth is already attached to the zipper. For your inner lining, (for us it was the cotton fleece), leave a four-inch opening so you will be able to reach your hand in and turn the case right side out.
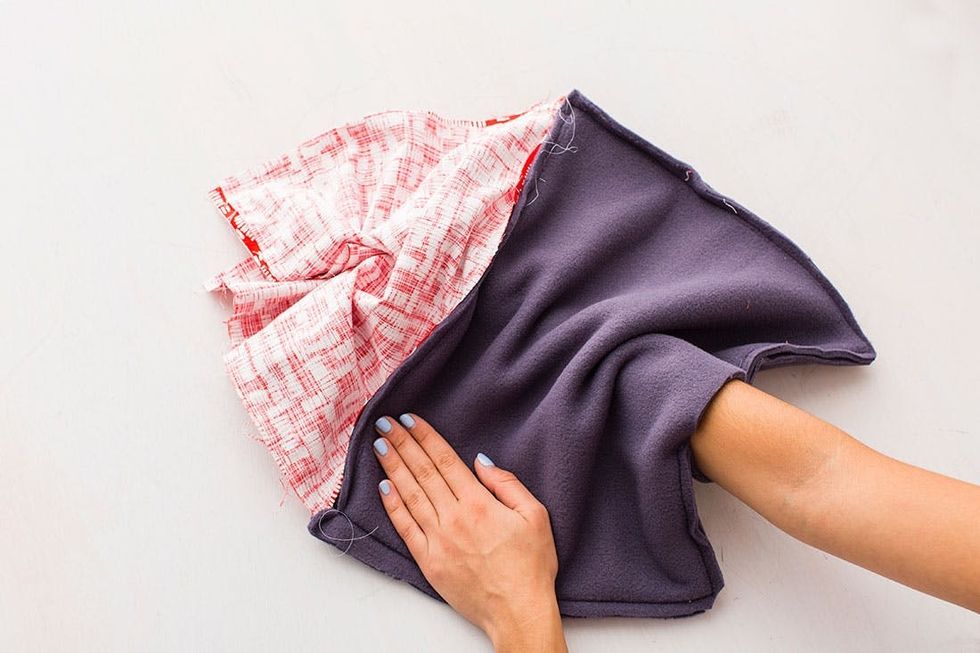
If you accidentally sew the whole fleece section closed, no worries! Use a seam ripper to create a small opening that will fit your hand, and turn your case right side out.
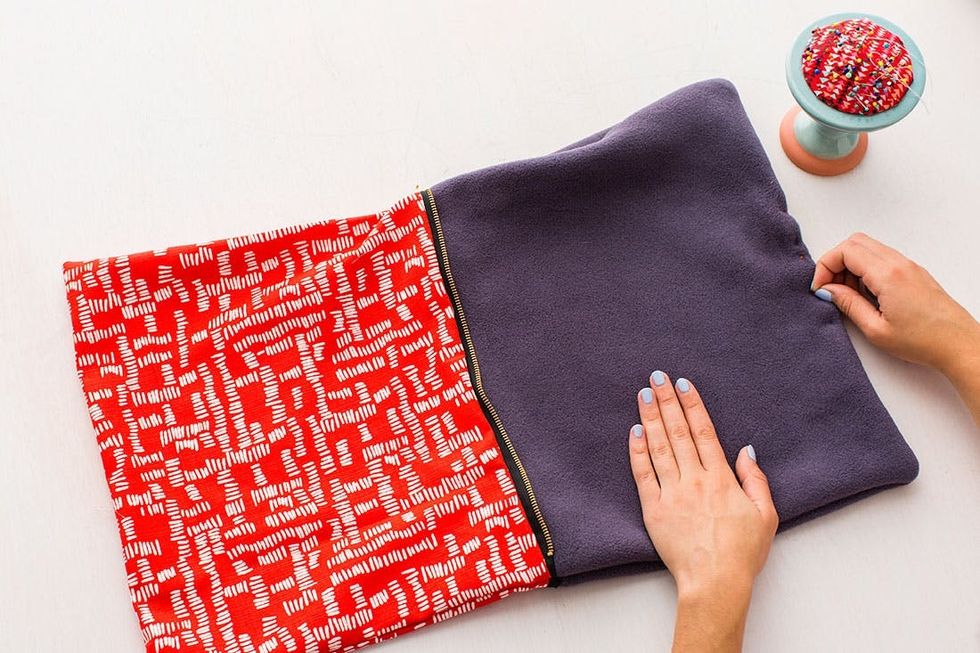
Pin the open edge closed and then sew.
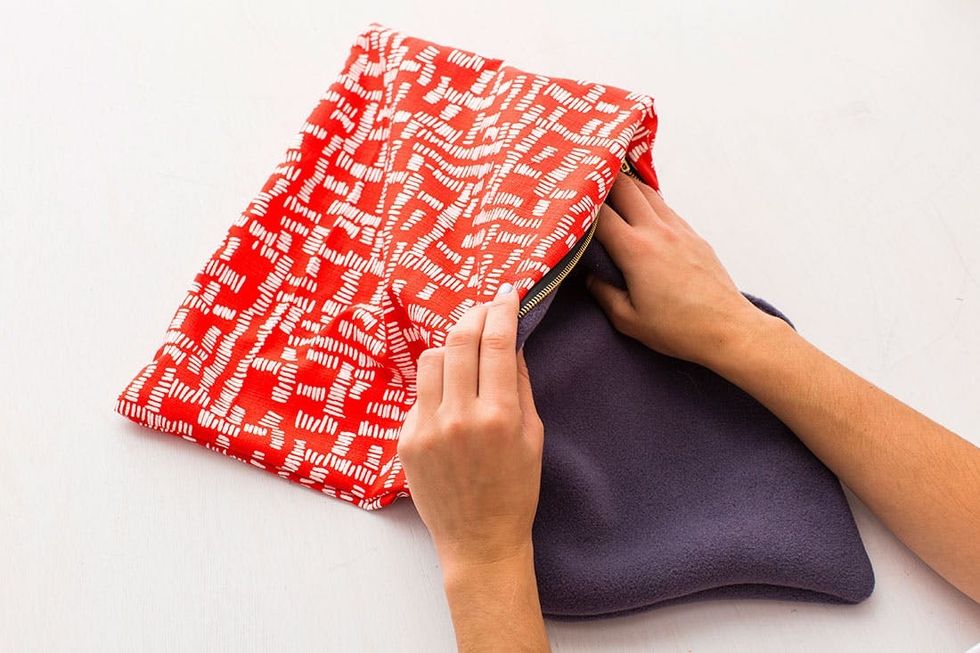
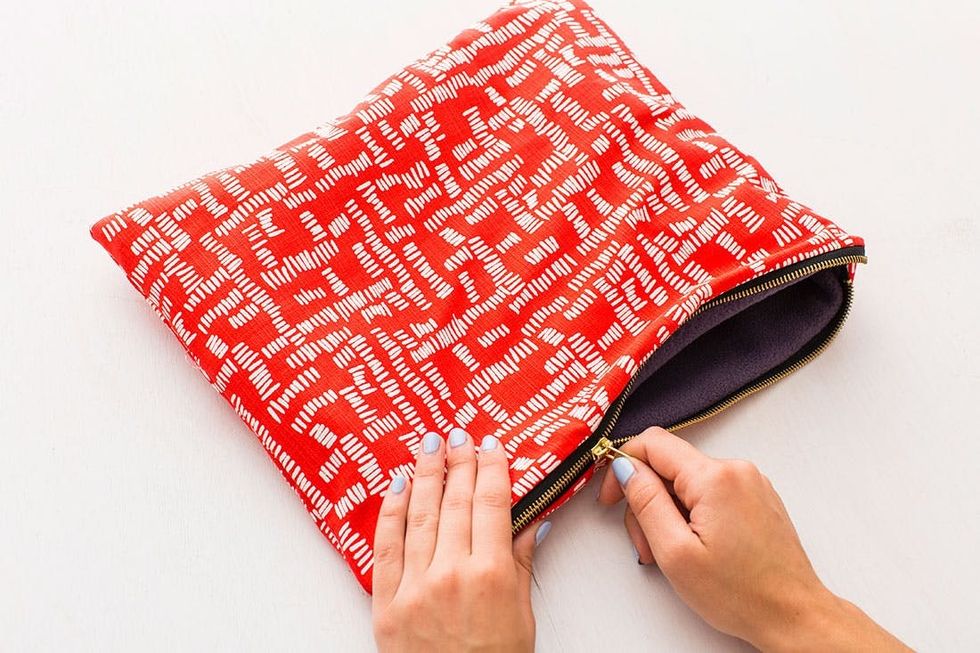
Stuff the lining into the outer shell of the case and zip closed.
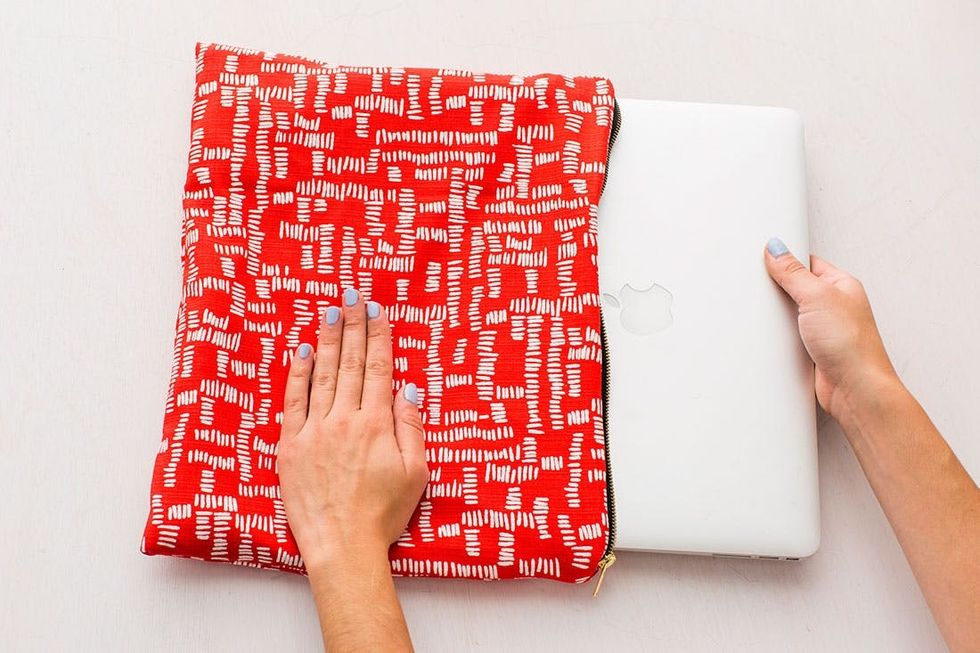
This is the perfect little home for your beloved laptop.

Instructions:
Cotton iPad Case
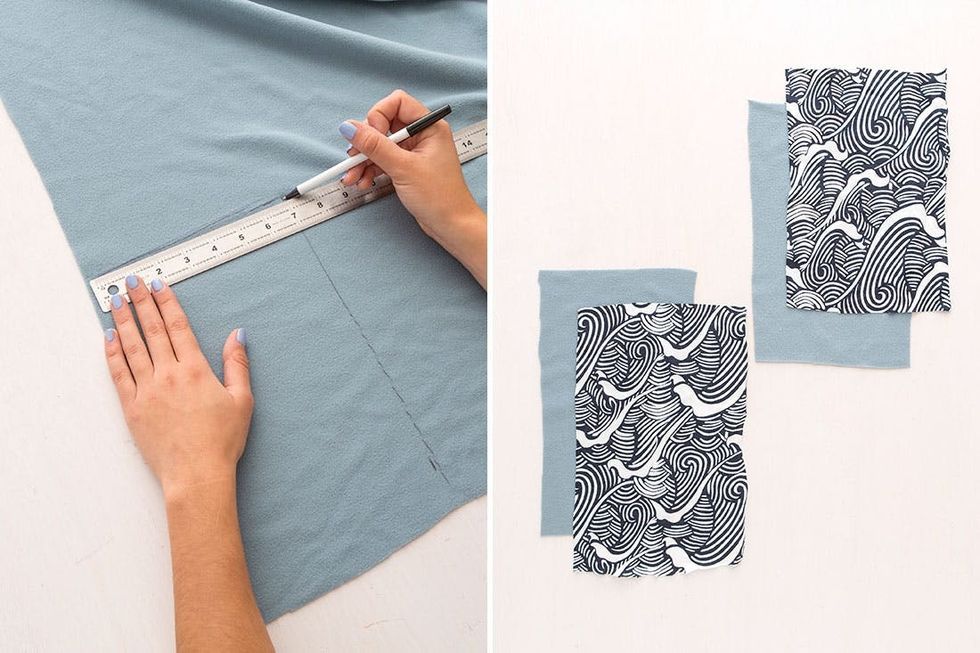
1. Cut out four rectangles of various cotton fabrics that measure 7 x 12 inches.
2. Pin all four pieces of cotton fabric together. The two pattern pieces go on the inside, and the fleece pieces go on the outside of the bundle. Sew them all together.
3. Fold over the top edge to create a hem, pin and then sew.
4. Create two button flaps by sewing small rectangles of fabric together and cutting a button-size hole in the ends.
5. Sew the button flaps in place, and then attach the buttons using a needle and thread.
We created this iPad case for an iPad Air. Our rectangles measured 7 x 12 inches.
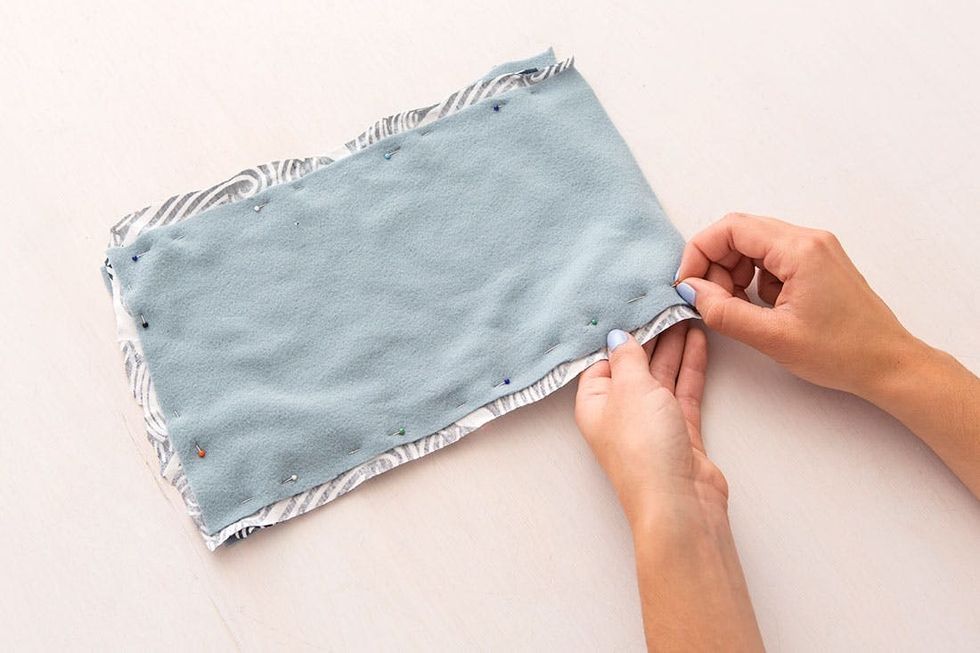
Pin all four pieces of fabric together. The two patterned pieces of fabric need to be sandwiched in the middle with the patterned sides facing each other.
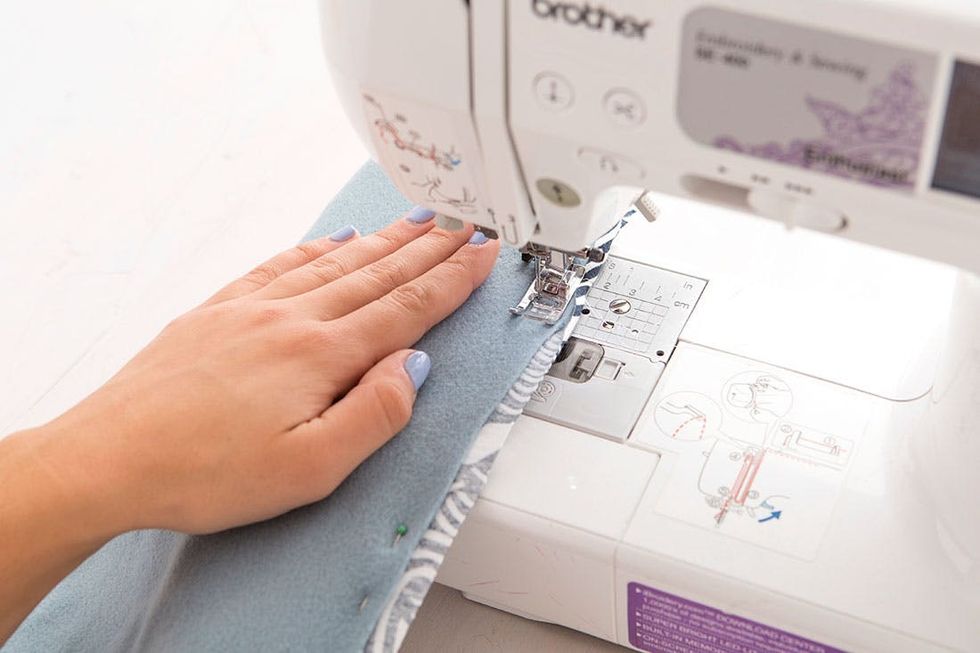
Sew three sides together, leaving the third side open so that you can put your iPad inside.
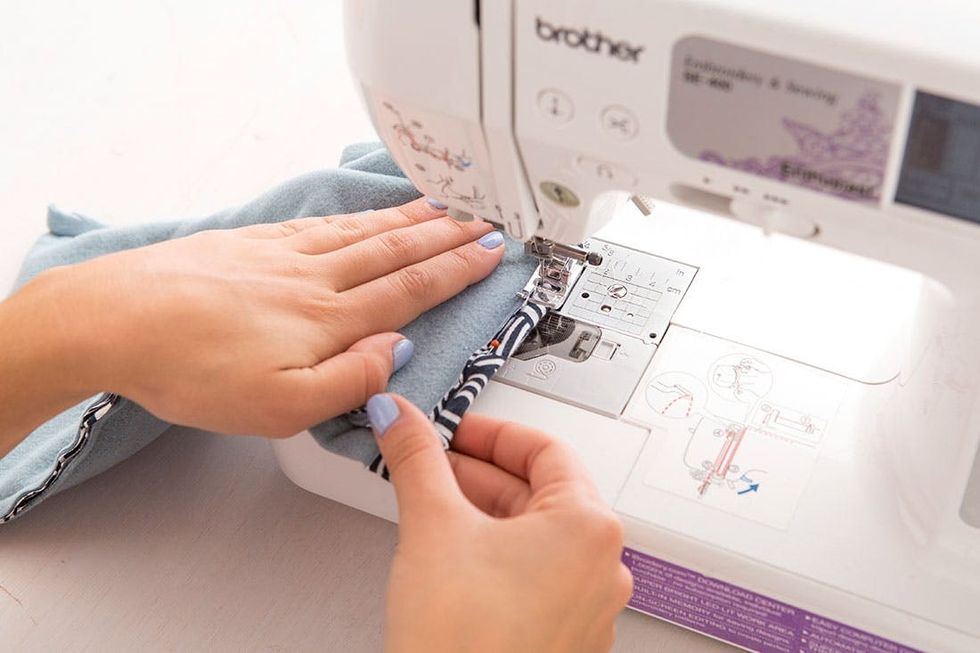
Fold over the top edge of the case, pin and sew in place. Then turn your case right side out.
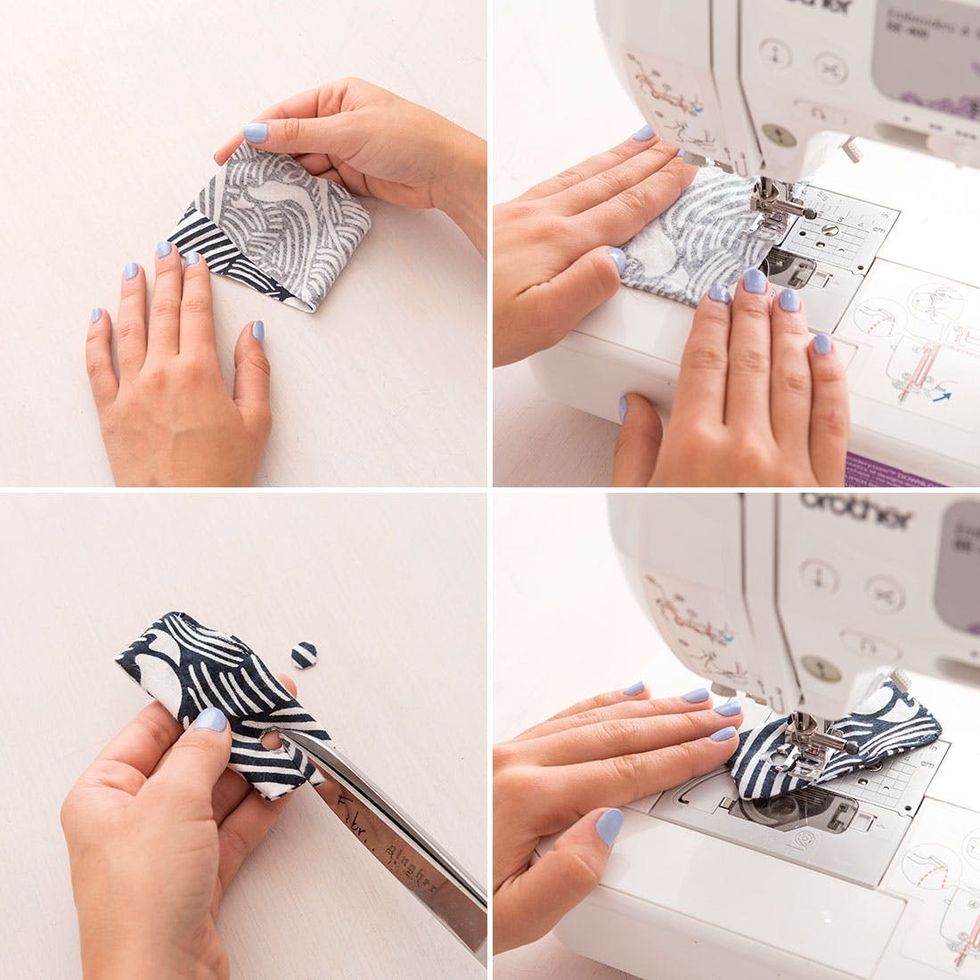
Create button flaps for your case by cutting a long rectangle (about 6 x 2 inches), folding it in half with the patterned side facing in, and sewing three sides together. Turn it right side out and sew the hole closed. Cut a small hole on the bottom section of the flap, and sew around the hole to keep the fabric in place. These extra stitches will prevent the button hole from fraying or stretching out.
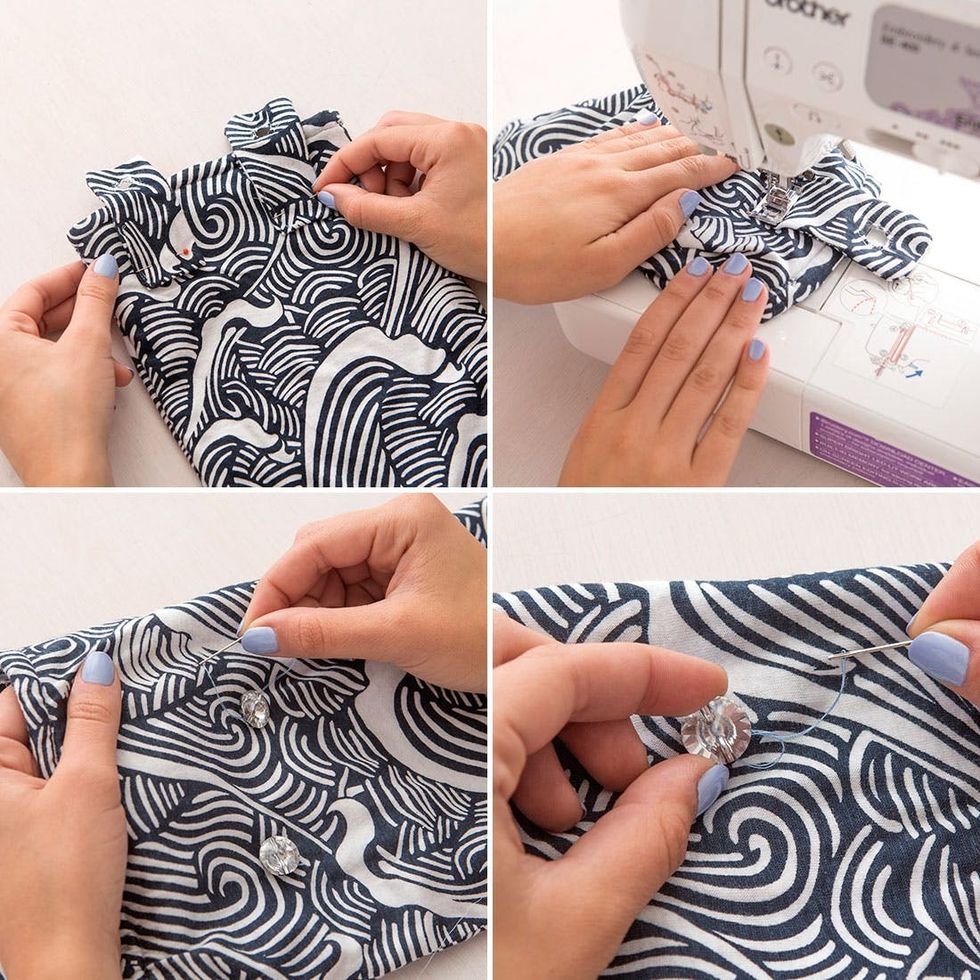
Pin and sew the button flaps in place. Fold them over and mark where you need to attach your buttons. Using a needle and thread, sew your buttons onto the case.
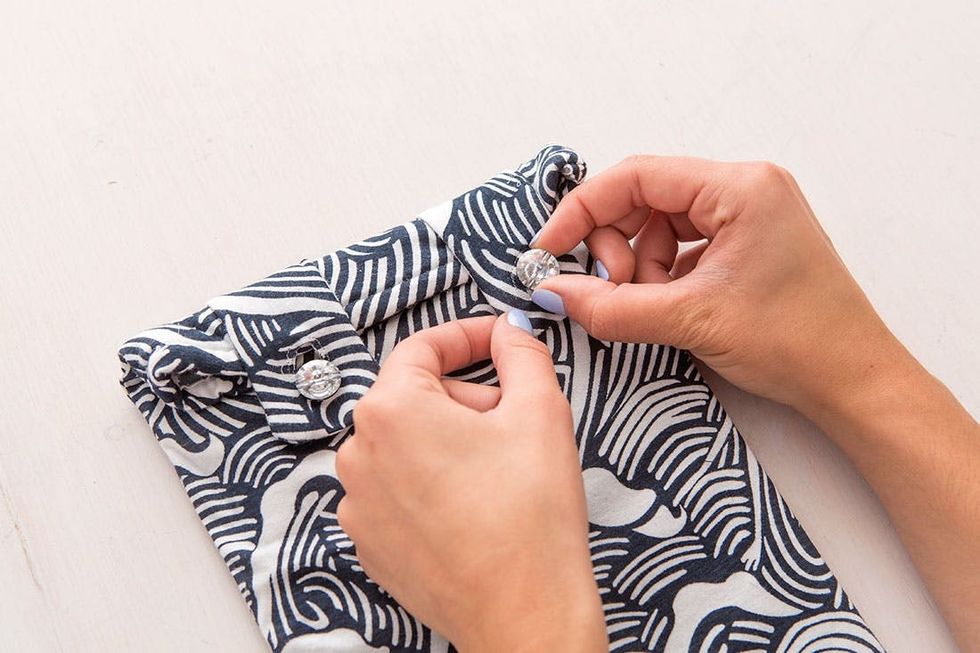
Diamond buttons? Yes please!
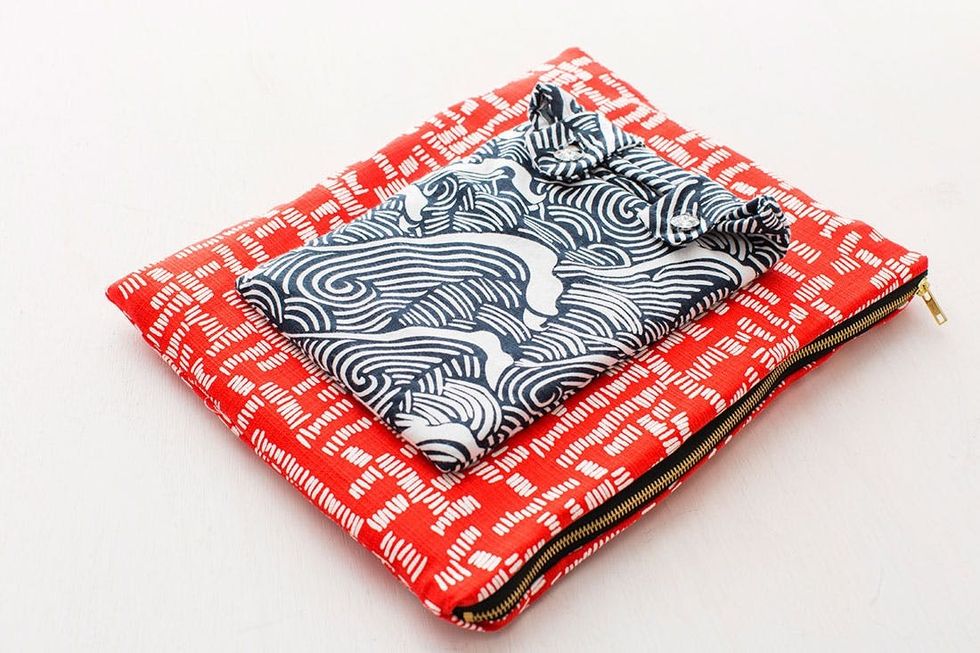
Protective cotton cases for your most valued electronic devices.

Juliet, from the sales team, was nice enough to join us for a morning cafe photo shoot. It included some light reading and a latte.

These cases are perfect for heading back to school. Customize yours with cotton fabric in your school colors or use an old cotton t-shirt from your favorite high school event.

No complaints about working from an outdoor cafe.


