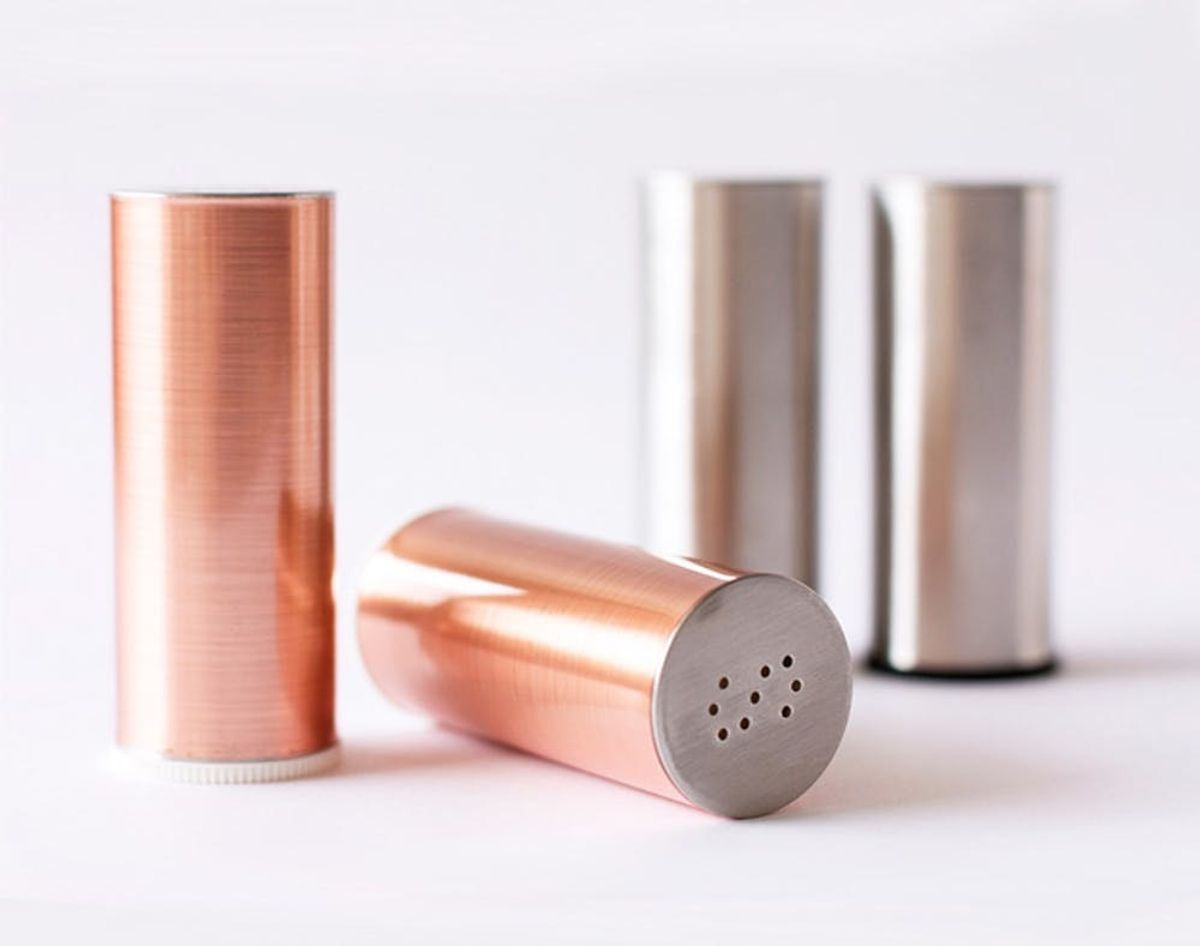
How often have you heard the phrase “the kitchen sells the house?” Well over here at Brit + Co., we happen to agree that the kitchen is one of the most important rooms in your home. We spend lots of time in ours concocting our next favorite recipe and testing our newest cocktails (someone’s gotta do it). One detail that is often overlooked when it comes to kitchen design is the accessories, which if you ask us, are what make all the difference between a drab kitchen and a fab kitchen. So, get excited. We’re showing you how to transform one of your kitchen staples, silver salt and pepper shakers, into cool mixed-metal vessels in just five minutes! Let’s just say, our super speedy DIY definitely won’t salt your style. ;)
Make These Metallic Salt and Pepper Shakers in 5 Minutes!

How often have you heard the phrase “the kitchen sells the house?” Well over here at Brit + Co., we happen to agree that the kitchen is one of the most important rooms in your home. We spend lots of time in ours concocting our next favorite recipe and testing our newest cocktails (someone’s gotta do it).
Materials:
– IKEA Salt & Pepper Shakers
– copper contact paper
Tools:
– scissors
– ruler
– pencil
Instructions:
1. Measure the height of your salt and pepper shakers. If there is a rim on the top and bottom of the shakers, make sure to measure just below. Otherwise the paper will crease when sticking.
2. Cut contact paper to size. (If you are using the recommended IKEA shakers, this will be 3 inches x 4.75 inches).
3. Remove the backing from the contact paper and wrap your shakers. Place in your kitchen and cook in style!
Here’s a before shot of our salt and pepper shakers—we got this minimalistic pair from IKEA for just $4! Even though they’re a silver finish, they’re still kind of boring. So when we set our eyes on this insanely awesome (and expensive—$70!) metallic set set, we knew we found our inspo. So we’re adding copper-colored contact paper to create a mixed metal set—a copper salt shaker and a silver pepper shaker—sounds pretty rad to us, especially at such a low price! Ready to get going? Don’t blink—it literally takes no time.
Once the height of your shakers is measured, cut your contact paper to size. Then, wrap your shakers. Be sure to wrap them straight—press hard and pull tight so you don’t get any air bubbles or creases. And that’s it! You’re donezo, and left with a pretty luxe looking salt shaker, we must say!
The copper contact paper looks completely seamless on these straight shakers, almost like you bought them looking this fly! We think using brass or brushed gold contact paper would make some really fancy salt and pepper shakers as well. But the set is sure to make waves in any modern kitchen.
Now when the silver pepper shakers are added back into the mix, the set looks chic, not cheap—even thought it did cost us next to nothing to make! Don’t worry, we can keep a secret ;)
Do you think you might shake it and give this super quick DIY a try? Let us know in the comments below.
(Photos via Brit + Co)


