We’ve noticed that the holiday season seems to be starting earlier and earlier each year. Don’t be surprised if you hear “Jingle Bells” at the mall BEFORE Halloween. As part of jump-starting the holidays, we decided to make some fluorescent Tumble-dyed napkins which are great for any time of the year. And they’ll add a great punch of neon to your holiday dining table. And they’d look pretty darn cute alongside our Neon Stitched Tea Towels!
Brighten Things Up With DIY Neon Napkins and Tea Towels


We’ve noticed that the holiday season seems to be starting earlier and earlier each year. Don’t be surprised if you hear “Jingle Bells” at the mall BEFORE Halloween. As part of jump-starting the holidays, we decided to make some fluorescent Tumble-dyed napkins which are great for any time of the year. And they’ll add a great punch of neon to your holiday dining table. And they’d look pretty darn cute alongside our Neon Stitched Tea Towels!
Materials:
– various colors of Tumble Dye
– white cloth napkins (we got ours on Amazon)
Tools:
– painter’s tape
– stencils
– alphabet stickers

Tumble Dye is easy to use. Unlike other material-dying techniques, there’s no need for boiling water and you won’t have blue stained hands for the next week. Hooray! This dye sprays right on, dries quickly, and washes off your hands (though not out of the material, don’t worry about that).

1. The Biker Napkin: We love bikes. We love fluorescent colors. This napkin is the best of both.
1. Place the bike stencil on top of the napkin.

2. Cover exposed part of the napkin with paper towels (or other scrap material).
3. Spray vertically with yellow Tumble Dye covering a third of the napkin.
4. Add a column of green covering the second third.
5. Move the stencil over .
6. Line up the last column of bikes with the first on the stencil .
7. Spray the last third with teal paint.
8. Repeat steps 5-7 until the napkin is covered in bikes.
When you place the stencil on the napkin, it can be helpful to tape it down so it doesn’t shift. Also, make sure you cover up the exposed parts of the napkin or you’ll wind up with a nice line from the edge of the stencil. You don’t want that! While spraying the dye, try to keep your hand at a consistent angle so that the dye doesn’t creep under the sides.
The dye will pool on the stencil, so be sure to blot it with a paper towel before moving the it. Continue to move the stencil around and spray the dye evenly.
Don’t the colors look awesome all mixed together? We think so.

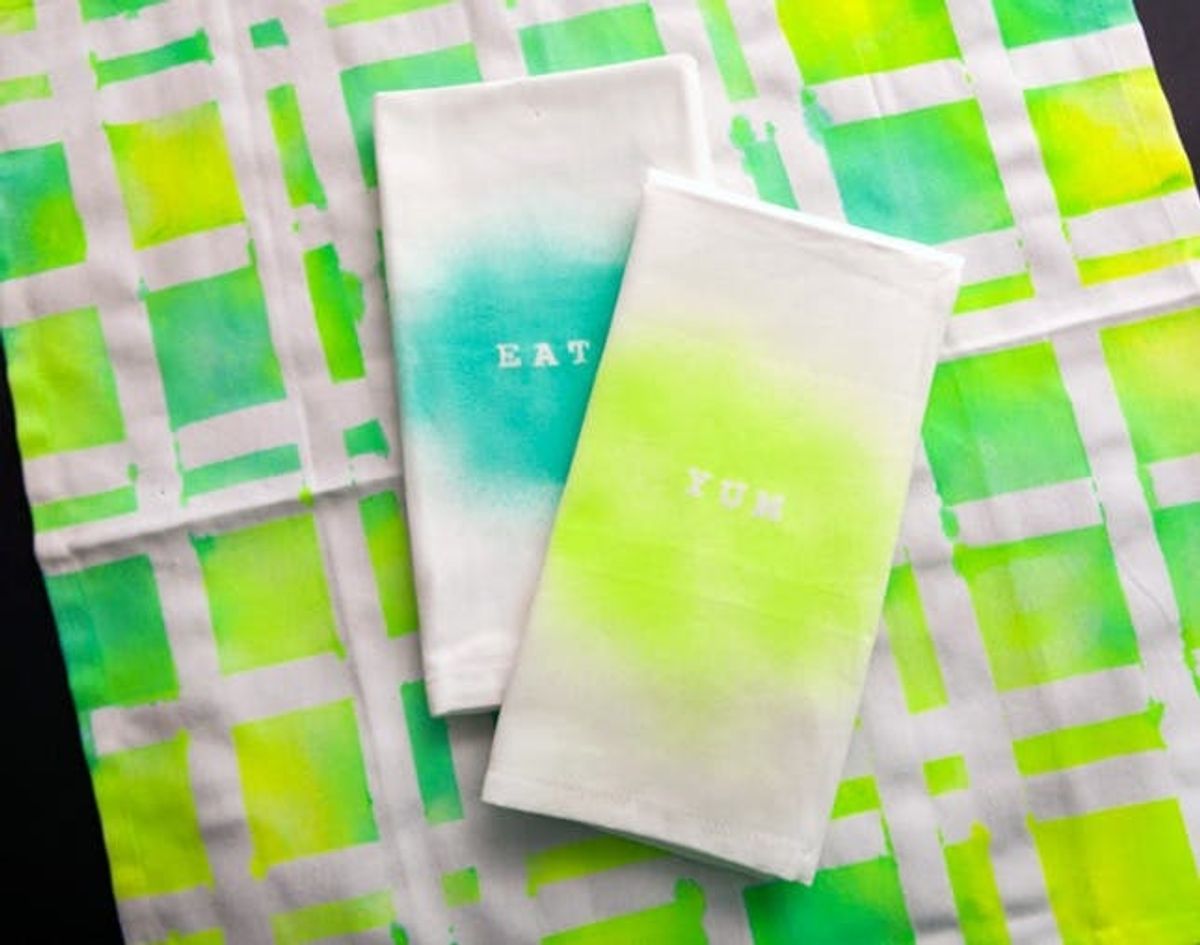
2. The Plaid Napkin: Preppy patterns and neon? It’s like the ’80s exploded!
1. Line the napkin with painters tape in a plaid pattern.

2. Spray Tumble Dye filling each square with a color (we used three).
3. Let dye dry.
4. Peel tape!
We decided to coat these napkins with a lot of dye so that some of it would seep under the tape to achieve the look we wanted. Alternatively, you can lightly spray the dye which will create more of a spray painted look with more defined lines.
Really secure the tape onto the napkin before you start spraying. Then have at it with your colors. Since we are making a set, we stuck with fluorescent yellow, green, and teal. Then peel!

The most satisfying part is peeling the tape off of these babies. Don’t they look great?

3. The Lettered Napkin: We made two napkins; one that says “EAT” and one that says “YUM.” You know, just in case your guests don’t know what to do or think at the dinner table.
1. Decide which word you’d like to put on your napkin

2. Place letters making sure you put them where they’ll be seen when you fold the napkin
3. Spray around the letters with Tumble Dye
4. Let dry
5. Carefully peel off the letters
These are our favorite napkins – so cute with their single words and bursts of dye. You could easily cover the napkin in words, but we wanted to keep it simple.
Make sure you don’t spray too much dye on these guys or else the color will seep under the stickers. It’s important to have clean lines so that the words are legible.

Now that you’re a pro with the Tumble Dye, you can make tea towels, table runners or an apron. The possibilities are endless.

What will you try dyeing with Tumble Dye? Or any other dyes? Talk to us in the comments below.


