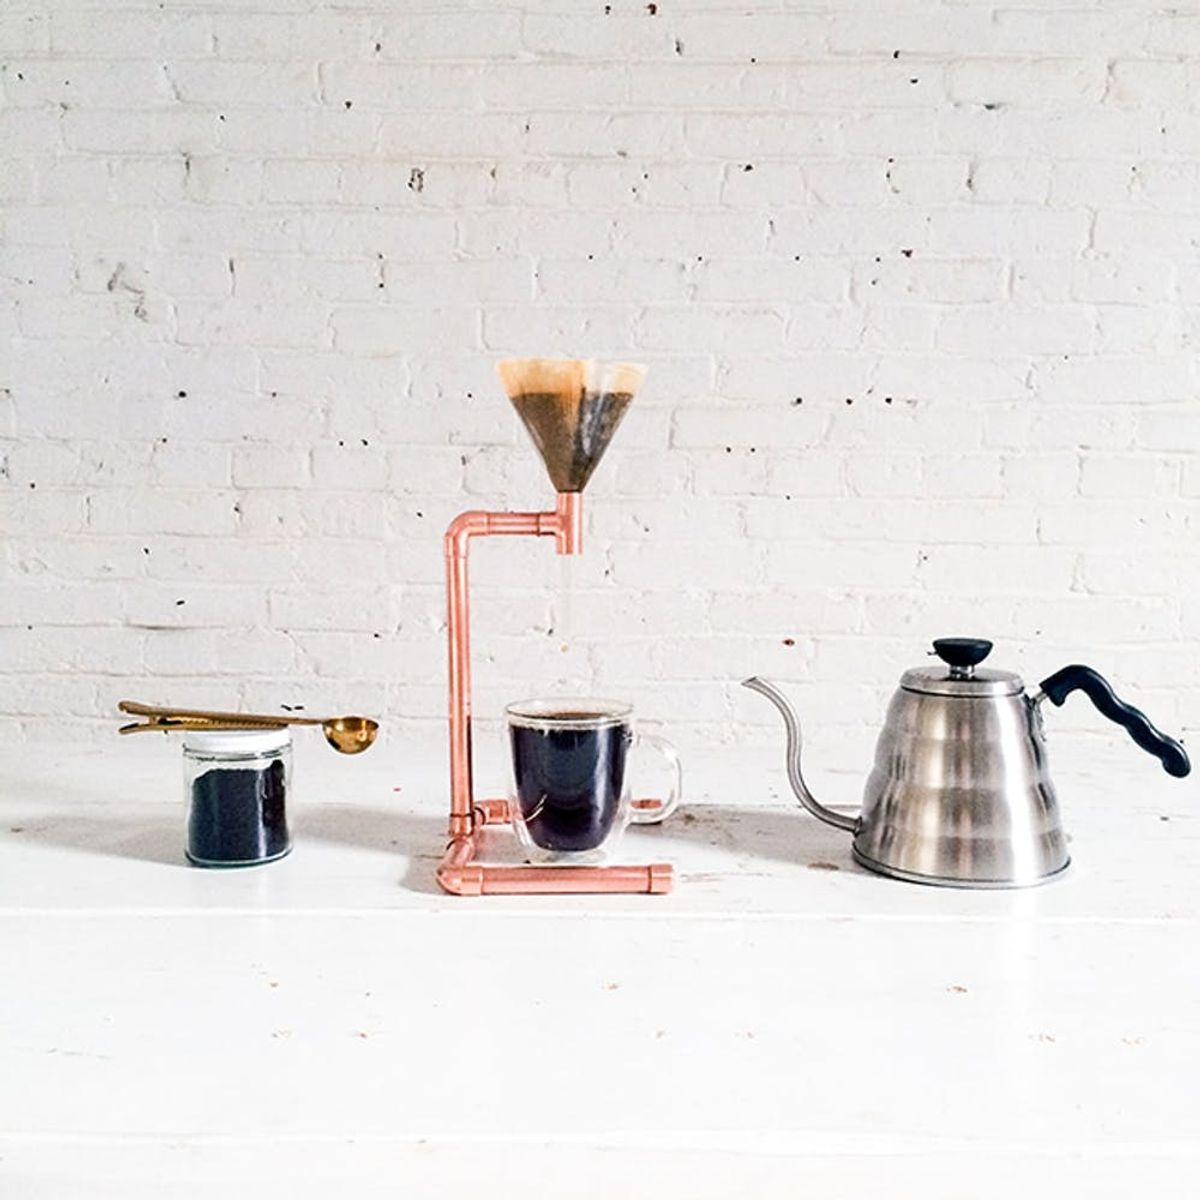
We get that having an automatic coffee pot that greets you with your fix first thing in the am is great, but if you say that it tastes the same as a pour over, you’re lying to yourself. Pouring over is a simple way to have coffee that tastes better than what a typical plug-in coffee machine makes. In addition to making a great tasting cuppa, it’s easy to clean and store away the setup. Once you’re done brewing a cup, all you have to do is throw away the filter and put the glass funnel in the dishwasher.
If you currently use a French press, you know how aggravating it is to clean out the screen. Chemex devices are great, but if you leave the coffee in too long, you need a bottlebrush to clean it. What we’ve found to be the best choice for the best tasting coffee is this copper pour over setup, held together with epoxy — so soldering equipment and skills are not required. Copper pipe can be cut with a tube cutter, making this project possible without a single power tool. Not only does it make a stunning display for your own home, but if you give this to a friend, you win all the housewarming-gift awards.
Materials:
— 2 feet of ½” Type M copper pipe (Type M copper pipe is thinner and easier to cut than the heavier duty types, like type L)
— ½” copper fittings (You will need 2 T fittings, 3 elbow and 2 end caps. Make sure the fittings are the right size for the copper pipe you selected)
— 1 glass funnel, 100mm
— #0 grade steel wool
— 2-part epoxy
— Chemex coffee filters
— 80-grit sandpaper
— blocks of wood
— a rag
Tools:
Instructions:
1. Cut the copper pipe into six pieces with the rigid tube cutter. You can make your device as big or small as you want to. Just be sure to measure your cup height and the height of your funnel before cutting the pieces. We made our vertical pieces 10 inches long. The other pieces are for support and the exact length is not important. Use your judgment to make it stable. We cut the horizontal support piece that attaches to the T fitting that holds the funnel 2 inches long. For the base supports, we cut two pieces 5 inches long and two pieces 2.5 inches long
2. Once you have the pieces cut, clean them with the steel wool.
3. Check the fit of the fittings. Scratch the part of the pipe that will be hidden inside the fittings with sandpaper. This ensures that the glue has some nooks and crannies to stick to on the otherwise smooth copper.
4. Mix the part epoxy together per the manufactures recommendations and apply to the ends of the pipe.
5. Assemble the coffee maker. Use blocks of wood to hold it in position while the epoxy sets. Different epoxies have different set times. For best results, follow the manufacturer’s recommendations.
6. Use a rag to remove epoxy that may have squeezed out during assembly.
7. Once the epoxy has set, do a final cleaning and polishing with steel wool.
8. Add the funnel and make a cup!
Copper pipe is really easy to cut and doesn’t require power tools. We used a tube cutter to score a line and then simply snapped off the pieces by hand. A pair of pliers can be used to help get a better grip, but make sure you don’t scratch the copper too much with the jaws of the pliers. You can wrap the copper with a rag before gripping it with the pliers to protect it. The length of the pieces depends on how tall of a cup you plan on using. Once you have the pieces cut, clean them with the steel wool.
We used a 2-part epoxy to fasten the copper pieces. Full disclosure: Soldering it with a torch would be better but is more difficult and requires additional tools.
Insert the glass funnel into the top T fitting and you are ready to add a filter, coffee grounds and hot water. Chemex filters are great. Even if you get the wrong size, you can just cut them down to the right size.
Ready to make your morning masterpiece? After you’ve put yours together, share a picture with us in the comments below!


