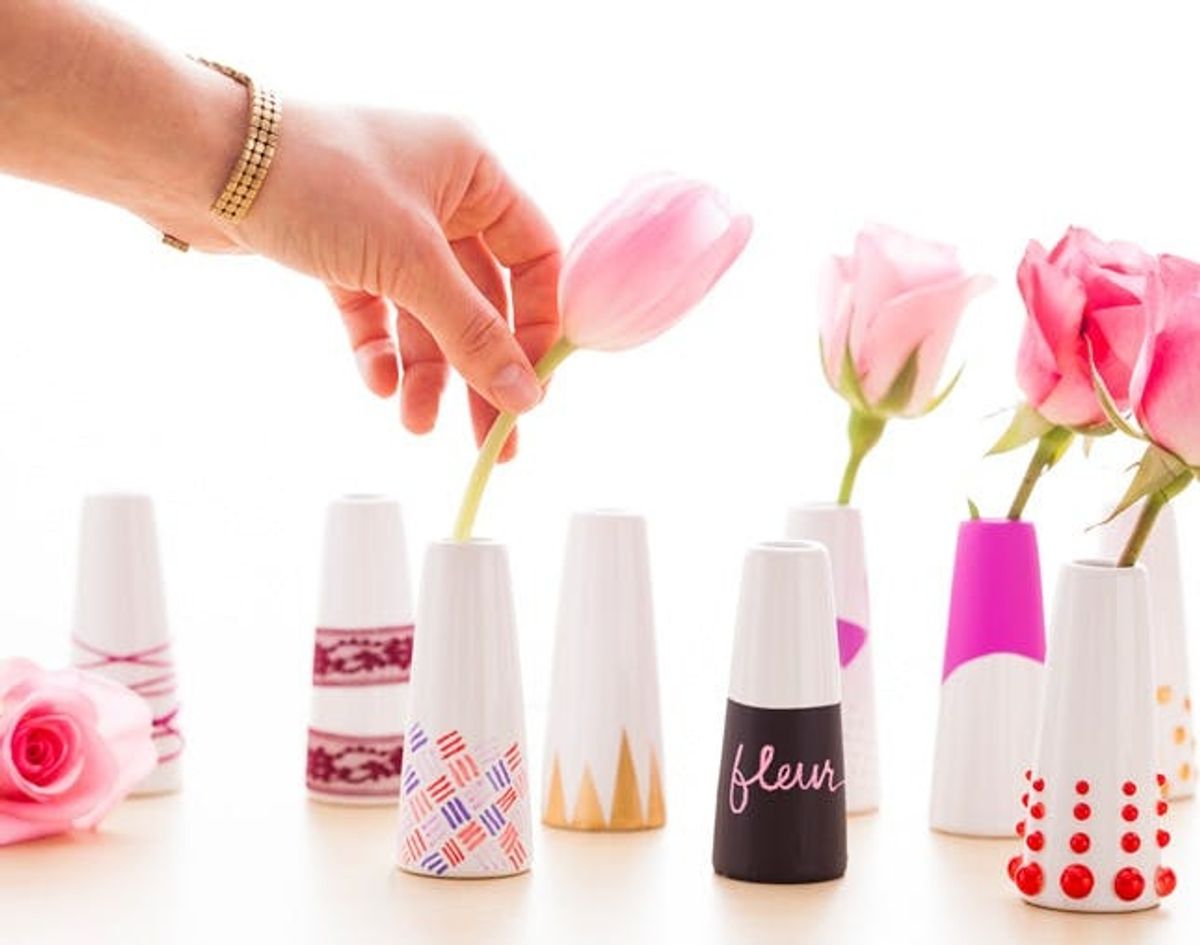
Bud vases are kind of the bee’s knees. You can give one away as a gift, cluster them to create an arrangement, or place a single vase on your bedside table for a clean, minimalist look. We’ve embellished a variety of vases in the past, from color-blocked vases to pattern-dipped vases. And now, in time for Easter decorations, Mother’s Day, and belated Valentine’s gifts, here are 10 clever ways to spice up any basic bud vase.
10 Brilliant Ways to Create a Custom Bud Vase


Bud vases are kind of the bee’s knees. You can give one away as a gift, cluster them to create an arrangement, or place a single vase on your bedside table for a clean, minimalist look. We’ve embellished a variety of vases in the past, from color-blocked vases to pattern-dipped vases. And now, in time for Easter decorations, Mother’s Day, and belated Valentine’s gifts, here are 10 clever ways to spice up any basic bud vase.
Materials:
– 10 vases
– spray paint
– chalkboard paint
– chalk pen
– flat back pearls
– sequins
– embroidery floss
– paint pens
– lace
– contact paper
– glitter
– washi tape
Tools:
– scissors
– spray adhesive
– hot glue
– paint brush
– painter’s tape
Instructions:
1. Determine designs using all of your materials.
2. Decorate your vases.
3. Add flowers and you’re done!

We raided our supplies closet to find all these colorful goodies for embellishing!

1. Washi Tape: Find two or three rolls of washi tape that look awesome together. Then have at it on your vase.
All you need to do is add strips of tape to create a unique design. Easy peasy.

2. Chalkboard Paint: Oh chalkboard paint, we really do adore you.

Grab your painter’s tape and stick some to your vase to create a straight line. This will block off a section for you to paint. Add a layer of chalkboard paint to the bottom half of the vase. Let it dry and continue to add paint until it’s no longer streaky. Once it’s dry, grab your chalk pen (these create a cleaner look that old fashioned chalk) and write a word or draw a design. This one is so classy.

3. Contact Paper: We went with gold contact paper for these. No surprise there! It looks so good, we can’t help ourselves.

Cut out shapes that you’d like to adhere to your vase. We made triangles, but polka dots, lines or squares would also be cute. Peel off the backing and then stick the paper to your vase.
Flat Back Pearls
 How cool are these flat-sided pearls? We’ve used them before to trick out shoes, and we’ll use them again. And again. They are perfect for embellishing everything.

To add them to your vase, just add a dollop of hot glue to the back and stick them on the vase. The glue dries very quickly, so you have to be quicker — just make sure you don’t burn yourself!

5. Sequins: Sequins aren’t only for making gorgeous clothes, they can also bedazzle so many projects. We’re adding some to our vases to get that polka-dotted look.

Carefully squeeze a drop of hot glue to the back and then press them to the vase.

6. Embroidery Floss: This one is SO EASY yet so chic.

Cut a long piece of embroidery floss. Glue one end to your vase with hot glue, and then wrap it around and around and around until you get the desired look. Add another bit of glue to the end and you’re done.

7. Lace: Just like sequins, lace is not only for pretty clothes.

Add a strip to your vase to give it that delicate feel. Hot glue works for this material as well, so place a bit of glue to one end, wrap your lace around the vase, and then glue the other end. We completed ours with two strips, but you could add more or less, or combine it with paint or embroidery floss. There are so many options.

8. Paint Pens: This is your chance to get really creative. All you need to do is draw a pattern on your vase with paint pens.

We did this on paper first to make sure we created a pattern we liked, and then we copied our favorite design onto the vase. You can make shapes, patterns, or intricate drawings with these awesome pens. Or you can write a word or phrase on your vase. Go wild with this method!

9. Color Block: Here’s the trick you’ve been waiting for — color blocked vases.

Stick some painter’s tape to your vase creating a line. Now tape the parts of the vase that you don’t want covered in paint. Spray paint has a mind of its own, so you should make sure the section you want to keep white is completely enveloped in tape. That goes for your clothes too! Don’t cover yourself in tape, but make sure you’re wearing something you don’t mind getting messy. Spray your vase, let it dry, and then peel your tape to reveal a block of color.

10. Glitter Dip: Oh what? You thought we forgot about glitter? Never.

For this vase, you’ll go through the same process as the color-blocked vase. Create your line with painter’s tape and then cover the sides you want to keep white. Add a thin layer of spray adhesive to your vase and then douse it in glitter. So fun! Give it a few minutes to dry and then carefully pull back the tape.

So many vases to choose from!

We recommend choosing three options and then making little clusters. Add some flowers and then adorn your house with gorgeous buds.

Which ones are your favorite? We’d love to hear your thoughts!


