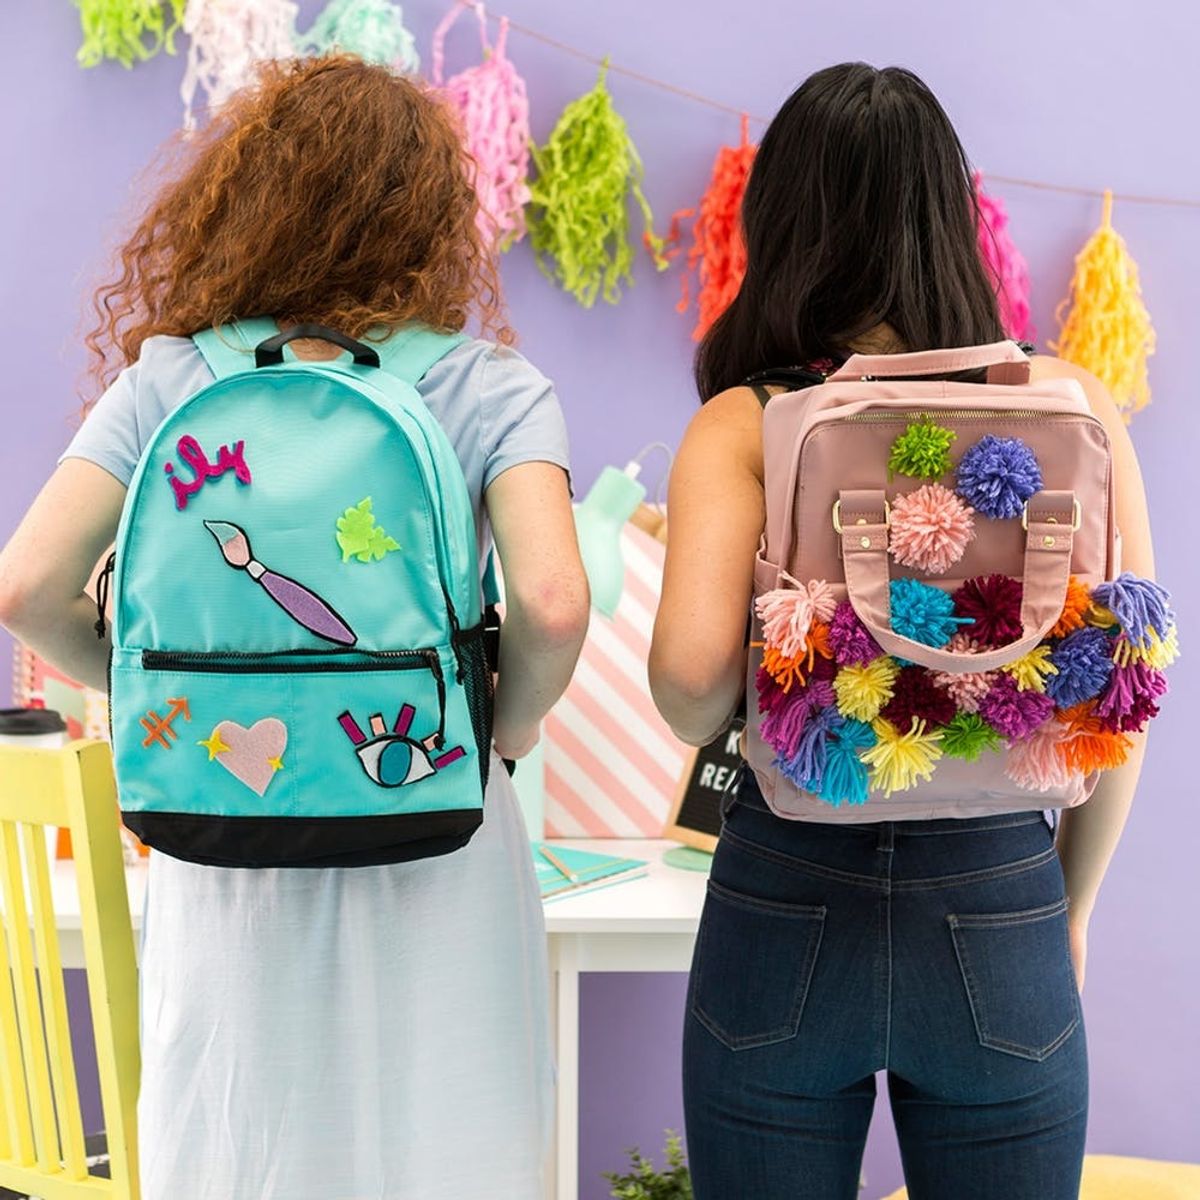
We’ve got your back.
Make These 2 Backpack DIYs for the Best Back-to-School Season

It’s back-to-school season, and the only thing that’s on my mind (other than summer work…) is buying the cutest school supplies! I think we can all say that we’ve spent HOURS walking up and down the aisles of stores (and even more time browsing online) searching for the perfect pens, binders, and, most importantly, the ultimate backpack. But all too often, nothing has that certain *oomph* that screams “me!” The solution? DIY, of course! I’m going to show you two different ways to revamp your backpack to make it totally functional and totally you.

B+C always has your back. Let’s go!

Materials and Tools:
- backpack (you can upcycle an old backpack for this!)
- yarn
- felt
- embroidery floss
- embroidery needle
- Fabri-tac (or other fabric glue)
- scissors
- pencil
Tassels + ‘Poms Backpack


First, take your yarn and start prepping by making the pom-poms. Though I used my hands to make these, a book works the same for this project. Pro-tip: Less yarn means smaller pom-poms!

Don’t put the yarn down yet! Use it to prep your tassels as well. Because we love tassels so much, it’s no surprise we’ve made them before. Check out our tassels tutorial here!

To stitch on the tassels, first thread your embroidery needle with a piece of embroidery floss. Stitch from the inside of the bag and through the yarn loops of the tassel. Pull the needle down back through the backpack and continue embroidering in a looping motion, another two times. To finish, use your needle and the extra piece of floss underneath the bag (from the beginning) to tie a double knot. Trim with scissors and repeat.

Here’s the easy part: attaching the pom-poms! Put fabric glue where you want the pom-pom to go, and immediately place it there. Apply pressure to make sure everything dries in place.
Felt “Patchpack”


Make your patches by sketching your design onto a piece of felt with your pencil. Try making your shapes a little bigger than you want them.

Carefully cut out your design. Here’s where drawing it bigger comes in handy: Cut on the inside of the sketched lines to end up with perfectly sized shapes rather than something too small. Don’t worry if there’s still some pencil; just flip your patch over for line-free felt.

Use your fabric glue to adhere all of your felt pieces together to create your patch. Don’t forget to apply pressure to make sure it sticks before letting it rest and dry! Repeat until all your patches are done.

Confession: I can’t get enough of the sparkly heart emoji.

Glue patches on backpack with fabric glue. Place them wherever you’d like on the backpack, and apply pressure to make sure they stick.

The best of both worlds.

Whether you’re more of a patches or tassels and pom-poms kind of person, both of these DIYs can help you show off the best of your personality without sacrificing your budget!

Ready for class! Coffee, planner, and everything in between.

Study buddies!

Of course, school isn’t all work all the time!

What other DIYs will you do for back-to-school season? Share your photos on Instagram using #britstagram, and follow us on Pinterest for more DIY inspo.
Author: Sophie Gilbert
DIY Production and Styling: Sophie Gilbert
Photography: Chris and Kurt Andre
Brit + Co may at times use affiliate links to promote products sold by others, but always offers genuine editorial recommendations.


