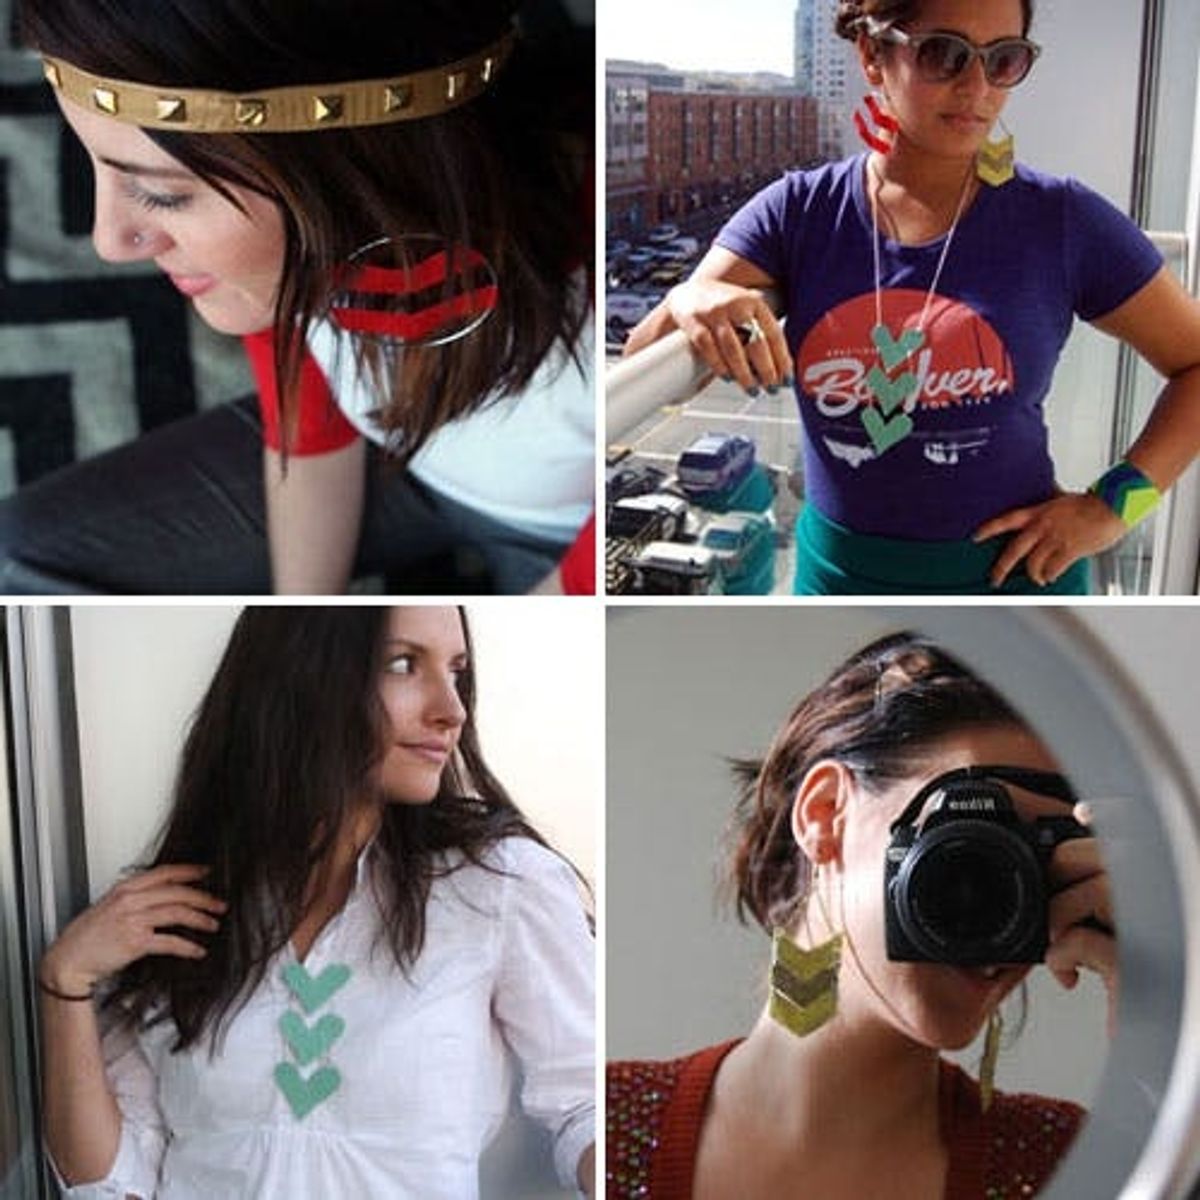
You didn’t think we’d have you drooling over all sorts of Chevron wearables without serving up a quintet of our own, did you? For today’s DIY project, we’ve got five electrifying pieces of chevron jewelry, from a bold revamp of your old silver hoops to a neontastic duct tape cuff. 1. Chevron Hoops: Every girl […]
5 DIY Chevron Accessories


You didn’t think we’d have you drooling over all sorts of Chevron wearables without serving up a quintet of our own, did you? For today’s DIY project, we’ve got five electrifying pieces of chevron jewelry, from a bold revamp of your old silver hoops to a neontastic duct tape cuff.
1. Chevron Hoops: Every girl has a pair of simple hoop earrings laying around, or several for that matter. Time for a fixer upper, and all you will need is duct tape!

Materials:

– hoop earrings
– duct tape (we used red)
– scissors
First, fold over a piece of duct tape onto itself, around 6” long.

Then, take one of the earrings and place it on the tape piece. We made a template of the chevron using cardboard, but you can also free hand sketch directly on the tape.
Cut out the pieces and place them in the desired position in your hoops. Cut out 4 small strips of duct tape to use to secure the chevron pieces to the hoops.
Wrap around the hoops and trim off the excess tape that is now hanging over the edges. Serve with two cold ones.

2. Chevron Staple Earrings: Easily your new staple piece for spring. ;)
Materials:

– cardboard
– lace
– stapler
– chain from an old necklace, or craft store
– earring Hooks
– small jewelry rings
– clear glue
– needle nose pliers
– wire Cutters
Sketch a chevron design onto your cardboard, cut out and use as your template for all 6 pieces that you will need.

Lay the lace over the cardboard and cut the lace in a vertical line at the center of your chevron piece, flip the lace over and line it up to cover the other side of the piece.
Glue the lace onto the piece, and do this to both sides of all 6 pieces and let dry for a few minutes. Once the glue is dry, trim off the excess lace that is hanging off the edges.
Line up the first 3 pieces and staple them together. Use as many staples as you like to get the look that suits your taste. Do the same with the other 3 pieces. Now, punch a hole on the top left and right side of each earring.
Using wire cutters, measure out 2 chains the same length and set aside. Then, using needle nose pliers, place a jewelry ring in each of the holes. Add in the chain to each and close up the ring.

Connect the earring hook to the center of the chain on both earrings to complete your piece!

3. Gold Chevron Band: A super simple accessory that can just may turn into your everyday piece of flair.
Materials:

– leather strips (you can buy bags of leather scraps for around $3 at your local fabric store)
– acrylic paint and brush
– needle and thread
– small snap button
First, cut out a strip of leather around a 3 /4” wide and the length that fits around your finger of choice. Then, sew on each snap to the ends of the leather. Paint your chevron design. (We tried sharpie with not awesome results, but a paint pen could also work.)

And poof! You’re done.

4. Chevron Valentine Necklace: How could we resist combining our two favorite February themes? A twist on the classic chevron look, we’re sure you’ll fall in love with this heart dropping necklace.
Materials:

– leather (or layered duct tape)
– thin rope
– small hole punch
Draw 3 hearts onto the leather and cut out using scissors or an X-acto knife.

Line them up one on top of the other. Using a black marker, place a dot on the tops and bottoms of the hearts where they will be connected with the rope. Then, punch each dot with the hole punch.
Tie in the rope to each section with a double knot. For the top piece, tie on the string leaving enough rope for your desired length.

5. Neon Duct Cuff: You know we love electrical tape (exhibit A + B) and duct tape really is a crafter’s best friend. Layer the two to create a shiny new arm piece perfect for ringing in spring.
Materials:

– 3 colors of tape
– bracelet fasteners and 2 fastener clips
– needle nose pliers
– jewelry glue
Pull off a piece of duct tape around 12” long and fold it over onto itself so that the sticky side of the tape is no longer exposed. Then, measure around your wrist and trim to fit.

With the other 2 colors of tape (if using electrical tape, the width is perfect, and no extra trimming is required), stick the chevron design on to the strip you just prepared.
On both ends of the strip glue and fasten the bracelet fastener clips. And, finally, with needle nose pliers, add the bracelet fasteners on to each clip.
Which chevron accessory is your favorite? Tell us in the comments below!


