You’re going to *fall* for these picnic ideas.
6 Stylish (and Easy!) Ideas for a Colorful Fall Picnic

‘Tis the season for colorful leaves, pumpkin everything and scarves, scarves, scarves. Before you let those cooler temps and shorter days keep you inside with your Netflix queue and an entire bottle of wine, seize the season by throwing a fall winery picnic with your fave people. Just start with a gorgeous venue, invite some friends and check out the must-have picnic finds and DIYs below to get your picnic party started.
We teamed up with Charles Krug Winery — the oldest winery in Napa Valley — to bring this pretty fall picnic to life. We set up camp in the grass near the vineyards and were surrounded by hundred-year-old redwood trees and changing leaves. With plenty of good eats and, of course, vino, we had an afternoon for the record books. Scroll on for all the gorgeous shots and learn how you can create your very own fall picnic with a few simple tips and easy DIYs.
A Seasonal Spread
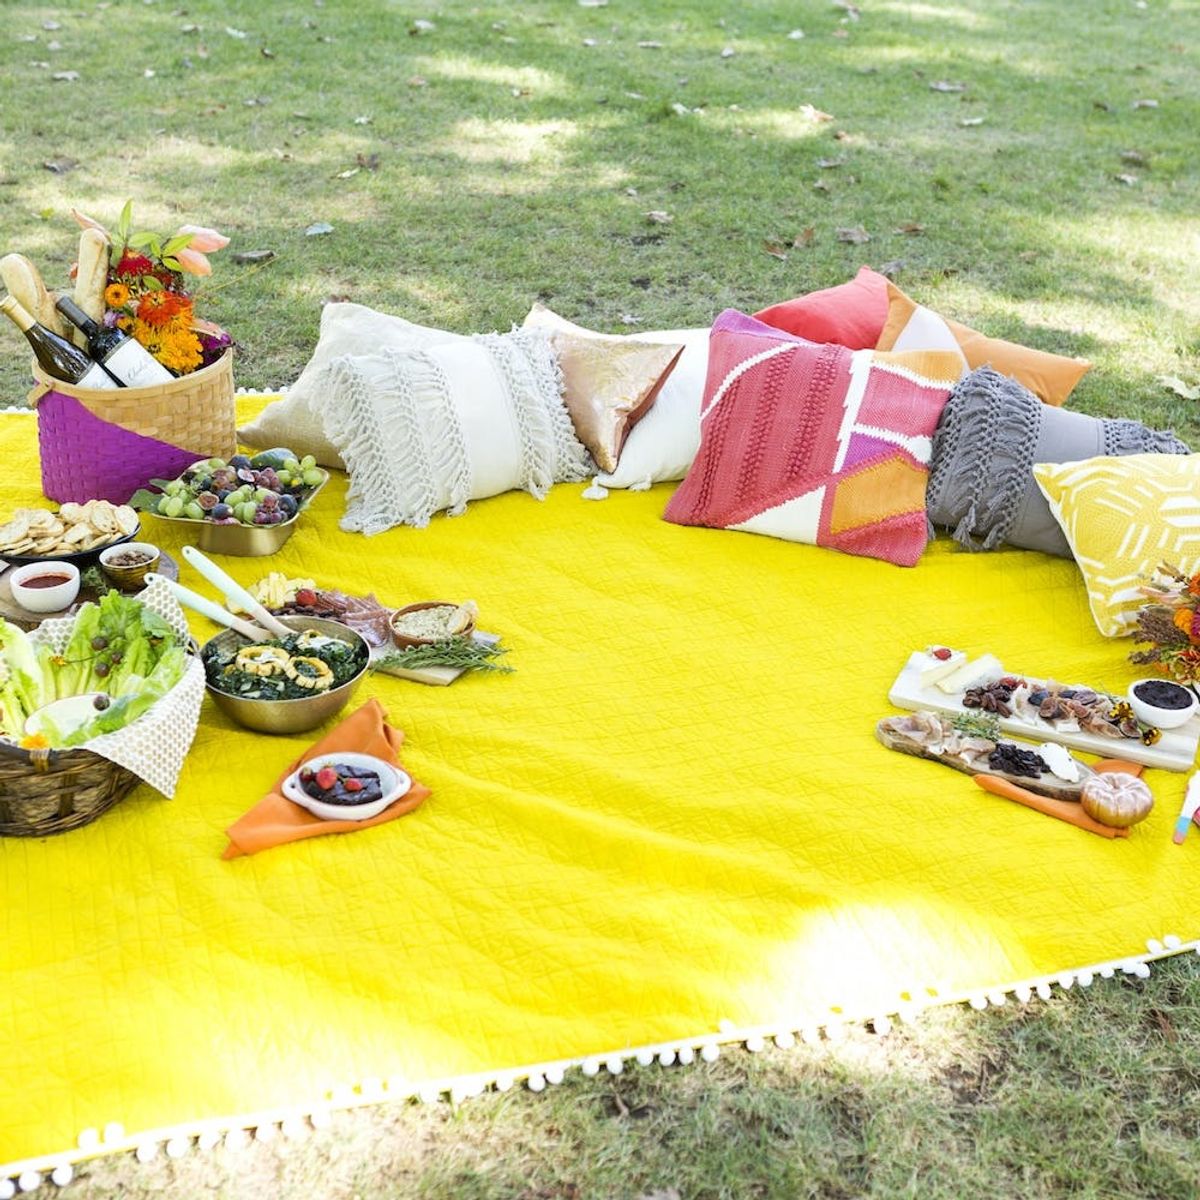
Every picnic calls for a mix of dips, bread, cheeses and meats. This gorgeous spread from the Jimtown Store was chock-full of seasonal eats like fresh figs, olive tapenade and hand-dipped salad (AKA the easiest picnic hack ever).
Pretty presentation is key, so we brought lots of wood and metallic platters. Pro tip: Cake stands also work great because they raise the food up and away from making stains on your pretty blanket.
colorful, Fall-hued Pillows
A little comfy lounge area at your picnic is a definite must. We brought some magenta, orange, yellow, gray and metallic pillows to go with our bright-hued autumn theme. Not only did these pillows look great and add a cozy vibe, but they also prevented that dreaded sore leg — and left for more wine and chill time.
DIY Color-Dipped Disposable Flatware
Whoever said silverware was required at a picnic never saw these colorful (and disposable!) wooden utensils. Add a bit of color to your own by following the steps below.
Materials:
- 1 set of wood utensils
- 3 different colors of acrylic paint
- medium size paint brush
- small sponge brush
- painter’s tape
Instructions:
Begin by taping off the bottom half of each utensil. Make sure that these line up across every type of utensil. Once all the utensils are taped, you can begin adding your two base colors. We chose magenta and blue bases and orange pops to add a nice color block vibe.
After you have painted the bottom of each utensil, allow for the paint to dry (this should take about an hour). Remove the painter’s tape and then add tape at varying diagonal angles.
Next, add the color pop paint (we chose orange for fall, of course) and place the utensils upside down in cups to dry. After the paint has dried, remove the painter’s tape and get ready to pack these beauties for your next picnic or party. You can mix up the color palette based on whatever season or holiday you’re entertaining for.
DIY No-Sew Pom Pom Trim Blanket
It ain’t a Brit + Co party without a little pom-pom action. Bring some pom-poms to your plain ol’ picnic or beach blanket by adding pom-pom trim with some easy no-sew fabric paint. Scroll on to see how to make your own.
Materials:
- 1 large blanket
- large white pom-pom trim (measured to the length of the sides)
- heavy duty fabric glue
- scissors
Instructions:
First, measure all four sides of your blanket before buying your pom-pom trim. Be sure to buy an extra foot or so, just in case. Then begin adding glue to the first edge of your blanket.
Add about six inches of glue at a time and then press the flat edge of your pom-pom trim down, holding for around five seconds. Repeat until the first edge is complete and cut the trim to start a new side.
Finish for the remaining sides, and voila! You’ll have the easiest pom-pom picnic or beach blanket EVER.
DIY Color Block Picnic Basket
Have basket, will carry lots of food. And wine. And desserts. Instead of settling for a boring basket, add color to yours with just a strip of painter’s tape and your favorite bright hue.
Materials:
- 1 wood picnic basket
- acrylic paint
- large sponge brush
Instructions:
First, tape off the bottom diagonal half and press the tape down firmly so the paint doesn’t slip under.
Then paint the basket with the large sponge brush. Make sure you’re using a large one, because the smaller one will take quite a bit longer. After one look at this beauty, you’ll want to add color-block action to just about everything — dining room table, dresser, plates, etc.
Fresh fall florals
Fall florals will really take your spread to the next level. Think: bright oranges, reds, magentas, yellows. These flowers by Rito-Ito added that je ne sais quoi to our spread and will do the same for yours!
At the end of the perfect day, a farewell vineyard stroll with wine in hand was definitely in order.
Happy fall, y’all!
This post is a collaboration with Charles Krug Winery.
DIY Production: Katie Bond, Lindsey Graham-Jones
Styling: Katie Bond, Brittany Griffin
Photography: Brittany Griffin
Models: Cortney Clift, Beth Wischnia, Lindsey Graham-Jones, Zoey Washington, Katie Bond
Venue + Wine: Charles Krug Winery, Napa, California
Florals: Rito-Ito
Catering: Jimtown Store


