How to 3D Print a Pumpkin in Photoshop

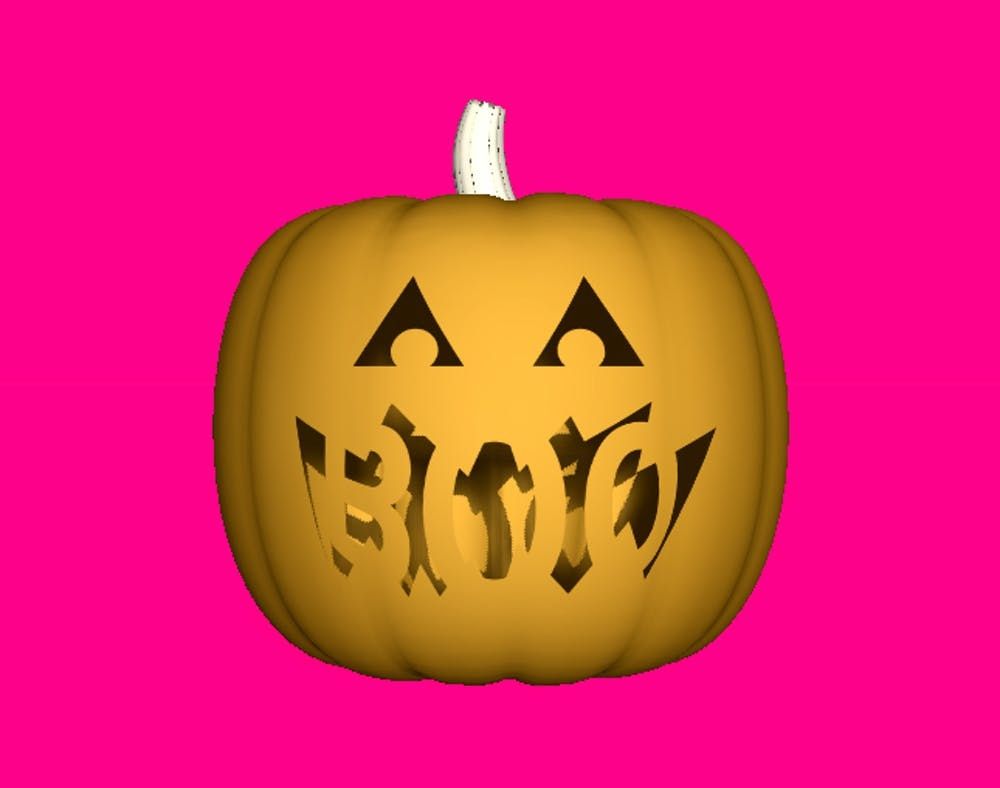
We love a good old fashioned jack-o’-lantern as much as the next guy and gal, but we know pumpkin guts and sharp knives aren’t everyone’s cup of tea. If you’re more of a digital whizz and less of a Michelangelo, why not give this year’s pumpkin a techie twist? Take to Photoshop to create a one-of-a-kind 3D printed pumpkin — we have the tutorial for you. Side note: If you’re new to the photo editing program, this may seem a little dense, but if you work in Photoshop on the daily this should be a breeze. Either way, we have faith in your skillz ;)

Materials:

– Adobe Photoshop CC 2014

Instructions:

1.Open the PSD Pumpkin file (Pumpkin.PSD). If you weren’t presented with the option to change the 3D workspace, or aren’t in the 3D workspace, I would suggest you switch to it now by clicking on the workspace drop-down menu in the upper right hand corner, and selecting 3D.

2. In the Layers panel, click on the layer named “Pumpkin Scene.” You should see the pumpkin sitting in the 3D panel. (You can double-click on the Layer Thumbnail to open the 3D panel. In the 3D panel you’ll see the basic scene elements, like: Environment, Scene, Current View (camera) and an Infinite Light, as well as a the Pumpkin mesh that has four materials attached to it: Skin, Stem, Top, and Bottom.

3. Click on the material layer named “Skin” in the Properties panel (this shows us all of the colors and textures being used for the currently selected material). The Diffuse Color determines the color of the pumpkin and there is no texture map loaded for the fuse (the folder icon to the right). Click on the Color Picker to change the color of your pumpkin.

*Note: Unless printing in full-color sandstone (via Shapeways), your model will print in the color of the material being used by the 3D printer.

4. Now, look at Opacity, and you’ll notice to the right field that the icon is different than the folder icons above. That’s because there is a texture map (image/Photoshop file) loaded. This is how you’ll be “carving” the pumpkin. Click on the Texture Map icon for Opacity, to the right of the opacity value field, and select Edit Texture. When the “opacity” document opens you’ll see three layers in the Layers panel (Boo, Face, and Background), and the Properties panel is now showing 3D Paint. You’ll also notice that the face is black on white — this is because for Opacity texture maps white is solid, and black is completely transparent.

5. There are two ways you can carve your pumpkin’s face: with the vector tools (in the Opacity texture map file), or painting on the texture map in the Opacity Texture map file on the Pumpkin model directly. Before we begin, let’s hide the two layers Boo and Face in the opacity map and make a new layer to work on.

Option 1: Carving with shapes when 3D printing give it a nice hard edge, and you can use all of the vector tools in Photoshop, such as the Shape and Path tools. Simply select the Shape tool, set the fill color to “black,” set the stroke color to “none” and draw the shapes you want the face to have. Save the changes (opacity texture) and switch back to the Pumpkin file to see your results in real-time.

Option 2: You can also “carve” the face using a brush. Just remember that you need to have a black and white image, and that shades of gray or a feathered brush can pose problems and have unexpected results. Simply make and hide the Boo and Face layers in the Opacity texture map, make a new layer and paint in black. Make sure your Brush tool options are set to Hardness: 100%, Mode: Normal, Opacity: 100%, and Flow: 100%.

6. When you finish carving you pumpkin and have saved and closed your Opacity texture map, switch back to the Pumpkin file and select Scene from the 3D panel. This will show you the Scene properties in the Properties panel. Select the 3D Print Settings attributes (second icon, similar to a printer, at the top of the Properties panel), to show the 3D Print Settings properties. In addition to printing locally, you can also use one of Adobe’s partner services to print your pumpkin. Just change Print To: and select Sculpito or Shapeways, select the material you’d like to use, and that’s it!

You can now adjust a few other properties, such as the Detail Level (higher level provides greater resolution), and change the size of the pumpkin to be printed. The last and final thing that you need to have is the Surface Detail enabled (checked) and Opacity enabled (checked). This will “carve” the face out of the pumpkin model when preparing the file to print.

7. Next, at the bottom of the Properties panel, with the 3D Print Settings still showing, you’ll see two icons, Start Print (left) and 3D Printer Utilities (right). Click on Start Print — this will prepare the pumpkin for printing. The 3D Print Dialog will appear when it’s ready to print or export. If you’re using a local printer, you can print directly from Photoshop by selecting Print. If you’re using a 3D Printing Service partner (Sculptio, Shapeways) you’ll save the file and then upload it to your preferred service provider.

That’s it! Good luck and have fun!

If you give these tech-inspired pumpkin a go, show us how they turn out by tweeting a picture to @BritandCo!
We love Halloween here at Brit + Co, I mean really love it. And we also embrace the celebrations in all of their forms, from IRL blow-out bashes to WFH office parties. If you've got a virtual Halloween party to attend on Zoom with your remote team or friends across the country, here's how to get dolled up for the best costuming and celebrating from a Zoom-y distance. Keep reading for fun ways to dress up with wigs, makeup, and festive tops without having to worry about what you've got on the bottom — basically, the costume version of a mullet. Happy Halloween!

Brit + Co

Pirate

Ahoy, matey! Just grab a red scarf, eyepatch, striped shirt and a fishtail side braid for this classic and super easy costume.

Brit + Co

Flamingo

This makeup is on point. Here's how to DIY this feathery look.

Brit + Co

Unicorn

Fulfill your magical dreams with this DIY unicorn costume.

Brit + Co

Cleopatra

Stand out with a costume that's part-Ancient Egyptian, part-badass babe. With some eyeliner and well-chosen accessories, you'll be able to craft up a Queen-of-Egypt-inspired Halloween costume that's sure to blow your Zoom party guests away.

Brit + Co

Rosie the Riveter

White button down and red polka dot headscarf, easy peasy. For the hair, pin up half of your hair and twist it up into a bun. Then take the rest of your hair and create another bun a little lower on your head. Top the look off with the scarf, and you'll be riveting in no time. :)

Brit + Co

Princess Leia

Best buns on the planet! Create this iconic hairdo with this easy hair hack.

Brit + Co

Elsa

Does Frozen still melt your heart? Be everyone's favorite snow queen with this DIY costume.

Brit + Co

Holly Golightly

Top off your top knot with a tiara, then add a LBD, pearls, coffee and sunnies.

Brit + Co

Angry Bird

We've seen this costume before, but this look is too dang cute to pass up. Especially when all you need is a yellow wig and some craft supplies. Draw out the face onto felt and cut it out, then glue the head piece to a headband. Everything else can be taped to the wig.

Brit + Co

Creepy Clown

Whether you're going for a clown or a mime vibe, this kinda creepy, kinda cute look will achieve all of your Halloween dreams.

Brit + Co

Day of the Dead

Dress up as a Dia de los Muertos sugar skull with this easy DIY tutorial.

Brit + Co

Lady Gaga

It's been quite some time since Gaga donned her signature bow, but we'll never get enough of it. Head to our Hair Bow tutorial here for the full how-to.

Brit + Co

Pumpkin

Okay, this may be really, really basic, but it is a Halloween staple. Plus, it's the one time of year you can wear all orange, all the time. Grab an orange wigand go!

Brit + Co

Queen of Hearts

Ace this Queen of Hearts costume with ared wig or red spray dye!

Brit + Co

Frenchie From Grease

Here's an excuse to break out that cute pink wig in your closet. Add a Pink Ladies jacket and bubble gum and you're ready for beauty school!

Brit + Co

Strawberry Shortcake

You can go with the full Strawberry Shortcake costume or just order a pink wig and bonnet— then add freckles and a pink top and you're Zoom ready!

Brit + Co

Pop Art

If you are looking to really up your costume game and stand out on Zoom, go for this pop art makeup look. Pop on some comic leggings (totally WFH-friendly!) and yellow wig too.

Brit + Co

Vampire

Don a black lip and eye makeup, then use that same eye makeup or black face paint to create a faux widow's peak. Spooky!

Brit + Co

Jem

We are as obsessed with our '80s cartoon characters as we are with wig costumes. For bright pink tresses, Jem is an absolute must!

Brit + Co

Cruella de Vil

This fierce villain oozes style, even if she is totally evil. Use spray hair dye on half of your head, then top off the look with red gloves, a faux fur coat, cigarette holder and a little Dalmatian. Oh, and that evil cackle is essential.

Brit + Co

Kitty

Every girl's backup costume is also the perfect Zoom costume. We made our ears by attaching black foam ears to a headband, but you can easily find a readymade option at just about any store this time of year. Get the full Black Cat makeup tutorial right here.

Brit + Co

Witch

Don a black witch hat and follow this makeup tutorial for this spooky cool green witch.

Brit + Co

Black Swan

The hair hack here is that slick top knot and the crowning tiara, though the key to the whole scene is obviously those crazy eyes. Here's a great tutorial right herefor gals who want to go all out.

Brit + Co

Minion

Learn how to get the look of the cutest minion costume ever!

Brit + Co

Katy Perry circa 2014

Or go for any of Katy Perry's Dark Horse video costumes with these Brit + Co DIYs.

\

Brit + Co

Mad Hatter

This Mad Hatter costume is pretty easy to replicate. Grab a brown jacket from your closet, orange wig and top hat. The thread holster is made by stringing thread spools onto yarn and draping it over the shoulder. The makeup is an understated version inspired by the original, but really easy to recreate. And yes, those are fake eyelashes as eyebrows!

Brit + Co

Mime

You can just stay on mute!

Brit + Co

Pippy Longstocking

Recreate Pippy's completely insane pig tails with this easy DIY trick.

Brit + Co

Barbie

Your co-workers will immediately get the idea once you show up with your pink visor, watercolor swimsuit and bike shorts outfit! They may even get a little jealous!

Brit + Co

Poison Ivy

"That girl is poison" best describes former botanist turned green seductress Poison Ivy. See how you can DIY this costume here!

Brit + Co

Gamora from Guardians of the Galaxy

Maybe you prefer to be a bada**, take no prisoners green goddess like Gamora from the Guardians of the Galaxy franchise. For fun, you can try your hand at method acting by acting like her during your virtual Halloween party. Just try to keep the sarcasm on the lighter side.

Brit + Co

Minions

To make things more fun, you and a few co-workers can dress up as Minions! It's a DIY-costume that's inexpensive and funny.

Brit + Co

The Sanderson Sisters

Hocus Pocus is basically life for the Brit + Co team so it only makes sense to show up to your virtual Halloween party wearing one of the above costumes!

Planning any virtual Halloween gatherings? Share your costumes with us @BritandCo!

Brit + Co may at times use affiliate links to promote products sold by others, but always offers genuine editorial

After revealing her breast cancer diagnosis on Pod Meets World in August, Danielle Fishel continues to prove she won't let the disease hold her back. The actress and director took the red carpet for the Wizards Beyond Waverly Place premiere, and she opened up to PEOPLE magazine about how this disease continues to impact her. Here's what she had to say!

At the premiere, Danielle Fishel shared with PEOPLE that she was actually "back and forth" about showing up to the premiere. She said, "I obviously wanted to come tonight because I absolutely love this show. I'm so honored to have been able to direct a couple of episodes of it."

Still, there was something holding her back. She shared, "At the same time, everything I wanted to put on, I was like, 'I can see my scars in that. Oh, I can see my scars in that.'"

Instead of letting that hold her back, though, Danielle decided to push herself. "I was like, 'Why am I going to let that be a factor in deciding to live my life?'" she said. "I got dressed and I had my makeup artist do her magic and I feel fine." Ultimately, she said she was "happy" to be there — which is all you can ask for when you're facing down your fears!

Fishel told PEOPLE that her "whole life has changed" since her diagnosis. She explained that her life consists of "many doctor's appointments," check-ups, and side effects. She said, "It's not fun, but it is what it is. And with all that said, I'm very fortunate and I'm going to live, which is the most important thing."

Back in August, the star explained to Rider Strong and Will Friedle that was diagnosed with DCIS — ductal carcinoma in situ — which she described as "a rare form of breast cancer." Even though she discovered the disease at "technically stage zero," she underwent surgery to remove the cancer, as well as follow-up treatments.

When she announced her diagnosis, Danielle explained that she thought she would "would suffer in silence" and "not tell anyone." However, it's clear she's made the conscious effort to not only lean on her community, share her story, and brave the aftermath — surgery scars included.

Fishel's brave red carpet move comes after another fellow breast cancer survivor, Olivia Munn spoke out earlier in October about how her own scars. Munn bared her scars for a SKIMS campaign, after deciding she didn't wanna cover them up anymore. We're so proud of all these strong women for telling their stories and fully embracing themselves, scars and all!

Looking for more inspiring news? Be sure to sign up for our weekly newsletter so you never miss a thing!

No matter what kind of day you're having, Marissa Cooper's having a worse one. Mischa Barton's The O.C. character went through the ringer during the first three seasons of the teen drama (remember how she overdosed in Tijuana...and also saw her parents post-hookup after their divorce?).

And during her time on The O.C., Mischa Barton struggled with drug and alcohol abuse. She was arrested for a DUI in 2007 and eventually received involuntary psychiatric hospitalization in 2009 after allegedly threatening to end her own life. And in a new interview, Peter Gallagher (who played Sandy Cohen on the show) says he's "just so grateful" for "the fact that she’s still alive."

  • Mischa Barton starred alongside Peter Gallagher in The O.C. from 2003-2006.
  • The actress has revealed the "trauma" of being a star at that point in her life.
  • Peter recently opened up about how he's thankful "she’s still alive."


Dimitrios Kambouris/Getty Images for FLC/John Lamparski/Getty Images

The O.C. follows Ryan Atwood, who moves in with the Cohens after getting kicked out of his mom's house, and starts a relationship with Marissa shortly after. While Peter Gallagher played Adam Brody's TV dad instead of Mischa's, Sandy was a definitely father figure for Marissa, and it seems like Peter felt that same responsibility off camera.

"I’ve always felt very protective of her," Peter told The Independent. "First fame is toxic. First fame can kill you. She was 16 years old when she started working with us, so just the fact that she’s still alive, I’m just so grateful."

“You can go to therapy every day for the rest of your life,” Mischa said in a 2023 interview with The Sunday Times. “There’s just a certain amount of trauma [from] all that I went through, particularly in my early twenties, that just doesn’t go away overnight.”

Josh Schwartz and Stephanie Savage revealed that season 1 overdose not only served as a cliffhanger, but gave “network executives an escape hatch on a performer they had been wary about” (via People). But Mischa Barton got her big break, becoming "how people knew the show," and (thankfully) Marissa recovered — only to die after a car crash in season 3.

As hard as that season 3 ending is to watch, Mischa did have the opportunity to watch it with Rachel Bilson and Melinda Clarke for the first time on their rewatch podcast. "It needed to be a thing, after everything she's been through, but if it's here I'll watch it with you," Mischa says.

"I couldn't do it, Mischa, I couldn't do it," Rachel adds. "But I'm going to do it if you're going to do it."

Mischa says even though being written off the show "was a little bit of a bummer," it wasn't necessarily a surprise. "The character was just doing too much," she told Vanity Fairin 2023. "And I think they ran out of places for her to go. It was not the best thing in the world, [but] there wasn’t much you could do at that point. It was whether she could sail off into the sunset, or die. At that point, I guess it’s better to have the more dramatic ending.”
What did you think of The O.C. season 3 finale? Let us know on Facebook!