Socks, scarves and flannels revisited.
9 DIY Gifts You Can Make That Will Help You Win This Holiday Season

Holla! As in holla-days. You guys, the season is upon us now that Halloween is over, so we are kicking it into high gear, DIYing gifts, decorating trees and wrapping presents galore! As moms, we know you want to give meaningful gifts to your loved ones, yet also consider the time you do (or don’t) have and get the most bang for your buck.

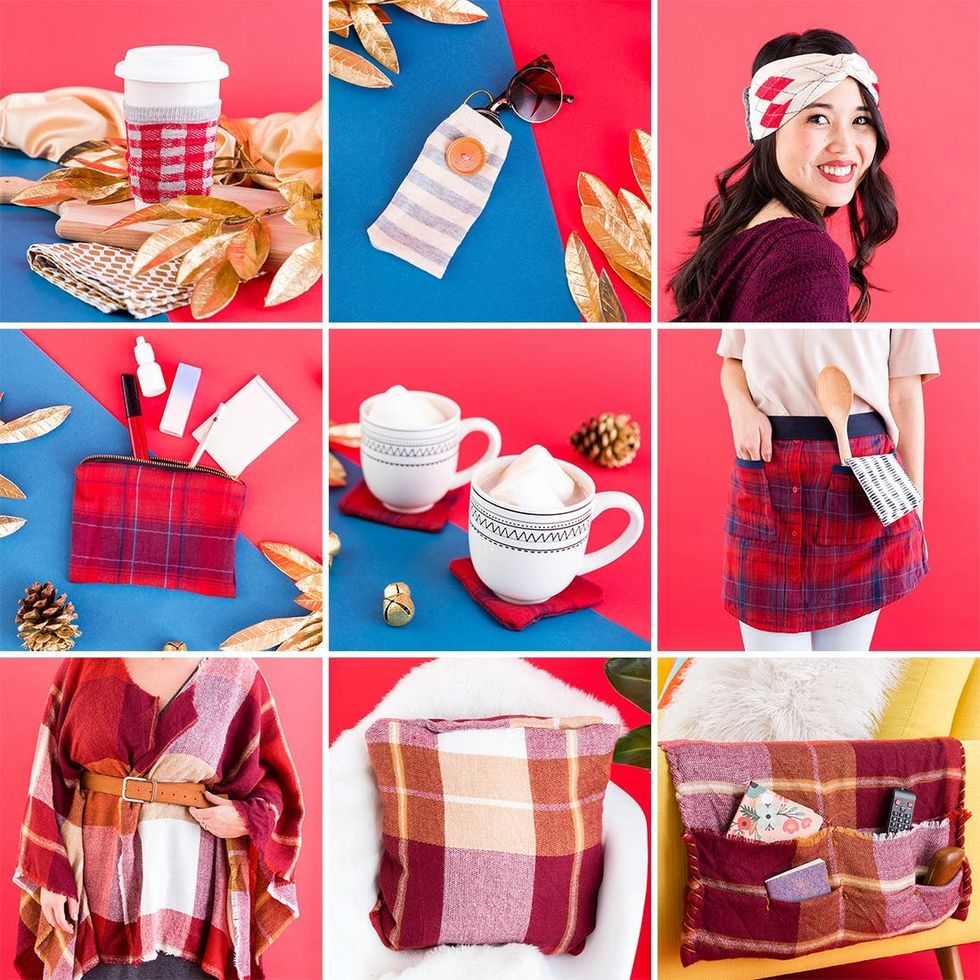
So today, we’re teaming up with JCPenney to inspire you with some projects you can make out of typical fall fashion items you can find in their stores. Because in our opinion, quick-and-easy DIYs + materials that won’t gouge your wallet = the perfect holiday gifts! Read on for nine (yes NINE!) DIYs you can make out of socks, flannels and scarves.
Made Out Of Socks

1. Coffee Sleeve
Who knew a sock would double as a coffee sleeve?! With a quick snip and some fabric glue, you can repurpose socks so that they protect your hands (instead of your feet!)
Materials + Tools:
All you need is a single sock for this one. We went for a wintery plaid pattern in festive colors.
- Mixit™ Crew Socks
- fabric glue
- fabric scissors
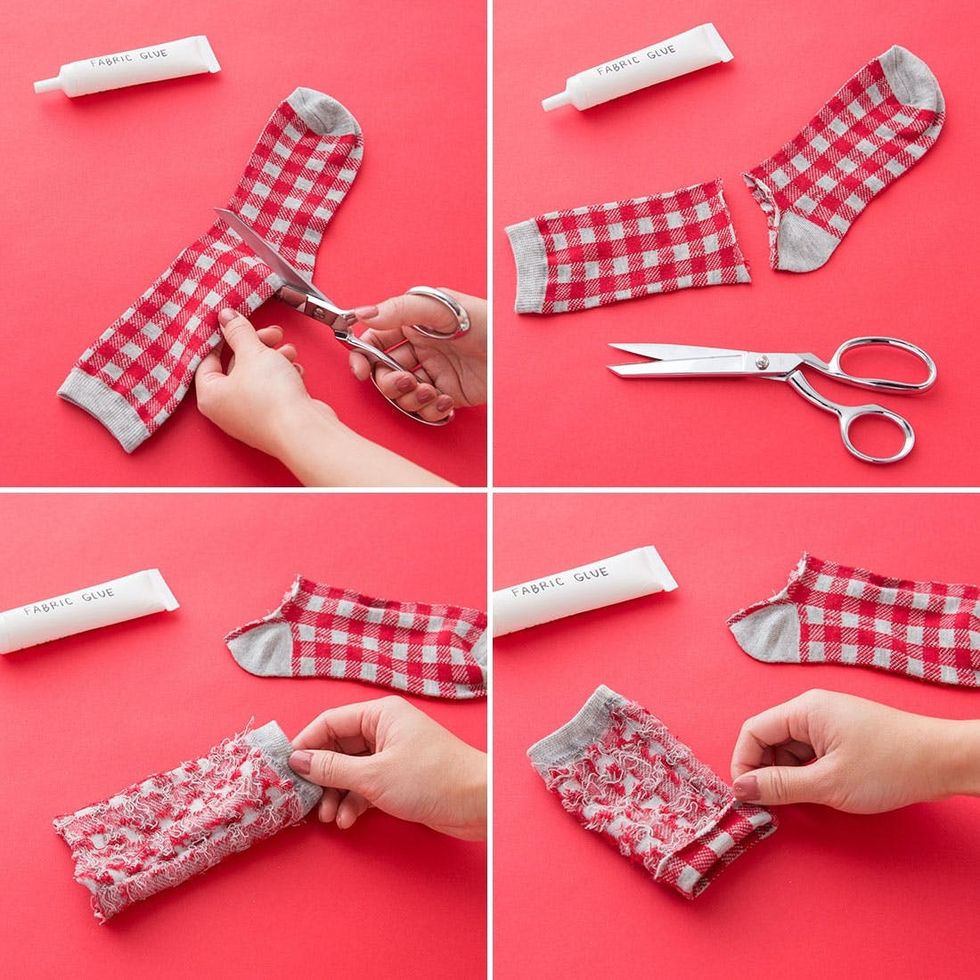
Cut the top portion of your sock off to fit the coffee cup of your choice (make sure to leave one extra inch at the bottom to fold under and hem). Turn your sock inside out and fold the un-hemmed portion of the sock over.

Apply fabric glue to the inside of the fold. Let the glue dry for 30 minutes to an hour.

Flip the sock back out and slide the sleeve onto your coffee mug! If it gets dirty, just throw it in the wash — after all, it’s just a sock.
2. Sunnies Case
Next up, we’ve got a sunglasses case that also doubles as an accessories case. We’re all about repurposing :)
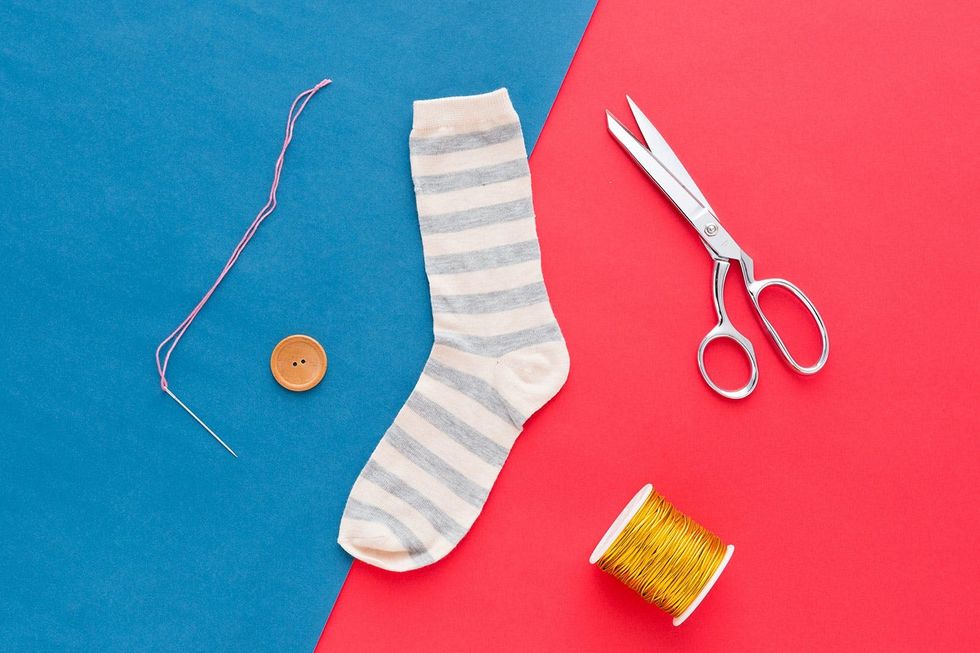
Materials + Tools:
Once again, you can make this cute case out of a single sock! Pretty easy find, we’d say.
- sock
- needle
- embroidery floss
- fabric scissors
- button
- elastic cord
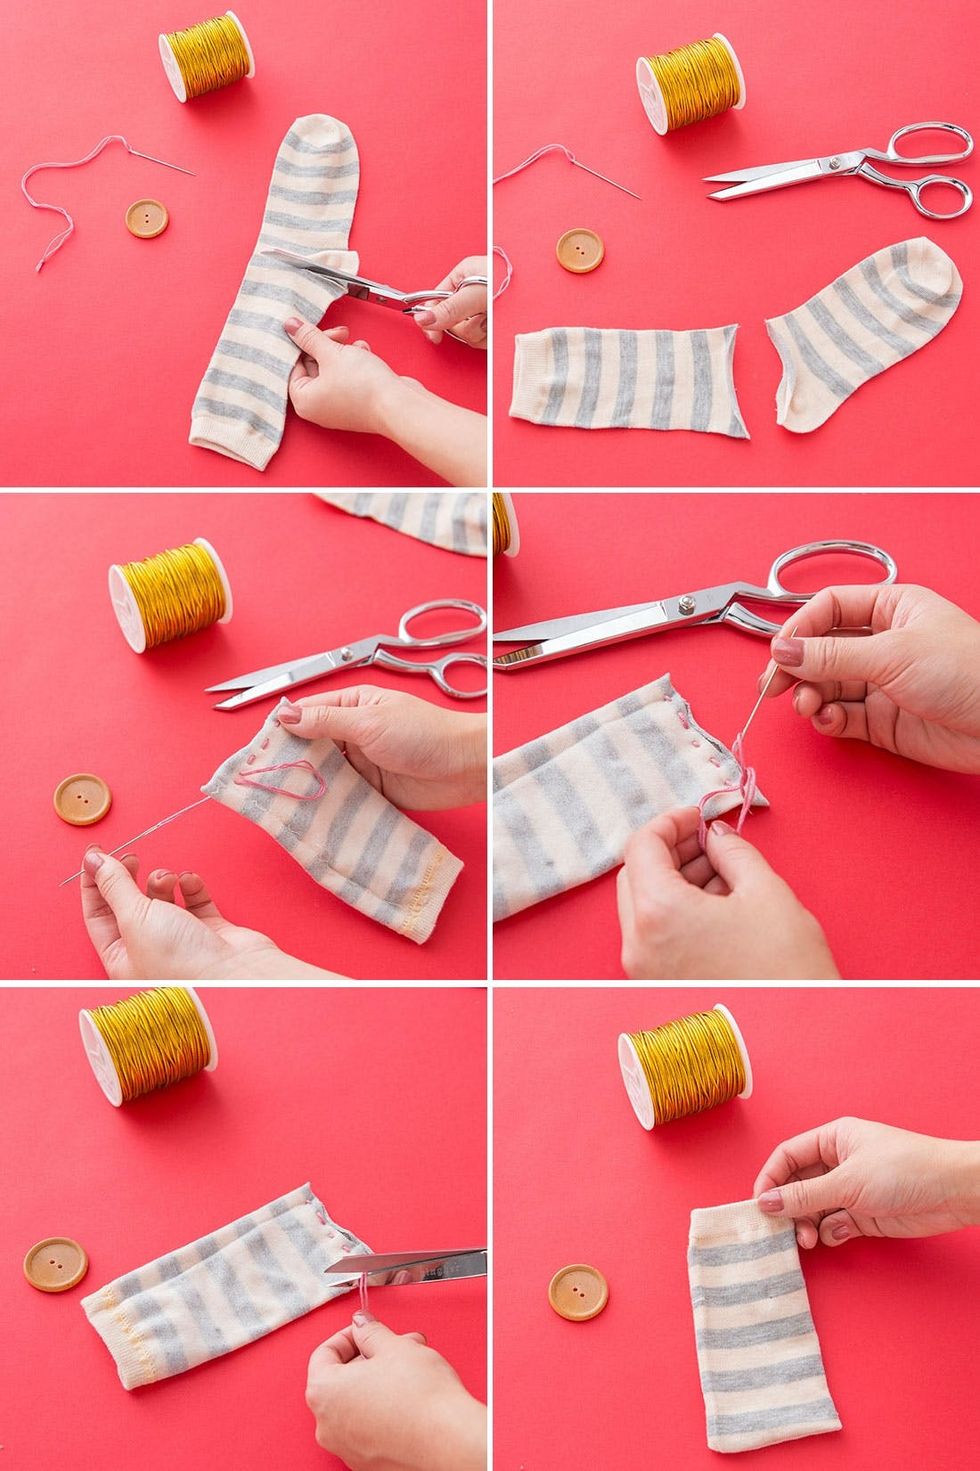
Cut the top portion of your sock off to fit the accessory of your choice (make sure to leave one extra inch at the bottom to hem). Flip your sock inside out and begin to sew stitches across the un-hemmed portion of the sock. Knot to secure and trim off any excess thread. Flip the sock back out.
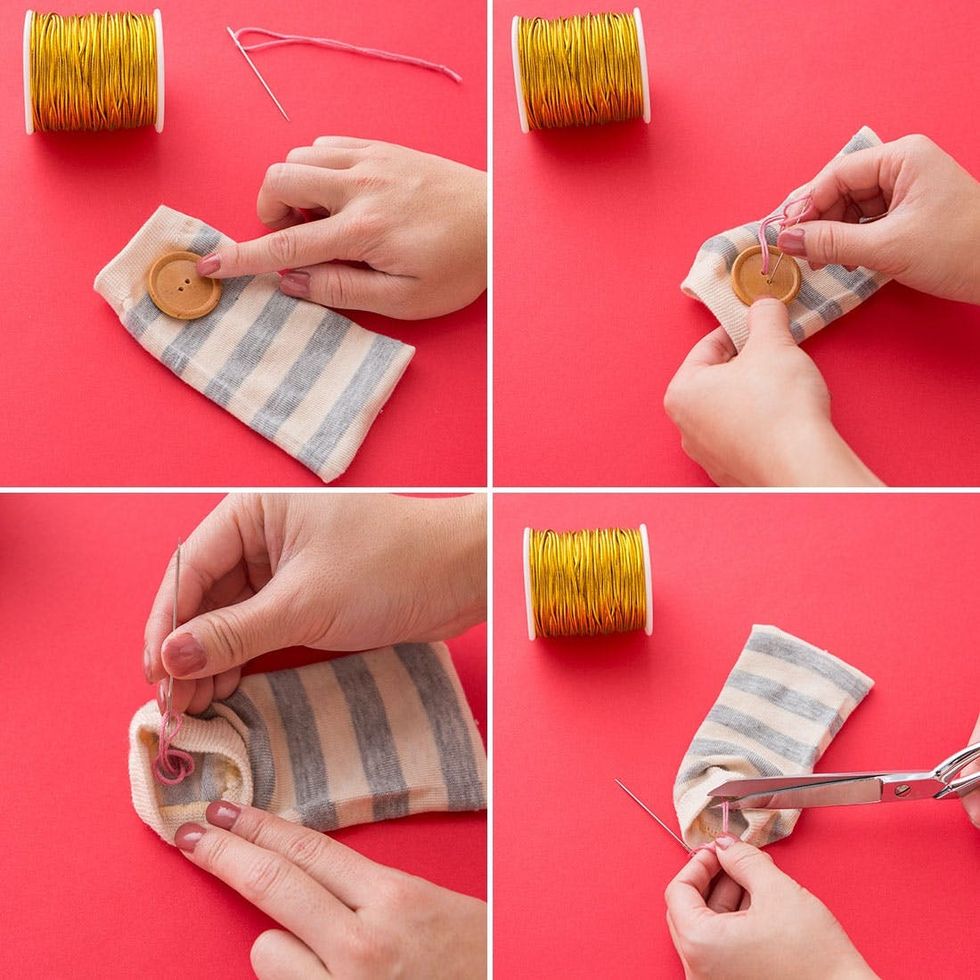
Place and sew the button where you see fit.

Cut a six-inch strip of elastic cord. Knot the end and sew to the back of the accessories case. Flip the case over and tuck the cord under the button to close it. Use the case to protect your favorite accessory.
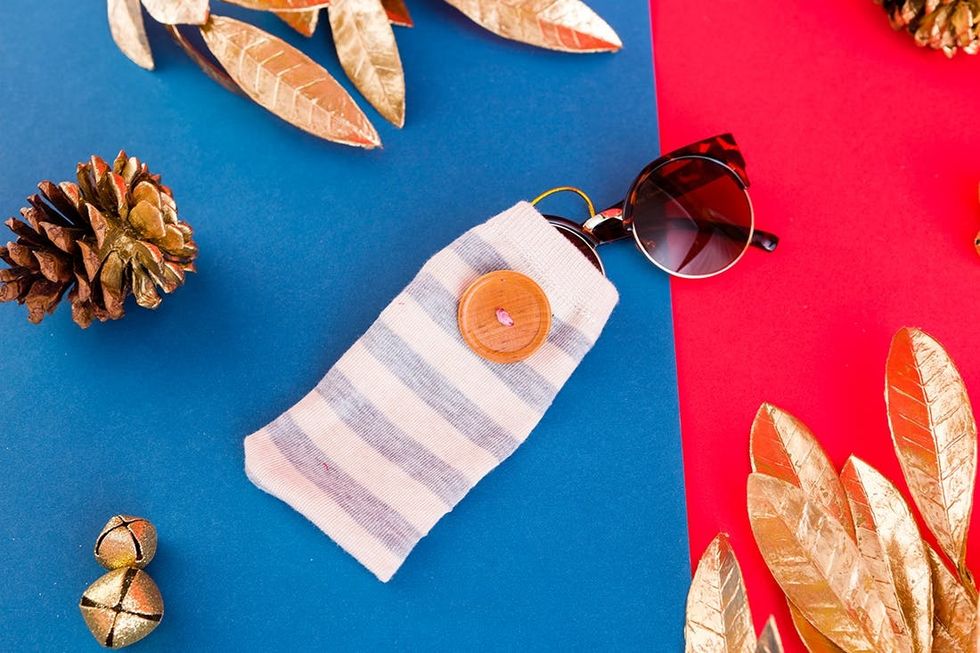
Perfect for a pair of sunnies.
3. Headband
Finally, we’ll use three socks to make a headband, perfect for keeping your ears warm in the winter months.
Materials + Tools:
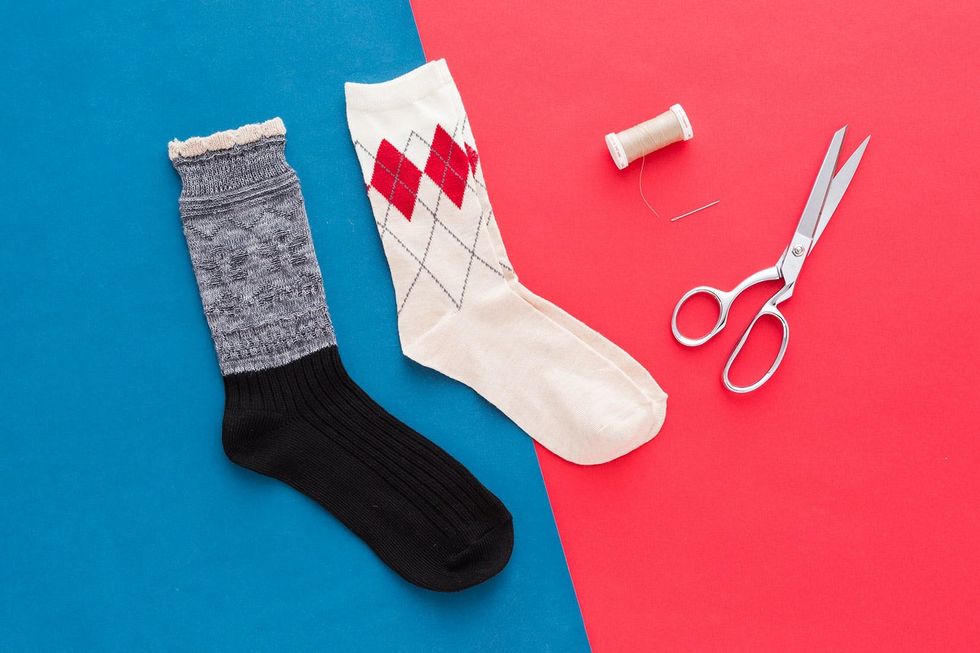
For this one, get a pair of socks and then a single sock that coordinates. You can mix and match textures, but just make sure the colors are cohesive.
- one pair of patterned socks
- one textured sock
- needle and thread
- fabric scissors

Take your textured sock and cut at the low ankle so that it forms a tube. This portion will be referred to as the tube sock. Set aside. (Feel free to trim off any excess ornamentation.) Grab your patterned socks and make an X. Then, fold each sock in half so that they cross over each other and the top and toe meet.
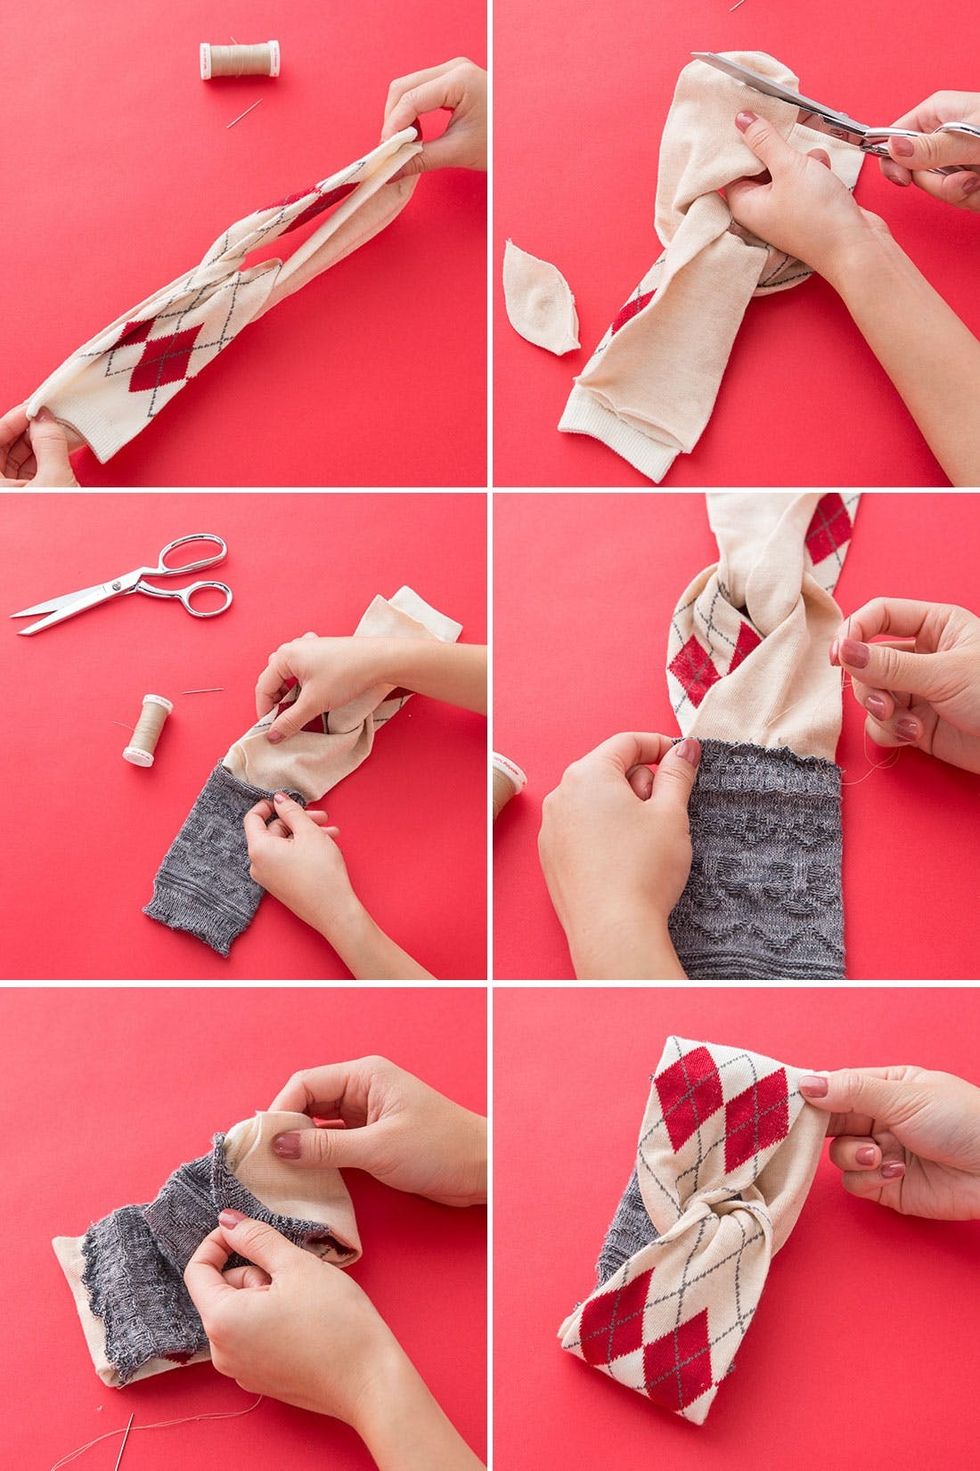
Snip off the tip of the toe so that it is even with the top end of the sock. Tuck the toe and the tip portion of one patterned sock into one end of the tube and sew it together. Repeat on the other side with the second patterned sock.
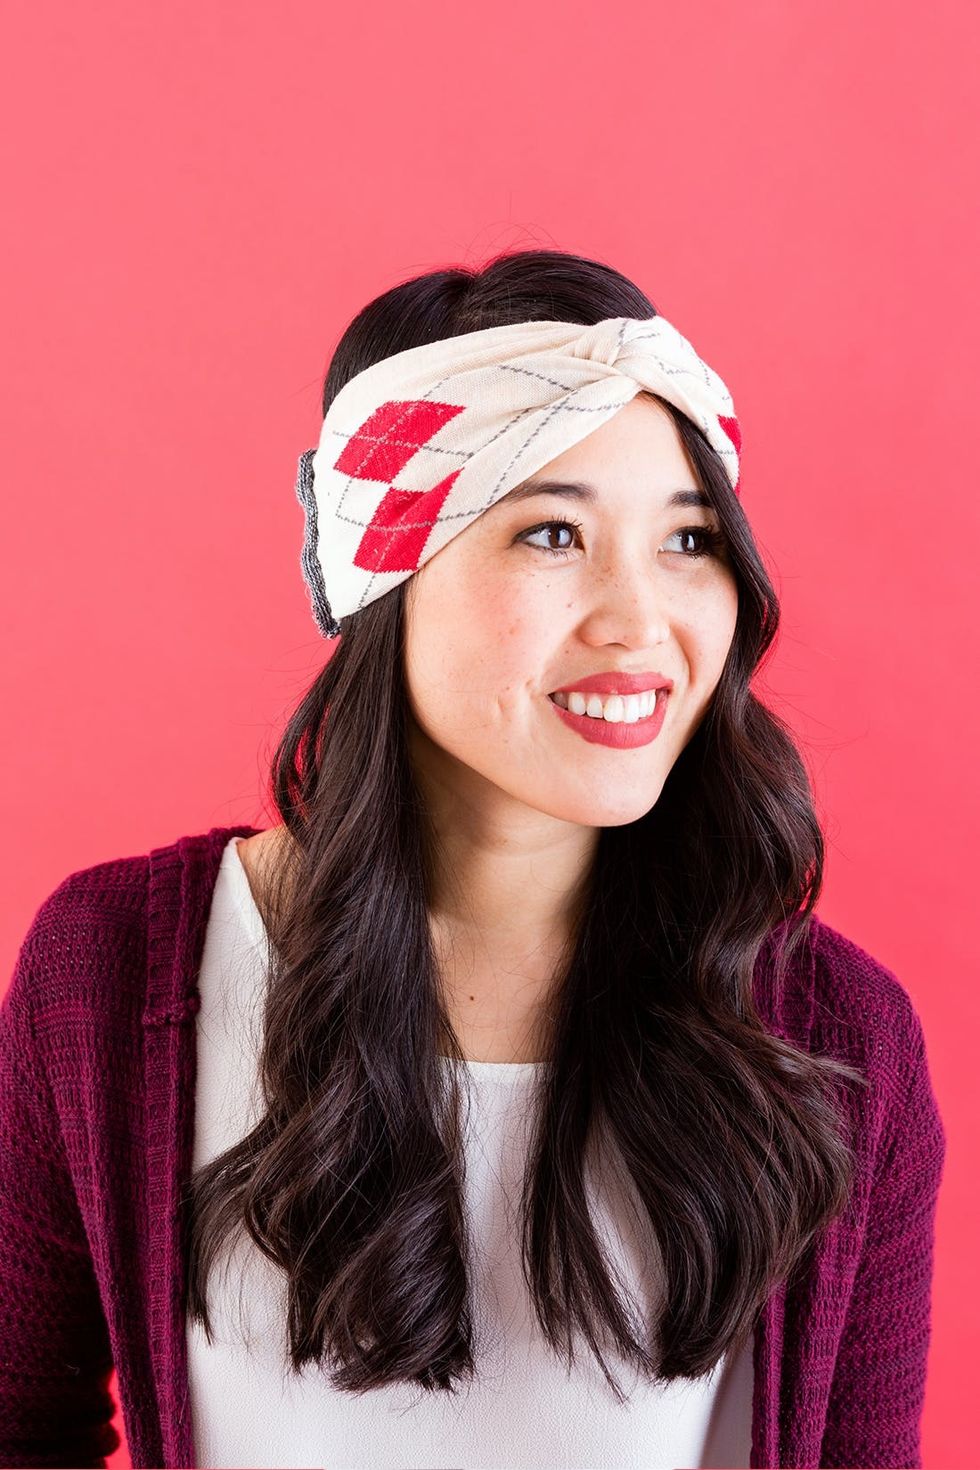
Sport your new DIY sock headband that will keep you warm and toasty all winter long.

4. No-Sew Zip Clutch
Much like the accessory case, a zip clutch is, well… a clutch item to add to your accessory stash.
Materials + Tools:
We went for a flannel with a cozy fall feel, but there are so many flannels to choose from. Pick the one with the pattern and color scheme you like best.
Made From a Flannel Shirt
- St. John’s Bay® Long-Sleeve Brushed Twill Shirt
- fabric glue
- 7-inch zipper
- fabric scissors
- pen
- ruler
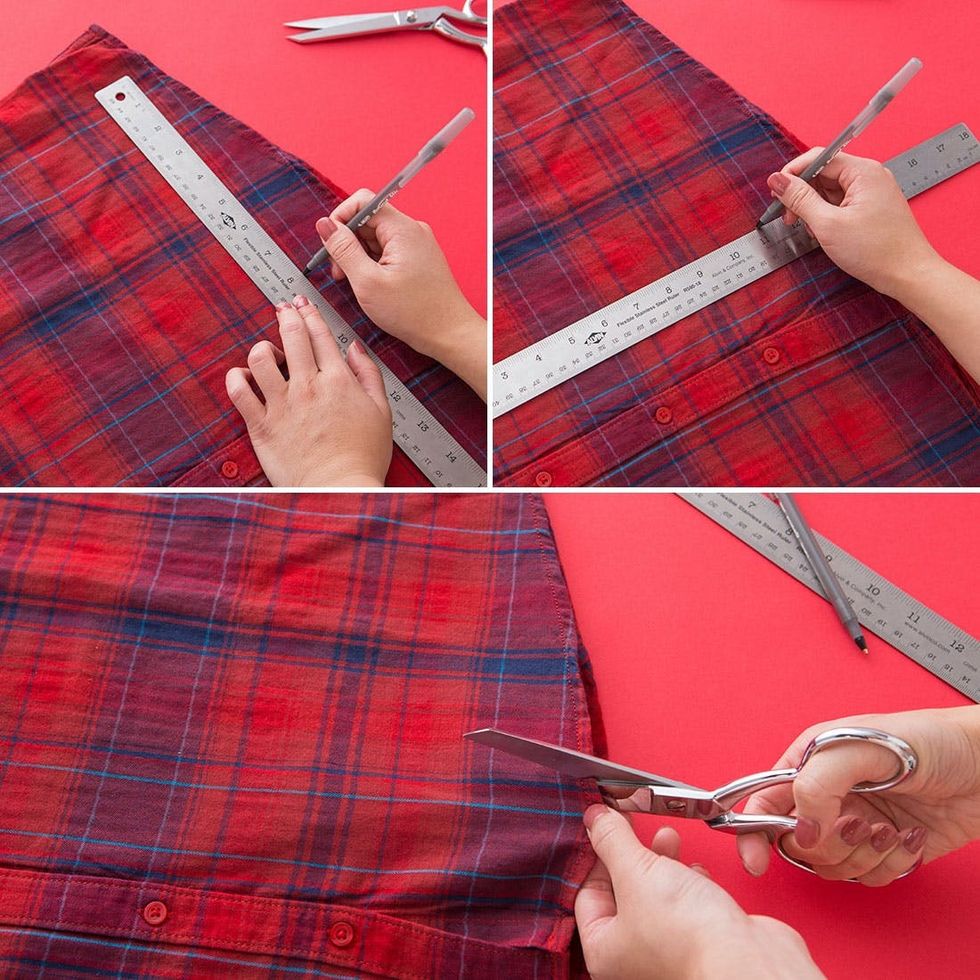
Measure and cut an 8 x 11-inch piece of fabric from the flannel.
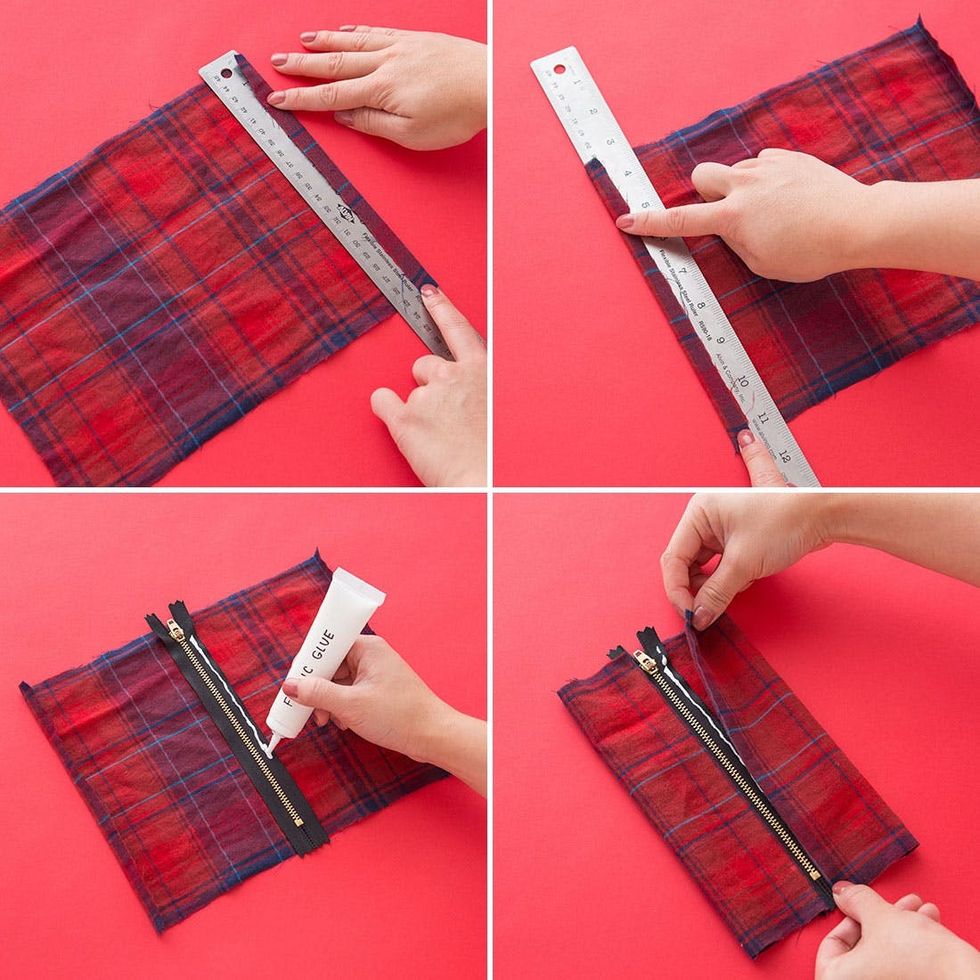
Use the ruler as a straight edge to fold the eight-inch sides of the flannel in. Place the zipper across the middle and apply a line of fabric glue down each side of the zipper. Fold each side of the fabric over on top of the glue and press down. Let the glue dry for 30 minutes to an hour.

Unzip the zipper and turn the fabric inside out. Apply fabric glue along both open sides of the pouch and press down firmly onto the fabric. Let the glue dry completely before moving on to the next step. Cut off any excess ends on the zipper and turn the pouch inside out.
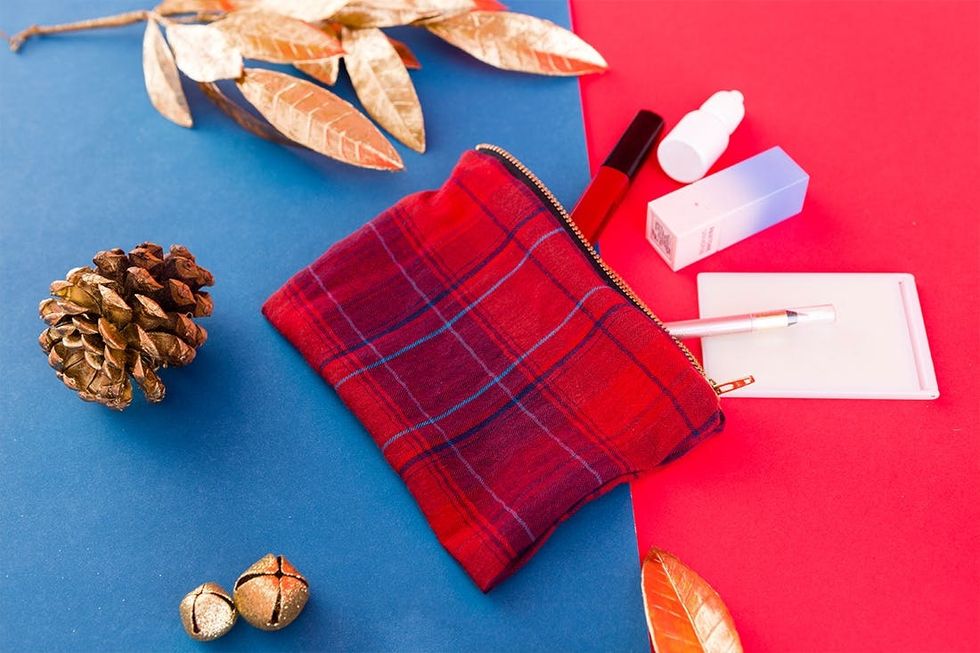
Now you’ve got a winter-friendly clutch to fill with your favorite makeup and accessories.

5. Coasters
Coast into the season with some festive squares on which you can rest your festive spiked hot cocoa! These are great stocking stuffers or gifts for your #momsquad.
Materials + Tools:
Think how many coasters you can make with a single shirt. For the price of one shirt, you’ll be able to make many gifts! That’s a win in our book.
- flannel shirt
- needle
- thread
- felt
- pins
- fabric scissors
- pen
- ruler
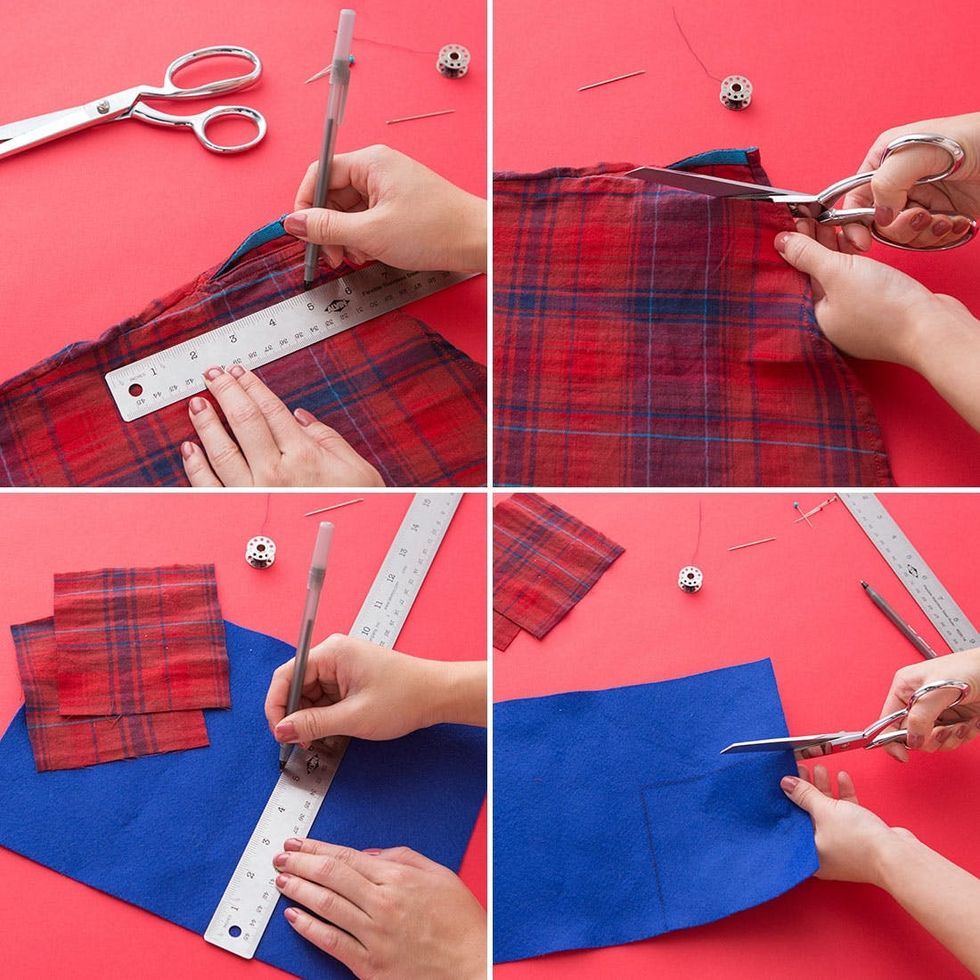
Measure and cut two 5 x 5-inch squares from the flannel. Measure and cut one 5 x 5-inch square from the felt.

Layer the flannel squares on top of the felt square. Pin down the layers and sew them together. Leave 1 ½ inches on the center of one side unsewn (you will use that area to flip the coaster inside out, hiding your seams). Back stitch at corners to form a stronger stitch. Trim excess fabric from the edges, leaving the 1 ½-inch section of flannel fabric uncut. We recommend trimming the felt down so it does not create a bulge when you fold in the flannel.

Open up the coaster at the gap between the two flannel pieces and flip it right-side-out. If you flipped correctly, the felt should be tucked inside and there should be a little extra fabric at the gap. Tuck the extra fabric into the gap and adhere the layers together using fabric glue.
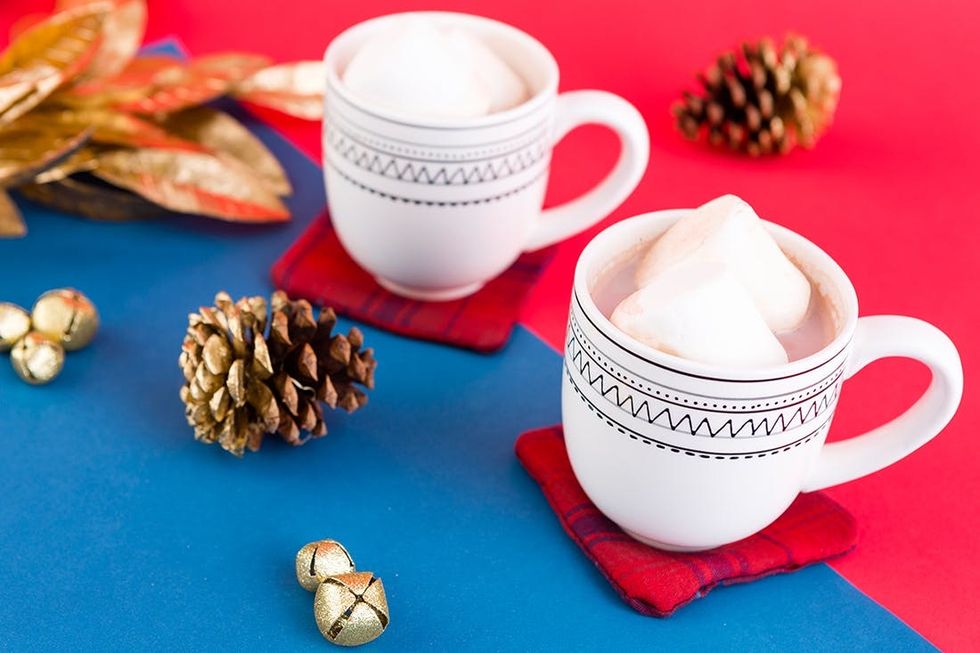
Mmm, hot chocolate.
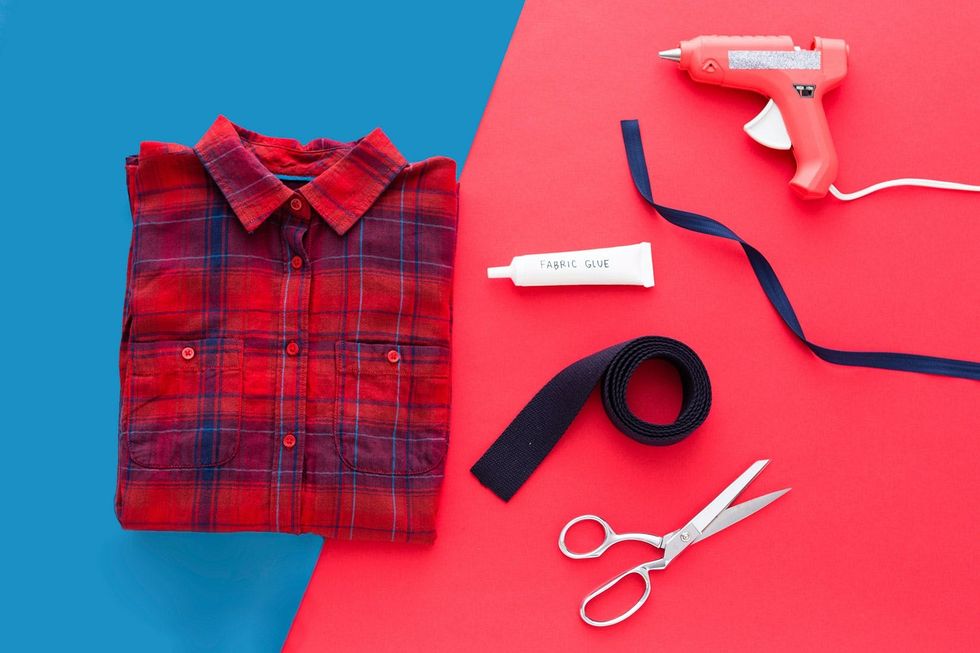
6. Apron
This might just be the cutest apron hack of all time. And it’s WAY easy to boot! That flannel is so versatile ;)
Materials + Tools:
Be sure to get webbing and ribbon that coordinates with your chosen flannel shirt. Pick out a color in the shirt and match the other pieces to it or go for a shade lighter or darker in the same hue.
- flannel shirt
- fabric scissors
- fabric glue
- hot glue gun
- 1 1/2 yards of 1 ½-inch wide webbing ribbon
- 1/2 yard of ½-wide ribbon
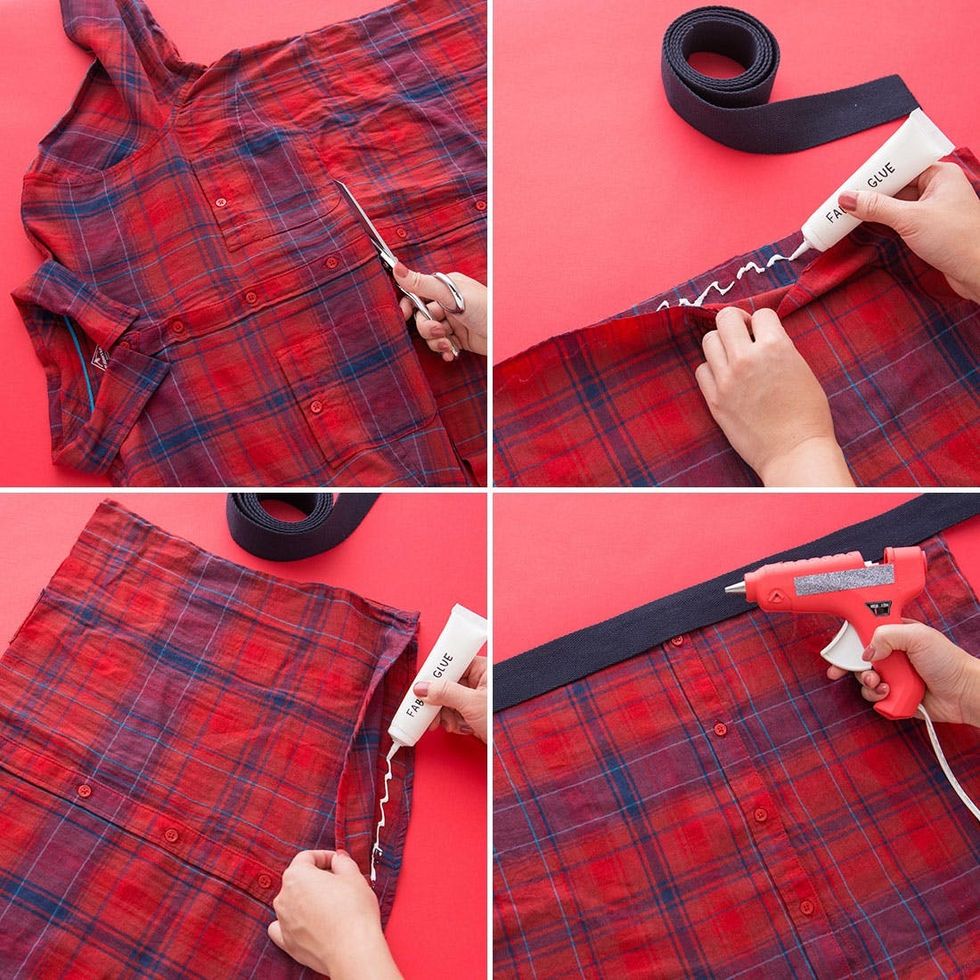
Cut the shirt right below the sleeves. Cut along the stripes so that your cuts are straight. Glue the top and bottom edges of the fabric together with fabric glue. Use hot glue to glue the webbing ribbon along the top edge.

Cut two 6 ½-inch strips from the flannel shirt sleeves. These will be the apron pockets. “Hem” the bottom edges, folding and gluing the bottom inch of the pockets with fabric glue.
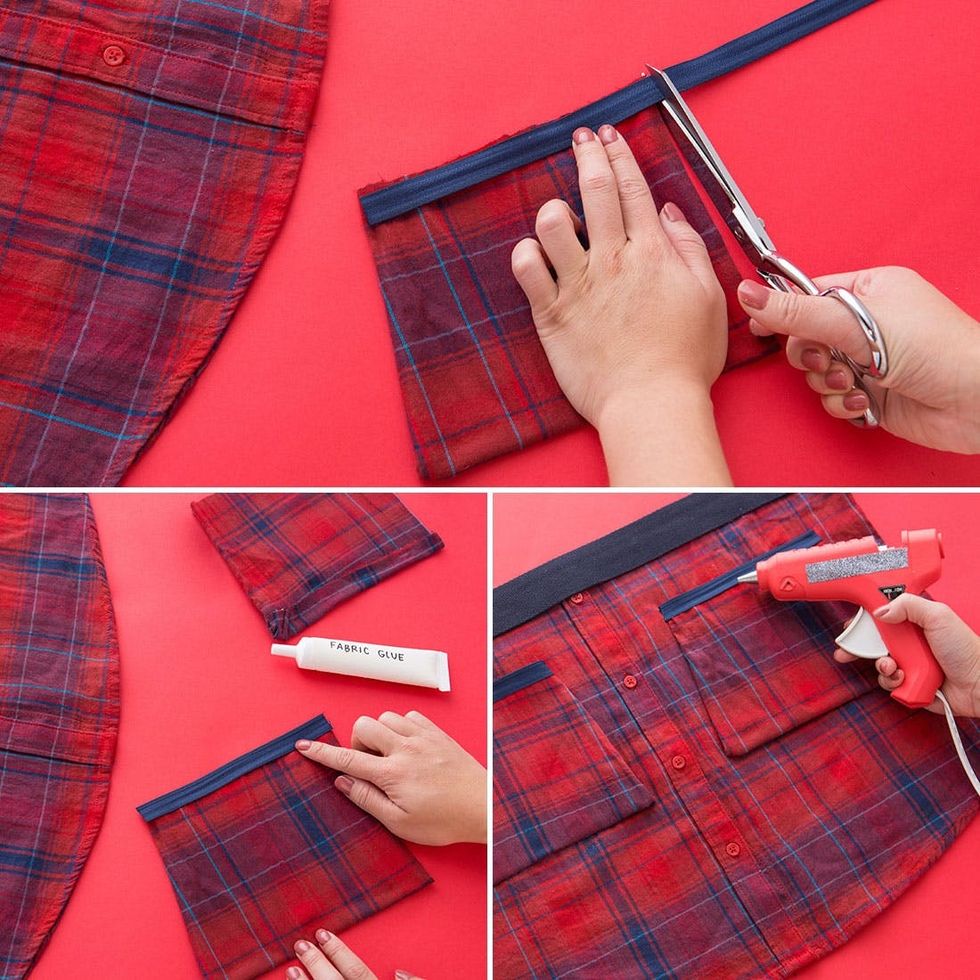
Use fabric glue to adhere the ribbon along the top edges. Use hot glue to glue the pockets on the aprons (make sure to leave the top open!).
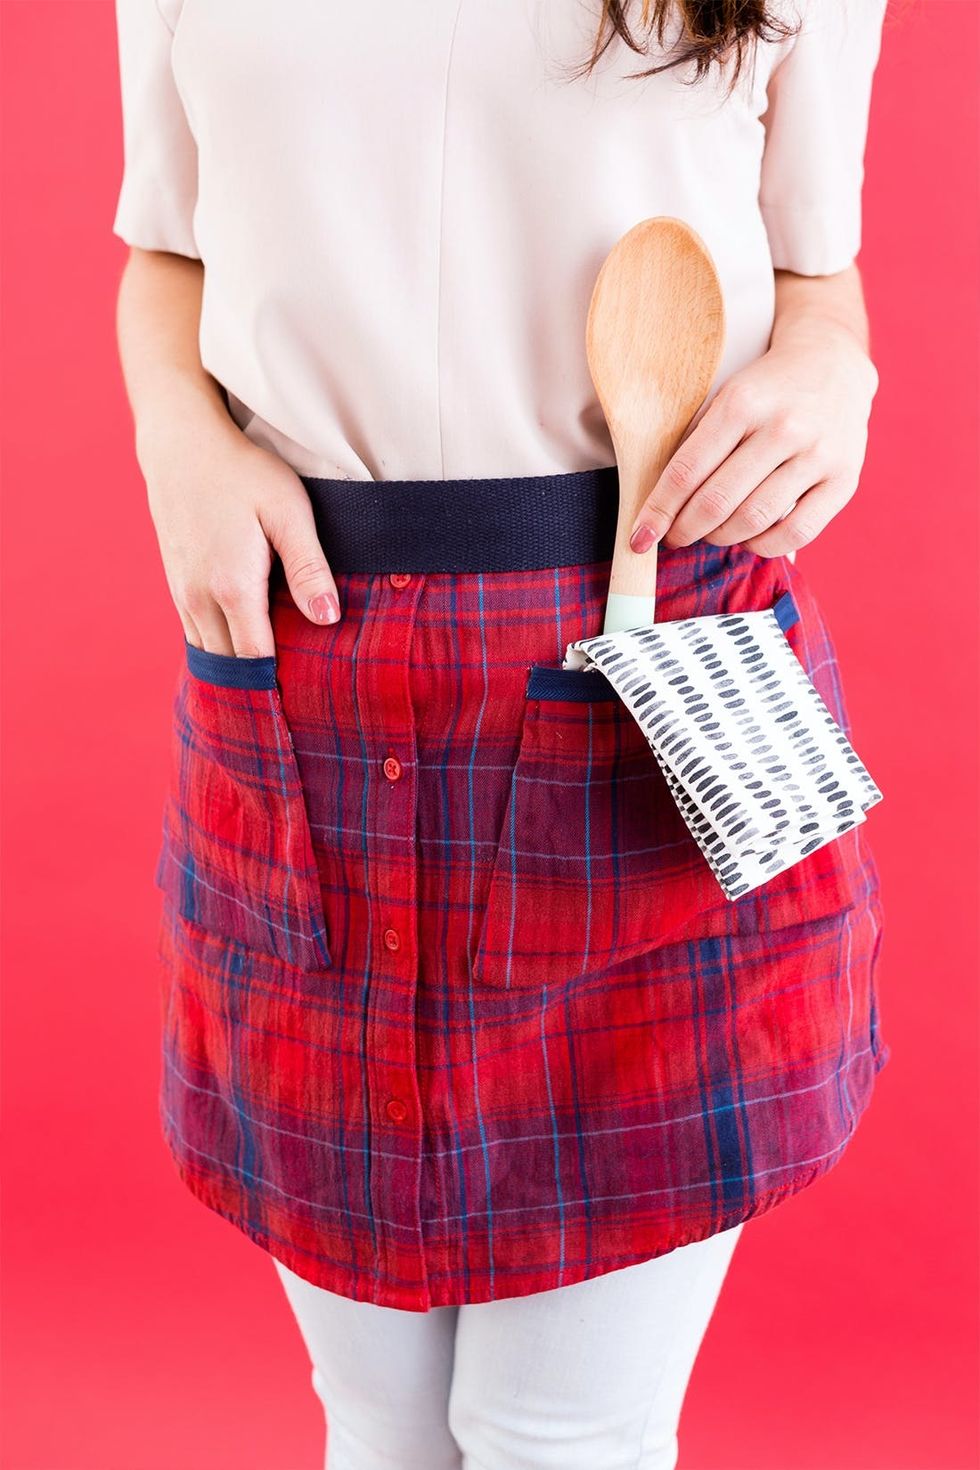
Insert your favorite cooking utensils and adorn your new apron for all your kitchen needs.

7. No-Sew Scarf Poncho
That’s right, we’re making a garment. Don’t get scared — you’ve totally got this.
Materials + Tools:
Pick a scarf that’s large enough to give you the coverage you want for a poncho. Also, be sure to use a plate that will create a comfortable neckline.
Made From a Square Scarf
- Mixit™ Playhouse Plaid Scarf
- plate
- liquid seam sealant
- fabric scissors

Fold your scarf in half. Place the plate midway on top of the folded half. Use this as a guide to cut the neckline. Cut the top piece of the scarf up the center until you reach the bottom of the plate. Then cut around the plate to create a half circle. Move the plate off and cut the half circle off at the fold.

Pull off some of the fraying ends so that the edges of the cuts look more natural. Put your scarf poncho on and mark the position you’d like your belt loops to be. Make them as wide as the belt you will be using to close your coat. Cut slits into the top piece of the scarf. Apply a layer of liquid seam sealant to prevent the fraying of your poncho.
Cinch up your new poncho with a cute belt and you’re done! Get ready to rock this for all your winter gatherings.
8. No-Sew Pillow Cover
We are big fans of switching out your pillows for each season. So help your friends out (or keep this one for yourself!) and make a simple yet stylish pillowcase out of a scarf.
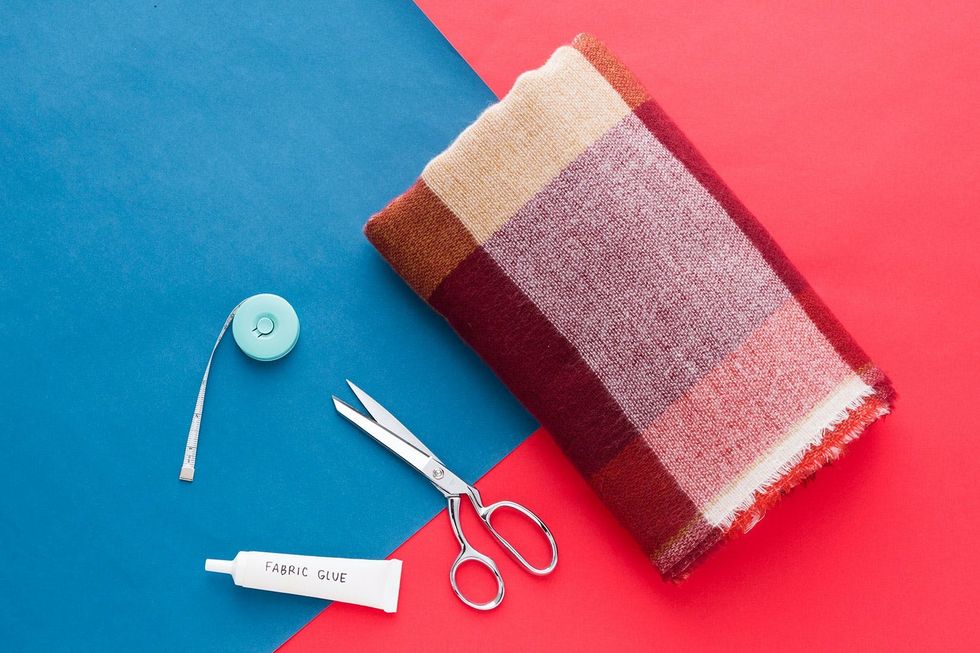
Materials + Tools:
Choose a scarf that works with the design of your room. That might mean you want one that pops or makes a statement. Or it might mean getting a solid color that will add texture to a group of pillows.
- square scarf
- measuring tape
- fabric glue
- fabric scissors

Measure and cut out one 20-inch square and two 15 x 20-inch pieces of fabric from your scarf. Apply a layer of fabric glue to one of the 20-inch sides of each 15 x 20-inch piece. Then fold the edge down to form a one-inch hem. Line up a 15 x 20-inch piece with the top edge of the 20 x 20-inch piece. Make sure the glued hem is facing up and on the opposite side of the edge lined up with the 20 x 20-inch piece.
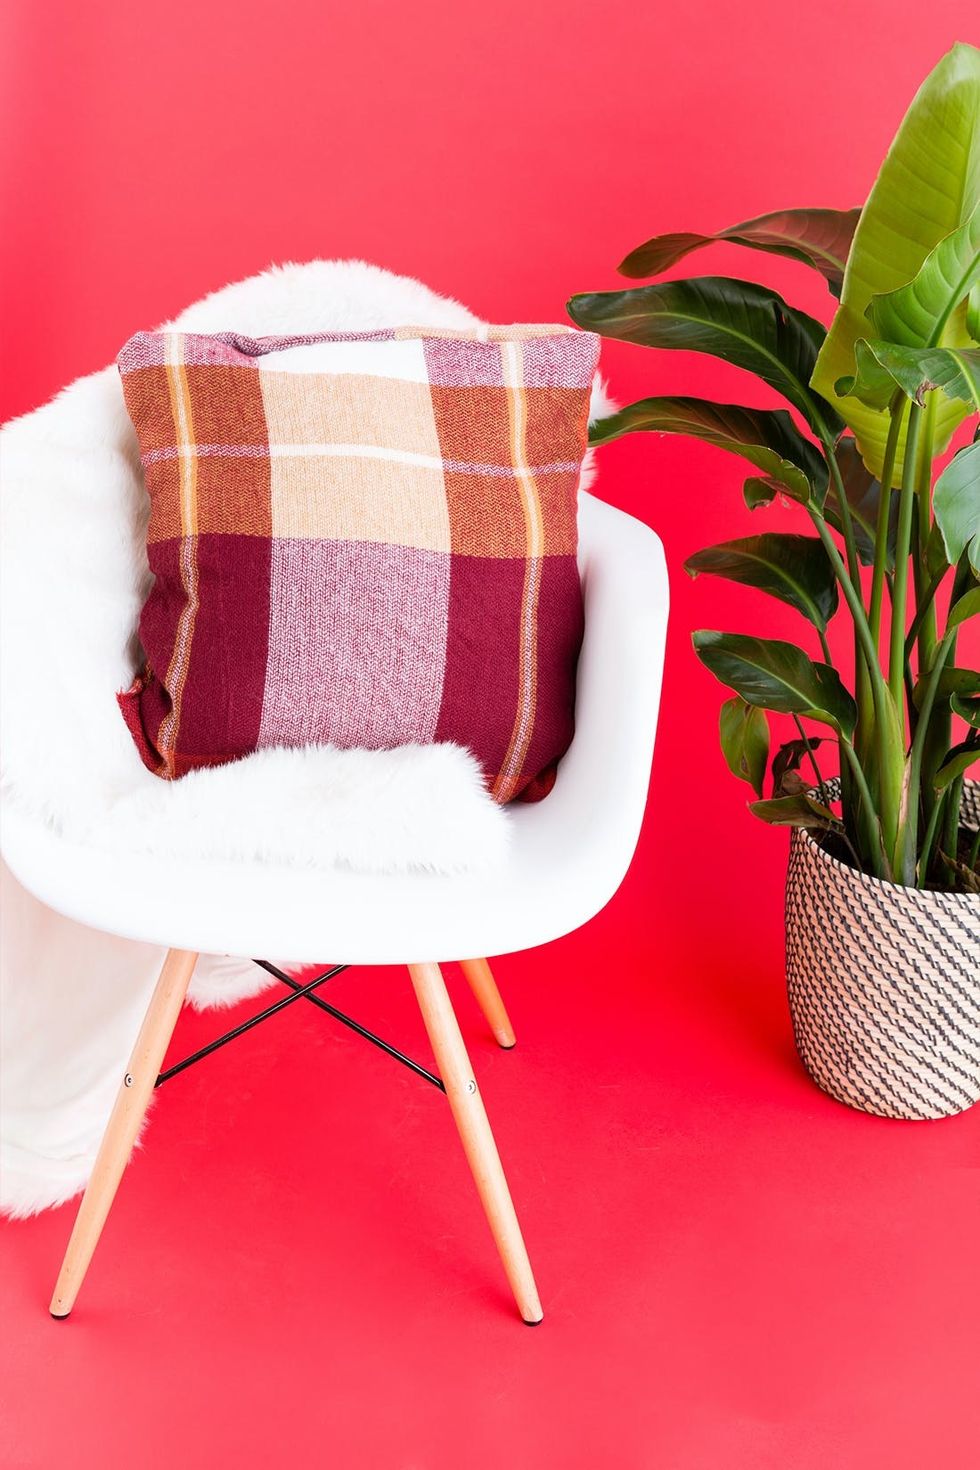
Apply fabric glue to the edges, leaving an opening for the middle. The folded edges of the 15 x 20-inch pieces should be overlapped. Let the glue dry for at least an hour before turning the cover inside out. Once the glue has dried, turn the cover inside out and stuff with a 20 x 20-inch pillow.
Pair it with your favorite chair or couch for a wintery touch.

9. Couch Side Organizer
Never lose the remote again with this couch side organizer! So this is basically a gift for everyone in your house :)
Materials + Tools:
Same as the comments on the last project. This piece can make a statement in your room or it can blend in, depending on the scarf you pick. Follow your heart and get one you love!
- square scarf
- pins
- needle
- embroidery thread

Fold scarf in half, and then fold it up about 14 inches. Fold the folded end up again another six inches. Keep the folds intact and flip fabric over.
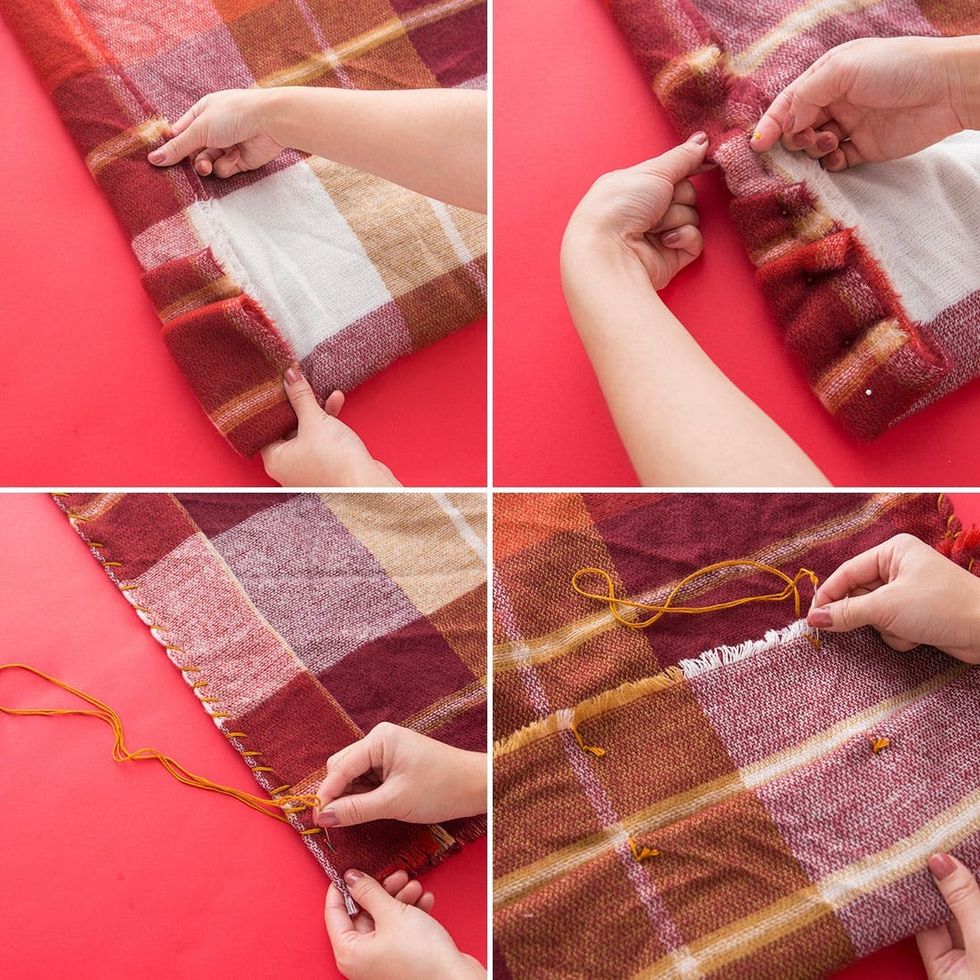
Fold back a two-inch section from the edge and pin the folded fabric to secure it in place. Repeat on the other edge. Whipstitch around the folded fabric to secure it. Repeat on the other edge. Flip the scarf back over and build pockets accordingly by cross stitching at various points to create smaller compartments.
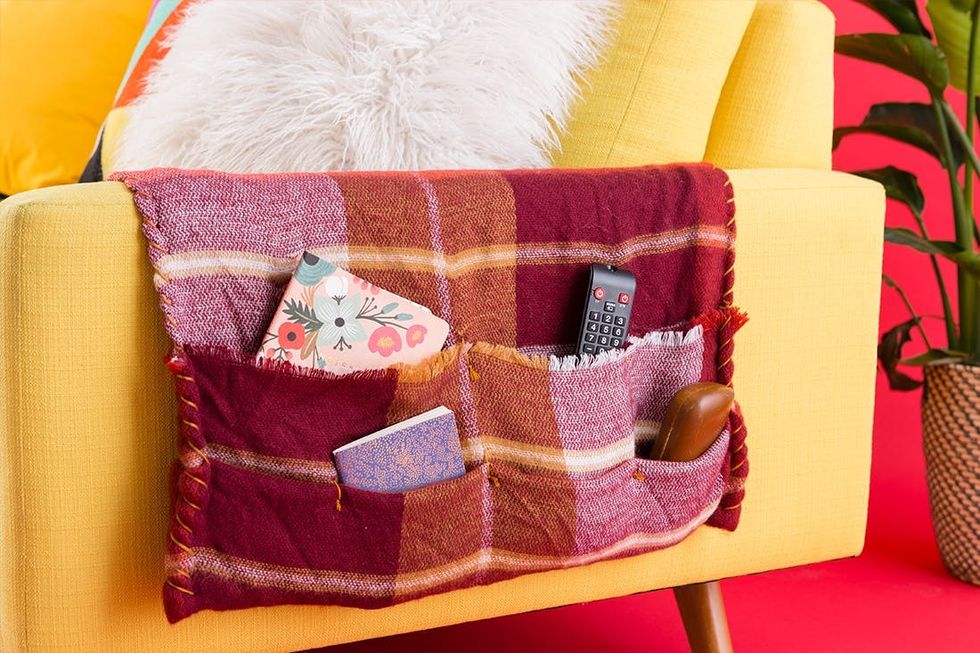
Drape it over your couch side and insert your commonly used tools and gadgets for easy access.


