Get Free Printables to Make Beautiful, Block-Printed Valentines
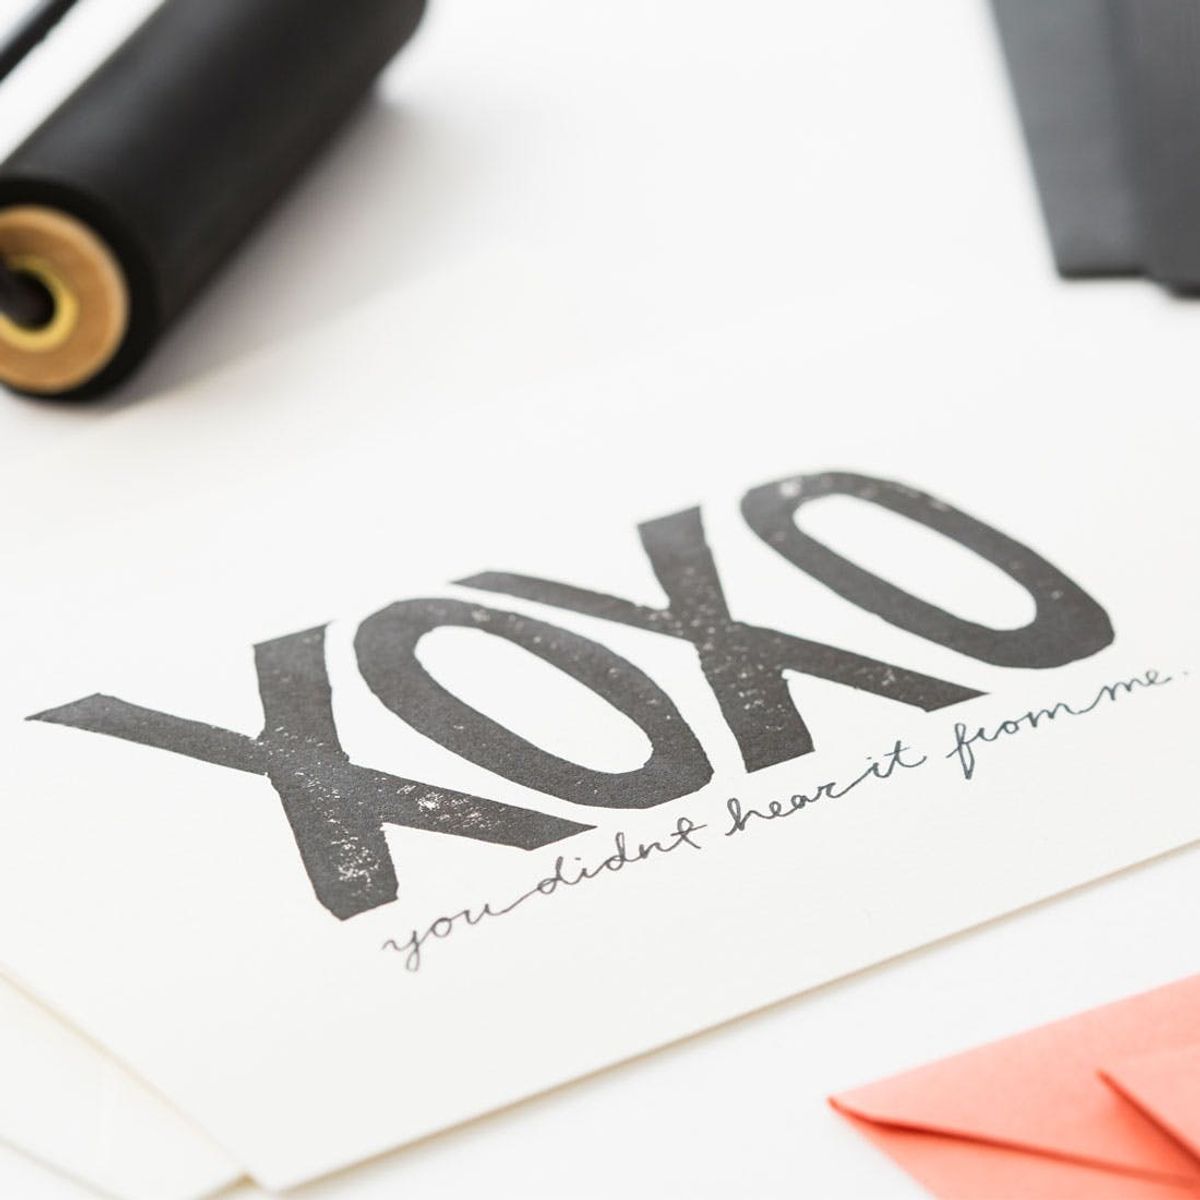
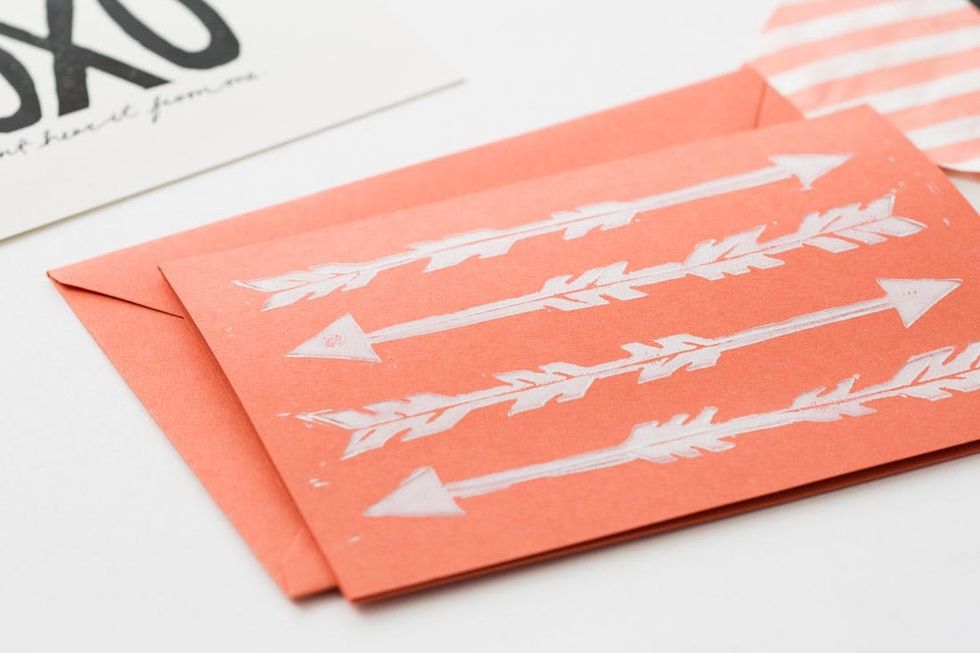
Looking to put a little extra love into your cards this year? Think carving a big block of rubber just sounds way too fun? Well, grab a linoleum cutter and join us in making these bold block-printed cards!
block-1

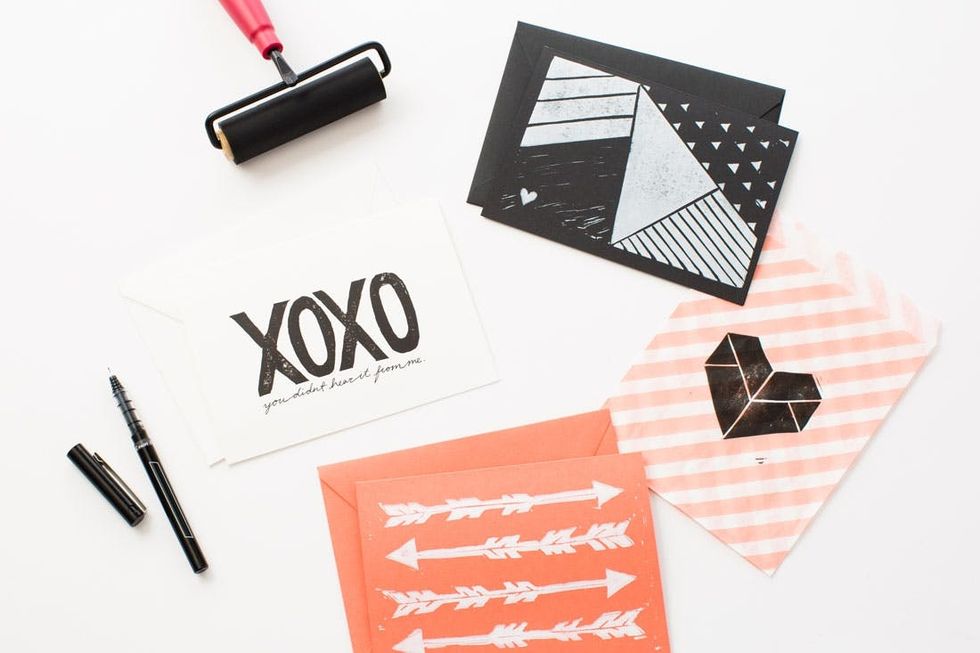
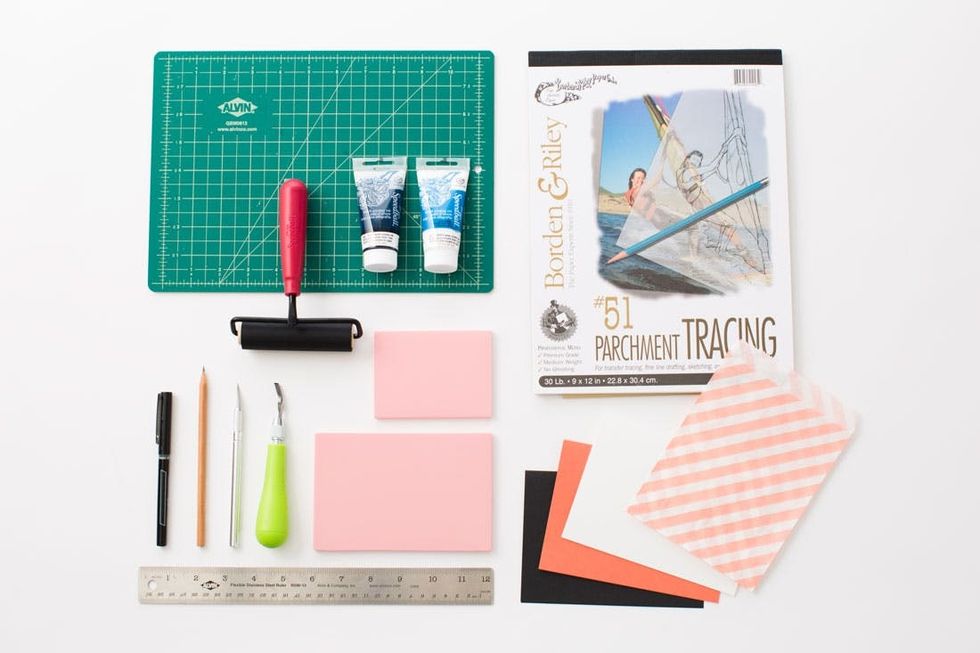
We used some of the materials from our Calligraphy 101 Kit and added a few block printing essentials to make a sweet set of designs, perfect for telling all your boos and baes how much you care!

Calligraphy 101 Kit
download these printable templates here.
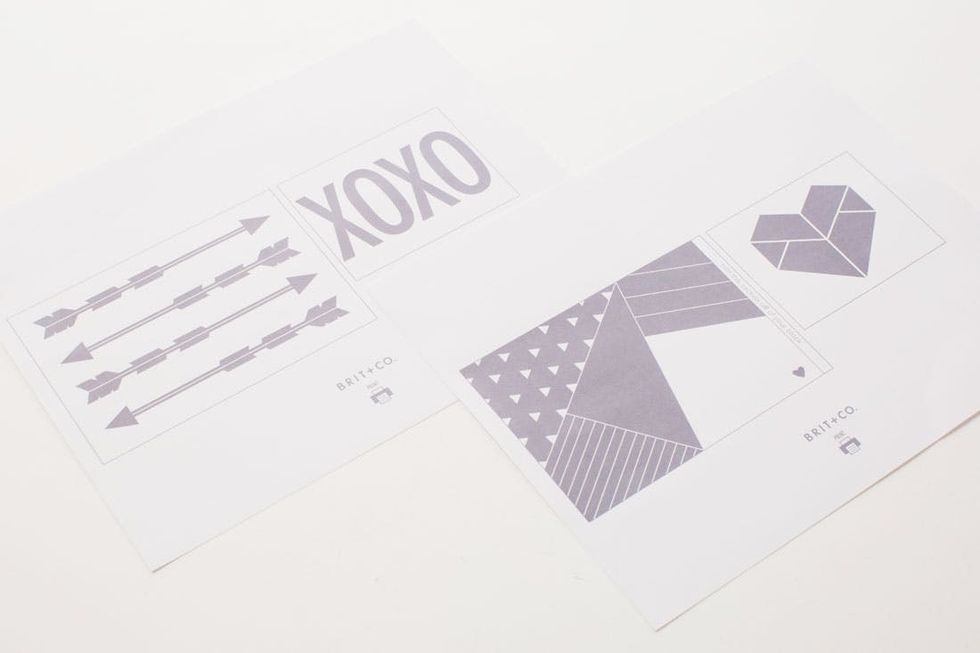
Alright, let’s carve it up!

The easiest way to start a design is to trace an existing print. Just print out your chosen phrase, photo or design, place it beneath a sheet of tracing paper and trace it in pencil. Don’t worry about the small details quite yet – basic shapes are all you need.

You could also draw an original design straight onto the tracing paper. Either way, make sure to press down firmly with your pencil or go over it a second time for an easier transfer later.
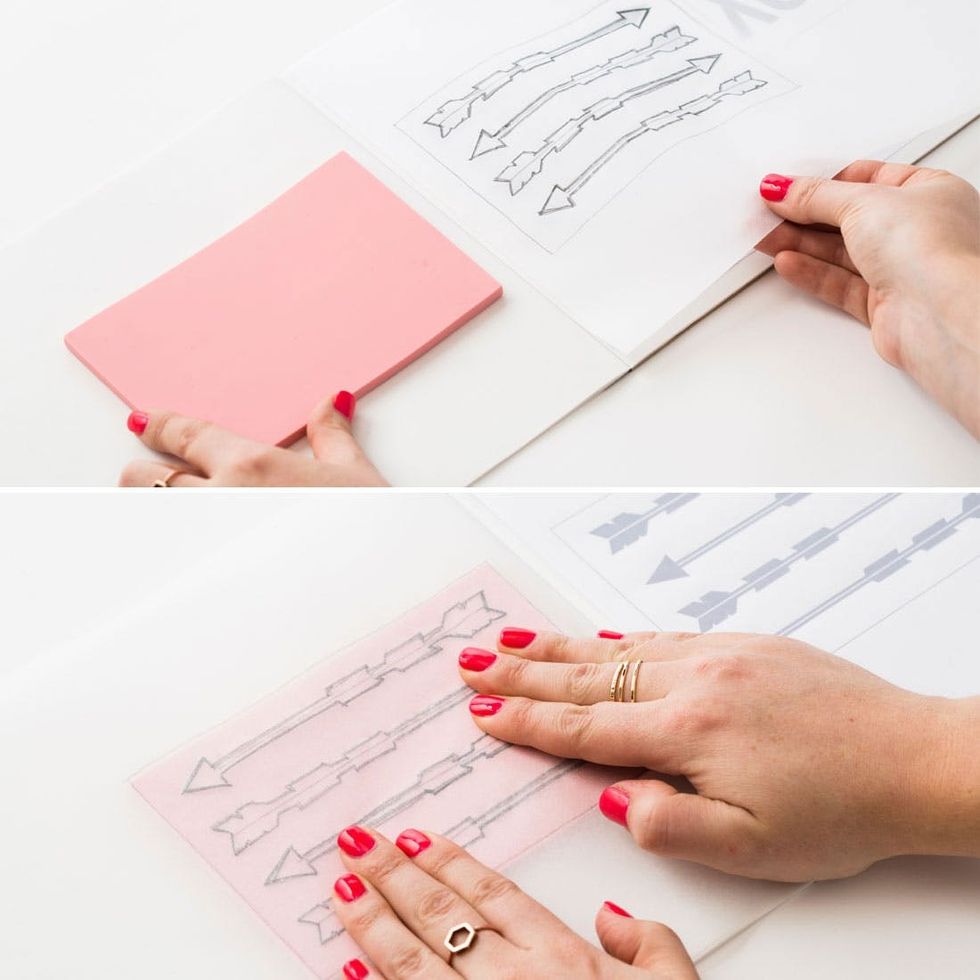
Place your tracing paper design on top of a rubber block and press down firmly so the pencil transfers. Take the time to really press it into the rubber block here.
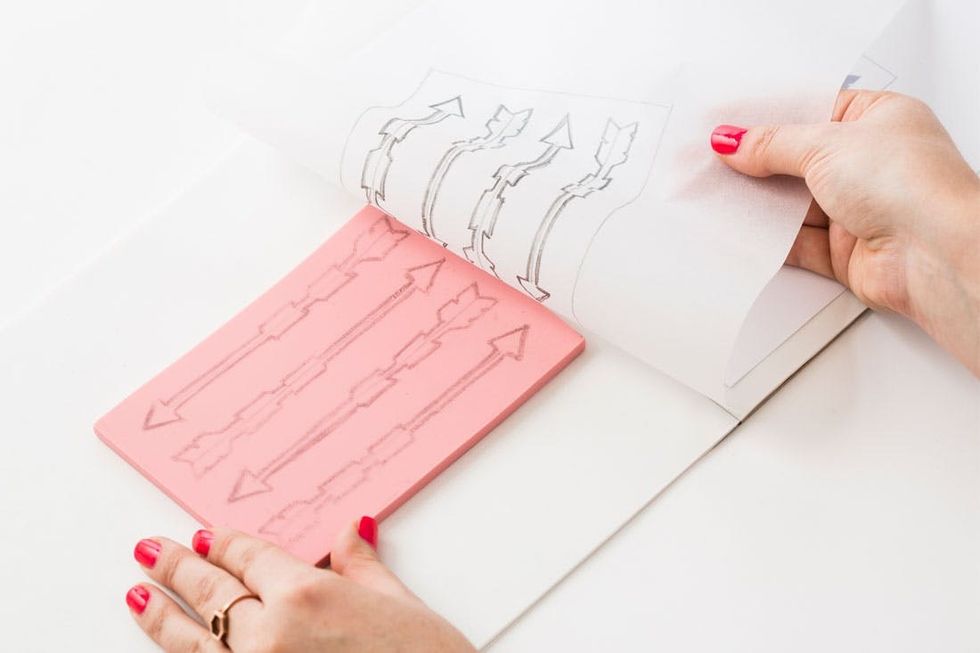
Lift up your tracing paper to reveal your transferred design and get ready to start carving.
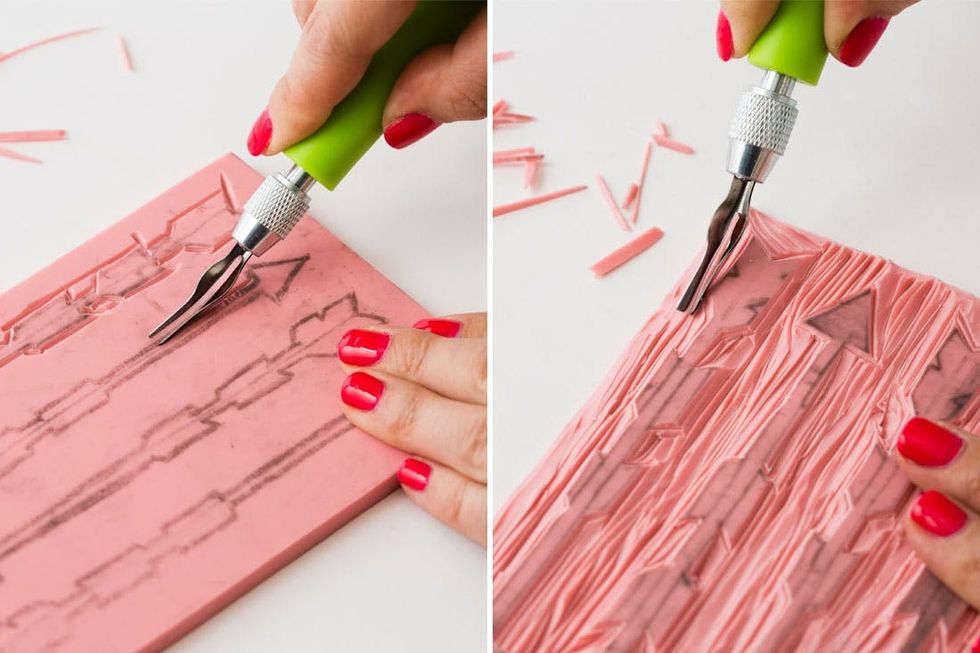
First, cut out the basic outlines of your design, making sure to always carve away from yourself and never toward your body or hands. Put on some good tunes and have a carving party, getting all the areas you don’t want to be inked. Note that the more pressure you use, the wider a cut you’ll make.
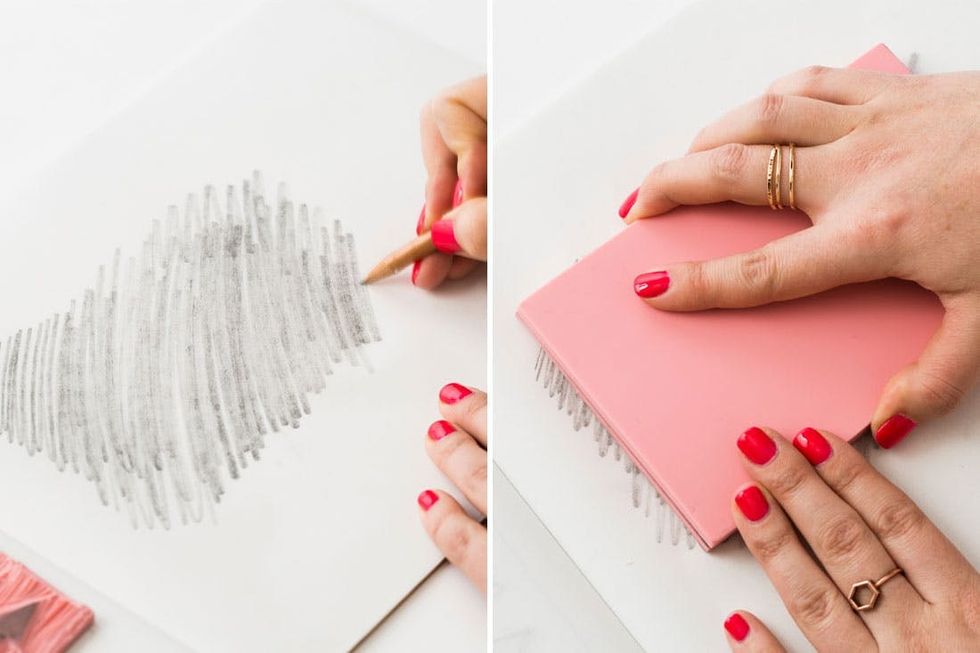
Now that your basic shapes are cut out, its time to get into the details. Shade an area the size of your block on tracing paper and rub your rubber block face down into the graphite.
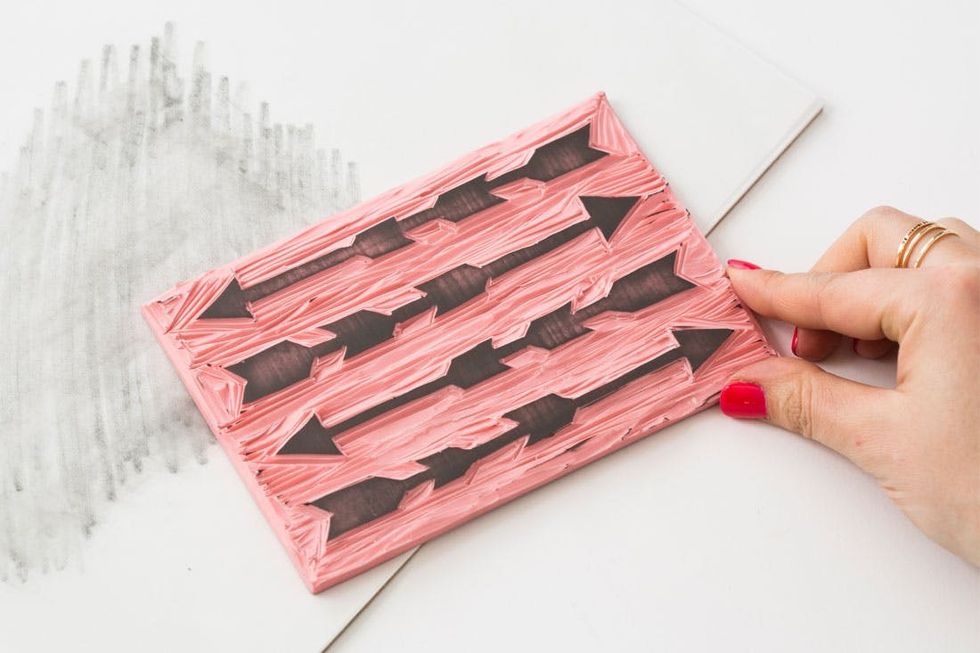
Look at this like a practice run for your ink. Now that you can see what you’re working with, clean up any edges and white spaces that you want clear. This doesn’t need to be perfect – the rough look is half the fun of block printing!
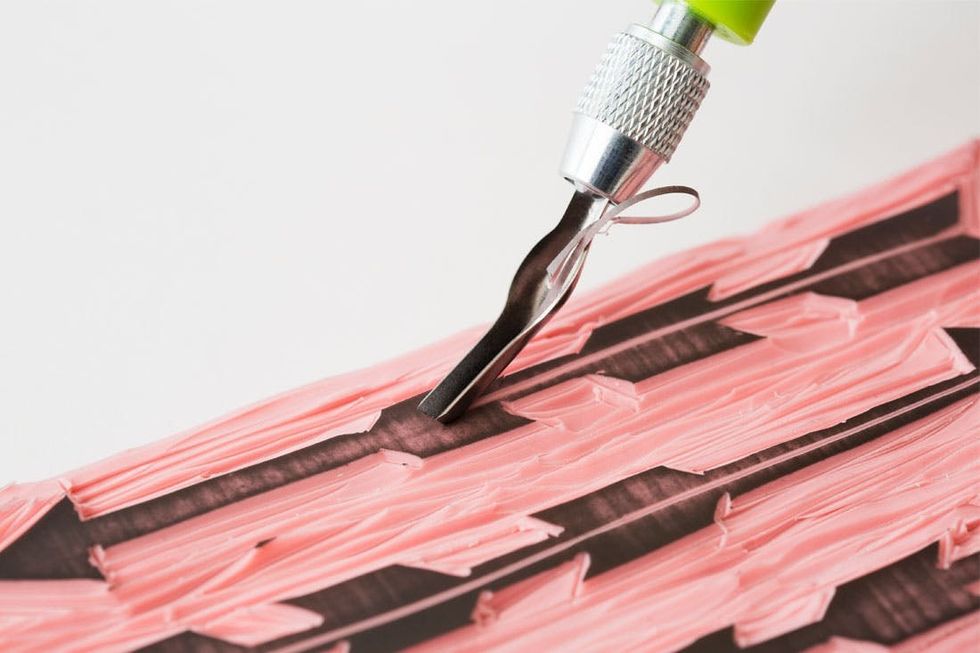
For this design we wanted to add some thinner detail lines to the center of the arrows and in the feathers. Remember, the lighter the pressure you use while carving, the thinner the line.
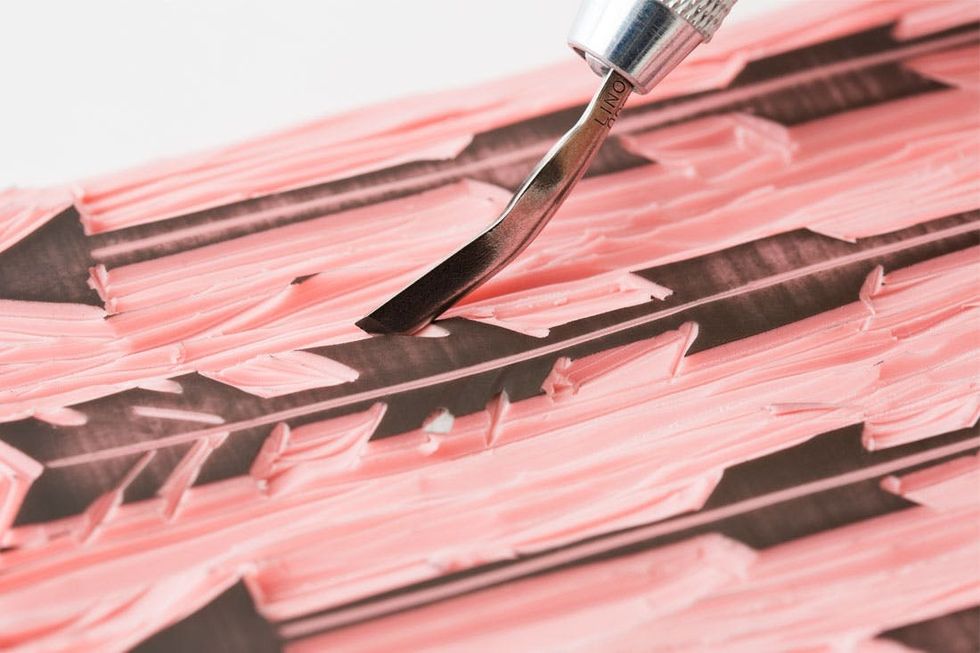
Cut out some little notches in the feathers to give this print some added texture and interest.
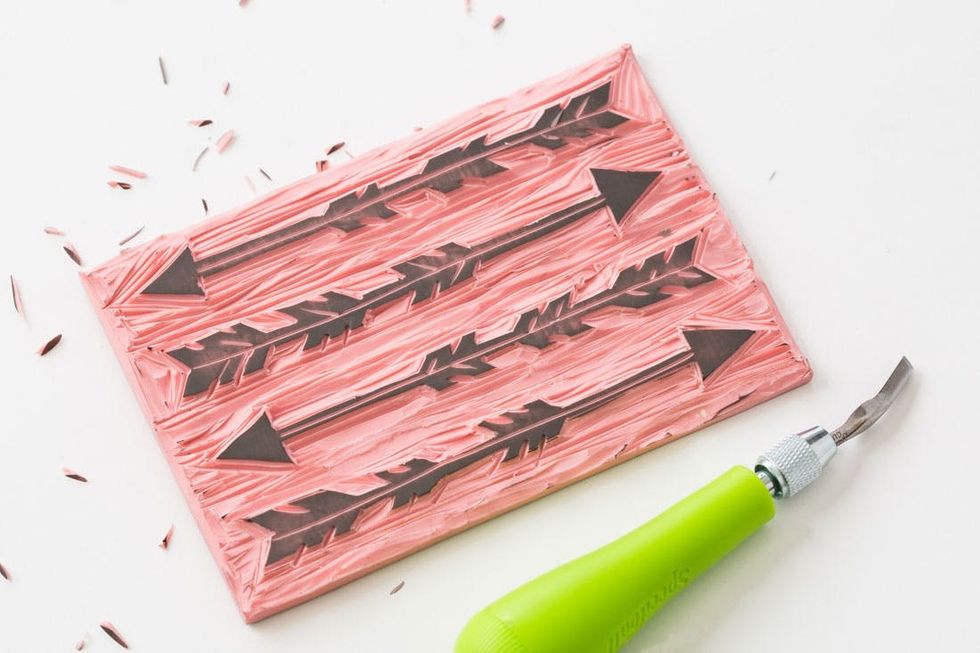
Whew! Check out your hard work.
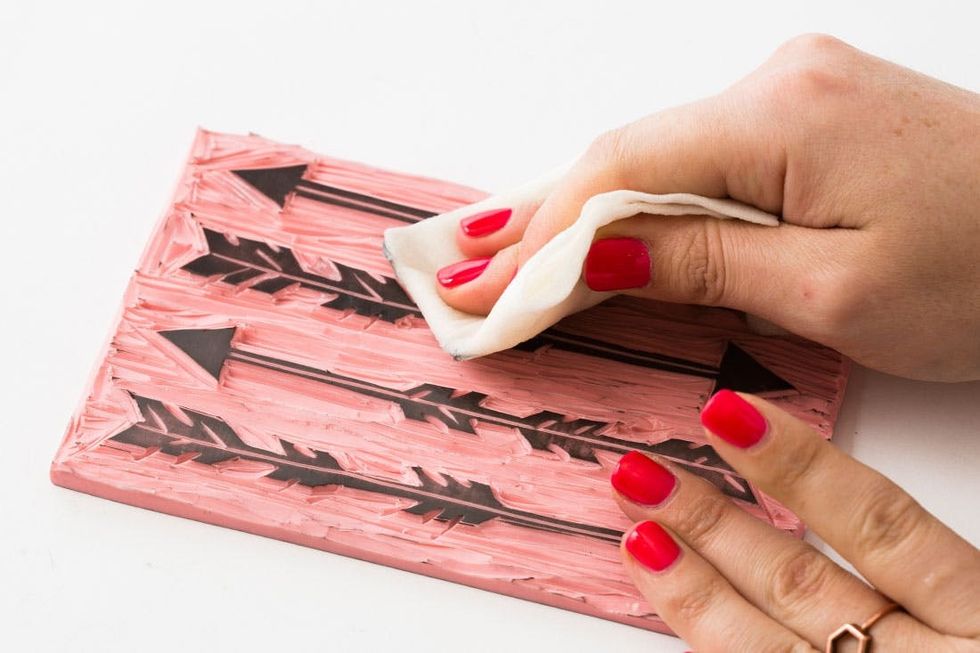
Once you’re happy with your design, wash off as much of the graphite as you can in the sink using soapy water and then dry with a paper towel. You won’t get it all off, but it still helps.
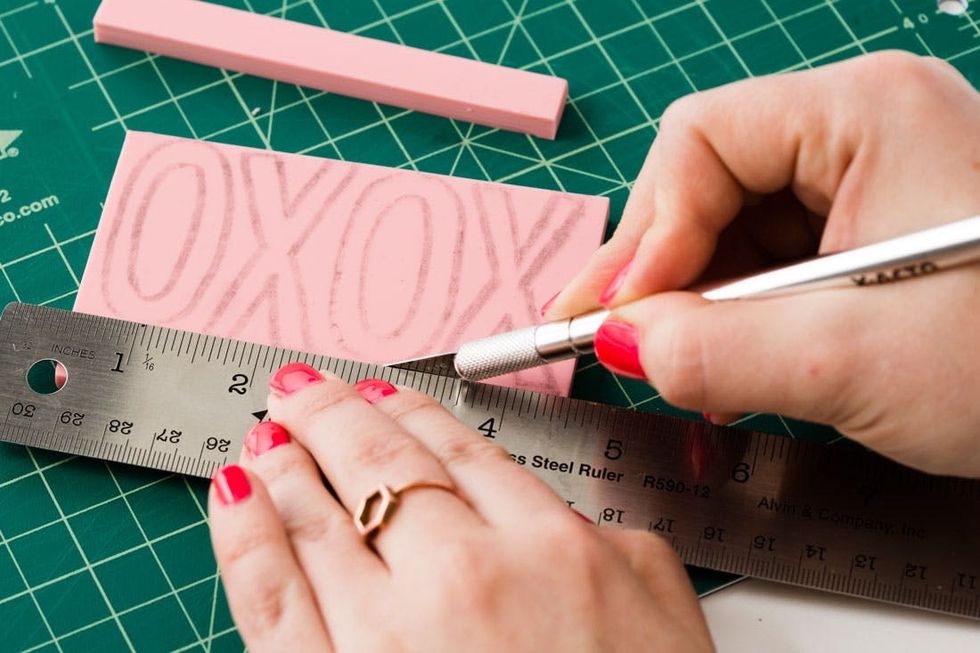
Next we’re going to try out some other designs that are included in our printable templates. For smaller shapes, save yourself some carving time and trim off the excess space with an X-Acto knife beforehand.
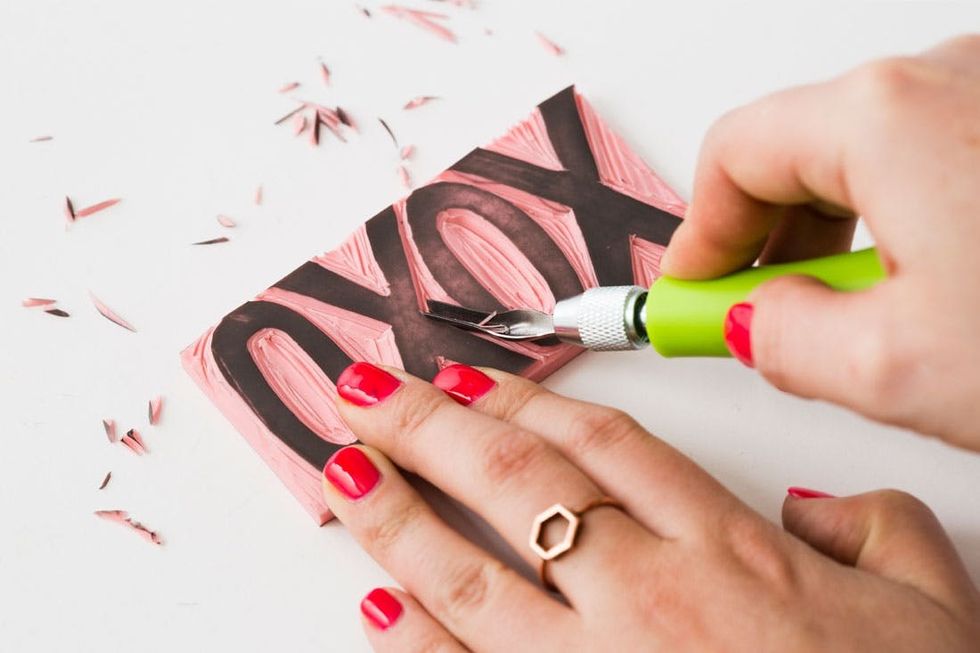
For typographic designs, your carved block will appear to read backwards. This is good! Your final prints will be reversed back to read normally.
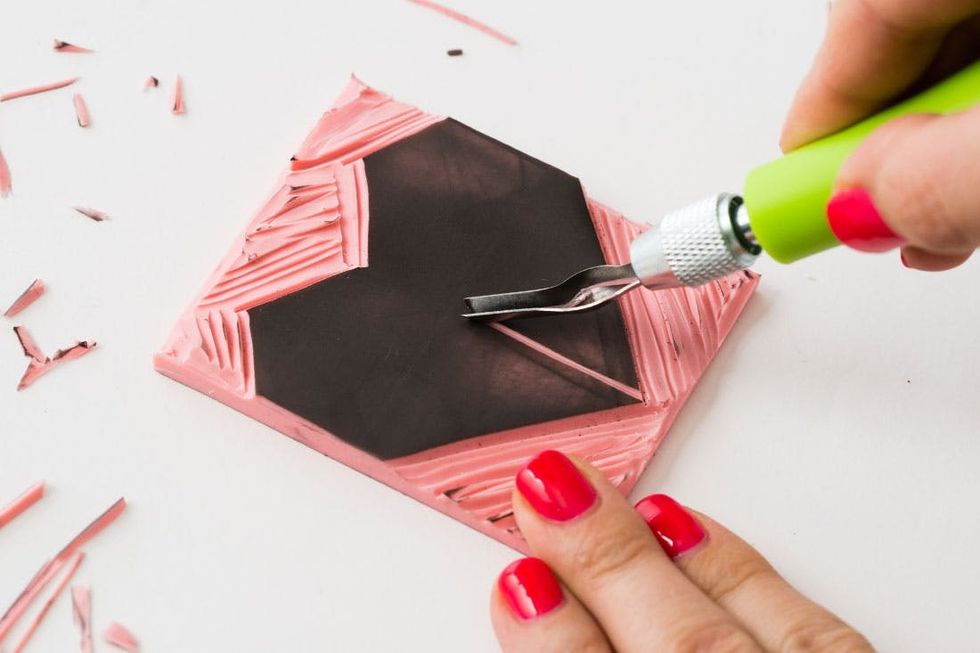
See how we carved out the basic shape first and then added in thin details later?
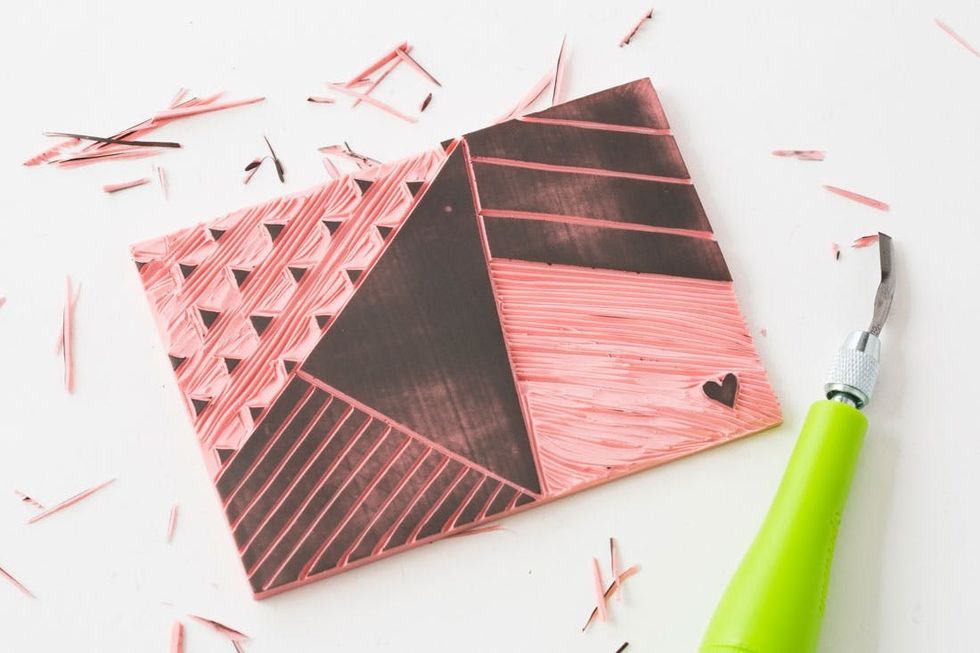
In this last one we went with some abstract shapes and textures to make a full-page design.
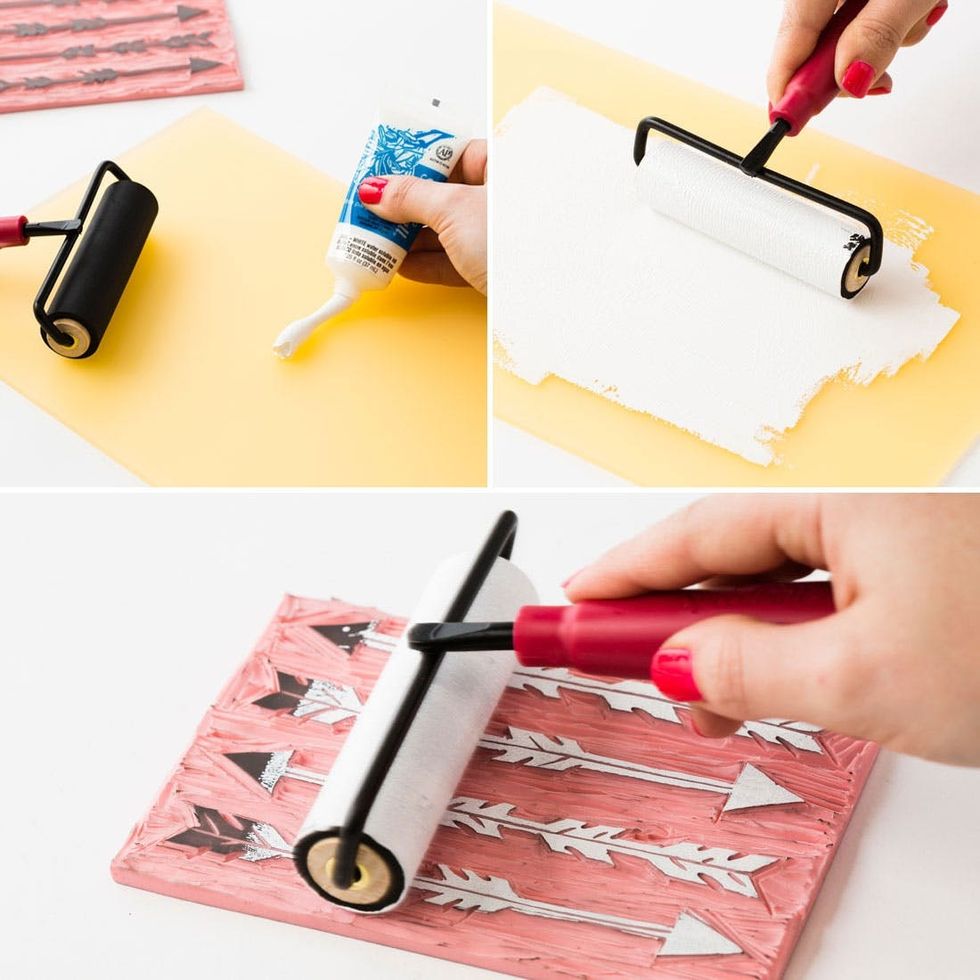
Now it’s time to ink it up! Squeeze out a small amount of block printing ink onto a flat dry surface (we used a sheet of plastic), and spread out the ink into a thin layer using your roller. Once the whole roller is covered, lightly roll a thin layer of ink onto your stamp until your whole design is coated.
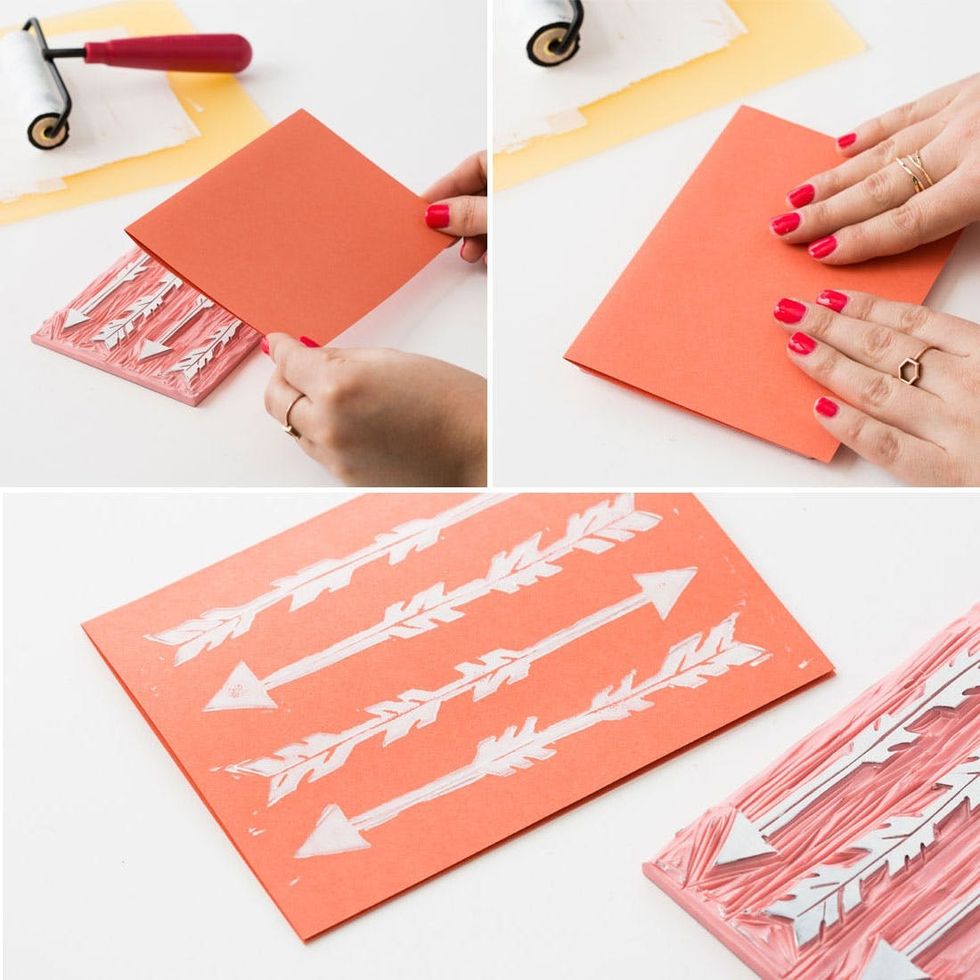
You may want to do a practice stamp on scrap paper first. When you’re ready, firmly press a card face down onto your ink-covered block and carefully peel away your card to reveal your design.
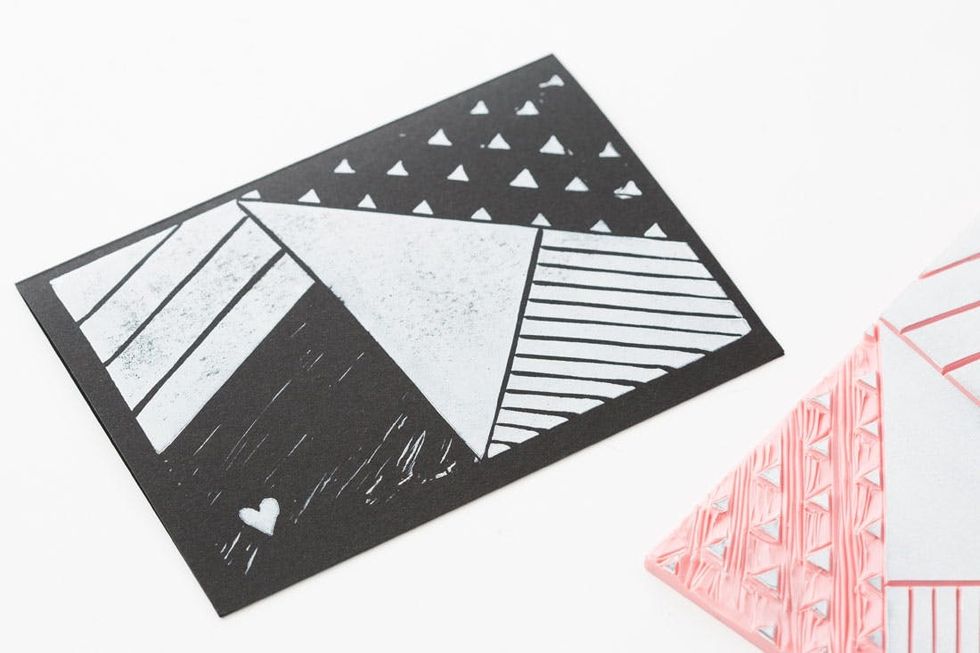
Here’s the abstract print in black and white. See how the carving lines surrounding the heart give it some added texture?
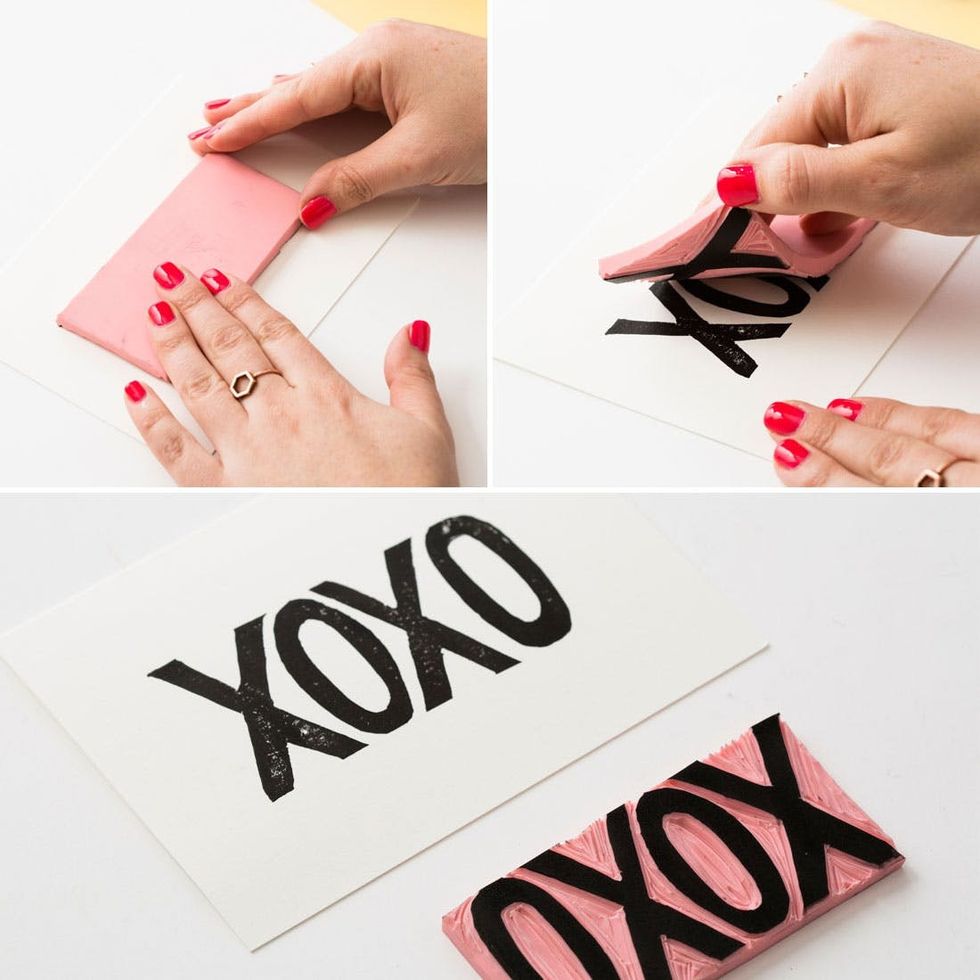
For the smaller stamps, we went the other way and placed the rubber block face down on top of the cards and treat bags.
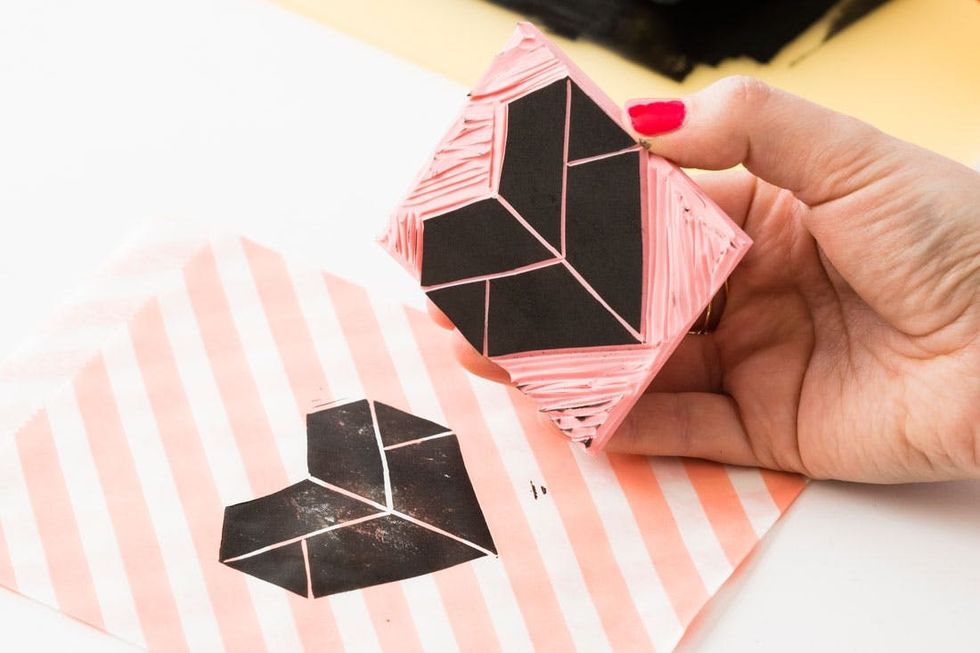
Check out how that black ink pops against these striped paper bags!
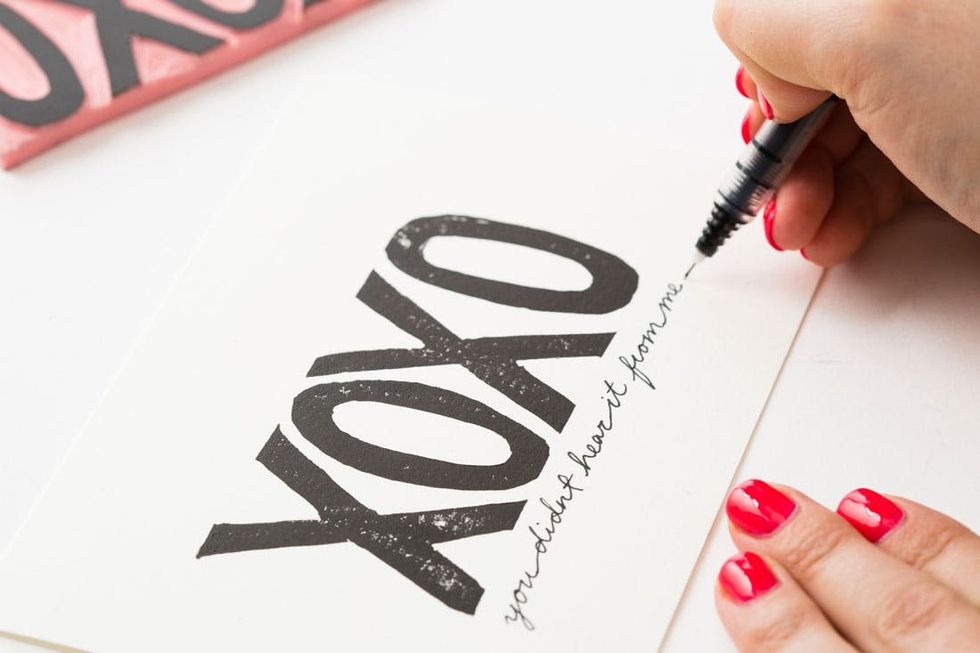
To give some of these cards a little extra something, add a little cursive note with a thin black pen. For this design we channeled our inner gossip girl in a secret admirer valentine.

Take a look at the whole fam! All these cards, envelopes and paper treat bags can be found in our Calligraphy 101 Kit. Combine these block-printing techniques with sophisticated calligraphy skills and you’ve got an unstoppable combination.
How will you personalize your cards this year? Tell us in the comments below!

As cute and clever as store-bought greeting cards are, there's something incredibly thoughtful that can be felt in a homemade birthday card from a friend or loved one. Not only does the act of creating DIY birthday cardsgive you the chance to slow down from the business of life and reflect on what you cherish most about the people you're celebrating, but the one-of-a-kind touch will be super memorable for your recipients as well.

Even if you're not the craftiest person, don't fret, because we've put together a straightforward guide on how to craft your own DIY birthday card for your besties and S.O.'s. Step into the world of DIY magic as we embark on a quest to create birthday cards that will leave your recipients in awe. From unexpected pop-up surprises to mind-bending interactive features, discover fresh ways to make birthday cards burst with fun and excitement. Prepare to unleash your inner artist as we dive into all the tips to help you craft unique and captivating birthday cards. And keep reading for some thoughtful text ideas to ensure that your birthday wishes are just as fun as the card design they're on.

Step 1: Gather Your DIY Birthday Card Supplies

Image via Karolina Grabowska/Pexels

Before embarking on your DIY birthday card adventure, gathering all the necessary supplies is essential. A well-prepared crafter is a confident crafter! So, let's make sure you have everything you need to bring your imaginative card ideas to life.

  1. Start with colored cardstock or paper as the foundation of your cards. Choose a variety of vibrant hues to suit different themes and moods. Scissors are your trusty sidekick, enabling you to precisely cut out shapes, create borders, and trim your cardstock.
  2. Grab glue or adhesive tape to hold everything together securely. Opt for a glue stick for a mess-free experience or double-sided tape for a clean and seamless finish.
  3. Round up all the art supplies you have, from markers and colored pencils, or pens. These magical tools will be your gateway to adding personalized messages, whimsical doodles, and vibrant colors to your DIY creations.
  4. Stock up on a dazzling array of embellishments for an added dose of flair and personality. Let your creativity soar as you explore the boundless possibilities of stickers, sequins, ribbons, twines, buttons, beads, and more. Watch your creations come alive with vibrant colors, textures, and eye-catching details. With these delightful elements at your fingertips, there's no limit to the magic your birthday cards can be infused with.

Step 2: Choose Your Card Design

Image via George Dolgikh/Pexels

The card design will function as the first impression that sets the tone for the entire experience. A well-designed card can evoke emotions ranging from joy and excitement to nostalgia and warmth, leaving friends and family in awe of the thoughtful gesture.

Handmade Watercolor Design:

Express your artistic side by creating a handmade watercolor masterpiece for a genuinely one-of-a-kind birthday card. Start with a blank cardstock or watercolor paper as the base, and let your creativity flow. Use watercolors to paint a vibrant and personalized design, such as flowers, balloons, or a recipient's favorite hobby or color palette. Add a heartfelt birthday message inside to complete the card.

Pop-Up Surprise:

Add an element of surprise and delight to your card with a pop-up feature. Cut out a simple pop-up mechanism using cardstock or colored paper and attach it to the inside of the card. Then, unleash your creativity by designing and cutting out fun shapes, such as cakes, candles, or balloons, and attach them to the pop-up mechanism. When the card is opened, the surprise element will make the birthday celebration of your loved one even more memorable.

Quilled Creations:

Quilling is a paper art technique that involves rolling and shaping thin paper strips to create intricate designs. Use quilling techniques to create beautiful and delicate patterns, flowers, or even personalized messages on your birthday cards. Experiment with different colors and shapes to bring your design to life and make it truly unique. The recipient will appreciate the time and effort put into crafting such an elegant and artistic card.

Hand-Stitched Greeting:

Consider incorporating those skills into your DIY card if you enjoy sewing or embroidery. Use a needle and thread to create hand-stitched designs or patterns on fabric or cardstock. You can stitch the recipient's name, a birthday message, or even cute motifs like balloons or cupcakes. The texture and charm of a hand-stitched card will make it a cherished keepsake.

Interactive Slider Card:

Create an interactive slider card to take your birthday card to the next level. Use cardstock to make a slider mechanism that reveals a hidden message or image as it is pulled. Write a heartfelt message or attach a memorable photo that slides out when the recipient pulls the tab. This interactive element adds a playful touch to your card and makes it truly engaging.

Step 3: Write A Clever Message

Image via June/Pexels

Elevate your birthday card by personalizing it with a heartfelt note to enrich the receiver's experience. Share warm wishes, inside jokes, or memories that make the card even more special and meaningful. Not sure where to start? Here are a few ideas for what to write inside your DIY birthday card!
  1. "Happy birthday, queen of the hashtags! May your day be as fabulous as your Instagram feed."
  2. "You're the avocado to my toast, the squad to my goals. Happy birthday, superstar!"
  3. "It's your birthday, so let's turn up the 'Lit' level and celebrate like it's 1999... or 2023!"
  4. "Birthdays are nature's way of telling us to eat more cake. Enjoy your special day!"
  5. "May your birthday be filled with good vibes and a bottomless brunch. Cheers to another fabulous year!"
  6. "Sending you birthday wishes with all the heart emojis. You deserve all the love and happiness today and always."
  7. "Happy birthday to my favorite extremely online friend. May your Wi-Fi always be strong and your battery never die."
  8. "Time to celebrate another trip around the sun. Let's make this year even more epic than the last!"
  9. "You're not getting older, you're leveling up! Happy birthday, gamer!"
  10. "Happy birthday, trendsetter! May your day be filled with selfie-worthy moments and viral-worthy adventures."

Step 4: Add The Perfect Finishing Touch

Brit + Co

As a bonus, consider creating a DIY envelope to complete the package. Choose decorative paper or repurpose materials like magazine pages or fabric scraps to craft a unique envelope that adds creativity and thoughtfulness to your handmade card. Personalize it by adding hand-drawn designs, stamps, or calligraphy for an extra special touch.

So, there you have it! DIY birthday cards offer endless possibilities for fun, creativity, and the chance to unleash your imagination. With just a few simple steps, you can create customized and sincere cards that will bring joy to your loved ones on their special day. Remember, the beauty of DIY is that there are no limits or rules. Let your creativity run wild, experiment with different techniques, colors, and textures, and, most importantly, have fun. Happy crafting!

For more crafty ideas, check out all of our DIY ideas on Brit + Co.

It's almost time to return to Cousins! The Summer I Turned Pretty season 3 is coming this summer, and Prime Video just gave us a first official look at Belly, Jeremiah, and Conrad. The new episodes will open at the end of Belly's freshman year of college, and in addition to seeing the evolution of our favorite characters, author and co-showrunner Jenny Han says "there are going to be surprises" in the final season. Eek!

Here's your first look at Lola Tung, Gavin Casalegno, and Christopher Briney in The Summer I Turned Pretty season 3, coming to Prime Video July 2025!


Jenny Han says 'The Summer I Turned Pretty' fans are in for a few surprises.

Erika Doss/Prime Video

"There are the things that [fans] know and then there are things they think they know, and then there's going to be, hopefully, things that surprise them," Jenny Han tells Entertainment Weekly. Listen, I am a very proud member of Team Conrad, and seeing how cozy Belly and Jeremiah are in these pics (not to mention the set leak that's definitely not in the third book), I'm starting to wonder if Prime Video is teasing I should switch teams.

But no matter which team you're on, Lola Tung promises the season won't let you down.

Team #JellyFish will get their time this season.

Erika Doss/Prime Video

"The one thing I've always admired about Jenny is that every season and every decision about what's coming next is purely to serve the story," Lola says. "She's never going to do anything that doesn't make sense for the story. It's all about this beautiful world she's created and giving the fans something really, really special and giving us something really special to work with."

And that includes some sweet moments which Jeremiah and Belly, who "are, at their core, best friends," Lola adds. "That relationship is something that's so special and so unique to them, so it's exciting to see this season and how their relationship blossoms."

And 'The Summer I Turned Pretty' images also feature Conrad.

Erika Doss/Prime Video

But don't worry Conrad fans, we also get a look at the elder Fisher brother who "we know that he went to Stanford, and so he's continuing on his journey to become a doctor, as you can see from that white coat," Jenny says. "I think people won't be surprised to see that."

Keep reading for more images from The Summer I Turned Pretty season 3!

Erika Doss/Prime Video

Jenny Han also teases this image is actually a flashback, "so do with that what you will." BRB, I'm off dreaming of a beach vacation. I also can't help but point out the warm color grade of this season! The golden look makes everything feel warmer and more magical — and offers a youthful glow as Belly gets older.

Erika Doss/Prime Video

But for those of us who care more about Steven and Taylor (Sean Kaufman and Rain Spencer) than the main love triangle, we got this single crumb from the new images. And I'm more than happy about it, thank you very much.

Erika Doss/Prime Video

Belly (Lola Tung) gets cozy on campus in a hoodie and sunglasses.

Erika Doss/Prime Video

And Belly and Jeremiah (Gavin Casalegno) get cozy with each other at a party.

Erika Doss/Prime Video

But they work as hard as they play! I have this exact outfit Belly's wearing, and you best believe I'm adding it into my fashion rotation.

How many episodes will The Summer I Turned Pretty season 3 have?

Erika Doss/Prime Video

Great news! The Summer I Turned Pretty season 3 will have 11 episodes instead of 7 or 8 like seasons 1 and 2 did. Stay tuned for the official release schedule.

Who's in the cast?

Prime Video

The Summer I Turned Pretty season 3 cast features all your favorites:

  • Lola Tung as Belly Conklin: a beach-loving volleyball player who's always dreaming of summer.
  • Christopher Briney as Conrad Fisher: Belly and Steven's lifelong friend who Belly's always had a crush on.
  • Gavin Casalegno as Jeremiah Fisher: Conrad's sunny younger brother.
  • Sean Kaufman as Steven Conklin: Belly's older brother.
  • Rain Spencer as Taylor Jewel: Belly's best friend.
  • Jackie Chungas Laurel Park: Belly and Steven's mom and Susannah Fisher's best friend.

Meet The Summer I Turned Pretty Season 3 Cast before the new episodes air on Prime Video this July!

So you’re hosting a party and need something creative to bring people together. But let’s be real: traditional icebreakers are B-O-R-I-N-G and frankly reminiscent of the beginnings of a stuffy corporate job. Luckily, there are plenty of fabulous (and fabulously funny) pre-made party games guaranteed to get your guests connecting in no time. Here are some of our favorites!

1. hella awk-ward Card Game ($24)

If you want to spark real conversations with your guests, this is the game for you. By the end of this game, you’ll be surrounded by plenty of new pals. Play by drawing a card and answering the prompt to get to know friends and strangers alike on a deeper level.

2. WHAT DO YOU MEME? for The Girls ($25)

Grab your girlfriends and stir the pot with this hilarious card game. To play, whoever has the most Instagram followers goes first and rolls the die. “Whichever side of the die lands face-up, take the top card from the corresponding color deck. Read it aloud to the group & perform whatever action is on the card,” the instructions read. “Some cards involve just that player, some require the whole group. The player to their left then rolls the die & the game continues like this. Every winning card gets you a point. 1 Card = 1 Point. The player with the most cards at the end wins!”

3. My Ex [A Deck of Conversation Starters] ($18)

Gather your closest BFFs and spend the night with some good ol’ trash talking (therapeutically, of course). You’ll definitely find out who had the craziest ex. Gather friends that are down for the drama and start by pulling a card. Some of the topics you’ll fill-in-the-blank include: 1. The biggest red flag. 2. What is your ex up to now? 3. The worst rebound.

4. {THE AND} Friends Edition - Conversation Starters to Make Friends Your Best Friends ($30)

Strengthen your friendships with this conversational party game. Get to know your friends (Or soon-to-be friends!) by choosing one card and answering the prompt.

5. BAD CHOICES - The Have You Ever? Game + After Dark Edition Set ($30)

You’ll really get to know the other party guests with this game. This might not be one to play with your new coworkers or mother-in-law!

To play, each player will draw six cards. “When it's your turn, choose one of your six question cards, then ask it to the player you think is most likely to answer YES. If they say YES, you get to discard your card. If they say NO you have to keep the card and try to use it again later,” the instructions read. With Skip Cards, Draw +1, Draw +2, and ALL PLAY cards, there's a surprising amount of strategy. The player who discards all of their cards first becomes the winner.

6. If You Know You Know IYKYK - The Question Card Game ($20)

Who knows each other best? This card game will (literally) put everyone’s cards on the table.

Getting started and playing this card game is super simple. A rotating judge asks the group a question about themselves from each of the three levels (indicated on the chosen card). Then, everyone chooses their answer. If you guess the judge's answer correctly, you get a point. The player with the most points wins.

7. Never Have I Ever Classic Edition Card Game Set ($25)

Who doesn’t love a round (or two, or three) of Never Have I Ever?! Warning: you may be shocked at some of your friends’ answers.

Playing is simple, as players take turns listing potential experiences they've never had. If someone has done the action in question, they take a shot or a sip (or whatever other consequence you dream up). If no one has done the action in question, the person who posed the query takes a drink.

8. Bold - Conversation and Question Card Game for Adults ($29)

Strike up meaningful conversations and facilitate new friendships with this card game focused on authenticity. To play, take a card and read the prompt. Everyone in the group will answer the question. Rinse and repeat!

9. Secret Confessions Game- Adult Version ($25)

Get ready to laugh the night away with this far too funny game. Each group member will take turns reading the cards’ prompts. With each prompt, every player will answer “yes” or “no.”

10. Actually Curious: Happy Hour Edition! ($25)

Mixing friend groups for the first time? Break the ice without the standard “fun facts” or “three truths and a lie.” Like many of the other instructions, for this game each player will read a prompt, and the other players will answer.

These games will definitely be making appearances at our next soirées, that’s for sure!

Find everything you need to throw the best party on Brit + Co.

Header image via Amazon

1923 season 2 premieres on Paramount+ February 23, and Michelle Randolph (who plays Elizabeth Dutton in the cast) is "so excited" for you to watch the new episodes — and she's been keeping up with all your fan theories!

"There are some crazy ones. I feel like the biggest fan theory thing is the family tree," she tells Brit + Co exclusively. "I've seen many different family trees and so it's like, 'OK, which one's accurate?' I actually drew my own at one point."

Here's what Michelle Randolph had to say about 1923 season 2, and the Dutton family tree, in Brit + Co's exclusive 1923 interview.

Michelle Randolph teases '1923' season 2 finally gives us answers to the Dutton family tree.

By the end of season 2, Michelle Randolph says "we might be able to fill in some blanks" in the Dutton family tree, which is a very hot topic for internet users! "I had to make my own [family tree] because all of the ones I saw on the internet were like — every single one was different. I was like 'I'm confused.'"

The Dutton family is made up of incredible cast members like Brandon Sklenar, Harrison Ford, and Helen Mirren, and Michelle reveals that the cast are just as close as their characters.

"There's a giant group chat called Giddy Up, which started during cowboy camp of season one," she says. "A cute little name, and I think I mean we all were on location in Montana and all in the same hotel, and we would get dinners after [filming], so I think even though our characters are very different and in different story lines like we all really did bond, which was really helpful to have each other throughout the chaos of of shooting a show."

The actress also says Elizabeth would connect with her 'Landman' character Ainsley.

Frazer Harrison/Getty Images

And if you're a tried and true Taylor Sheridan fan, you've probably picked up on the fact that Michelle isn't just in 1923 — she also has a starring role as Ainsley Norris in Landman! But would Elizabeth and Ainsley get along if they met in an alternate universe?

"That would be a fun thing to witness. I think they would," she says. "They're very different, but the similarities between them is they're both young women who are finding their place in this world and I think that they both actually look at the world through very bright eyes and have a lot of hope, which is an interesting correlation between the two of them. I think Elizabeth has gone through so much more than Ainsley obviously, so there might be a difference there, but I think they would get along."

Check out the 8 Compelling Historical Fiction Books For 1923 Lovers and read our interview with Julia Schlaepfer where she teases the Spencer and Alex's future.

This interview has been edited for length and clarity. And this post has been updated.

Leaders in the matcha industry are predicting a matcha shortage this spring. Sparked by a huge surge in demand, it’s possible that your go-to drink could be affected.

Here’s everything you need to know about this season’s matcha shortage.

Nataliya Vaitkevich / PEXELS

Per The Japan Times, increased demand for matcha powder put an “unprecedented strain” on the tea industry last year, and the same effect is predicted to take place in 2025.

According to the Ministry of Agriculture, Forestry and Fisheries, Japan saw a 185% increase in matcha production from 2010 to 2023 in order to keep up with demand from cafes and home baristas around the world, The Japan Timesreports.

Cup of Couple / PEXELS

Seeing that over half of Japan’s matcha is exported internationally, matcha lovers are looking toward the country for their green tea fix. Search interest for matcha has nearly quadrupled over the past 5 years, and it shows no sign of slowing down.

Olena Bohovyk / PEXELS

This year, mostly organic matcha strains will be affected by the shortage, though lower-grade varieties could face the same issues if consumers begin reaching for them in favor of organic offerings. While top-tier, organic strains like ceremonial-grade matcha are known for being sweeter and smoother, the lower-grade kinds like culinary-grade matcha are noticeably more bitter and don't have the same vibrant color.

Charlotte May / PEXELS

Matcha can only be harvested in the springtime, so though a shortage may be happening now, there’s hope for increased supply in the near future. This year’s harvest will start in April.

Polina Tankilevitch / PEXELS

Even though production will ramp up, Jason Eng of Kametani Tea in Japan, a company that produces matcha for beverage companies around the world, says: “This year will be an interesting one. We haven’t hit a point yet where we’re going to run out, but it’s going to be really tight this autumn – not just for us but for everybody. The demand is off the charts.”

Subscribe to our newsletter for more food news!