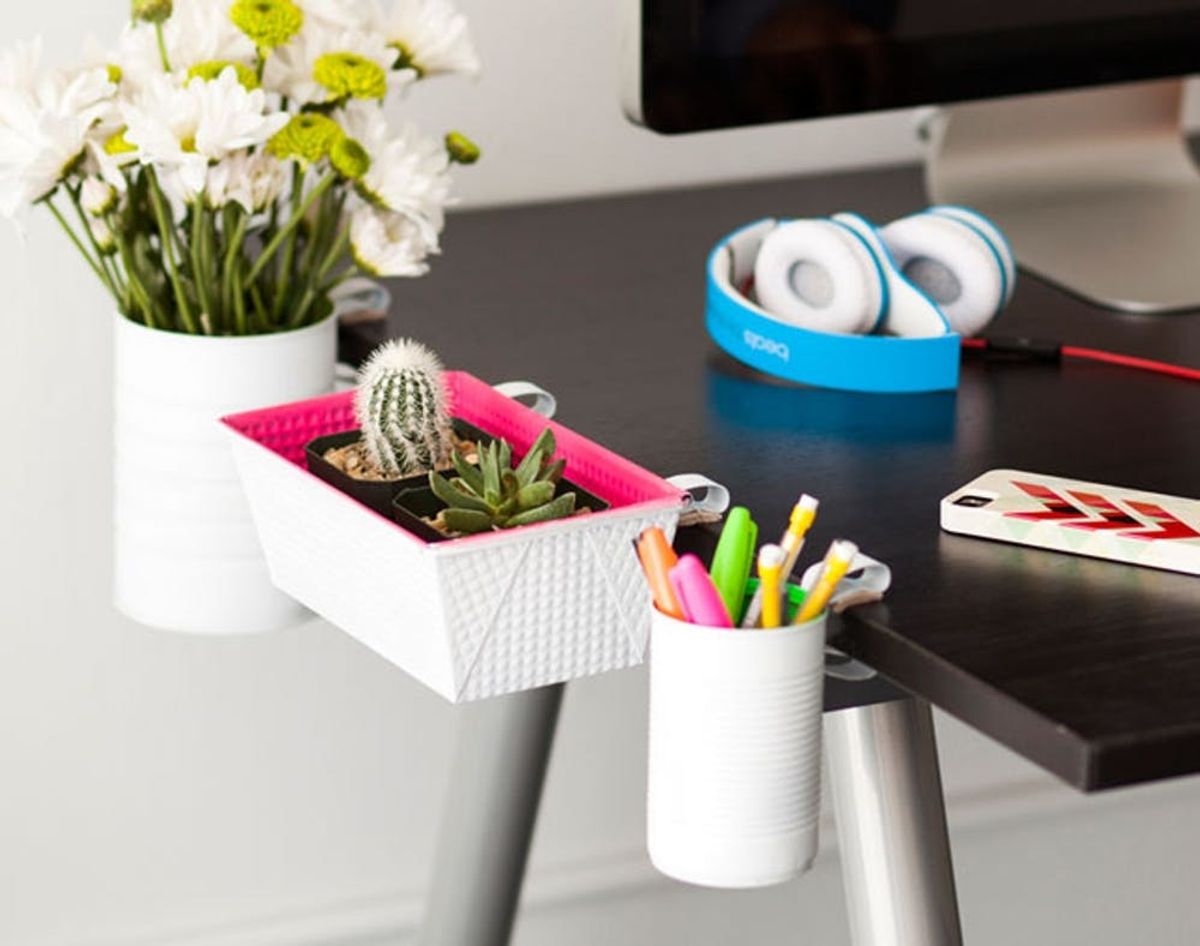
Our recent move into a new office has turned us all into part-time work space problems solvers. We even have a bit of friendly competition going on—a desk “pimping” competition which challenges us to buy or DIY the best desk accessory for $50 or less. We know nothing is more pimp than customization and we learned a lot about the ultimate customizable desk solution from Worknest last month. It inspired these DIY Clip-On Desk Organizers, which will help you free up some surface area on your desk without sacrificing any workspace sexiness. It may even make you more efficient and productive!
Major Space Saver Alert! DIY Clip-On Desk Organizers

Moving into a super-tiny studio apartment last month got me super jacked about creative small space solutions. This exciting event was paralleled in my work life, where we at Brit + Co. are getting settled into our new space (which is, thankfully, much larger than my cozy little studio.)
White and neon seemed like a good color direction to go in for desk pimping purposes. We saw cold, hard proof that it works in last week’s neon home decor post. Of course, feel free to riff on this project as you like. That’s what’s so great about this one. There is a lot of room for making it your own with different kinds of containers, colors and of course what you put in them!
Materials (makes 3 clip-on organizers):
– 4 grip clips ($5 on Amazon)
– 4 washers, nuts and bolts
– 1 loaf pan
– 1 coffee can
– 1 soup can
– 1 piece of self-stick heavy duty felt blanket pad ($5 on Amazon)
– white and fluorescent spray paints
Tools:
– power drill
– screw driver
– rubber gloves (for spray painting)
You might try using a teeny tiny flower box instead of a loaf pan, but we found a great textured pan that did just the trick!
First line up the clips on your containers and mark the drill hole with a sharpie.
Next, get a firm grip on your container with one hand and put some pressure against the drill with the other to keep it steady—then go to town. We noticed that we had to pulse the drill a couple of times to get a nice divot in the metal that would allow us to apply the pressure needed to get all the way through the container.
After all of your holes are drilled it’s time to spray paint.
We started by painting the interiors of our containers with the neon colors to avoid any masking. If you screw up it doesn’t matter because you are just going to flip them over and cover any mistakes with the white paint! Spray hack! Also, make sure you always spray paint outside or in a well-ventilated area.
Once you have the interiors of your containers painted and dried flip them over and paint the exteriors of your containers with white spray paint.
We also recommend spray painting your clips white. Let everything dry.
Now it’s time to attach those clips to your new organizers.
Once all of the clips are attached you can measure and cut out the felt pads. Stick the felt pads on the underside of the top clip (sticky side up) to prevent your table from getting scratched.
Voila!
Attach those little guys to your desk and feel free to kick up your shoes and admire your stellar handiwork. Fill them with pens, plants, flowers, cords, business cards, sticky notes or any other small objects that need to be stowed, but always within reach.
What does your desk look like? Have you made any clever caddies to keep yourself organized? Talk to us in the comments below.


