graduation parties
Cornhole Board
Materials:
– large pieces of cardboard
– two 24 in x 36 in canvases
– four 8 in blocks of wood
– paint
– nails
– spray paint
– Mod Podge
Tools:
– box cutter
– hammer
– pencil
– painter’s tape
– plate
– yard stick
– paint brush
– gloves for spray painting
Instructions
1. Draw a square in the center of the canvas about 4 inches from the sides and 8 inches from the top. Place your plate inside the square and trace it. Cut out the circle with a box cutter to create the hole.
2. Cut cardboard pieces to the same size as the canvas and slide it in place between the canvas and the canvas frame. If the cardboard covers the hole, use the box cutter to cut away the excess cardboard.
3. Measure and mark the center of your canvas. Then, create a diagonal line with the painter’s tape that reaches from the bottom corner to the center mark. Do this on both sides of the canvas to create a triangle.
4. Spray paint your canvas. You can use one or two colors for your design. Let dry and then remove the tape. You can also spray paint the wood legs of your board.
5. Apply a thick layer of Mod Podge onto the canvas and let dry.
6. Using a hammer, nail in the wooden legs into the top corners of the canvas. Each leg should get two nails.
7. Repeat to make two boards.
First we make, then we play.
Cornhole is great, but the boards are too freakin’ heavy! All of that plywood and 2x4s really rack up the weight. Step one of this cornhole hack is to use an art canvas from your local craft store as the cornhole board. It cuts the weight in half! Part two of the hack is to use a plate to trace The Hole. To do that, measure the canvas and create a square in the center, 4 inches from the sides and 8 inches from the top. By making a square, you will be able to lay the plate in the center without having to line up center points. You’re welcome ;)
Since canvas isn’t as strong as wood, use a cardboard backing to make it more durable. The cardboard will be able to slide in-between the canvas and stretcher strips.
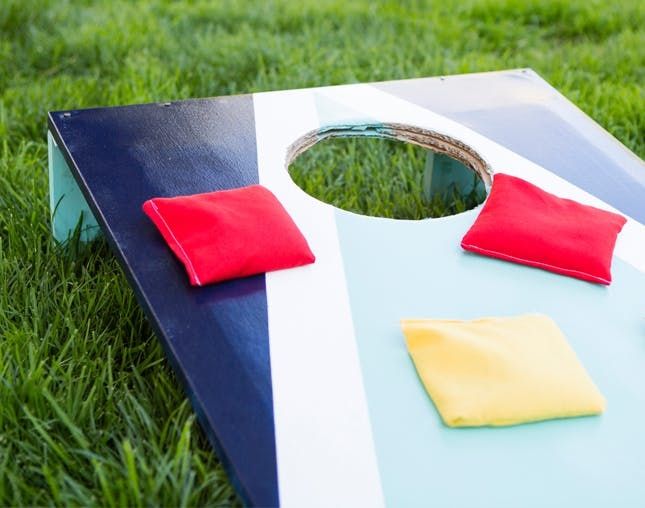
Time to paint! We chose to do geometric racing stripes. Find the center of your canvas and place tape from the center mark to the bottom corner. Repeat on both sides.
We used two different colors of spray paint for a fun race car effect. Wait for it to dry, then peel off the tape.
To get a smooth finish, cover the canvas with a thick layer of Mod Podge. This will make the bean bags slide easier and amp up the competitive aspect of the game :)
You’re almost ready to play! Use two nails to secure the board into the wooden block legs.
Let’s get ready to play! Wait — bean bags! We need to make bean bags.
Materials:
– two colors of canvas fabric
– rice or beans
– thread
Tools:
– sewing machine
– scissors
Instructions:
1. Fold fabric in half and measure and cut out four 6 in x 6 in squares in each color fabric.
2. Sew three sides of the squares together.
3. Turn your bag inside out and fill with rice.
4. Sew up the last side and get ready for a game of Toss!
These rice/bean bags are so simple — a project anyone who passed Sewing 101 could easily complete.
Bean Bags
Cut four 6 inch squares out of two different colors of fabrics. Easy.
Sew three and a half sides, flip the bag inside out and fill with rice. Don’t fill it to the brim — leave a good inch of space or your bean bags will turn into bean bricks :( Sew up that last side.
Ta-dah! Four red and four yellow bean bags. Let’s play — for real this time!
When choosing colors, find ones that really pop against each other. That way, each team can easily see how many points they’re racking up.
Let’s get these boards on the lawn!
Toss away! Remember: The first team to 21 points (without going over) wins!
If you get the bean bag on the board you score one point; through the hole is three points.
If both teams land their bags on the surface of the board, the points cancel each other out. For example this board would total zero points because there are two red bags AND two yellow bags. Womp Womp.
But we couldn’t end on a sour note. Victory!
