Got five or 10 minutes? Then you can totally DIY your nails like a pro this Halloween.
4 Halloween Manicures You Can DIY in Under 10 Minutes

Halloween is one of the best times of year to go crazy with nail art, and it should be that way for all levels of nail art obsessives. With fun and freaky manis for all in mind, I created two sets of classic Halloween nail designs: one of simple but striking looks that anyone could pull off, like cute cat ears and fierce fangs, and then next-level versions of the same designs. Think: moonlit black cats slinking across your digits and Twilight-level fangs with Rocky Horror-style red lips roaring on your nails (and there may or may not be a gold grill involved). No matter which design you choose, it’ll take 10 minutes or less to dress up your nails for the 31st like a total pro.
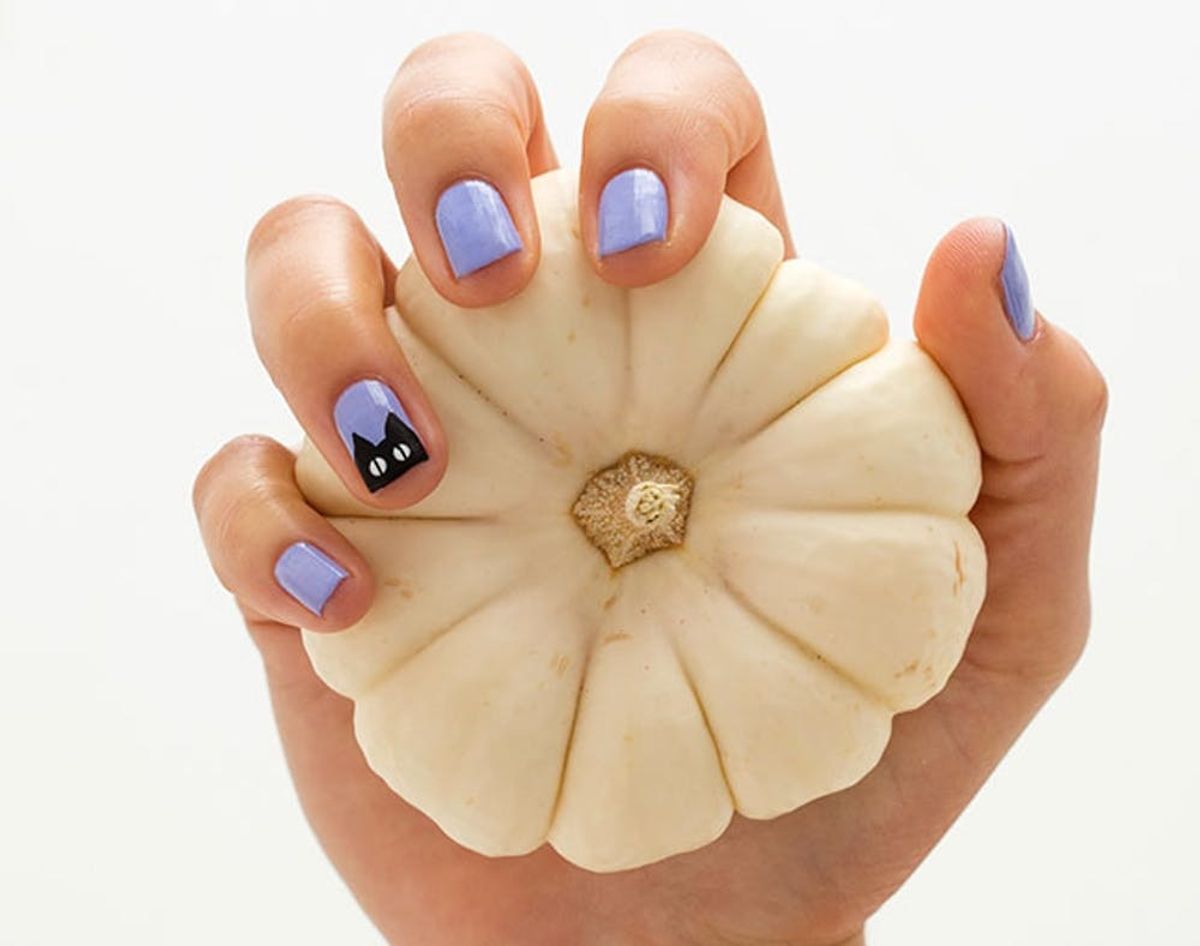
5-Minute Mani: Cute Cat Ear Tips
As a cat lady myself, I love any excuse to paint cute kitties all over my nails.
1. Start by applying a base coat to your nails.
2. Apply your base color. I used one of my favorite pale purples, You’re Such a Budapest by OPI ($12).
3. Once your base color is dry, use your black striping brush to paint two triangles in the middle of your nail. Paint a semi-circle underneath the triangles to complete the cat face shape. Fill in the face with the black striper brush.
4. Using a dotting tool and white polish — I’m using Alpine Snow by OPI ($7) — add two white dots for the eyes.
5. To complete the cat eye, use your black striping brush to add a vertical line down the middle of each white dot.
6. Finish your design with a fast-dry topcoat. Seche Vite ($4) is my all-time favorite.
10-Minute Mani: Black Cat Mani
For this design, I wanted to depict a black cat sitting on a fence under the moonlight. It’s a scene that takes a little more time and patience, but is totally worth the end result!
1. Start by applying a base coat to your nails.
2. Apply your base color. I wanted to use a pretty blue that pops, so I grabbed No Room for the Blues by OPI ($9).
3. Once your base color is dry, paint the top half of your nails a light brown. I used Tanlines by Floss Gloss ($8), one of my absolute favorites.
4. To start the cat design, use a dotting tool to create the head of the cat. Dip the dotting tool in the polish from the your black striping brush. After you have created the head, use your brush to create small triangles to make the ears. After the head is complete, continue using the striper brush to finish the shape of the body. I used these nail decals as inspiration for different cat shapes.
5. Once your cat is complete, dip your dotting tool in silver polish, like My Signature by OPI ($8) and place one silver circle in the background of the nail.
6. Once the silver circle is dry, dip your dotting tool in the same blue as your background color. Place a blue dot halfway over the silver dot. This will create a perfect crescent moon shape!
7. Finish off your design with your favorite fast-dry topcoat.
Purr-fect!
5-Minute Mani: Sinister Snakebite
These simple fangs are easy to execute and a fun way to add a little bite to your Halloween manicure.
1. Start by applying a base coat to your nails.
2. Then apply your black base polish. One of my favorite shiny black shades is Dark Matter by Formula X ($11).
3. Once your base polish is dry, use a white striping brush to create two thin triangles at the tip of your nails — these are the fangs.
4. Once the fangs are dry, use a red striping brush to add drips of blood at the tip of the fangs. Don’t worry about this step being perfect — a little variation on each fang looks great.
5. Finish off your design with your favorite fast-dry topcoat.
10-Minute Mani: Vampire Lips + Gold Tooth Fangs
I can’t get enough of these fangs with a bling tooth! These festive and fabulous nails will punch up any Halloween costume.
1. Start by applying a base coat to your nails.
2. Apply your black base polish. I used Dark Matter by Formula X.
3. Using your white striping brush, paint a thin french tip on your nail.
4. Once dry, cover the white tip with your red striping brush. The white base will help the red polish pop.
5. Using your white striping brush, paint a lip shape at the base of the nail. I started by painting a small V at the base of the nail, and adding a curved line above the V. Fill in the space between with your white striping brush.
6. Once dry, cover this white polish with your red striping brush.
7. Using a small dotting tool and white polish like Alpine Snow by OPI ($7) to create small dots lining the edge of the red lip towards the tip of your nail.
8. Once you have created the bottom set of teeth, use the white striping brush to create two longer fangs coming out from the upper lip.
9. Use the small dotting tool to create teeth on either side of the fangs, leaving a space for a gold tooth next to one of the fangs.
10. Using a shimmery gold polish like Luxe by Orly ($6) to create one extra special bling tooth.
11. Bonus! If you really want to take the bling tooth to the next level, use a flake of gold glitter on top of the gold tooth. I used my dotting tool to grab a piece of gold flake from Gaining Mole-Mentum by OPI ($7). The gold flakes bring the shine to the next level!
12. Finish with your favorite topcoat. I always use Seche Vite.
Um… we can’t get over that gold grill!
We even love how the beginner + advanced designs look together! Pro tip: if you go this route, you’ll want to paint the more intricate design with your dominant hand. Of course, to finish the look, a classic spider ring is a must.
What nail art designs are you planning on donning this Halloween? Tell us in the comments below!


