Pack All Your Favorite Pieces in This DIY Travel Jewelry Roll

For all of you who resolved to collect more stamps in your passport in 2016 (and for those who are only visiting white sand beaches in your dreams), we’ve got you covered on the jewelry organization front. We know that untangling necklaces when you’re trying to get to your tan on is NOT the business, so we teamed up with the Chloe + Isabel — a lifestyle jewelry brand dedicated to empowering creative + confident entrepreneurs — to bring you the ultimate DIY Travel Jewelry Roll Kit. Now you can chill without losing your chill over tangled jewelry.

C+I2

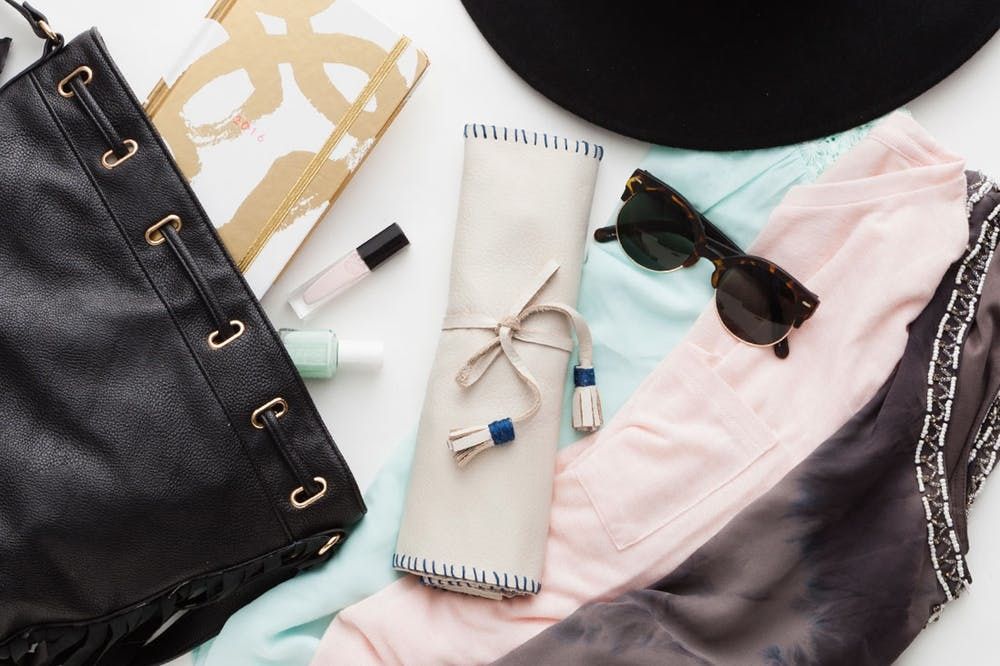
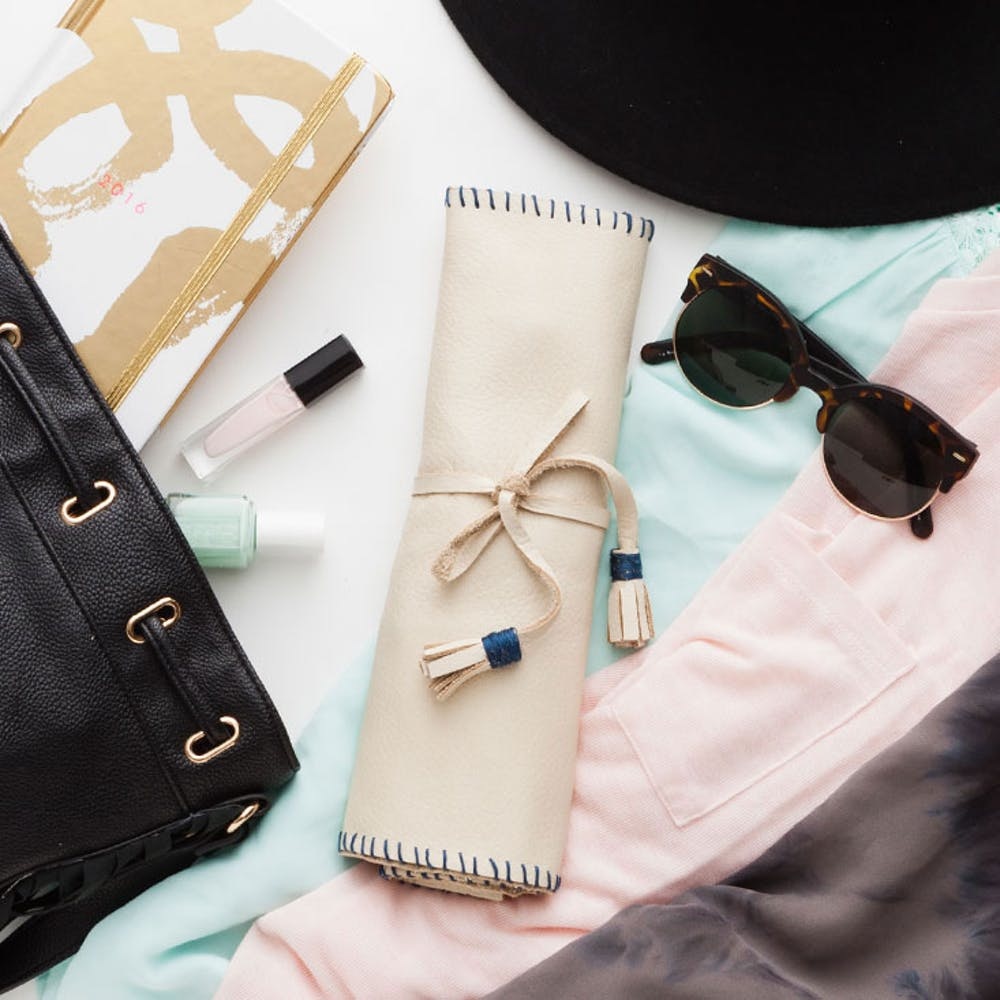
We developed this DIY Travel Jewelry Roll Kit with Chloe + Isabel’s ultra dreamy Spring 2016 jewelry line in mind, channeling European luxe with supple ivory leather while adding a pop of color for a true Brit + Co touch.

With plenty of pockets and storage for statement and delicate pieces alike, this jewelry roll will be the only one you’ll need to pack for any weekend getaway or month-long adventure. As a bonus, this kit comes with 20% off your next Chloe + Isabel jewelry purchase so you can travel in serious style.

Materials (included in our kit HERE)

  • 16 x 22-inch piece of leather
  • embroidery floss (color 3750)
  • E6000 glue
  • embroidery needles
  • leather scissors

Additional materials (not included)

– 12-inch ruler

– fine point pen

Grab your materials (or buy the kit HERE) and let’s get started!

  1. To make things easy, we’re going to use 16 inches as our standard width for the majority of the larger pieces. Begin by measuring out a rectangle 16 x 11 inches long. To make sure you’re getting an accurate measurement, make a series of tick marks at 11 inches across the entire piece of leather, then connect the marks with a single line. This piece will be the main component to your jewelry roll.
  2. Next you’ll measure out a piece of leather for the jewelry roll pockets. Using the same measuring technique we just used, measure and mark a piece of leather 16 x 4 inches long.
  3. Measure and mark a piece of leather 16 x 1 inches long for the bracelet band. Measure and mark two pieces of leather 16 x ¼ inches long for the tassels. Measure and mark an additional piece of leather 16 x ¾ inches long for the necklace loops.
  4. Your marked up panel of leather should look like the example above. From the left to right: main component (16 x 11 inches), pockets (16 x 4 inches), bracelet strap (16 x 1 inch), tassels (16 x ¼ inches), necklace loops (16 x ¾ inches). Save the remaining piece of leather for later — we’ll use this piece for a few finishing touches.
  5. Carefully cut along the marks you’ve made. Be sure to cut in one continuous motion. Leather is less forgiving than paper, and snipping in different strokes will result in a feathered, unclean edge.
  6. We’ll use the remaining piece of leather for the earring panel and the fringe detail of the tassel. Start by making a rectangle measuring 4.5 x 3½ inches. We liked the corner detail in the earring panel, so in this case we found the center point of the edge measuring 3½ inches (1¾ inches) and pitched the edges up by one inch. Feel free to get creative with this!
  7. Once you’ve cut out the earring flap detail, measure out two strips of leather 1½ inches long each. You probably won’t use both pieces, but they’re good to have just in case.
  8. You should have a similar assortment of pieces as in the example pictured above. From left to right: main panel, pocket panel, bracelet panel, tassel strings, necklace loops, earring flap, and tassel fringe.
  9. Now comes the fun part: whipstitching the embroidery floss detail! We marked ¼-inch dots all along the edge of the main leather panel (16 x 11-inch piece). For whipstitching, thread your needle with embroidery floss and knot the end. Leave about three inches of extra thread through the eye of the needle. Start by piercing through the front of the leather and bringing your needle around to the other side of the panel by “wrapping” the edge. This is a great activity to do passively while watching your favorite show ;)
  10. Your completed whipstitched panel should look like the example above.
  11. To make the pockets, take the 16 x 4-inch leather panel and apply a line of glue on both ends and in four-inch increments in between. Align this panel with the bottom of the main panel, press firmly, and allow to set. Repeat this step with the 16 x 1-inch panel. Position this piece about one inch above the pocket panel.
  12. For the earring flap, mark and cut as many holes as you’d like. Snip in a cross pattern as shown above.
  13. Add a line of glue to the top of the flap, and align it with the top edge of the main panel. Press firmly to adhere both pieces together.
  14. We’ll use the 16 x ¾-inch piece of leather you cut for the necklace loops. Measure and trim four inch-long pieces. Create the loop by gluing one end to the other, being sure to leave about a half inch of surface area. Then apply glue to the exposed surface as well as the very tip of the “A” side of the tab (the side with the pebble pattern).
  15. This will ensure a strong hold when you’re gluing the tabs onto the main panel. Space and glue the four tabs evenly across the top edge of the main panel.
  16. On the leather panel you cut for the fringe, make marks about ½ inch apart down the entire length of the panel. Trim along the marks, about ¾ inches long, then cut two pieces about 3½ inches long. Apply a line of glue along the uncut edge of the fringe, and wrap the leather piece measuring 16 x ¼ inches in the fringe. Repeat this step with the other tassel string. Allow these pieces to dry for about 30 minutes before you continue handling them. For the wrapping detail, apply a small dab of E6000 to the fringe, and wrap the embroidery floss until you have nice coverage. Secure the end of the string with another small dab of E6000.
  17. To secure the tassel string to the rest of the jewelry roll, make a cut about ¼ inch long right above the bracelet panel. Pull the tassel strings through the hole and knot them together to keep them in place.
  18. You’re all finished!

Tangled jewelry is officially one less thing to worry about while you’re globetrotting. Bon voyage ;)

Show us where your next adventure takes you (and your DIY Travel Jewelry Roll) by tagging us on Instagram with #iamcreative and #chloeandisabel.

This post is a collaboration with Chloe + Isabel. Whether you’re a DIY tastemaker, a fashion-loving stylist, or a social media guru, Chloe + Isabel offers a one-of-a-kind community where you can be creative, be confident, be you!

DIY Production and Styling: Marianne Koo
Photography: Brittany Griffin

If you know me, you know how much I love Taylor Swift. Something about hearing music written by someone while they experience the same life stages feels so personal, and there's a good chance that almost every emotion I feel can be summed up by a Taylor Swift song. In short: I just love her.

Taylor frequently drops merchandise when a holiday rolls around and for Valentine's Dayin 2022, she released a collection inspired by her 2019 album Lover. I fell in love with a pair of fuzzy dice inspired by her hit song "Cruel Summer," and apparently so did everyone else because the next time I visited the website, they were sold out! So, I decided to make a simplified version of them with my sewing machine for a fun V-Day activity and to add some extra pink to my space. Check out our online sewing class to brush up on your skills and keep reading for a low stakes tutorial on how to make your own!

Here's how to make your own Taylor Swift "Cruel Summer"-inspired dice for Valentine's Day.

Supplies For Your Own "Cruel Summer" Taylor Swift Fuzzy Dice:

Chloe Williams/Brit + Co

  • Sewing machine
  • Pink fleece fabric
  • Pink thread
  • Pink felt
  • Scissors
  • Blue rope/cord (I took mine off a loofah)
  • Needle + pins
  • A copy of Lover to listen to while you sew ;)
  • Poly-Fil Stuffing (not pictured)
  • Ruler (optional)
  • Glue gun + glue gun sticks (optional, use it to touch up your seams if you need)

Instructions:

Chloe Williams/Brit + Co

Start by marking your fleece with the measurements for your squares. Since the size of the dice on Taylor's official website was listed as 3.5", I marked them just above 3.5" so I could leave room for a hem. You'll need 12 squares total.

Chloe Williams/Brit + Co

Next, cut out your squares. I used the first square as a template for the others, then went back in and cleaned up the edges where necessary.

Chloe Williams/Brit + Co

The first image I made was a sun, and I started by drawing a circle on my felt. I used the rim of my thread spool to make sure I had a perfect circle but you can also free hand if you want the circle to be a different size.

Chloe Williams/Brit + Co

Pin your felt to the center of a fleece square.

Chloe Williams/Brit + Co

Sew the circle to the fleece using a regular straight stitch.

Chloe Williams/Brit + Co

Next, move your sewing machine from a straight stitch to a zigzag stitch and decrease your stitch length to a lower number like 0 or 1. This will allow your art to have more of a filled-in border, instead of a messier, chevron finish.

Go back over the rim of your circle with the zigzag stitch to give it that embroidered look. I did this with the fabric right side up, then I did it again with the fabric flipped upside down just to be extra thorough.

Chloe Williams/Brit + Co

After your circle is complete, it's time for the sun rays! Use the same zigzag stitch and 0 stitch length to move from the circle outward. This is where you'll want to add another element: stitch width.

To give the sun rays their triangular shape, adjust your stitch width as you move out from the heart of the sun. While the stitch length ensures your sewing won't have empty spaces, the width will let you move from a wider sunbeam base to a thinner point. I just decreased the width every few stitches as I went along.

Chloe Williams/Brit + Co

Your finished sun will look something like this! I went back in with a needle to clean up loose threads by hand. I waited to trim them until I had threaded them to the back so that the front image had a more polished look.

Chloe Williams/Brit + Co

Repeat the above steps for your devil and angel hearts. There are only a few differences between these and the sun; you'll cut the felt into hearts instead of circles, and to fill in the horns and the wings, I used a straight stitch to give it a colored-in look, reserving the zigzag stitching for the borders.

I know the original dice had "Cruel Summer" lyrics stitched onto these squares, but I ended up leaving them off. It makes the design more minimal and easier to work with.

One thing to note about this step: beware of bunched fabric! Filling in the angel wings brought the edges of the squares in a bit, but I wasn't too upset about it. I think flaws give a craft some personality!

Chloe Williams/Brit + Co

The "Lover" stitching got a little more complicated than the images. I first traced the word with my pen so that I would have some guide as to what the word should look like. Move the stitch width back down to one of the lower settings.

Then instead of just moving the fabric in a circle like I did for the sun, I moved it all around to follow the word I had written in marker. Repeat this a few times until you're satisfied with the thickness. I definitely tried this step a couple different times so don't worry if you don't get it on the first go!

Chloe Williams/Brit + Co

For my final embroidered square, I did a simple "TS," which of course stands for "Taylor Swift."

Chloe Williams/Brit + Co

Before you can sew your squares together, line the edges up and pin them. I used my ruler to mark how far I wanted my hem to go (I did 1/4" at every edge) for a sewing guideline.

I pinned the squares one at a time, checking at each step that they were pinned the right way (especially after I sewed two together incorrectly and had to pick out the stitches. Oops.)

Chloe Williams/Brit + Co

Arrange the images in a similar way to the official dice, or change it up however you'd like! I chose to arrange the squares so that there was a blank in between the images.

Chloe Williams/Brit + Co

Pin and sew your remaining three squares around the middle square so that you end up with a cross.

Chloe Williams/Brit + Co

I continued pinning and sewing the edges to one another until I had an inside-out cube. Here's a tutorial to help you better understand which edges should be sewn together.

I did one square at a time, making sure to focus on the corners and going back in to tighten them up once I was done. You only want one gap, which is where you'll flip the cube inside out and then stuff it.

Chloe Williams/Brit + Co

Once you have a cube, flip the fabric inside out. I used my pen to make sure all the corners and edges were good to go.

Chloe Williams/Brit + Co

Next, stuff your cube with whatever filling you prefer. I didn't stuff it super full because I didn't want it to have a rounded look when I was done.

Chloe Williams/Brit + Co

Ta-da! A little wonky but very cute :)

Chloe Williams/Brit + Co

When you have both dice, cut a small hole in the top for your cord. Knot the ends and stuff them into the holes, then use your needle and thread to attach the cord and the fleece together.

Chloe Williams/Brit + Co

Voilà!

Chloe Williams/Brit + Co

They're soft, fuzzy, and pink. What could be better than that?!

Chloe Williams/Brit + Co

If you don't want to hang these in your car, they also make excellent Valentine's (or Galentine's) decor.

Chloe Williams/Brit + Co

If you need me, I'll be blasting "Cruel Summer" for the rest of the month.

Loving these Taylor Swift fuzzy dice? Follow us on Pinterest and TikTok for more entertainment inspo, and don't forget to check out The Latest On Taylor Swift And Travis Kelce's Relationship!

Brit + Co may at times use affiliate links to promote products sold by others, but always offers genuine editorial recommendations.

This post has been updated.

Ben Affleck and Jennifer Lopez are no strangers to making headlines — and apparently Ben has a lot to say about that after their blockbuster divorce. Bennifer 2.0 was a shocking rekindled romance, but nothing was more shocking about how brief take two was for these seemingly star-crossed lovers. While Ben's historically been pretty tight-lipped about his personal life, he recently opened up in an interview with GQ about Jennifer, their divorce, and how he really feels about it all. Here's what he had to say!

Scroll to see Ben Affleck's rare comments about Jennifer Lopez post-divorce...

Again, it's pretty well-known that Ben Affleck doesn't care much for the spotlight. I mean, he's literally known for looking grumpy — and drinking Dunkin' — in pap shots. And Ben is pretty adamant that underneath all those major headlines, he's just a normal guy with a normal family. He told GQ that his "life is actually pretty drama-free," noting that he experiences all the same things anyone else does.

"I’m sure in your mind you’re thinking, Oh, well, you just got divorced. That’s not drama-free. And I understand that instinct," he elaborated. "But all of this is pretty adult, and for all the sensational stuff that gets written, if somebody sat down and talked to me about it, and I said, “Well, this is really the experience,” their eyes would glaze over with boredom."

When asked about the divorce-stricken elephant in the room, Ben surprisingly shared what ultimately lead to his split from Jennifer Lopez. The interviewer noted that in The Greatest Love Story Never Told, it was clear that Ben wasn't comfortable with sharing so much of himself on screen — and asked what he was going through in those moments.

"Like I mentioned to you before, there are a lot of people who I think have handled celebrity more adeptly and more adroitly than I have, Jennifer among them. My temperament is to be a little bit more reserved and private than hers. As happens in relationships, you don’t always have the same attitude towards these things," he said. "And so I thought, Oh, this is interesting because how do you reconcile that? Because exactly what you said is true. I love and support this person. I believe in them. They’re great. I want people to see that."

Ben explained that there's a highly-quoted part of the documentary where he says, "You don’t marry a ship captain and then say, 'Well, I don’t like going out in the water.'" And ultimately? Ben said that really isn't what caused he and JLo to break things off. He said, "I think it’s important to say that wasn’t the cause of some major fracture. It’s not like you can watch that documentary and go, 'Oh, now I understand the issues that these two had.'"

Maybe one day we'll get the reason Bennifer 2.0 broke our hearts, but for now this answer will have to do. Here's hoping these two are both happy in their own right!

Looking for more celebrity news? Follow us on Facebook so you never miss a thing!

Valentine's Dayis one of our favorite holidays for many different reasons. The desserts! The dinners! The cocktails! Not to mention the fact that it's basically an entire holiday dedicated to pink, red, and all things romantic. You can always gift your sweetie flowers and chocolates, but if you want to get creative with DIY Valentine's gifts, you've come to the right place.

We love that V-Day is low-pressure as far as gifting holidays go, and that it celebrates love in its many forms. We've thought a lot about what to give and get here at Brit + Co, and whipped up a list that includes a few hits that you can give after trying one of our fun date night ideas. Here are our favorite DIYs for the big day.

DIY Valentine Gifts Your Partner Will Love

Brit + Co

Give your sweetheart hugs and kisses via these easy-to-sew XOXO pillows. Pick fabric that goes with your decor or use the brightest red and pink fabric that you can find.

Brit + Co

This floral backdrop is perfect for a doorway surprise for when your love or little ones wake up on Valentine's Day morning. Plus, by the time your V-Day celebrations end, you might as well leave them up for March.

Studio Ink

Keep the surprises coming withbreakfast in bed. We heart these Red Velvet Heart Waffles with Cream Cheese Glaze — yum! Sprinkles are encouraged.

Brit + Co

Challenge your love(s) to a game of Jenga with this cute DIY Valentine's gift. This will make for an adorable game to play any time of year.

Brit + Co

Make your own box of chocolates with a piñata twist. We'll take two, please!

Brit + Co

Gift your gal pals a hand-stamped scarf for the occasion or make a DIY night of it! Since you make the stamps yourself, you can create any pattern you want.

Brit + Co

Dig into this DIY conversation heart cake for the sweetest V-Day dessert you ever did try.

Brit + Co

Put a ring on it! Chocolate ring pops for the DIY Valentine's gifts win. Our favorite part is definitely the fun colors.

Brittany Griffin

Here's a long distance-friendly idea: Make theseConversation Heart Piñata care packages to send to your BFFs or you can surprise your fam in the morning with a goodie-filled one.

Brit + Co

Give your sweetheart something delicious and gluten-free with these Cassava Flour Brownies.

Brit + Co

Get cozy with these conversation heart pillowsfor your favorite texting pal.

Brit + Co

Serve your Galentine's Day guests Celebrity Heartthrob Cookies— the next best thing to the real deal. Pass us the Ryan Gosling cookie please!

Make a stack of pixel-inspired Pop-Up Heart Cardsfor your favorite people.

Brit + Co

Add a green twist to your Valentine's Day surprise with these Air Plant Wall Artpiecesthat creatively make use of nails and string.

Brit + Co

For a more hands-on DIY Valentine's gift, whip up these fun DIY Conversation Heart Coasterswith polymer clay and letter stamps.

Brittany Griffin

Map your travels together with this clever Photo Map Wall Artfor a personal and so special touch!

Brittany Griffin

Celebrate your Valentine's favorite food with these extra cute (and yummy) Heart-Shaped Boxes. Fill them with candy today and love letters tomorrow.

Happy Love Day! If you make a DIY Valentine gift, tag us in a pic — and don't forget to subscribe to our newsletter!

This post has been updated.

It's easy to understand why Yellowstone has captivated audiences for five whole seasons. The show is packed with intense drama, complex characters, and stunning landscapes.

Yellowstone is also home to plenty of powerful moments and memorable lines. Whether it's a gut punch of wisdom or a cutting remark, here are some of the show's most iconic quotes.

Scroll to see the most iconic Yellowstonequotes we can't get enough of!

"The only thing I ask is that you outlive me so I never live another day without you." – Beth Dutton

Beth may be regarded as the toughest character in Yellowstone, but beneath her fierce exterior is a deep well of emotion, especially when it comes to Rip.

In one of the most poignant moments of the series, Beth revealed a side of herself that viewers don't often see: her vulnerability and intense love for Rip. For Beth, having him by her side is more than just about companionship. It's a source of strength and stability.

Paramount

"You're either born a willow or born an oak. That's all there is to it." – Lloyd Pierce

In Yellowstone, the harshness of ranch life shapes its inhabitants in unique ways. Here, Lloyd offers a candid observation about the nature of people, suggesting that some are inherently strong and resolute, like oaks, while others are more adaptable and pliable, like willows.

This quote underscores one of the central themes of the show: the tough world of ranching creates individuals who are either suited for the challenge or will be bent by it.

Paramount

"You know, when you boil life down, it's funny just how little you need, isn't it?" – Rip Wheeler

This line perfectly encapsulates Rip's simple yet profound outlook on life. As a man deeply connected to the land, he values self-sufficiency and is content with the basics, a philosophy that aligns closely with the rugged Western lifestyle the Duttons defend.

In his eyes, all that truly matters is the ranch and his family. His humble nature and his unwavering loyalty make him a grounding force amidst the chaos of the show.

Paramount

"The brand isn't something you earn; it's something you live up to." – John Dutton

The Yellowstone brand is not merely a symbol of belonging. As the quote shows, it's also a constant reminder of the responsibility and expectations that come with it.

When Jimmy is given the choice to accept the brand, he isn't just going to be marked as part of the ranch. John Dutton runs his operation with a strict code of loyalty and unquestioned obedience, and Jimmy is being offered an opportunity to prove himself and live a life defined by hard work and sacrifice.

Paramount

"A man who puts a hand on a member of my family never puts a hand on anything else." – Jamie Dutton

Despite their conflicts and dysfunctions, the Duttons share an unbreakable bond when it comes to protecting their own. Jamie's line goes to show that, even with all their flaws, the Duttons will unite in retribution when one of their own is harmed.

What makes this quote particularly striking is that it comes from Jamie, who's like a black sheep in the family.

Paramount

"When you fight for a thing, the thing doesn't care if you win or lose because the thing ain't alive. But when you fight for people, they care." – Kayce Dutton

This line delivered by Kayce underscores the difference between fighting for a cause and fighting for the people you love. He points out the contrast between fighting for material possessions, like the ranch, and the genuine connection and impact that comes from fighting for those you care about.

The quote reveals a key difference between him and his father, John Dutton. While John's primary focus is the ranch's preservation, Kayce is more concerned with his family's well-being.

Paramount

"Learn to be meaner than evil and still love your family and enjoy a sunrise." – John Dutton

In a modern Western like Yellowstone, there are undeniable themes of survival, sacrifice, and loyalty to family. This quote by John reflects the harsh reality of the cowboy lifestyle.

Furthermore, he believes that while life may demand hard choices, it's still possible to find moments of beauty and joy and hold onto the love that makes life worth living. His advice isn't just about fighting evil but surviving in a world where evil is inevitable while preserving a sense of humanity.

Paramount

"When the misery is bad enough, tomorrow is rarely factored into decisions." – Monica Dutton

Finally, it's no secret that Monica has faced an unthinkable amount of challenges in her life, from the trauma of Kayce killing her brother to dealing with systemic racism. This quote shows her belief that when life is filled with mystery, it becomes nearly impossible to think about the future because the present is all-consuming.

It speaks to the emotional weight of living in such a brutal environment and resonates with many of the characters on Yellowstone.

Missing Yellowstone? Us, too. Here's everything you need to know about Taylor Sheridan's epic Yellowstone universe, from 1923to Landman.

The Twisters storyline is said to continue with a sequel! A second iteration of the 2024 remake is “reportedly in the works,” according to entertainment writer and insider, Daniel Richtman. That could potentially mean more Daisy Edgar-Jones, and, of course, more Glen Powell!

Here’s everything we know about Twisters 2.

Who will star in 'Twisters 2'?

Melinda Sue Gordon for Universal Pictures / Warner Bros. Pictures / Amblin Entertainment

Though we don’t have an official casting for the film quite yet, fans are speculating that Daisy Edgar-Jones and Glen Powell would return for a Twisters sequel.

“There's no doubt in my mind that Powell and Edgar-Jones are game to reprise their lead roles,” Jordan Ruimy writes for World of Reel.

“I don’t think it needs a sequel but if they can write a compelling story with halfway decent character development and maintain the chemistry in the cast, I’d definitely go see it,” one Twisters fan wrote on Reddit.

What will 'Twisters 2' be about?

Melinda Sue Gordon for Universal Pictures / Warner Bros. Pictures / Amblin Entertainment

There’s no word on the plot of a Twisters sequel, either. Some fans of the film were definitely quick to share some theories for it:

“Tyler faces the moral dilemma about click bait vs accurate information. Kate gets upset about him profiting off of people’s fears. Then Tyler adjusts some way. Still can get tornadoes in there easily,” one person wrote. “Or they could continue down the experiment route and having to get and keep funding looking for better ways to stop a tornado. Or the fall out of the sodium ruining the farm land.”

“Another film to continue the chemistry between Kate and Tyler would be sick,” another user said.

While a potential Twisters 2 sounds appealing to some fans, others are hesitant to greenlight it, preferring a separate storyline instead.

“I'm open to the idea of a Twisters sequel, but I'd prefer they'd leave it as a standalone film,” one more person weighed in.

When does 'Twisters 2' come out?

Melinda Sue Gordon for Universal Pictures / Warner Bros. Pictures / Amblin Entertainment

Twisters hit theaters last year in the summertime, so we predict any potential Twisters 2 would come out the summer of 2026. It’s a tad bit too early to say for sure, though, since murmurings of the movie are still fairly new.

Subscribe to our newsletter for more 2025 movie news!