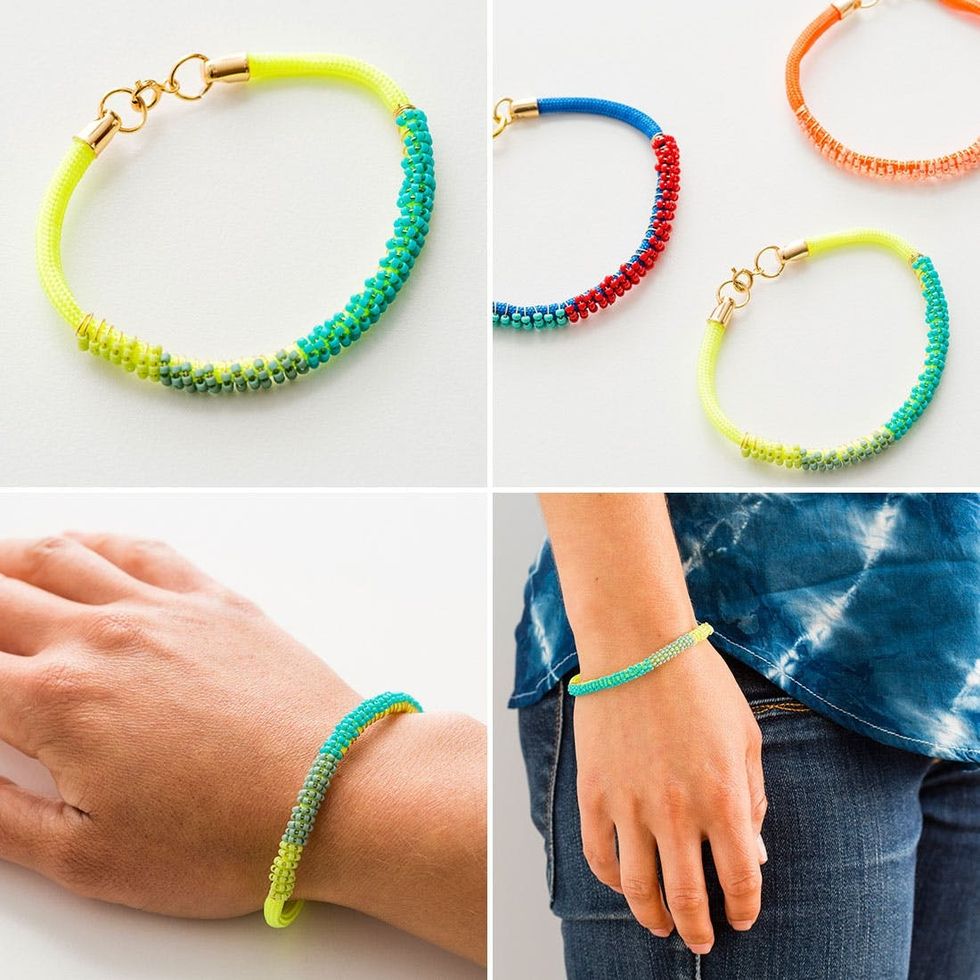
Remember back in 1985 when friendship bracelets were really a status symbol? How many friends do you have? Let me check out your wrist and we’ll know. No need for Facebook or Instagram, just a peek at your bracelet stack and we’ll see. So silly, right? Who made that up? Regardless, we sure loved those bracelets. So today we’re bringing them back. We’re going to teach you how to make some fun seed bead bracelets that your friends will love.
2 Modern Takes on DIY Beaded Bracelets
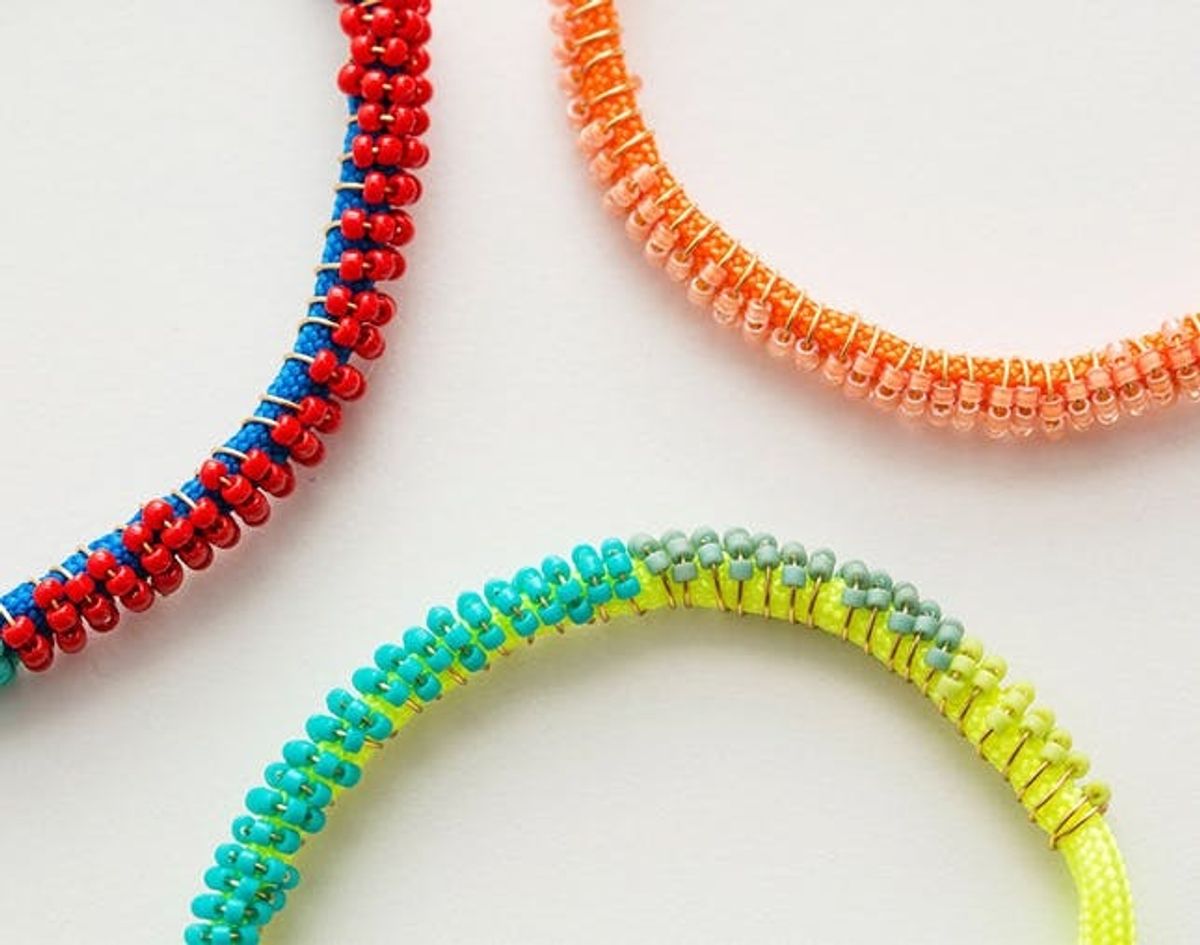
Remember back in 1985 when friendship bracelets were really a status symbol? How many friends do you have? Let me check out your wrist and we’ll know. No need for Facebook or Instagram, just a peek at your bracelet stack and we’ll see. So silly, right? Who made that up? Regardless, we sure loved those bracelets. So today we’re bringing them back. We’re going to teach you how to make some fun seed bead bracelets that your friends will love.
<br/>
 – seed beads
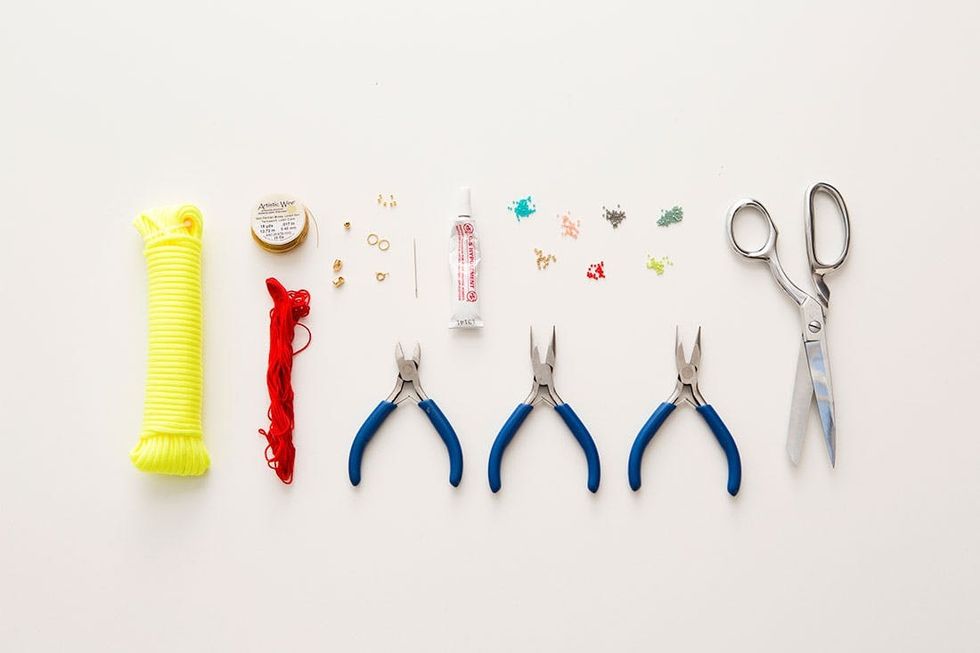
– artistic wire
– paracord
– embroidery floss
– 2 cord ends
– 2 jump rings
– 1 small gold bead
– 6 crimp beads
– 1 clasp
Tools:
– GS Hypo Cement
– scissors
– needle
– wire cutters
– 2 sets of needle nose pliers
Paracord Bracelet
Instructions:
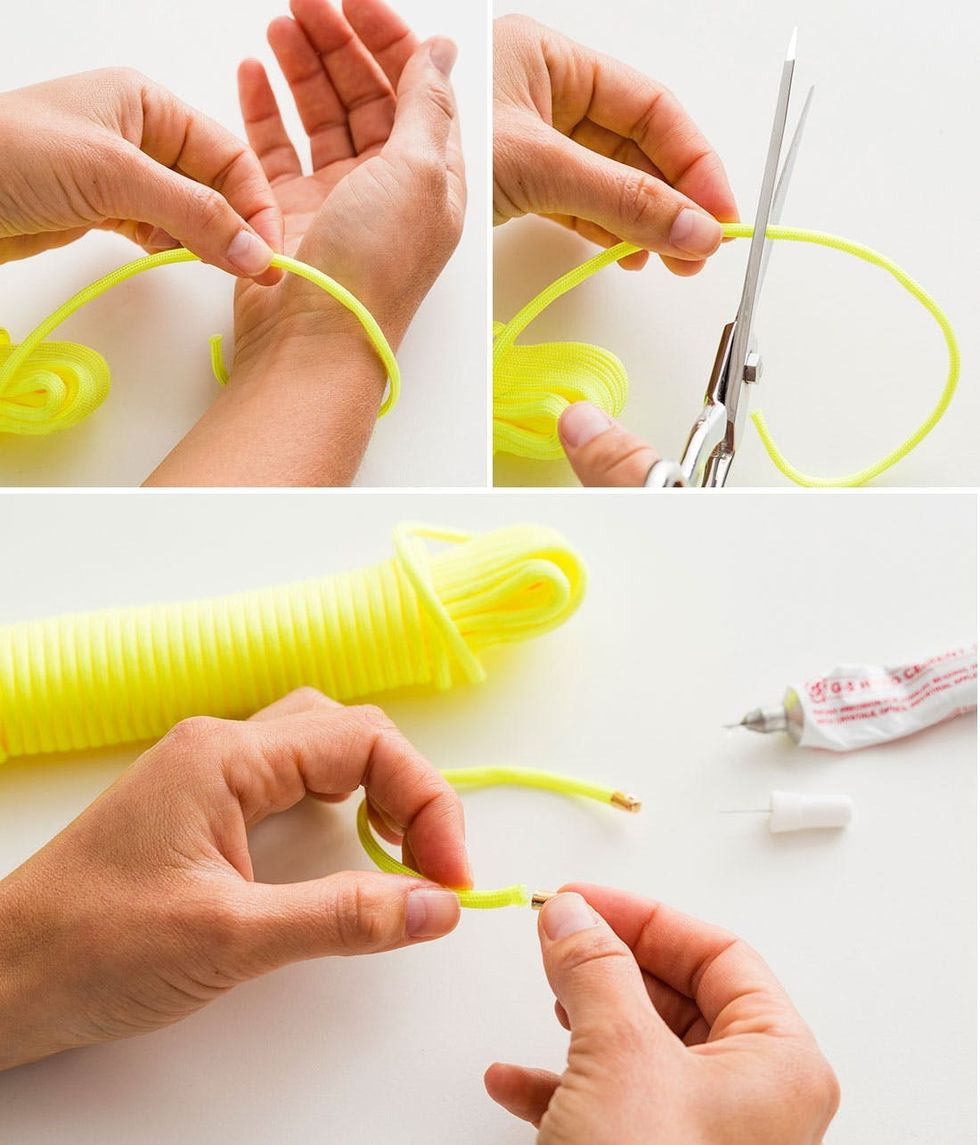
1. Wrap the paracord around your wrist for size. Remember that there will be cord ends and a clasp on each end. Cut your cord.
2. Squeeze GS Hypo Cement onto each end and add your cord ends. Let the glue dry.
3. Cut a long piece of artistic wire (about a foot and a half).
4. Wrap the end of the artistic wire tightly around the paracord three times about an inch from the end.
5. Add five seed beads and then keeping the beads close to each other, position them on the top part of the bracelet. Wrap the wire underneath, then add four seed beads and wrap the wire underneath again. Repeat this process until you are about an inch from the other end of the paracord.
6. Once you’ve added all of your beads, wrap the artistic wire around the paracord three times and then trim.
7. Twist open a jump ring and add it to one of your cord ends. Do the same thing on the other side but also add the clasp.
First off, measure the length of your paracord by wrapping it around your wrist. There will be findings on the ends, so cut it a little bit shorter to account for the jump rings and clasp. Then add a little bit of GS Hypo Cement and a cord end to each side.
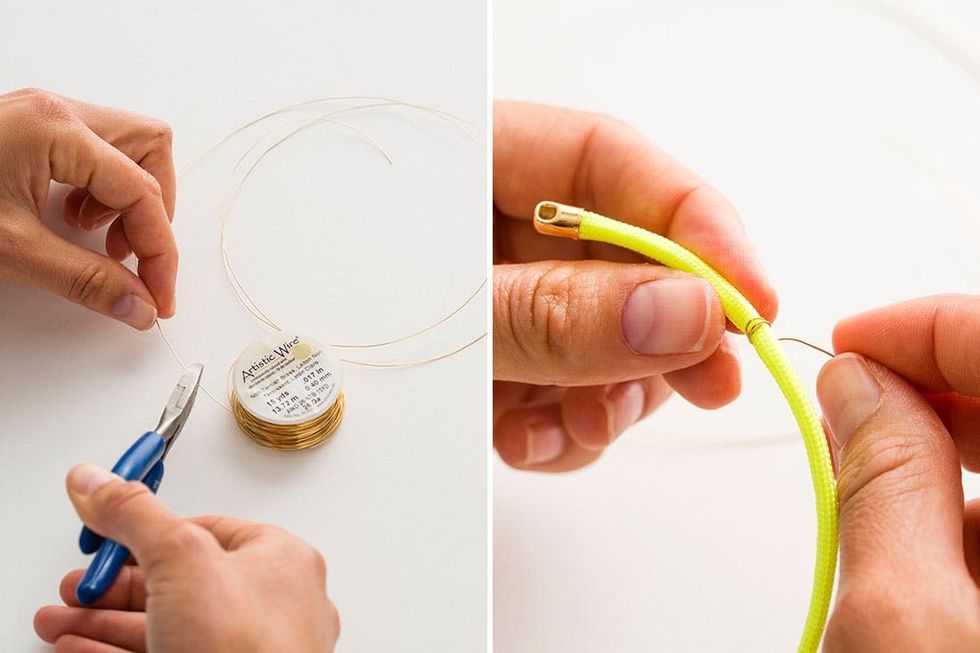
Okay, now cut what seems like a ridiculously long piece of artistic wire — about a foot and a half will do. The reason you need so much wire is because you’ll be wrapping it around the paracord a bunch of times. Speaking of wrapping, it’s time to start! You’ll want to make your first loop about an inch from the end of the bracelet. Wrap the wire snuggly around the paracord three times.
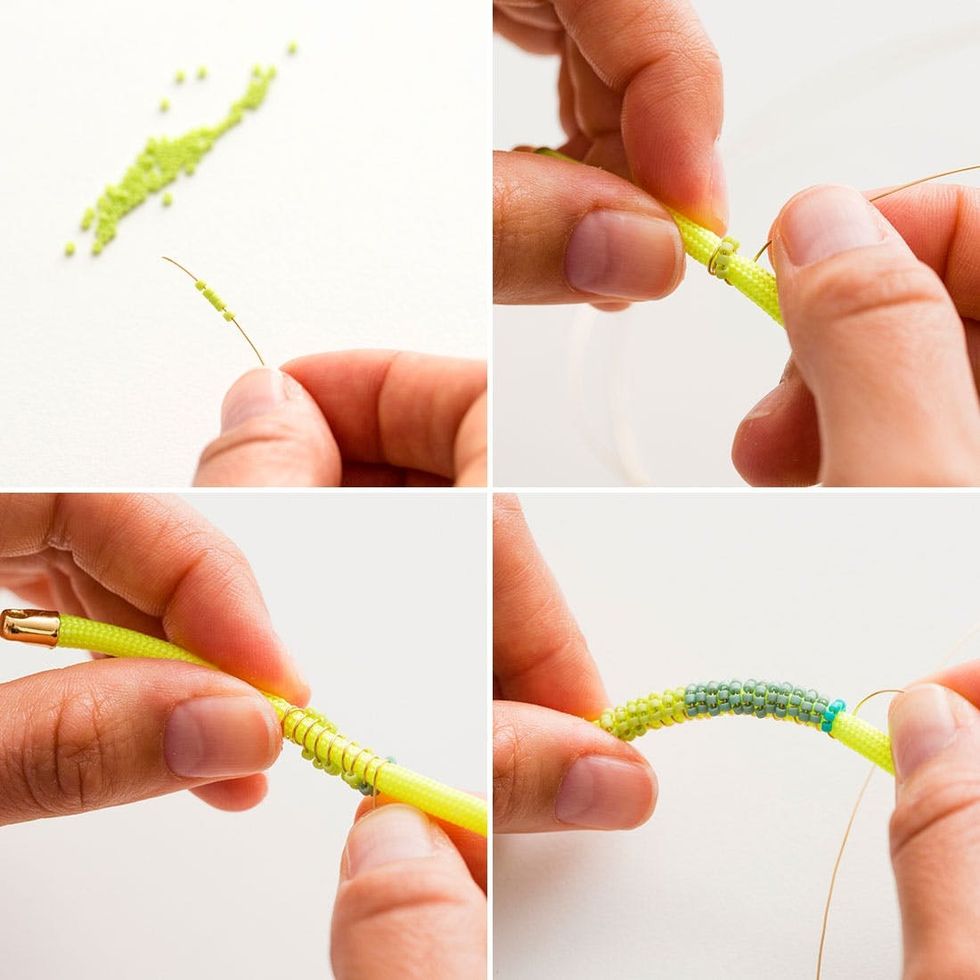
Now it’s time to add your beads. First place five beads on the wire and then watch them roller coaster their way down the wire to the bracelet. It’s like one of those toys in the waiting room at your childhood dentist’s office. Remember those? When the beads reach the bracelet, keep them next to each other and sit them on the top part of the bracelet. Then wrap the wire underneath. Now add four beads and do the same wrapping technique. Keep adding beads and feel free to change colors along the way!
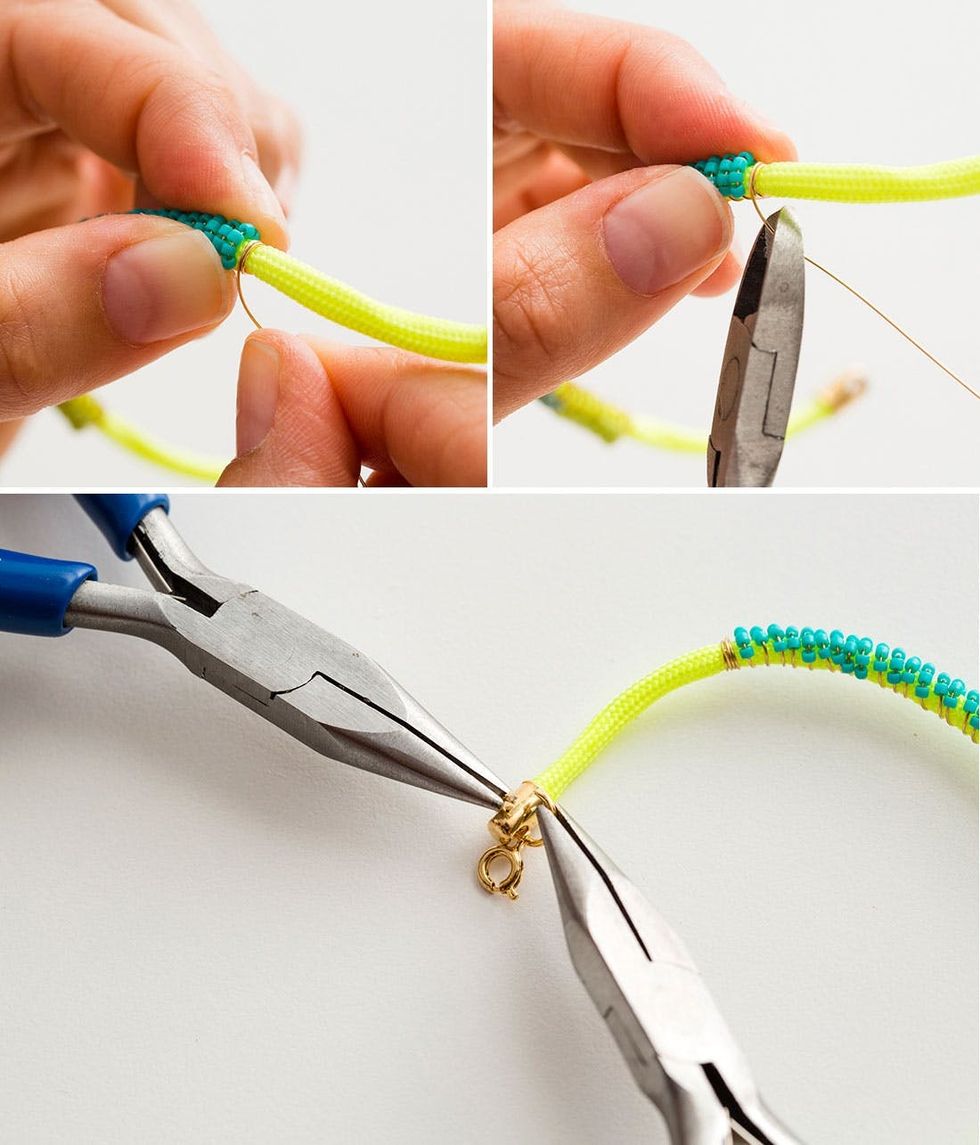
To finish off the bracelet, wrap the wire around the paracord three times just like you did at the beginning. Then snip off the excess wire. Add a jump ring to one cord and then a jump ring and clasp to the other end.
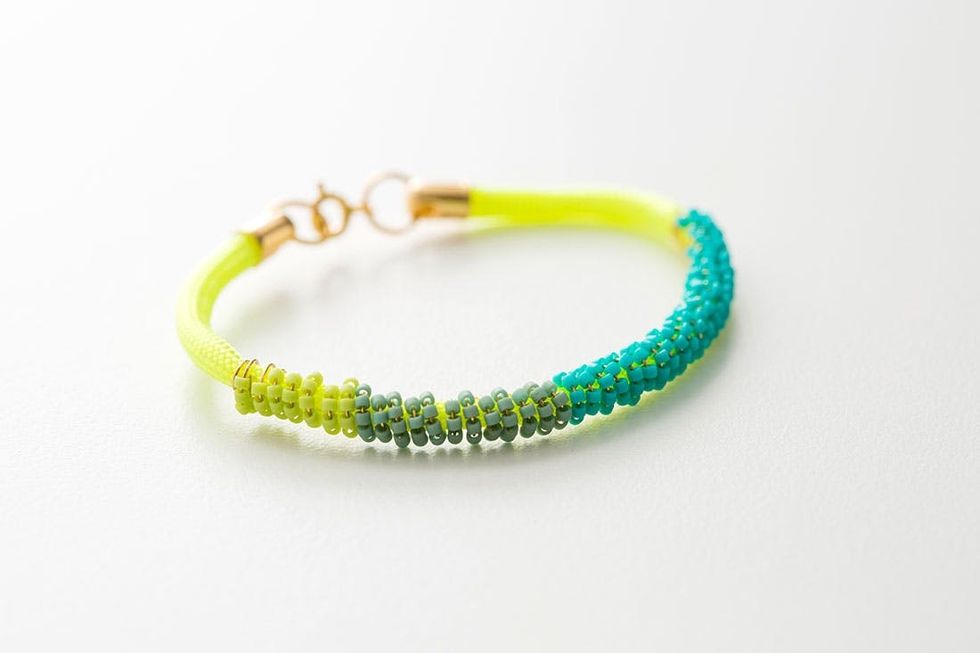
You’ve officially got a lovely new seed bead bracelet! Hoo-ray!
Friendship Bracelet
Instructions:
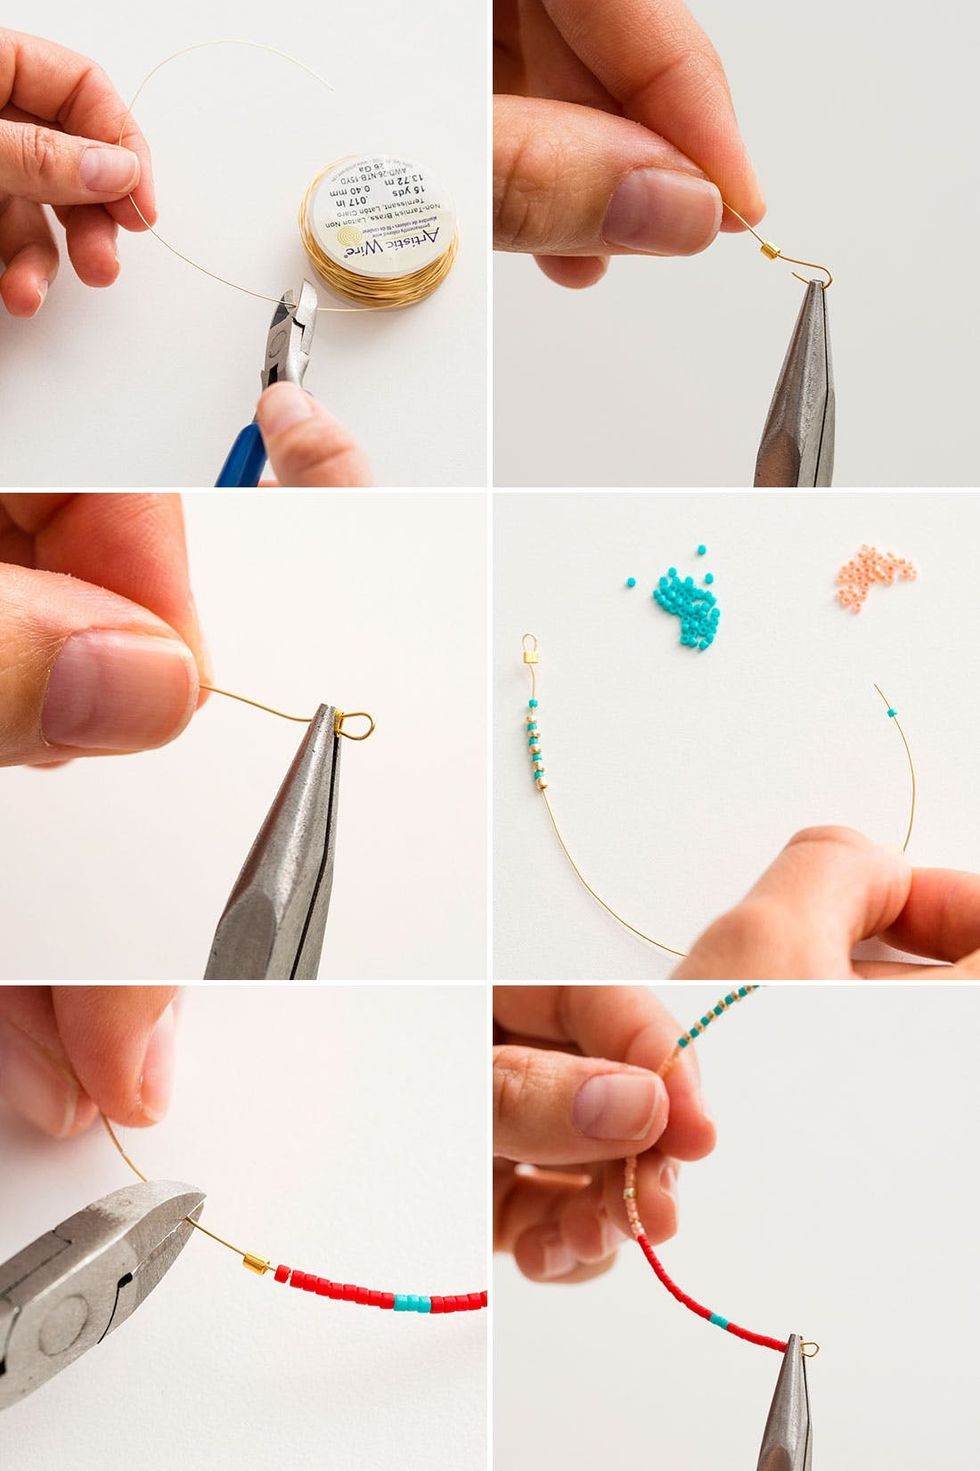
1. Cut a piece of artistic wire approximately three inches long. Add a crimp bead, create a loop at the end of the wire and place it into the crimp bead. Then pinch the crimp bead using your needle nose pliers.
2. Add seed beads creating a design that you love.
3. When you reach the end of the wire, leave about ¼ inch for a crimp bead. Add your crimp bead using the same method from Step 1.
4. Slip your embroidery floss through one of the loops at the end of the bracelet. Folded over, each side of the embroidery floss should be about three inches. Do the same thing to the other side.
5. Thread your needle with one end of your embroidery floss and add one crimp bead, your gold bead and then a second crimp bead. String these onto the embroidery floss and remove the needle.
6. Place the needle onto the second side of the embroidery floss and then feed it through the same findings — the crimp bead, then the gold bead and the other crimp bead.
7. On the other side, you’ll thread your needle, add one crimp bead and then feed the needle through the gold bead going in the opposite direction of the embroidery floss that is already in the bead. Then add your second crimp bead. Do the same thing with the other end of the embroidery floss.
8. Clamp all of your crimp beads shut at the length you desire and then cut off the excess embroidery floss.
Cut a small piece of artistic wire (no roller coasters for this one!) about three inches long or you can measure the top part of your wrist. Add a crimp bead to the wire, then make a small loop at the end of the wire and place the end into the crimp bead. Clamp that baby shut using your needle nose pliers. Now it’s time for the beads! Create a fun pattern or mix of colors with your seed beads. When there is about a 1/4 inch of wire at the end, add another crimp bead and make a loop just like you did on the first side. Crimp it shut.
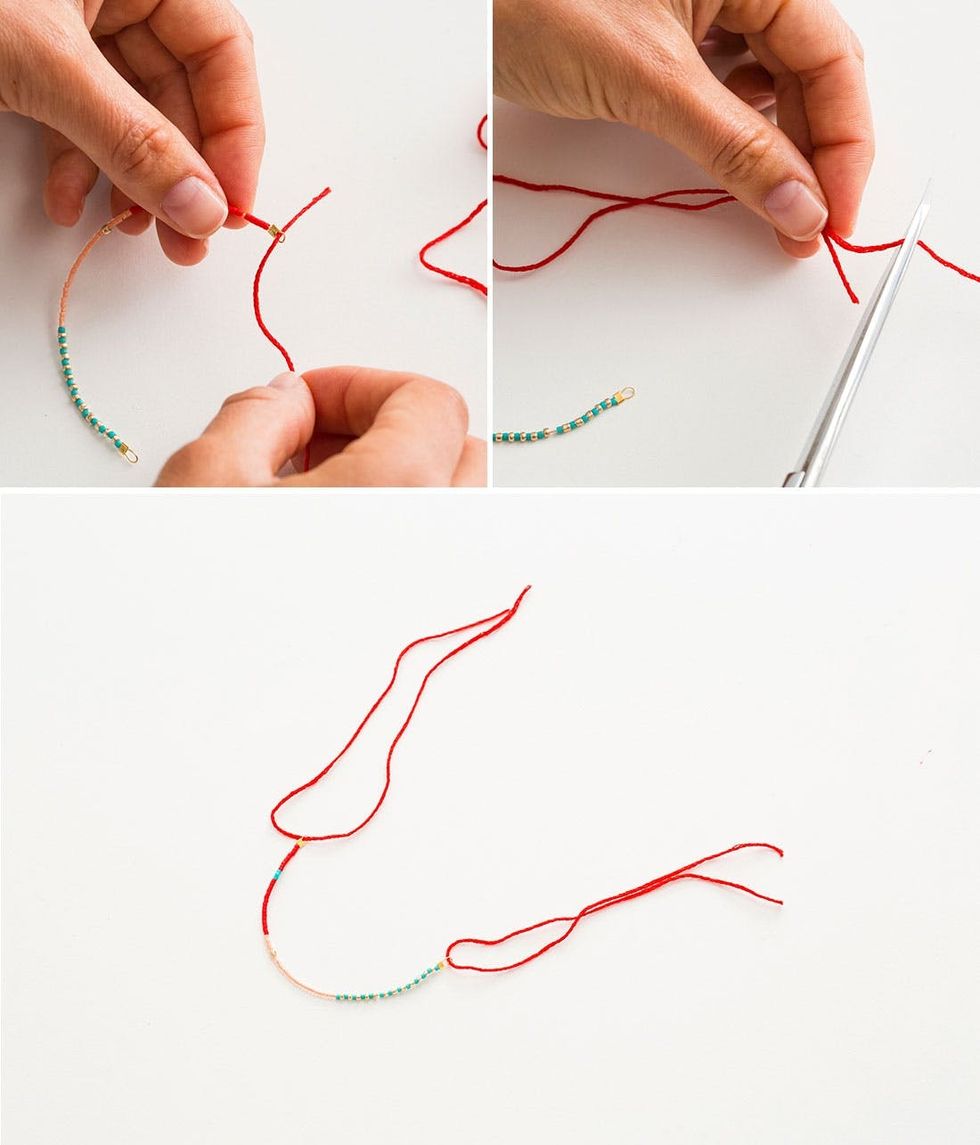
Okay! Now it’s time to add the embroidery floss. Slip your embroidery floss through one of the loops at the end of the bracelet and fold it over. Each side will be about three inches. Follow the same steps on the other side of the bracelet.
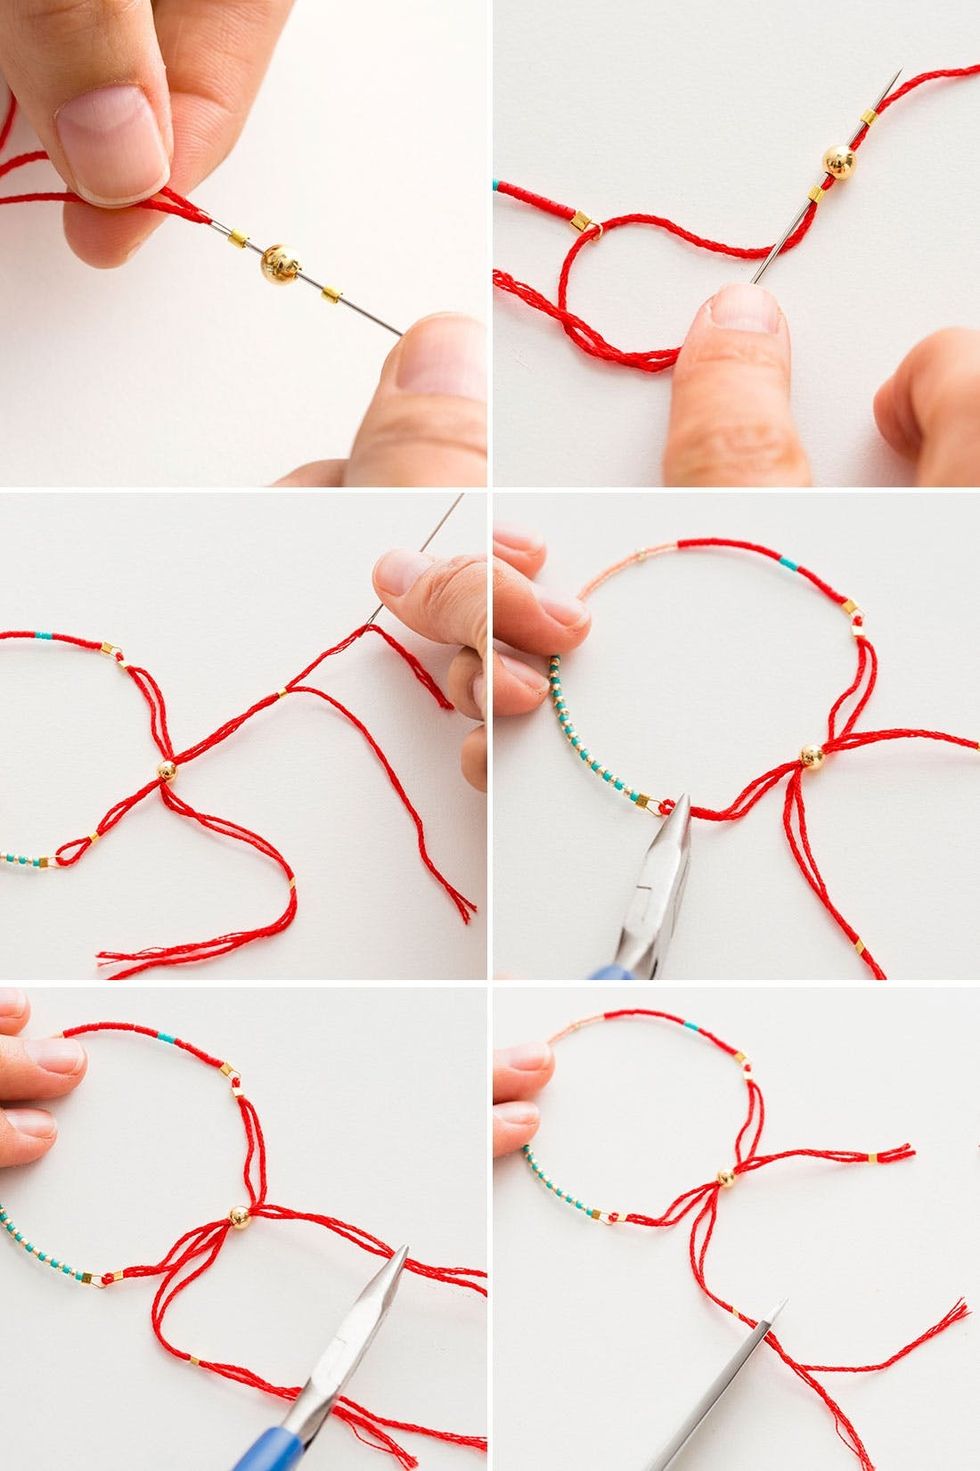
Time to make this little guy functional. Thread your needle. Then add a crimp bead, your gold bead and another crimp bead to one end of the embroidery floss. Put the needle on the other end of the folded piece of embroidery floss and slip it through the same little group of findings — the crimp bead, the gold bead and the other crimp bead.
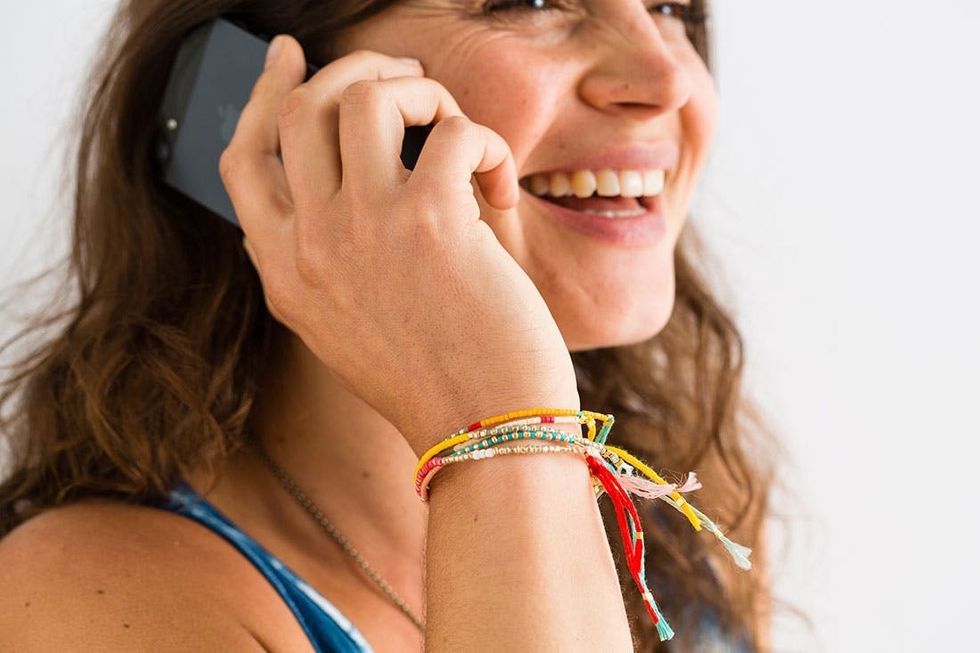
On the other end, thread your needle and put one crimp bead on your thread. Place the needle through the gold bead going in the opposite direction of the embroidery floss that is already through the bead. Then add a crimp bead to the end. Follow the same steps with the other side of the folded embroidery floss. Smoosh all of the crimp beads leaving about two inches between the two, and then trim the ends of the embroidery floss.
These are great for everyday wear but would be especially good for summer concert season! Make a bunch and stack them or wear one with some other bangles. Either way, make sure you give some away to your gal pals. They’re friendship bracelets after all!

What other jewelry have you made with seed beads? Tell us in the comments!


