Bring it on, 2016!
DIY This Motivational T-Shirt to Keep Your Goals in Check

As the optimistic glow of New Year’s resolutions fades and the reality of another winter sets in, we hit that critical point where you can either drop a few promises and return to our old ways, or say, “Dear Life: BRING IT” and keep kicking! We’re here to tell you to keep that fire alive, and happen to have the perfect DIY tees and totes to serve as a little reminder to motivate you to keep moving onward and upward throughout the year.
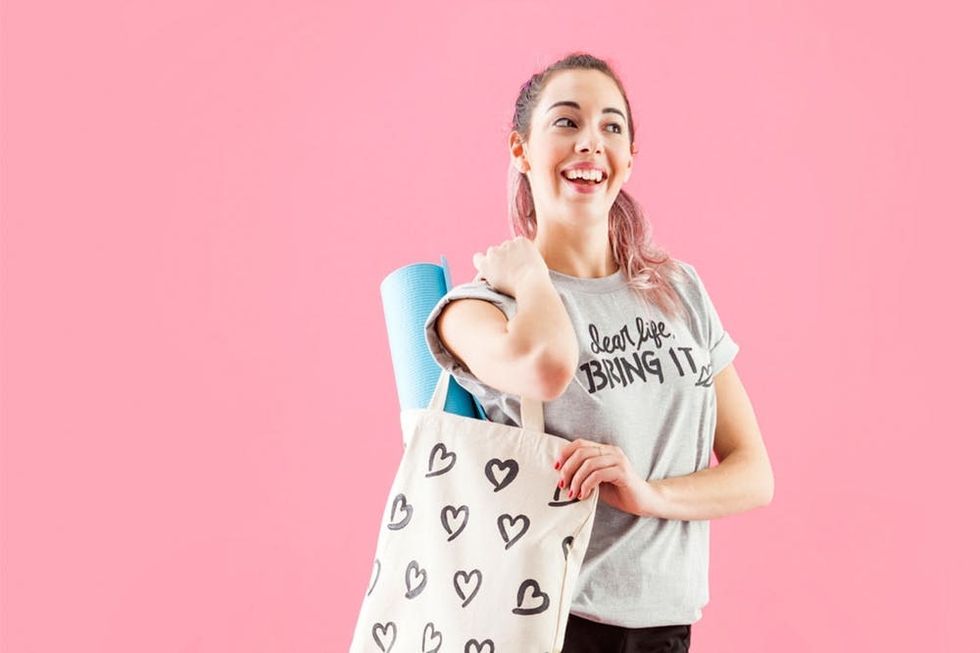
To make this little DIY venture even easier, we teamed up with Heidi Bartlett of Idieh Design to bring you this Stenciled Tee + Tote Kit, which includes this awesome reusable stencil designed by Heidi herself!
Materials (included in our kit!):
– gray cotton tee in small, medium or large
– canvas tote bag
– black fabric paint
– reusable stencil
– foam brush
Additional Recommended Supplies (not included in kit):
– masking or painter’s tape
– sheet of cardboard
– thin paintbrush for small touchups as needed
Instructions:
1. First, insert a piece of cardboard into your tee to prevent paint from seeping through all the way to the back side.
2. Position your stencil wherever you like on your tee. You may want to tape it down with masking or painter’s tape to secure in place.
3. If you’re just stenciling the words first, we recommend taping off the shapes and then carefully sponging paint over the stencil.
4. Let your paint dry and then carefully remove your stencil. You may want to touch up the edges using a thinner brush.
5. Rinse off the stencil with water to remove any wet paint and then position it back onto the tee to add hearts or lips shapes.
6. Once it’s dry to the touch, remove your stencil. Your tee is ready to wear after drying for four hours and machine washable after 72 hours.
7. Use this same stencil to add designs to the second half of this kit — your canvas tote bag!
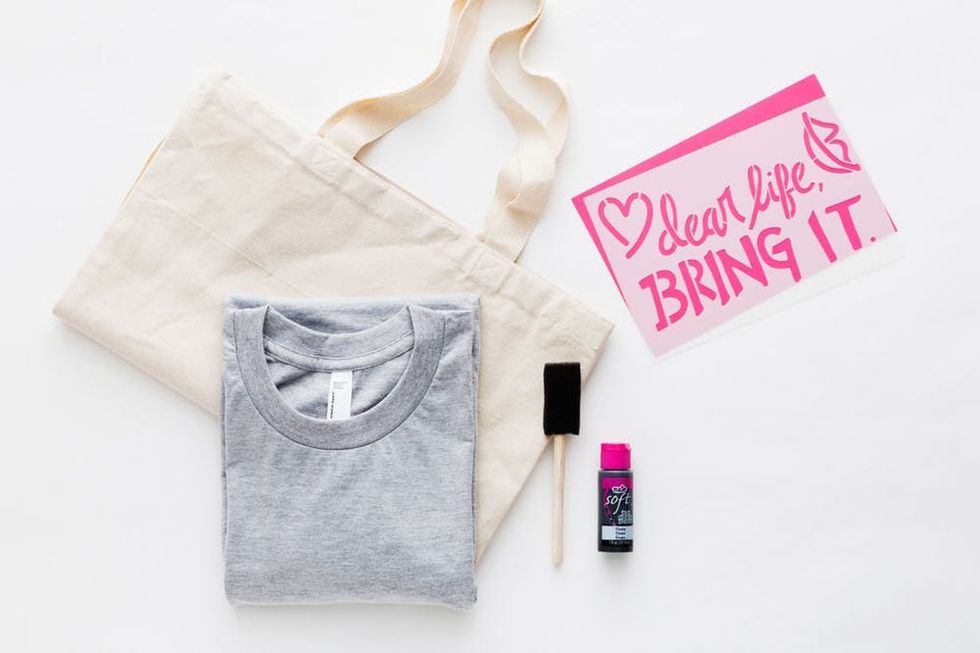
Grab a kit for yourself HERE and let’s get stenciling!
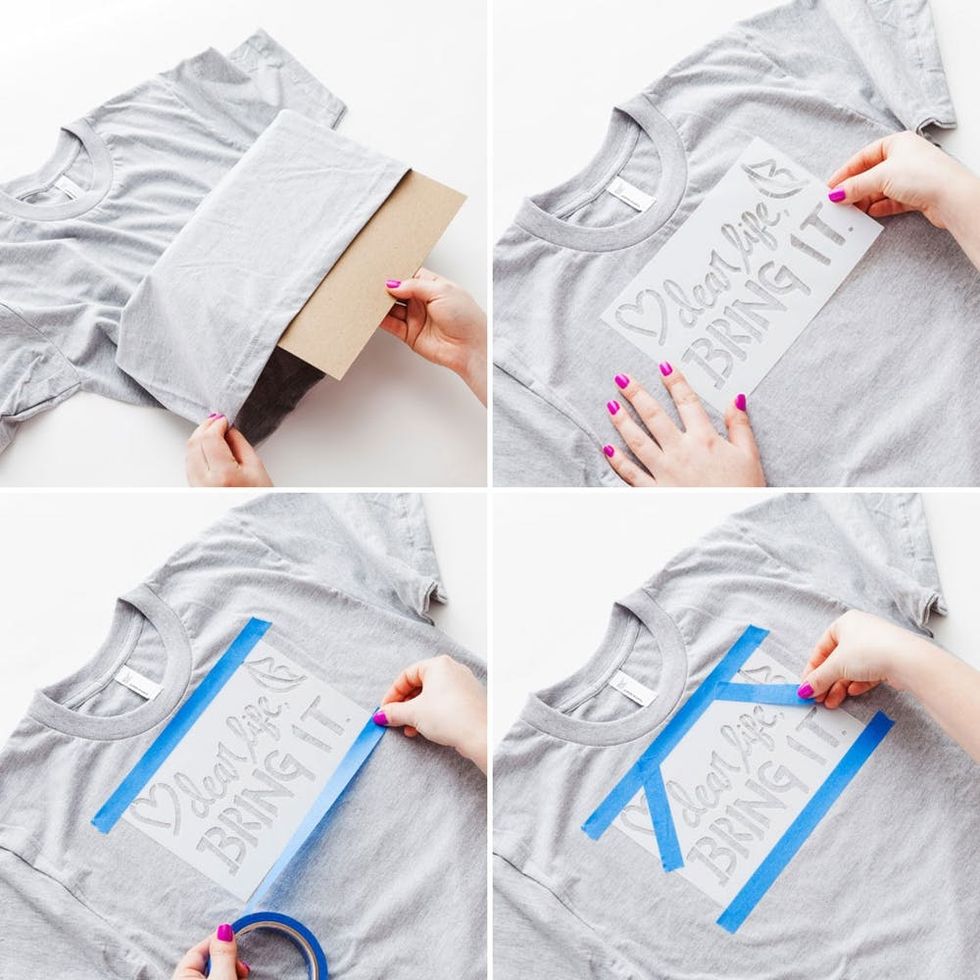
First, insert a piece of cardboard into your tee to prevent paint from seeping through all the way to the back side. Then position your stencil on your tee. You may want to tape it down with masking or painter’s tape to secure in place. And if you’re just stenciling the words first, tape off those shapes just to make sure you don’t accidentally paint them in.

Now carefully sponge paint over the stencil, holding your foam brush straight up and down to apply paint over the top of the stencil.

Let your paint dry and then carefully remove your stencil.
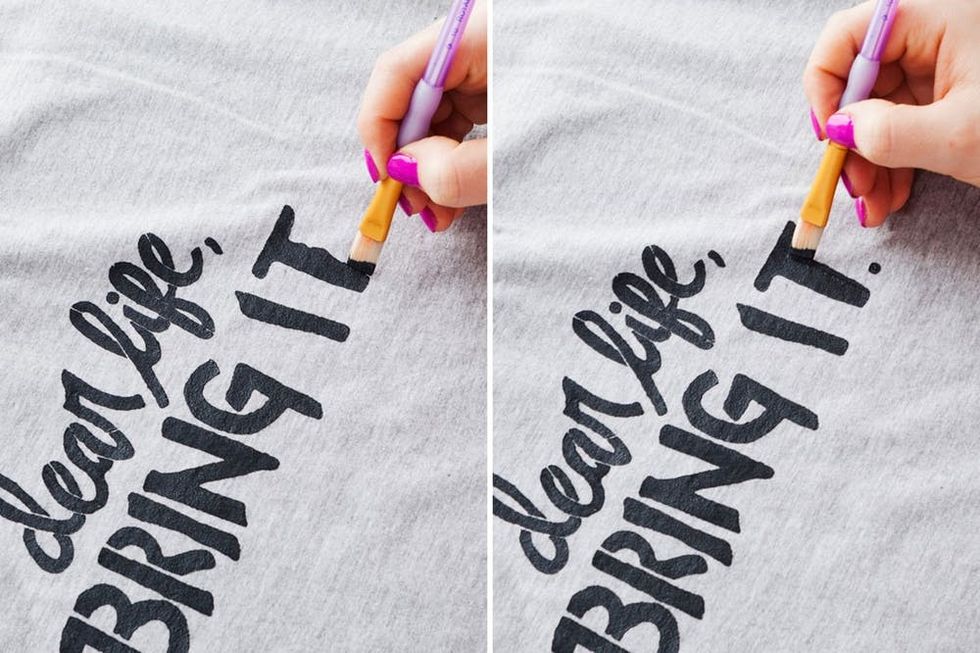
If you prefer a super clean edge, touch up your letters using a thinner brush, or leave it rough for a more devil-may-care look ;)
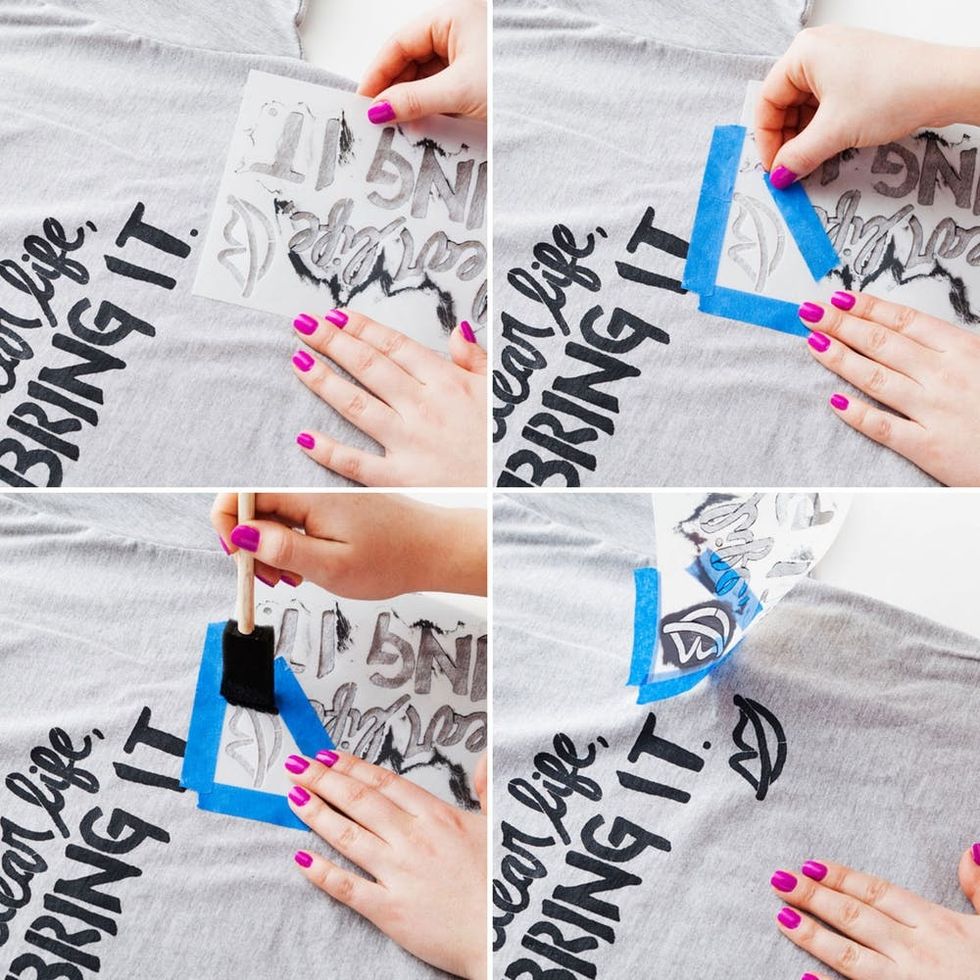
Rinse off the stencil with water to remove any wet paint, then position it back onto the tee to add hearts or lips shapes. Once dry to the touch, remove your stencil. Your tee is ready to wear after drying for four hours and machine washable after 72 hours!
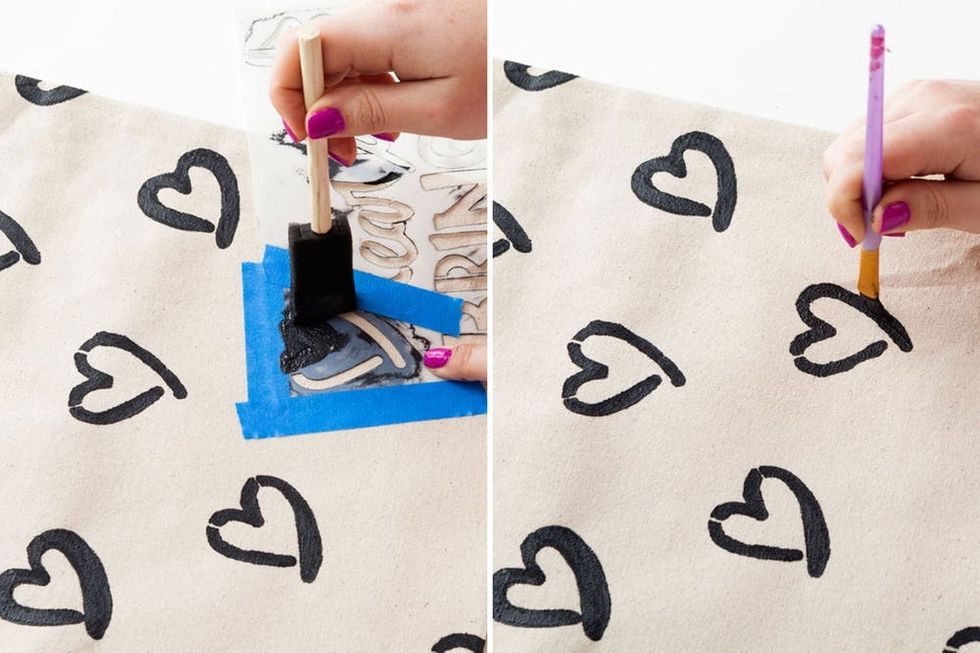
Now, you can use this same stencil to add designs to the second half of this kit — your canvas tote bag!

Here we opted for a repeating pattern, stenciling multiple hearts all around the bag and touching up any rough edges with a small paintbrush.
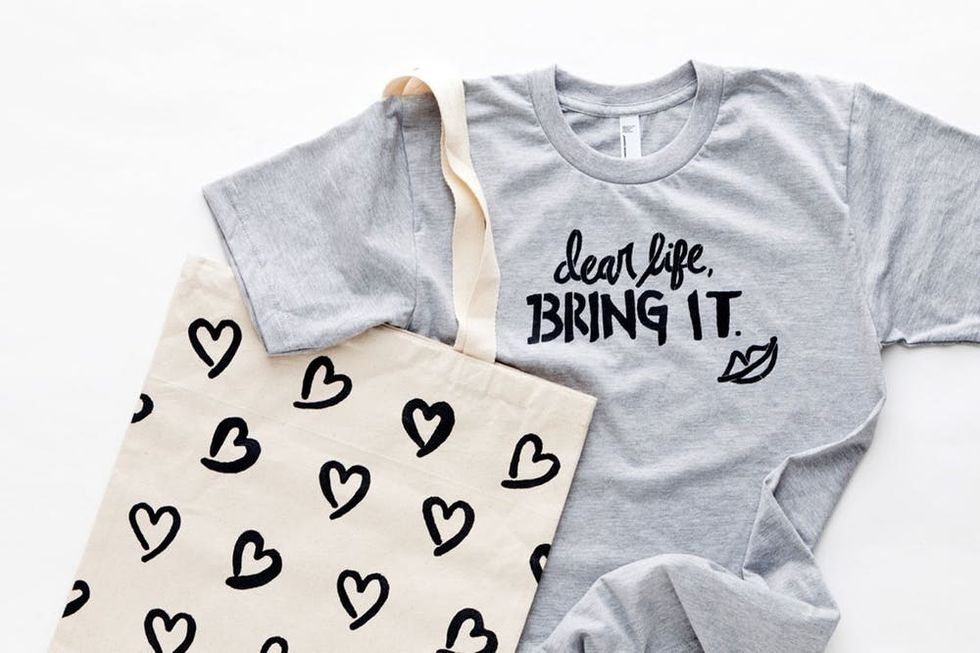
Let your tote dry for four hours as well to completely cure, and your new stenciled ensemble is ready to wear! Your tote will be hand-washable after 72 hours.

Roll up your sleeves, stack on some cool accessories and wear your tee and tote out into the world!

Fashion blogger meets DIY maven? This look bridges both worlds.

This look obviously exudes confidence ;)
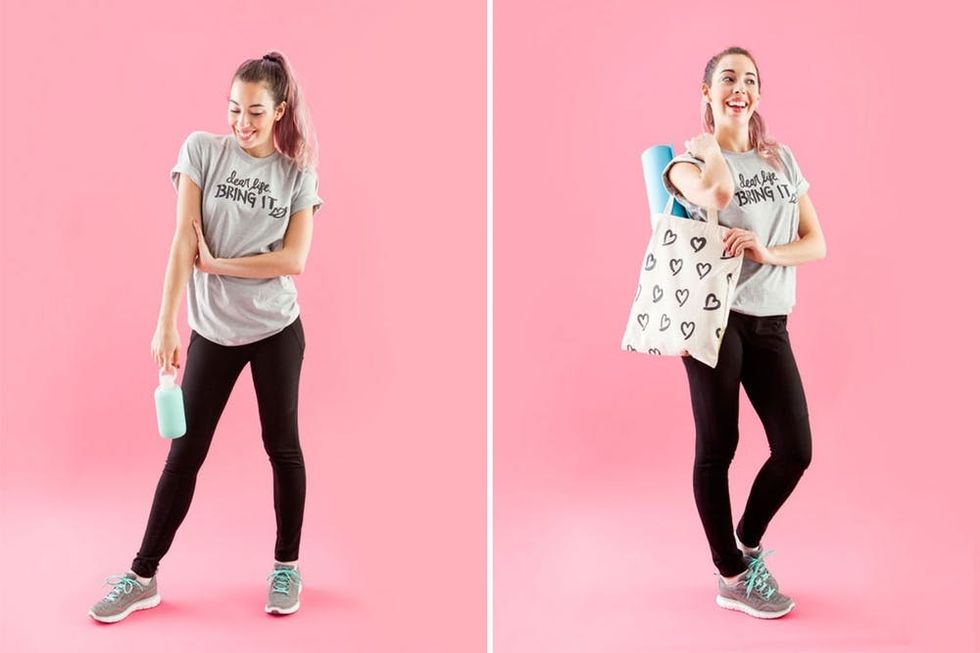
These pieces also transition beautifully to workout gear. Pair with your fave yoga pants and fill up that tote with all your fitness essentials and you’re good to go!

What other items will you stencil? Show us your project by tagging us on Instagram + using hashtag #iamcreative!
This post is a collaboration with Idieh Design.
Model: Kelly Bryden
DIY Production and Styling: Lee Schellenberger
Photography: Brittany Griffin


