Learn to Make Your Own Tea

As a new year begins, many of us make resolutions. Whether your motto for the year is to learn to play the piano or lose a few pounds, the common thread is often making yourself a healthier person. If your goal this year is to make more, then you’re in the right place. This month we are dedicating each day to learning a new skill with our #31DaysofDIY tradition. From weaving to wood burning to gold leafing, you’re sure to find a skill you want to improve. For today’s DIY we’re showing you how to make your own tea. A tea-torial, if you will. Not only will this project get you into the making spirit, but it will also provide you with some beneficial drinks to help you achieve your health goals and tea-tillate your taste buds.

No idea what #31DaysofDIY is? It’s a brand new tradition here at Brit + Co that’s all about kicking off 2015 right. We’ve challenged ourselves to make or learn something new every single day for the month of January, and we’re inviting all of you along for the ride. From DIY basics like Sewing 101 to learning to design and laser cut our own stencils, we hope this month of making inspires you to make all year long. Now, let’s get TEA it :)

Materials:
– colorful card stock

– tea bags

– tea ingredients as per each recipe below!

Tools:
– hot glue gun

– scissors

– shape hole punch

Making tea is easy as pie. Do a quick internet search to find a local shop that sells bulk herbs. If you can’t find one in your town, go to the grocery store and get single-flavor teas. Cut open the bags and you’ll have ingredients to use. You can also buy herbs from the market, pull flowers from your garden, or dry fruit rinds. There are so many options! We’ve created four flavor combinations to share. Feel free to try these or come up with your own concoctions.

Licorice root has a plethora of benefits. From reducing stress to helping with a sore throat, this bark is well worth a taste. And the best part — it’s sweet so it will quench your sugar cravings if you tend to add a spoonful to your tea. For those of you who don’t like licorice, fear not. The flavor of this root is far from the intense and unique taste of black licorice.

Licorice Root + Peppermint Tea

Add about a tablespoon of licorice root to your empty tea bag. Fill the rest of the bag with peppermint and then pull the string to seal the bag.

Green tea is full of antioxidants and rich with other health benefits including reducing the risk of cancer and keeping cholesterol levels at bay. Add that to some lemon, peppermint and ginger and you’ve got yourself a healthful tea with a kick.

Lemon Verbena + Peppermint + Ginger + Green Tea

Fill the bottom quarter of your tea bag with green tea, the second quarter with peppermint, the third with ginger and then add some crushed lemon verbena leaves to the top.

Rose Buds + Lavender + Licorice Root + White Tea

This one is for all you floral lovers. Though some might smell this tea and want to hit the spa, those who enjoy a botanical tea with a hint of sweetness will be sipping on this and daydreaming about lounging in a rose garden.

Add a pinch of white tea to your tea bag. Then place 2-3 pieces of licorice root for that delicious hint of sweetness. Add 3-5 rose buds depending on how small they are and then fill the rest of the bag with lavender.

Parsley + Lemon Verbena

Parsley tea?! Yep. Don’t run away just yet. We know it sounds strange, but parsley tea is actually very good for you. Among other benefits, parsley is known to help with digestion and cardiovascular ailments. Let’s talk about flavor. Know that when you take a sip of this tea, you might think you’re drinking broth. If you keep that in mind, you might just find that you dig this leafy green drink.

Fill the tea bag with parsley leaves and top it off with approximately one tablespoon of lemon verbena leaves.

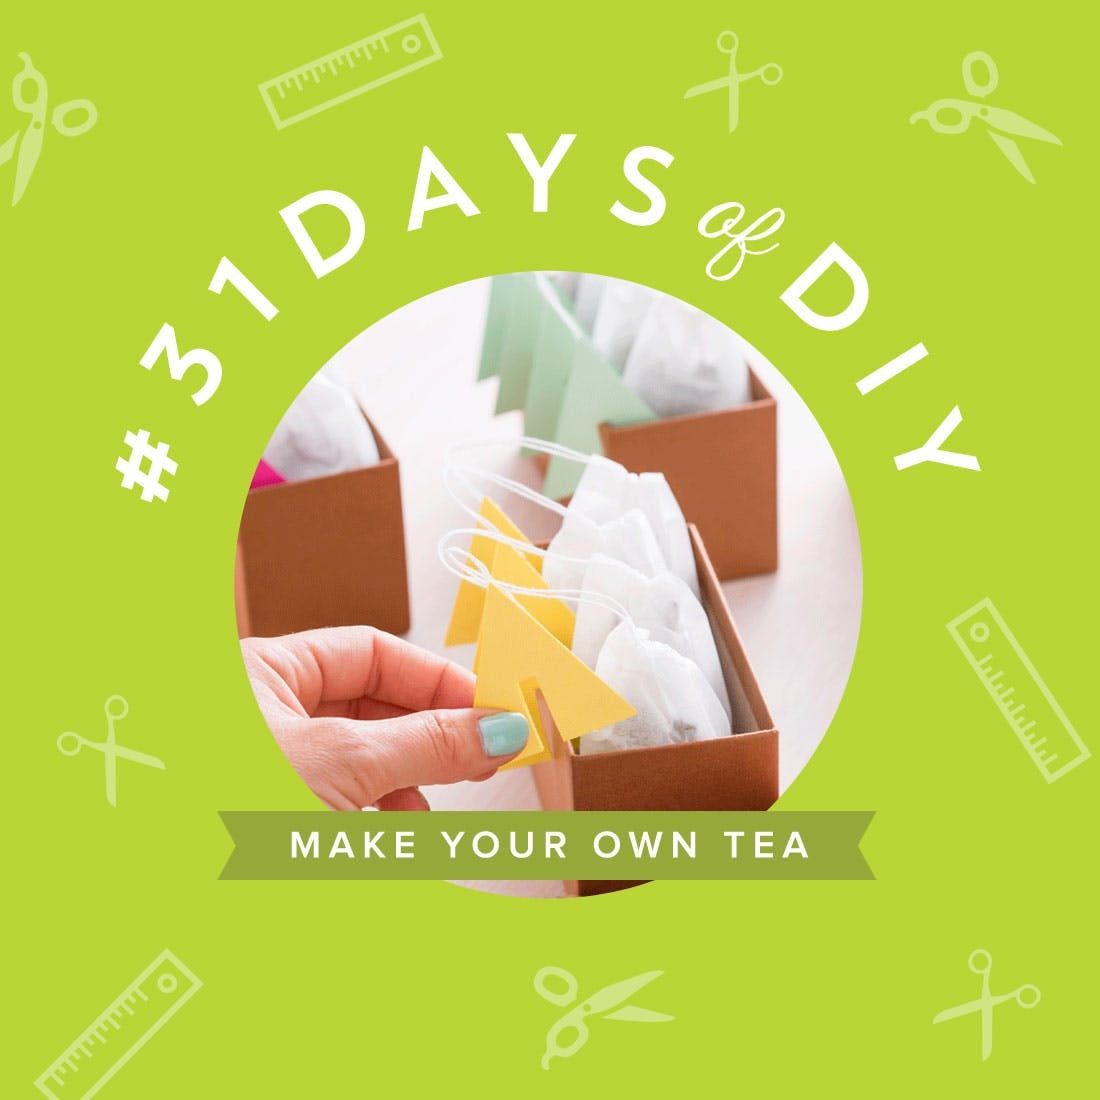
Of course we had to make our own tags for these little tea bags.

Using your shape hole punch, cut out a bunch of paper. You’ll need two shapes for each bag of tea. Place two of them together, and then cut a small slit in the center. This part will sit on the edge of your mug.

Add a drop of hot glue to the top and adhere the string from your tea bag. Cover the rest of the tag with hot glue and press the other side down firmly.

We think these would be a tea-rrific gift.

Grab your favorite book and snuggle up on the couch with a delicious cup of tea.
Nothing says the holidays like gingerbread house decorations. But, sometimes we'd rather skip the making-the-house part. Lucky for us, the folks at Dylan's Candy Bar have a pre-assembled gingerbread house just waiting to be decorated like the dickens. Each gingerbread house comes with a bunch of festive candies, but we hit up Dylan's Candy Bar in person to stock up on even more gummy candies, candy canes and a whole collection of colorful candy accoutrements.

Armed with more candy than you've even seen in person before, we created five gorgeous gingerbread houses: Candy Cane, Emerald City, Stripes + Lights, Color Blocked Craziness and Gold Rush.

How to make the best gingerbread house ever...

First thing’s first: get yourself a gingerbread house and mix up a batch of royal icing.

Then, it’s time for CANDY. Seriously.

Talk about a sugar rush.

Now, let’s start tricking out these houses!

Check out these creative gingerbread house ideas!

CANDY CANE Gingerbread House

Grab a Dylan’s Candy Bar Signature Holiday Paint Can ($30; Alt: Down Under Delight Paint Can, $17), as well as gumdrops, peppermints and candy canes.

You’re going to need a LOT of royal icing to stick on all the little candies! Make sure you’ve got two piping bags per house, just in case. We created a scalloped roof complete with red polka dots. Candy canes flank the door, welcoming you in, and we’re particularly in love with the sour gummy hedges in the front.

Add your finishing touches.

Voila!

So obsessed with this roof.

EMERALD CITY GingerBread House

For this house, you'll need a Mini Bin Filled with Mini Gumballs ($16; Alt: Sour Gumballs Bulk Bag, $6) and then you can pull out all of the green goodies.

The roof of your gingerbread house is definitely the best canvas for creativity. We created polka dot and squiggly stripes on this green roof. And sour gummy shutters? Yes please.

How fun are those fish at the top of the door? Sort of remind us of Eureeka’s castle.

STRIPES + LIGHTS GingerBread House

Dylan’s Candy Bar Wizard of Oz “Over the Rainbow” Paint Can ($16; Alt: Dylan's Candy Bar Rainbow Sour Belts Paint Can, $17) to create our striped roof.

Cut up gummy stripes to be the same length as your roof. Use royal icing to attach. Create icing windows and adorn with rainbow shutters.

Then use royal icing to create a string for your “lights” to hang on.

We couldn’t resist creating a few Christmasy hedges in the front of the house, complete with bright pink lights on top.

It almost looks too good to eat.

These gingerbread house designs are creative and so simple!

COLOR BLOCKED Gingerbread House

Just pick out some Dylan’s Candy Bar Tackle Box ($24; Alt: Dylan's Candy Bar Classic Christmas Tackle Box, $28), Dylan’s Candy Bar Everything Under the Sun Paint Can($17) and Dylan’s Candy Bar Whirly Pops ($3.75 each) to make this house.

We started with a criss-cross roof and embellished with floral candies.

Then, it’s time to add color everywhere you possibly can.

One fish, two fish, blue fish, blue fish!

GOLD RUSH Gingerbread House

Finally, we’re bringing the gold rush back with this minimalist design. The gingerbread dudes from Dylan’s Signature Holiday Paint Can ($17; Alt: Dylan's Candy Bar Candy Land Mix Bulk Bag, $9) are what really take this sleek look to the next level.

First cover the roof with icing, then add in gold stars. Use white chocolate-covered pretzels on the front of the house, and make sure to make dripping icicles out of your icing.

To finish it off, add snow piles around the house to give it a truly wintery vibe.

Done and done. And complete with a gummy gingerbread dude welcoming you in. Go ahead and pop a kiss off the top — we won’t tell.

And there you have it. Five ways to decorate the best gingerbread house ever.

We hope you have found some new gingerbread house decorations to get creative and inspired by this holiday. Tag us on Instagram when you complete, join our newsletter for more holiday inspiration, or take the Gingerbread House making class on B+C Classes!

Brit + Co may at times use affiliate links to promote products sold by others, but always offers genuine editorial recommendations.

This post has been updated.

In the midst of award show season, everything points to Oscar Sunday. The show, which celebrates achievement in film, is my most-important night of the year and my friends and I go all out. Themed snacks, ballots, and very loud celebrations when our favorite stars and movies win. But before the big day comes, we need to watch all the movies up for awards!

Here's where you can stream all the biggest movies of the year before the Oscars airs on March 2, 2025.

Dune: Part Two — Stream On Max

Niko Tavernise/Warner Bros. Pictures

This sequel opens after Paul has joined the Fremen, and after he escaped the murderous Harkonnen family. Now he's out to avenge his father — and come to terms with his destiny as a savior.

Dune: Part Two is on Max and stars Timothée Chalamet, Zendaya, Rebecca Ferguson, Dave Bautista, Stellan Skarsgård, Josh Brolin, Javier Bardem, Charlotte Rampling, Florence Pugh, Austin Butler, Lea Seydoux, and Christopher Walken.

Twisters — Stream on Peacock

Universal Pictures

Twisters follows former storm chaser Kate. When she's roped back into chasing by her friend Javi, Kate meets social media star Tyler, and comes face-to-face with the biggest storms ever.

Twisters is on Peacock and stars Daisy Edgar-Jones, Glen Powell, Brandon Perea, Anthony Ramos, Maura Tierney, Sasha Lane, Harry Hadden-Paton, David Corenswet, Daryl McCormack, Tunde Adebimpe, Katy O’Brian, Nik Dodani, Kiernan Shipka, and Paul Scheer.

Emilia Pérez — Stream On Netflix

Netflix

In this musical thriller, Cartel leader Emilia enlists the help of Rita, a lawyer, to help her retire from a life of crime and live out her truth.

Emilia Pérez is on Netflix and stars Karla Sofía Gascón, Zoe Saldaña, Selena Gomez, Adriana Paz, and Edgar Ramírez.

Wicked — Rent On Amazon Prime

Universal Pictures

But this year's biggest musical is definitely Wicked. This alternative origin story for the Wicked Witch of the West and Glinda the Good follows the college roommates as they come of age in Oz, and learn the Wizard isn't all as he seems. I can't for Part 2 this year!

Wicked stars Cynthia Erivo, Ariana Grande, Jonathan Bailey, Ethan Slater, Jeff Goldblum, Michelle Yeoh, and Marissa Bode.

The Substance — Stream On MUBI

MUBI

Elisabeth Sparkle gets fired from her own fitness TV show after she turns 50. But she seems to find a solution when she acquires The Substance...and creates a younger version of herself. The absolutely crazy thriller was one of the buzziest movies of the year — and won Demi Moore her first Golden Globe!

The Substance is on MUBI and stars Demi Moore, Margaret Qualley, and Dennis Quaid.

Challengers — Stream On Prime Video

Amazon MGM Studios

In Challengers, former tennis star Tashi coaches her husband Art, but her job gets way more complicated when he ends up in a match against his former best friend (and her ex) Patrick.

Challengers is on Prime Video and MGM+ and stars Zendaya, Mike Faist, and Josh O'Connor.

Inside Out 2 — Stream On Disney+

Walt Disney Studios

Riley's becoming a teenager in Inside Out 2, which means Joy, Sadness, Anger, Envy, Fear, and Disgust have to make way for new emotions like Anxiety and Envy. What could go wrong?

Inside Out 2 is on Disney+ and stars Liza Lapira, Tony Hale, Ayo Edebiri, Maya Hawke, Adèle Exarchopoulos, Paul Walter Hauser, Amy Poehler, Lewis Black, Phyllis Smith, Kensington Tallman, Lilimar, Diane Lane, and Kyle MacLachlan.

Deadpool & Wolverine — Stream On Disney+

Marvel Studios

Deadpool teams up with the one and only Wolverine (well, after meeting dozens throughout the multiverse) after learning the TVA plans on destroying his timeline and his loved ones.

Deadpool & Wolverine is on Disney+ and stars Ryan Reynolds, Morena Baccarin, Stefan Kapičić, Brianna Hildebrand, Shioli Kutsuna, Owen Wilson, Matthew Macfadyen, Emma Corrin, Jennifer Garner, Chris Evans, Wesley Snipes, Channing Tatum, Blake Lively, and Dafne Keen.

Beetlejuice Beetlejuice  — Stream On Max

Warner Bros.

Lydia Deetz and her daughter Astrid return to Winter River after a family tragedy, and wind up enlisting Beetlejuice's help (if you can even call it that) after Astrid opens a portal to the afterlife.

Beetlejuice Beetlejuice is on Max and stars Jenna Ortega, Winona Ryder, Michael Keaton, Willem Dafoe, and Justin Theroux.

Gladiator 2 — Rent On Amazon Prime

Aidan Monaghan/Paramount Pictures

After the death of his wife, Lucius becomes a gladiator with a mission: take revenge on the general responsible for her death.

Gladiator 2 is on Amazon Prime and stars Paul Mescal, Connie Nielsen, Fred Hechinger, Joseph Quinn, Pedro Pascal, and Denzel Washington.

Anora — Rent On Amazon Prime

Neon

When sex worker Anora and politician's son Vanya tie the knot so Vanya can get a green card and escape his father, their lives totally flip upside down — and not just because Vanya's family sets out to end the marriage.

Anora is on Amazon Prime and stars Mikey Madison, Mark Eydelshteyn, Yura Borisov, Karren Karagulian, Vache Tovmasyan, and Aleksei Serebryakov.

Conclave — Stream On Peacock

Focus Features

This movie takes place during a conclave to choose the next pope, and is totally unprepared for the scandals he uncovers along the way.

Conclave is on Peacock and stars Ralph Fiennes, Stanley Tucci, John Lithgow, Sergio Castellitto, and Isabella Rossellini.

A Real Pain — Rent On Amazon Prime

Searchlight Pictures

Two Jewish American cousins who reconnect and embark on a Holocaust tour in Poland after the death of their grandmother. This was one of my favorite movies of the year and I couldn't recommend it more!

A Real Pain is on Amazon Prime and stars Jesse Eisenberg, Kieran Culkin, Will Sharpe, Jennifer Grey, Kurt Egyiawan, Liza Sadovy, and Daniel Oreskes.

The Wild Robot — Rent On Amazon Prime

Universal Pictures

Robot Roz crashes on a deserted island and quickly adopts an orphaned gosling, teaching him to fly and prepping him for the annual migration. Prepare to cry, like, a lot!!

The Wild Robot is on Amazon Prime and stars Lupita Nyong'o, Pedro Pascal, Kit Connor, Catherine O'Hara, Bill Nighy, Stephanie Hsu, and Mark Hamill.

Alien: Romulus — Stream On Hulu

20th Century Studios

A group of young space colonizers are tasked with exploring an abandoned space station and must confront the most terrifying life form in the universe.

Alien: Romulus is on Hulu and stars Cailee Spaeny, David Jonsson, Archie Renaux, Isabela Merced, Spike Fearn, and Aileen Wu.

Stay tuned for the official 2025 Oscar nominations and check out 25 New TV Shows You NEED To Watch In 2025!

This post originally appeared in our #31DaysofDIY series, and we just can't get enough of this cozy scarf! We hope you love it as much as we do.

Truth time: I love crafting, but when it comes to knitting I ALWAYS get frustrated. I was lucky to grow up with a great teacher, my grandma, but year after year we would need to start from the beginning because of angry battles in which the yarn won. My main trouble when learning how to knit a scarf was figuring out how to hold the yarn in my fingers to give it the proper tension, looking at the stitches on my needle and realizing which piece needs to go over and which goes under, and then before I knew it I would end up frustrated with a pile of knots.

Arm knitting is a great beginning step to learning how to knit. Since you are working with your arms, which are now also known as extremely large needles, it’s easy to see the stitches and understand what to do with them. It also goes a lot faster than regular knitting — this circle scarf took us 30 minutes start to finish. Don’t get me wrong, it did take time to learn arm knitting too. My arms got tied up in knots and I had to cut myself out, but with practice I got it! For this DIY scarf project, we broke the steps down to be very basic and to help you understand which way the strands need to move. Scroll back through when you’re making your scarf to really get the hang of creating stitches. Soon you’ll be an arm knitting pro and then soon after that you’ll be a knitting pro. We promise. (Not sure if you believe us yet? Try out ourIntro to Knitting course!)

What You'll Need

  • 2 skeins of super chunky yarn
  • Scissors
Arm Knitting Pro Tip: The yarn that is attached to the skein is called the working yarn, and the piece that you pulled out is called the tail.

Instructions

1. Hold both ends of the yarn in your hand and measure out seven “elbow” lengths of yarn. At the seventh “elbow” mark, make a slip knot and place it around your right arm just below your elbow.

2. Create a loop with the tail and hold the top of the loop with your right hand.

3. Put your left arm through the loop and grab the working yarn.

4. Put the new loop on your right arm. Tighten by pulling the working yarn. Cast on 24 stitches.

5. To start the next row of stitches, you will hold the working yarn in your right hand, pull off your last stitch, and insert your left hand through the new loop.

6. Keep repeating for all 22 stitches until your knitting is on your left arm.

7. To create the next row you will hold the working yarn with your left hand, pull the last loop off of your arm, and insert your right arm through the new loop. You will want to create 8 rows. The knitting should end on your left arm.

8. To bind off your scarf you will need to knit two stitches on your right arm. Then pull the first stitch over the second stitch. Knit one more stitch from the left, and then pull the first stitch on the right over the second stitch on the left. For the last stitch, pull the loop off your arm, snip the end, and pull through so you end up with a second tail.

9. Time to stitch the scarf together into a circle. Meet the two ends together and, using your two tails, weave the sides together as if you were lacing a shoe. Secure by tying a knot where the ends meet.

Arm Knitting isn’t the easiest thing. Believe me, you can get really tangled up in the strings, especially when you’re working with multiple skeins. We suggest sticking to two skeins when you’re starting your arm knitting adventures. Once again, I suggest you scroll back up and go through the images multiple times. The stitches will seem awkward at first, but with practice it will “click” and you’ll be creating rows of stitches in no time at all!

To begin your knitting adventure you are going to want to hold both ends of the skeins in one hand and measure out seven “elbow” lengths of yarn.

At the seventh “elbow” length mark you will want to create a basic slip knot. To do this you create a loop by crossing the two strands over one another. Grab and pull the back strand through the loop. This will give you a loop with a knot! Slide it onto your right arm.

Time to complete your first stitch! The first row of stitches are referred to as “Casting on.” To cast these stitches onto your arm you’re going to make a loop with the tail end of your yarn and hold it in your right hand.

Weave your left hand through the loop and grab the working yarn.

Pull the working yarn through the loop.

Slide the new loop onto your right arm.

To tighten your stitches, pull the tail and working ends of the yarn. You want the stitches to be tight on your arm, but not so tight they can’t move.

You will need to cast on between 22-24 stitches. I’m not going to lie, I watched many tutorials over and over before I was comfortable creating stitches. I scrolled back through the tutorial every time I was casting on a new stitch. When you’re ready, move onto the left arm!

We will now only be using the working yarn (yarn attached to the skeins). We’ll work with the tail again later.

Hold the working yarn with your right hand and slip the last stitch over your hand while pulling the working yarn through. This will create a loop.

The first stitch of the second row! Slip it onto your left arm.

You will want to pull the end of the working yarn to tighten these stitches.

Second row of stitches done! They should all be on your left arm and your right arm should be free.

Now move back to your right arm. Hold the working yarn with your left hand and slip the last stitch over your hand and slip the knew loop onto your right arm. Scroll back through the tutorial to master the stitches of arm knitting!

You will want to create eight rows of stitches. They will end up on your left arm.

Time to “cast off.” It was nice having a warm cozy piece becoming one with my arm but I wasn’t ready for the commitment forever. To start casting off, you will need to create two stitches onto your right arm.

Grab the first stitch on your right arm and pull it over the second stitch and off of your hand.

You will now just have one stitch remaining on your right hand. Next you will need to create a new stitch on your right hand (by pulling the working yarn through the stitch on your left hand). Repeat the process above. Slip the first stitch on your right arm over the second stitch, leaving one stitch behind. You will follow this pattern until you have reached the end of your 24 stitches.

Can you believe it? You’re all done! For your last stitch you’re going to snip the working yarn and pull it all the way through to create a knot. When snipping the yarn, leave a two-foot-long tail.

Can you believe you made that with just your arm?! We can’t! Now I know we’ve said we're hooked on crafts, but arm knitting is in a whole other ballpark. We are OBSESSED!

Using the long tail you cut from the working yarn, you will tie the two ends of the scarf together to make a cowl scarf! Weave them through the rows of stitches as if you are lacing a shoe lace. There is no science to this, just weave them together. Tie the end in a knot with the tail end of the yarn from the beginning steps. Luckily this yarn is very fluffy and forgiving. It is impossible to see mistakes.

So fuzzy and warm. This is definitely a winter staple.

Try making more scarves with different types of yarn. We still used two skeins but this yarn was less fuzzy and created a less dense scarf.

Like we said, this is a winter MUST!

Have you ever tried arm knitting, or are you still trying to figure out how to knit a scarf? Be sure to subscribe to our newsletter for more DIYs!

This post has been updated.

One of the deep questions I asked myself on January 1 was, "How do you want to feel as a stay-at-home mom who's also a part of the WFH crew?" The first word that popped into my mind wasn't a full sentence; it was 'ease.'

I've spent the greater part of my life as a people pleaser who also has a Type A personality when inspired during work hours. There's nothing wrong with being ambitious, but I don't always know when to turn it off which leads to burnout. Does this sound like you?

If so, we're not doing this anymore bestie. This year we're changing the way we approach work so we're not on a first-name basis with stress 10 months out of the year. I've got tips from the following bada** ladies who know how imperative it is to not let work drain us:

  • Kayla Baum, CEO & Founder of Twello (a workplace wellness company!)
  • Corry Frazier and Melissa Pepin, Founders at The Business Reboot

Keep scrolling for 8 expert-approved tips for how to make work less stressful — & trust me, you need these.

Karin Kaufer

1. Actually Use Your Planner In 2025

We're not buying pretty planners just so they can collect dust on our desks or coffee tables anymore. Corry Frazier and Melissa Pepin want you to get serious because they feel "it starts with planning." They don't mean the kind you eventually flake on either.

"Effective planning is key to maintaining balance and reducing burnout. Whether you're mapping out tasks, meetings, or events, dedicated time for preparation ensures focus and reduces stress," they say. In other words, "the more intentional you are in planning, the more productive you'll be," according to them.

Ever since I've been blocking out my tasks by hour in planner, I've been able to get more done without feeling overwhelmed by splitting my time between writing and being in mommy mode. Frazier and Pepin suggest that you "set weekly planning sessions" that consist of "30-60 minutes each weekend to map out your upcoming week."

This eventually "reduces decision fatigue, fosters a sense of control, and helps you start Monday with clarity and purpose," they add. Yes, this is a sign that you'll be breaking up with the dreaded 'Sunday scaries' if you follow their advice. "You'll feel proactive and grounded rather than reacting to the week as it unfolds," they agree.

Zen Chung

2. Embrace A "Fake Commute" When Working From Home

One of Kayla Baum's tips is to switch up your routine if you're a remote worker. Rolling out of the bed at the last minute before logging on for work sounds appealing until you realize you're uninspired by your days. But, what is a "fake commute?"

"It mimics the structure of a traditional commute to establish a boundary between work and personal life. This could mean taking a walk around the block, doing a 10-minute guided meditation, or even just changing clothes at the end of the day," Baum mentions.

Based on her experience, she's found that "it works because it provides a psychological buffer, helping to separate work and home life." She feels it's "crucial for positive mental health and boosting productivity at work (and at home)."

You can also create a separate work space that's not in your bedroom to get work done! That's helped me tremendously so I'm not sleeping and working in the same area.

Anna Nekrashevich

3. Focus On High-Impact Tasks

Similar to planning your work days as best as you can, Frazier and Pepin want you to "prioritize the tasks that align with your goals." To minimize distractions, they want you to ask yourself:

  • What is the most effective use of my time right now?
"For instance, if you're preparing for a big presentation at work, concentrate on immediate needs rather than getting sidetracked by unrelated projects. This approach helps you conserve energy for what truly matters," they suggest.

Greta Hoffman

4. Stop Making Daily Decisions Hard

Tasks like your morning routine or figuring out what you'll eat don't have to take up a chunk of your time anymore. "Use productivity hacks, such as pre-planning meals or laying out weekly outfits," suggest Frazier and Pepin. They feel that "small routines like this eliminate unnecessary choices" to "make mornings smoother."

According to them, it's "especially helpful for families juggling multiple schedules." I couldn't agree more because I've spent so many frazzled mornings trying to make decisions about what myself and my toddler would wear or eat instead of planning them. With the help of my fiancé, we've cut so much time in half by being prepared ahead of time instead of 'winging it' before work.

Yan Krukau

5. Understand What Your Boundaries Are And Set Them

Worried that you'll be considered 'mean' if you tell your manager or coworkers what your boundaries are at work? Depending on your environment, it's 100% understandable. However, you're human and there's no reason you should be over-performing to your detriment. Frazier and Pepin say, "Set boundaries and communicate clearly. Adopt Brené Brown's mantra: 'To be clear is to be kind.'"

They encourage you to not only "be upfront about your schedule to manage others' expectations," but it's also so you can "avoid over-commitment." Say it with me: I will not make false promises just to appease others. Why?

Frazier and Pepin say, "Don't be afraid to say no to side projects or anything that doesn't align with your goals."

Kaboompics.com

6. Ignore Emails Sent After Your Work Hours

I've been guilty of sending an email after work to acknowledge that I saw something, but I never expect other people to feel obligated to respond until the next business day. On the flip side, I've felt pressured to answer something that feels timely and I've gone to sleep thinking about the sender's potential follow-up email.

"Just because a coworker chooses to work late at night doesn't mean you must answer. One helpful trick is to include your working days and hours in your signature, explaining that responses may be delayed outside of those times," Frazier and Pepin say. They even have a prompt you can use if you're not sure what to type:

  • "My working hours are [Your Working Hours, e.g., 9 AM - 4 PM ET]. Please note that these may differ from your local time zone. I appreciate your understanding and will respond to emails during my working hours."

I can't wait to start utilizing this...for research purposes only 👀.

Tima Miroshnichenko

7. Please, log off from work when it's time.

Unless you're scheduled to work late, take the time to log off from work and not think about it until the next day. Baum says, "Commit to fully logging off once the workday ends—no 'quick email replies' or sneaking in work over the weekend." I'm eyeing you Ms. "I just need to send a quick email" while you're on vacation or spending time with your significant other.

Baum says creating this separation works because "fully disconnecting allows your mind to reset and recharge" which ends up "making you more efficient, creative, and focused during actual work hours." According to her, you'll eventually "improve personal well-being" and "enhance long-term work performance."

As soon as my work day is over, I make a beeline for the shower so I can decompress. After that, I take my time with my skincare routine and keep my phone out of reach so I'm not tempted to look at anything work-related. I'm not always successful, but I've noticed a difference in my mood since making this shift.

Yan Krukau

8. Speak Up When You're Feeling Overwhelmed

And if you're 100% drained because you've been trying to tackle work tasks during and after hours, Frazier and Pepin want you to speak up. "If you're feeling overwhelmed with your workload, approach your manager with honesty and a focus on solutions," they suggest. Here's another prompt of theirs you can use:

  • "I've been noticing that my workload has extended beyond regular hours, and maintaining balance is becoming challenging. Could we discuss prioritizing tasks or adjusting expectations to ensure I can deliver quality work without compromising my well-being?"
What this does is "frame the conversation as collaborative and proactive, encouraging your manager to work with you on a resolution," Frazier and Pepin observe.

Visit more of our work-life articles when you need career advice or how to learn to part ways with burnout for good.

Eating out as a vegan can be a true challenge, especially if you don’t exactly know that what you’re ordering is 100% vegan. Fast food faves like McDonald’s and Taco Bell are secretly packed with vegan items, and Starbucks is no exception. From oat milk coffees to satisfyingly savory snacks, you’ve actually got plenty of plant-based choices when you pull up at your local Starbucks.

Scroll on to explore every vegan Starbucks drink and food item you can add to your order!

Vegan Starbucks Drinks

Starbucks

1. Brown Sugar Oatmilk Cortado

This new-to-the-menu espresso drink combines brown sugar syrup and oat milk to balance out the punchy coffee notes.

Starbucks

2. Latte (Iced + Hot)

You can totally enjoy a latte at Starbucks if you're vegan. Their oat, almond, coconut, and soy milks are vegan, plus many of their syrups qualify as vegan, too, if you want to flavor up your drink. According to this Starbucks supervisor, all of Starbucks "clear" syrups are vegan and dairy-free. Starbucks' regular and white mocha sauces and caramel drizzle are also vegan and dairy-free.

Starbucks

3. Americano (Iced + Hot)

Starbucks' Americanos are just water and espresso, so you don't have to worry about any dairy being in there. Optionally, you could ask for a splash of non-dairy milk and pumps of your fave syrup.

Starbucks

4. Brewed Coffee (Iced + Hot)

Same goes for their brewed coffees, including iced coffee. Easily ask your barista to add in some non-dairy milk and a few pumps of syrup if you desire!

Starbucks

5. Nondairy Salted Caramel Cream Cold Brew

This vegan cold brew drink is crafted with non-dairy cold foam that's flavored with salted caramel – and it's delish!

Starbucks

6. Nitro Cold Brew

A plain nitro cold brew from Starbucks is fully vegan and dairy-free. You can choose to add a splash of non-dairy milk, if you wish your sip to be a bit smoother and creamier.

Starbucks

7. Iced Brown Sugar Oatmilk Shaken Espresso

This one's a classic: shots of espresso get shaken up with ice and brown sugar syrup to create a frothy foam, then the drink is topped off with oat milk to cut the bitterness. It's quite a delectable order, even if you're not eating fully vegan.

Starbucks

8. Starbucks Refreshers

All of Starbucks' fruity Refreshers are vegan. Plus, you can can add lemonade, tea, other flavor inclusions like strawberry and peach to add some extra oomph.

Starbucks

9. Iced Black Tea

Their refreshing iced black tea is certifiably vegan, too.

Starbucks

10. Iced Green Tea

If you prefer green tea, Starbucks' offering is vegan-friendly. If you tend to take your tea a bit sweeter, just order it with however many packets of your preferred sweetener, and your barista will add it in.

Starbucks

11. Lemonade

You truly can't go wrong with a lemonade!

Starbucks

12. Hot Teas

Starbucks' hot teas are totally vegan, too. If you want to make them fancier, ask for an additional splash of your go-to non-dairy milk!

Vegan Starbucks Foods

Starbucks

1. Rolled & Steel-Cut Oatmeal

Now onto the food! First up is Starbucks' oatmeal, which you can fancy up with nuts, berries, and brown sugar. Make sure to order it with water to ensure it stays vegan.

Starbucks

2. Plain Bagel

Surprisingly, Starbucks' bagels are also vegan.

Starbucks

3. Everything Bagel

The plain and everything bagels will work for any vegan eater.

Starbucks

4. Avocado Spread

Plus, you can order your bagel with a side of this delicious avocado spread for a nutritious boost!

Starbucks

5. Spicy Falafel Pocket

This 100% vegan snack pocket is new to the Starbucks menu, but it's already become a fan-favorite amongst vegans and non-vegans alike.

Starbucks

6. Chipotle Almond Dip

You can order the Spicy Falafel Pocket with a side of this fully-vegan Chipotle Almond Dip (AKA Bitchin’ Sauce). Yum.

Subscribe to our newsletter to discover more amazing Starbucks orders!