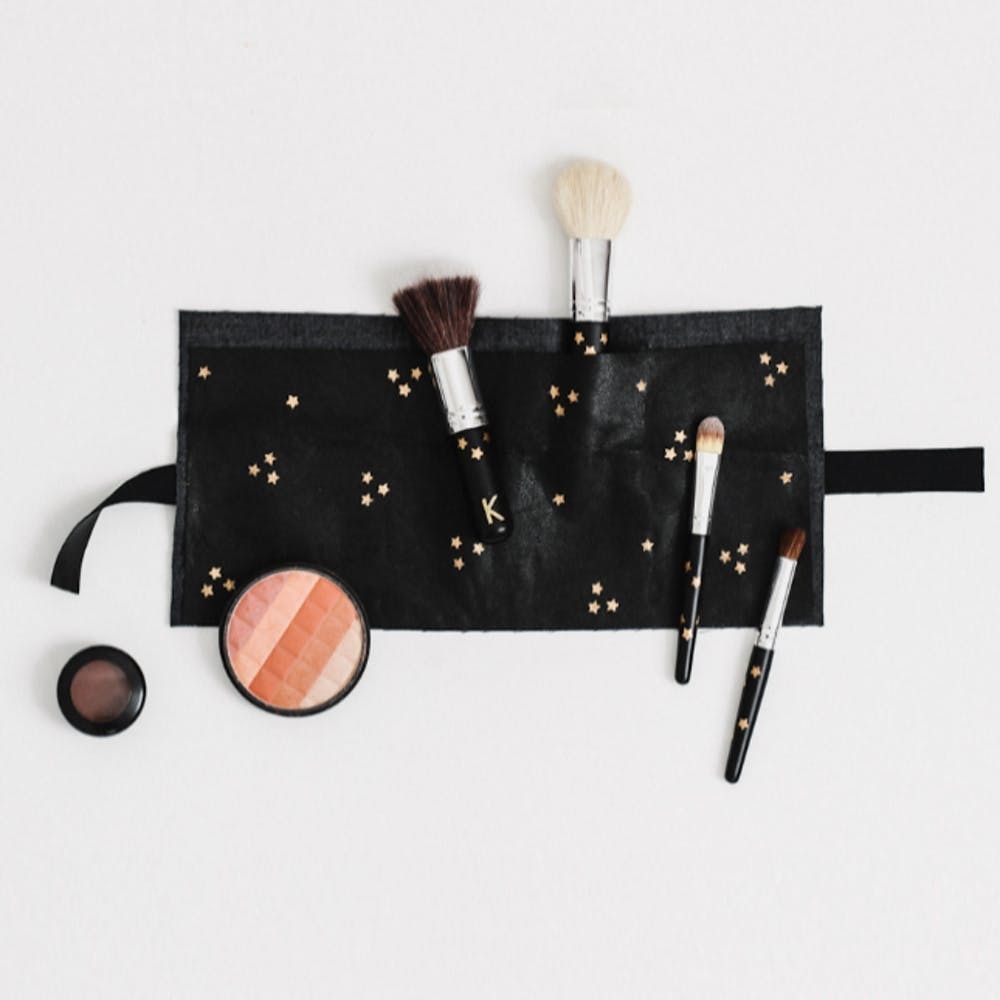
Whether you’re a poshy jet-setter or a self-proclaimed nomad, a traveling girl has got to stay on top of her beauty game. It would be amazing to teleport your entire makeup kit everywhere, but that’s just not practical. That’s where travel-sized brushes come in. The mini versions are super cute, and they get even cuter when amped up with an adorable metallic star print. While you’re at it, make a matching roll-up case with faux-leather scraps. We’re getting starry-eyed just thinking about this DIY.
STENCILED BRUSHES
Materials:
— painter’s tape
— liquid gilding
— vellum
— set of mini travel brushes (ours were 4.75 inches from the top of the bristle to the bottom of the handle)
Tools:
— star hole punch
— foam brush
Instructions:
1. Place a piece of tape on vellum and punch out a trio of stars.
2. Peel away the tape; you just made an adhesive stencil! Adhere to the brush’s handle and apply liquid gilding.
Don’t forget to mix the liquid gilding really well before applying. Since it’s oil based, the layers tend to separate and settle when not in use. Gilding is super potent, so you’ll only need to apply a little bit at a time. The stencil can be re-used up to three or four times, so you can use the same exact tape for the rest of the brushes.
For added awesomeness, add matching letter stickers to a few of the brushes. An instant print and a monogram? We are so in.
STENCILED ROLL-UP POUCH
Materials:
— painter’s tape
— liquid gilding
— vellum
— strong craft glue
— faux leather (one large rectangle: 11 x 5.5 inches, one small rectangle: 11 x 4.75 inches, one strip (for the tie): 17 inches long)
Tools:
— star hole punch
— foam brush
Instruction:
1. Create your stencil the same way you did for the brushes. Add gold stars all over the rectangles of faux leather, alternating between singles and trios of stars. Let dry.
2. Horizontally glue the strip of faux leather half way across the large rectangle.
3. Turn it over and place the brushes on top. Add glue around each one. This will ensure that the pockets are the right size.
4. Remove the brushes and place the small rectangle right side facing up. Leave to dry overnight.
The measurements of your faux leather will depend on the size of your brushes. If you use the same sized brushes we did, you can follow our measurements. Otherwise, place your brushes side by side, about 1.5 inches apart. Measure 1 inch before the first brush to 1 inch past the last brush; this is your final width. Measure the top of the brushes to 1 inch past the bottom; this is your final height. The large rectangle should meet these exact measurements while the small one should be 1 inch less in height. For the tie, add 5 inches and trim it to be about 3/4 of an inch thick. All of this can be done easily with a rotary cutter and a cutting mat.
You only want to glue your strip of leather halfway across the large leather piece so that you can tie your pouch up on your travels.
Your brushes will be protected in the cutest way during your next trip or vacation.
Just roll it up, pack and go!
Readers, how would you personalize this brush set? Tell us below!


