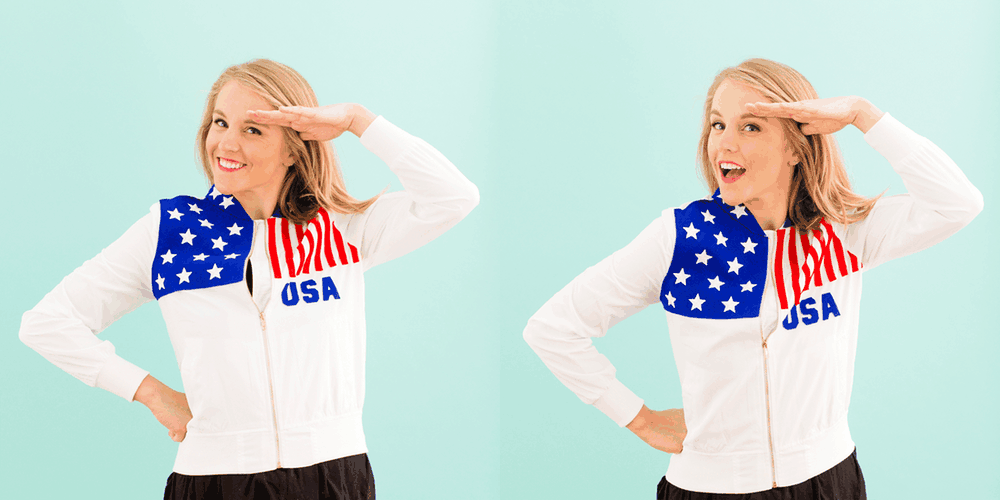
Yay! It's Olympics time! While I'm not a huge sports fan, I always get excited to watch the Olympics. It's amazing seeing the whole world united in a competition of human strength, coordination and poise. Plus, it's a great excuse to gather friends for a viewing party and whip up some Olympic-themed DIYs, like these fruity Olympic torches! Though we're super into this year's Team USA opening ceremony uniforms, today we're showing you how to DIY a vintage Olympics-inspired Team USA bomber jacket. All you need are a few materials and you've got yourself an awesome USA-reppin' jacket. Let's get to it!
Materials and Tools:
Instructions:
1. Fold back the left sleeve of the jacket. Place a sheet of navy blue felt on the jacket with the bottom left corner touching the bottom seam of the left sleeve. Use the jacket seams as a guide to draw a template on the felt. You want to draw a piece of felt that covers the top left chest portion of the jacket. Cut along the lines.
2. Glue the fabric on the jacket. You may need to trim or stretch the felt so that it fits perfectly on the chest.
3. Use the blue felt scrap as a template to trace another chest piece with red fabric. Cut the shape out.
4. Use the ruler to measure ½-inch strips. Cut the strips. Glue the red stripes onto the right side of the jacket.
5. Cut a thick strip of blue felt and wrap around the collar. You might need to do some trimming so that the strip fits around the collar. Glue down.
6. Cut U, S and A letters by printing out a Team USA logo, cutting out the letters, tracing them on felt and cutting the felt. Glue the letters under the red stripes.
7. Arrange the stars on the navy blue felt. Iron them on. You’re done!
Fold back the left sleeve of the jacket. Place a sheet of navy blue felt on the jacket with the bottom left corner touching the bottom seam of the left sleeve. Use the jacket seams as a guide to draw a template on the felt. You want to draw a piece of felt that covers the top left chest portion of the jacket. (This part can be a little tricky; I promise it gets very easy after this!) Cut out the shape.
Glue the fabric on the jacket. You may need to trim or stretch the felt so that it fits perfectly on the chest.
Use the blue felt scrap as a template to trace another chest piece with red fabric. Cut the shape out. Use the ruler to measure ½-inch strips. Cut the strips and glue them on the right side of the jacket.
Cut a thick strip of blue felt and wrap around the collar. You might need to do some trimming so that the strip fits. Glue down.
Cut U, S and A letters by printing out a Team USA logo, cutting out the letters, tracing them on felt and cutting the felt. Glue the letters under the red stripes.
Arrange the stars on the navy blue felt.
Iron them on.
You’re done!
Go USA!
I think this jacket deserves a gold medal, don’t you?
Have you tried any Team USA DIYs? Share your photos with us on Instagram and tag @BritandCo! Need even more inspiration? Head to Pinterest STAT.
DIY Production + Styling: Irene Lee
Photography: Kurt Andre
Modeling: Maddie Bachelder
