Obsessed with washi tape? How about wallpapering an entire wall with all sorts of colorful tape?!
How to DIY Temporary Wallpaper Using Washi Tape

A couple weeks ago, we announced something totally amazing. We teamed up with Scotch to inspire all of you to make amazing things! As part of their Make Amazing Contest, we’ve created a series of DIY ideas and interior inspiration using a bunch of Scotch products, especially… tape! From magic tape to masking tape to washi tape, there’s an abundance of awesome stuff you can do with a roll of tape and a pair of scissors. For this next inspiration, we’re going behind the scenes of our Make Amazing video to show you how to create your own tape wallpaper.
(Pssst: Don’t forget to enter the ScotchBrand.com/MakeAmazingContest for an opportunity to win $5,000 in prizes. The contest ends on August 3rd! More details below.)
Statement walls can add so much to a room. In fact, with the right look your wall might be the most eye-catching part of your room. Whether you want a permanent installation or a temporary statement wall for a party, this tape works like a charm.
Show us what you can make using Scotch Brand products for an opportunity to win $5,000!
<br/>
 – Scotch Expressions Masking Tape
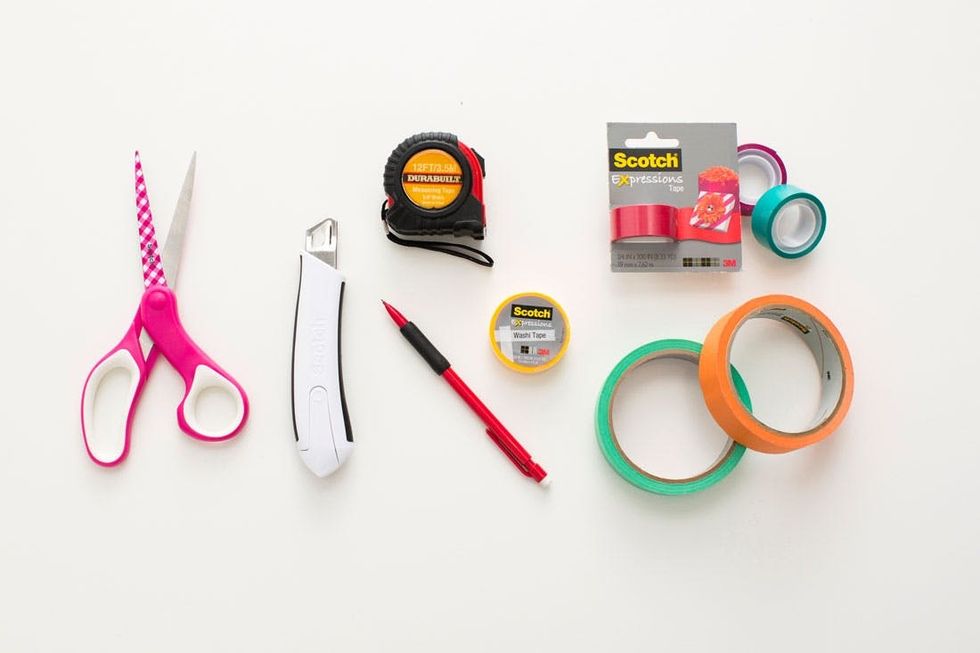
– Scotch Expressions Magic Tape
– Scotch Expressions Washi Tape
Tools:
– Scotch Titanium Utility knife
– scissors
– measuring tape
– pencil
Steps:
1. Measure the length of your wall, find the midpoint and determine how high you want your outermost triangle to be. Mark this point with a pencil.
2. If you are leaving space on both sides of your design, mark the wall where the furthest edges of the triangle will be.
3. Recruit a buddy to help you pull the tape. It’s difficult to make straight lines without help so grab a friend!
4. Tape the top point of the triangle holding it there and have your friend pull the tape down to the bottom corner. Cut the tape and lightly press it against the wall.
5. Step back to see if the line is straight. If so, press the tape firmly to the wall.
6. Using the same method, add a second strip of tape to the other side creating a triangle shape.
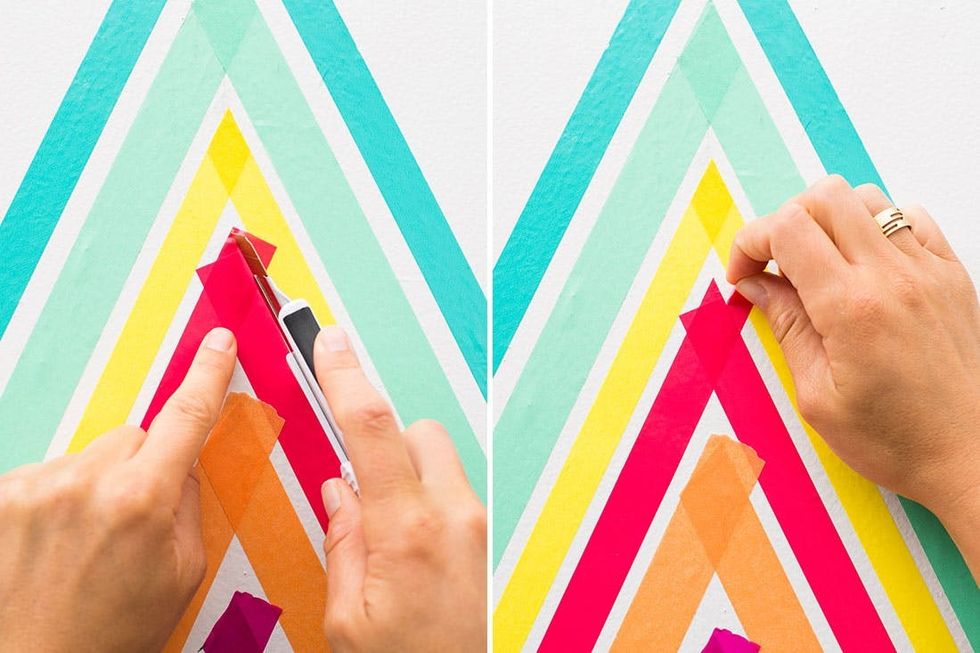
7. Cut the overlapping part of the tape at the point with your utility knife to create a clean line.
8. Continue adding tape making sure the midline is straight and leaving about a 1/4 inch between triangles. It can be helpful to draw a line from the top of the triangle to the midpoint at the bottom of the wall to keep your concentric triangles straight.
This wall is easy to make and it’s a great project to do with a friend. Throw on some tunes and get taping.
We used three different kinds of Scotch tape — masking, magic and washi. Not all of these tapes remove cleanly from some surfaces, so make sure you pay attention to whether a tape is permanent or temporary. In our design, we used bright solid colors that popped on the wall creating a look that really grabs the eye, but there are tons of patterned tapes that would also be really cool on a wall. Don’t be afraid of patterns!
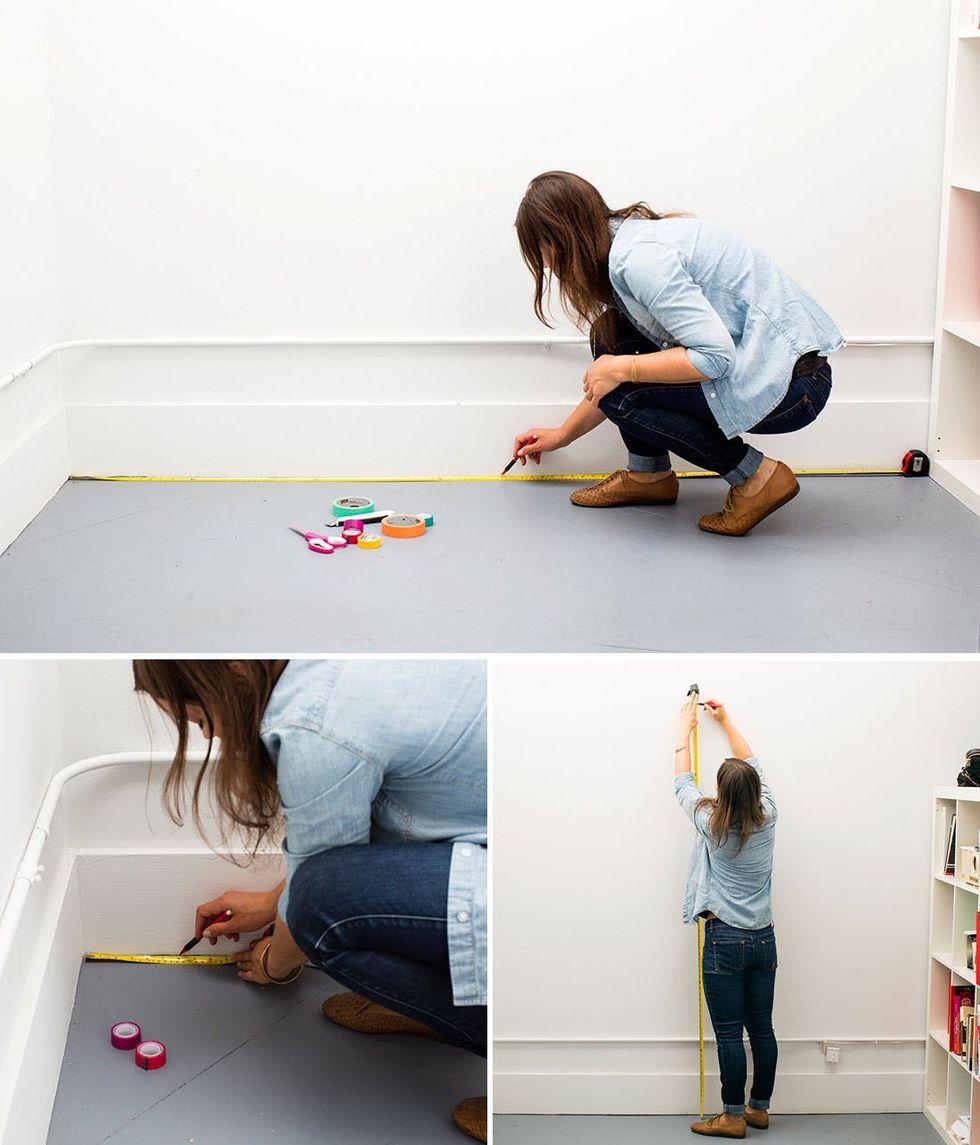
Choose a wall and measure the height and width. Decide where you want your design. We left room on the sides of our triangle as well as the top. Find the midpoint with your measuring tape and leave a light mark with your pencil. Do this on the bottom of the wall and where the top of your triangle will be.
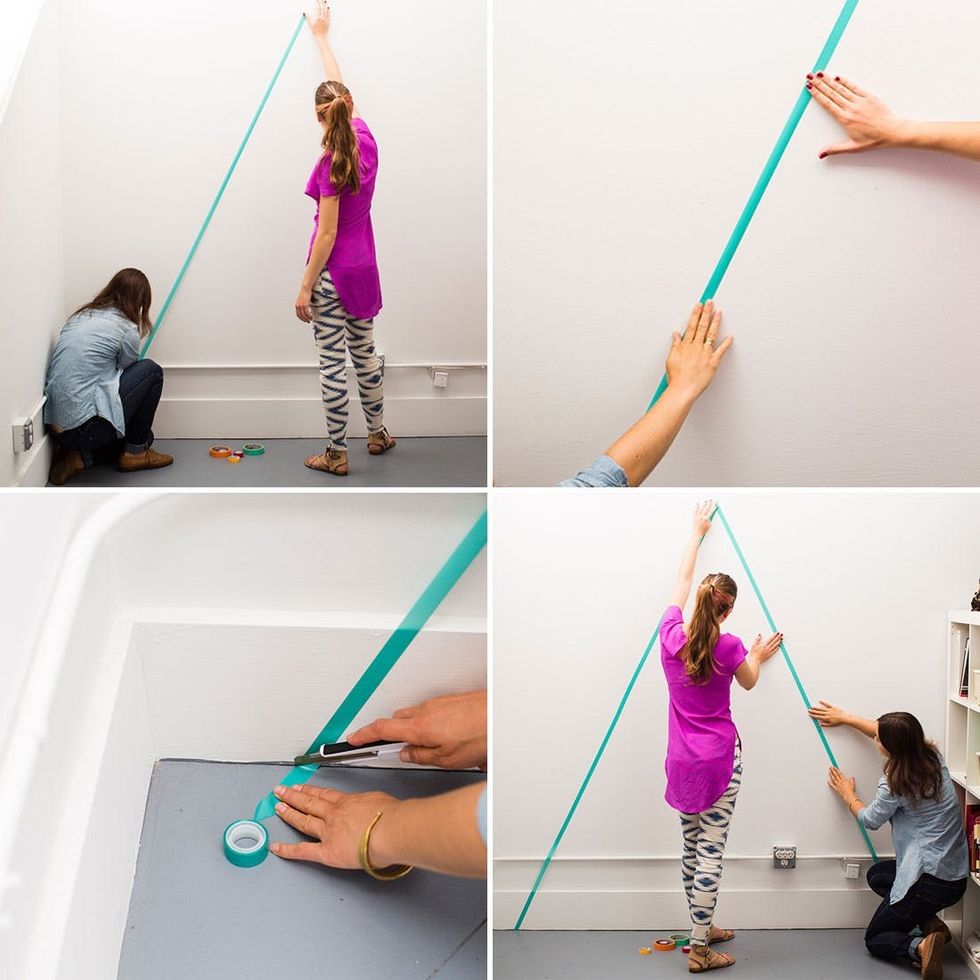
Grab a friend and have her help you. Because the strips of tape are long, it’s very easy to make crooked lines. This process is much easier with two people. One person can hold the tape up at the top and the other can pull the roll down to the bottom. Lightly press the tape against the wall and then take a step back to see if you’ve successfully made a straight line. If not, pull the tape back up and make the necessary shift. Once the line is straight after a try or two, you can firmly press it against the wall and slice the tape at the bottom.
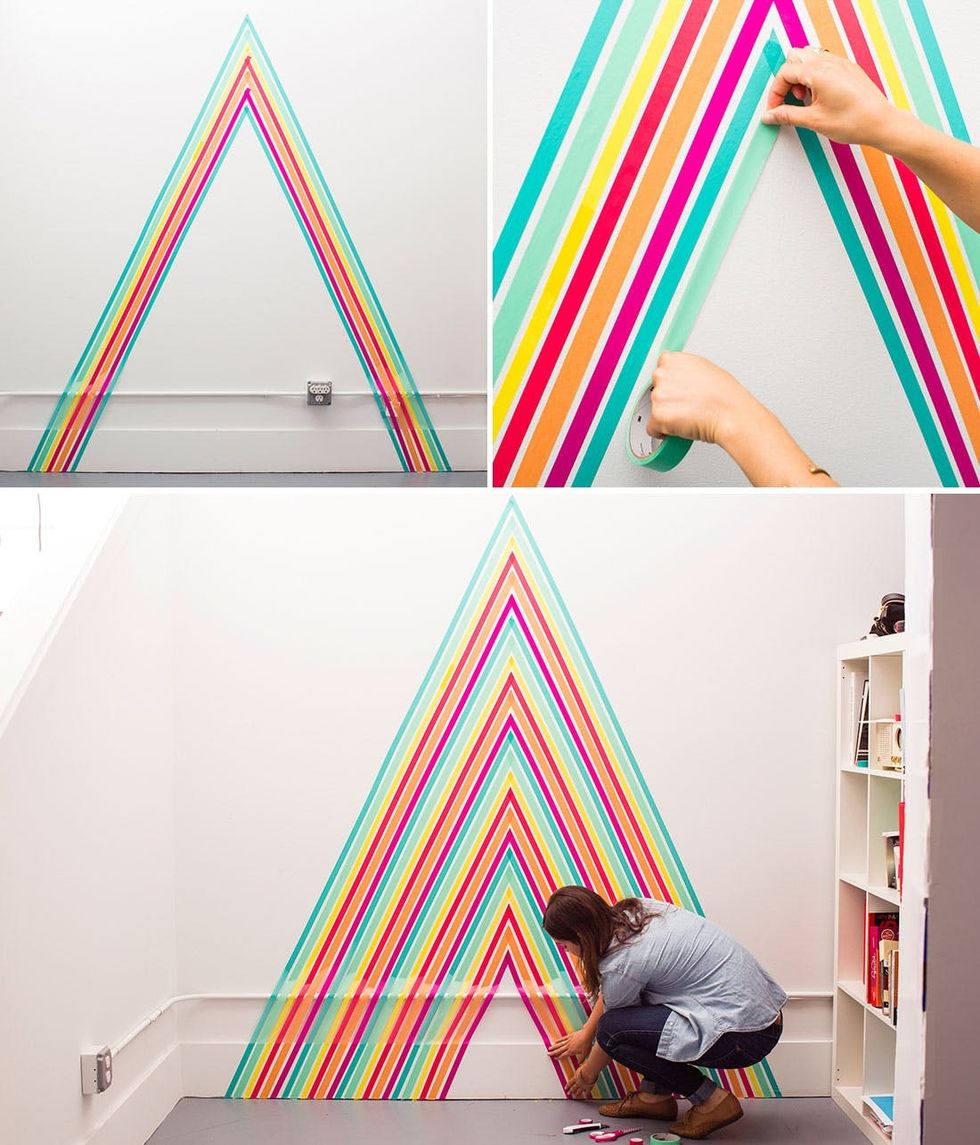
Move on to your next color. It’s a good idea to decide the order of your colors before you put them up on the wall. Place the tape rolls next to each other to see what color combo looks the best. You can also tape small strips to the wall to get a better picture.
Continue adding pieces of tape to the wall until you fill your triangle. Make sure your midline is straight. As you move down the wall, you can measure the distance between your triangles and add a pencil mark at the midpoint. Alternatively, when you start you can make a straight line from the tip of the triangle to the midpoint on the floor. Either way, you’ll want to step back and make sure the line isn’t wandering in the wrong direction.
You’ll notice that the overlapping pieces of tape don’t look clean. Using your Scotch Titanium Utility Knife, slice the edges and peel away the excess tape. Whenever you’re using a utility knife, be super careful not to cut the wall (or yourself)!
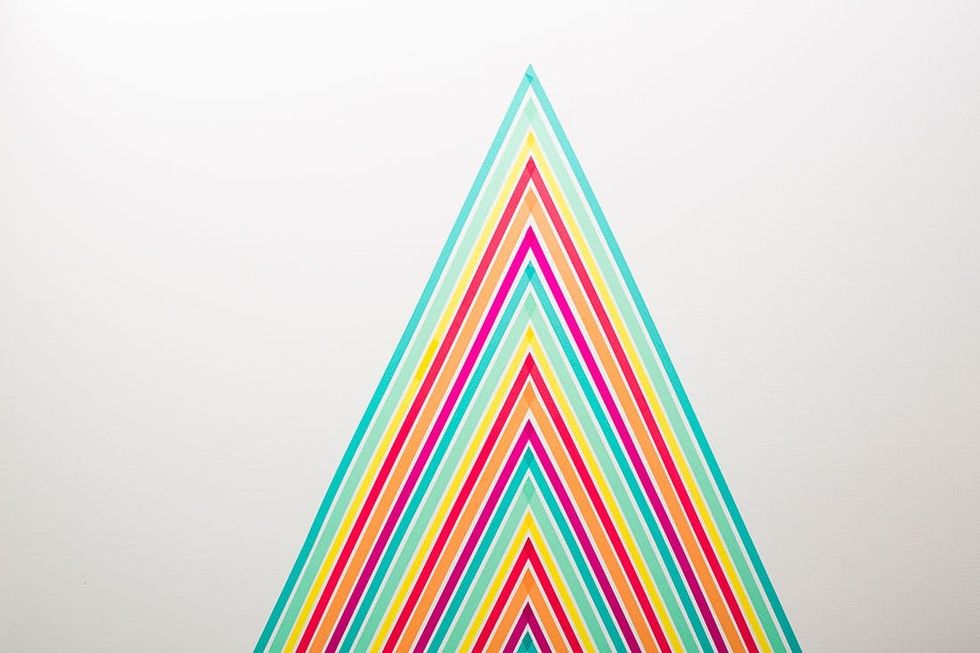
Add a couch with some colorful pillows, and it’s just like the wall in the video! :)

As you can see from the photo above, in the video we created a mirroring triangle on the floor. It looked amazing! How cool that you can transform a room with a little bit of Scotch® Tape!

Oh, and it is obviously an epic backdrop for silly photos as well ;)

Now it’s time to see what you can do! Head to ScotchBrand.com/MakeAmazingContest to learn all about how you can enter the Make Amazing Contest for a chance to win one of three $5,000 cash prizes. Happy making!


