Save yourself time and money with these save the dates.
Make Your Own Save the Dates With Watercolor and Illustrator
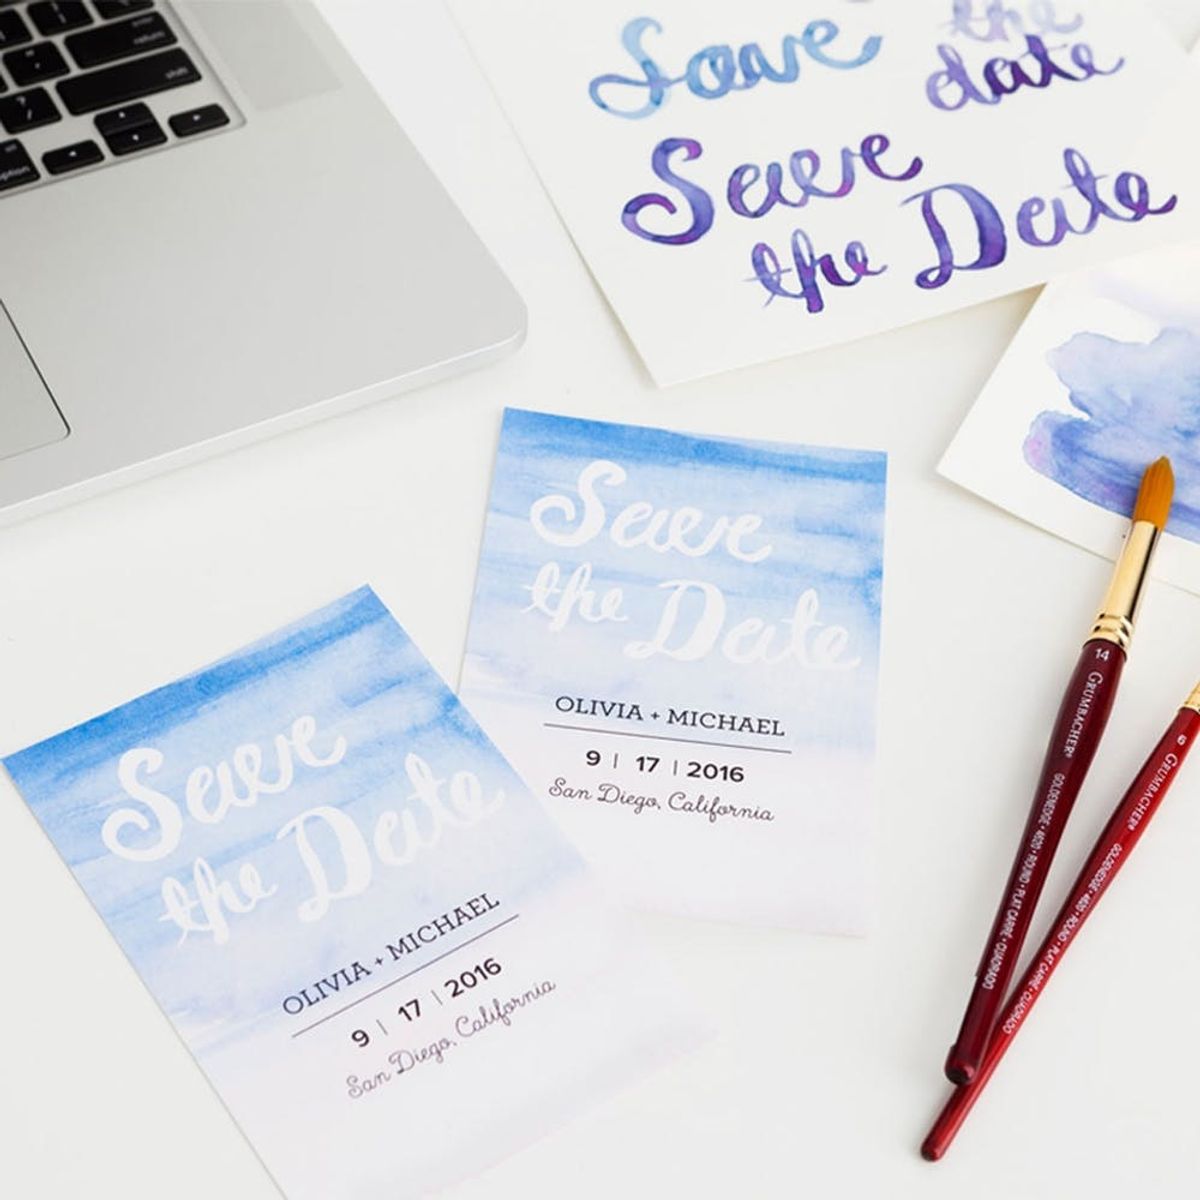
We all know that wedding planning (or party prep of any kind) takes a lot of time, money and pretty stationery. To check off one item on that list, here’s a simple, budget-friendly DIY that combines art and tech for the easiest save the dates EVER! This is the first time that I’ve made invitations like this, and I was amazed at how quickly and beautifully these came together. It seriously only took about 30 minutes of painting by hand and 30 minutes of designing in Adobe Illustrator!
We’re fully taking advantage of the current watercolor trend here by channeling its flowy, easy-going qualities that anyone can recreate with a little bit of practice. While more intricate invitations require a lot more work and illustration, these are completely beginner-friendly, so you have no excuse not to give it a try! We used skills and techniques from our Watercolor Painting online class and our Adobe Illustrator online classes, so if you’re nervous about trying this out for yourself, sign up for a class, and you’ll be a pro in no time!
Materials:
— paintbrushes (here and here)
Additional Tools + Programs:
— Adobe Illustrator downloaded onto your computer (free trial HERE)
— scanner
Instructions:
1. Practice painting a light watercolor wash onto a sheet of paper. Try blending colors and creating light-to-dark gradients.
2. Paint your names and/or phrases onto another piece of paper using your thinnest brush and more saturated watercolor paint.
3. Scan in your favorite pages of lettering and watercolor washes, and save as a .JPEG.
4. Create a new document in Adobe Illustrator, and then open up your scanned .JPEGs in Illustrator as well.
5. Image trace and expand your scanned lettering, and delete all versions of your names or phrases that you’re not going to use.
6. Position and size your chosen lettering on top of your watercolor background in the new Illustrator document.
7. Add text boxes to your document, and fill with the important event details.
8. Save as a .PDF with crop marks and bleeds for print.
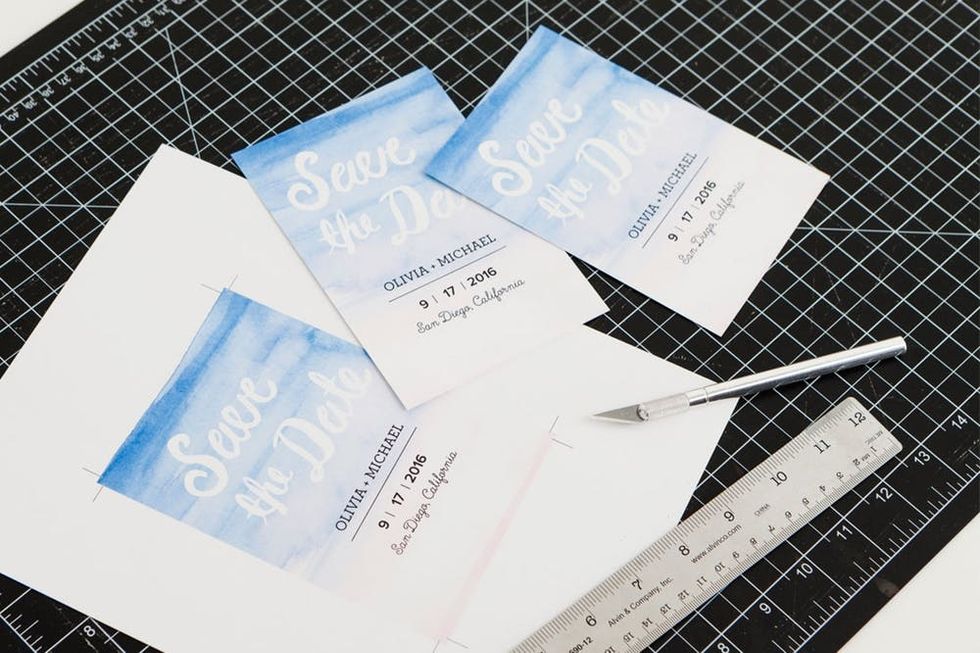
9. Print out your finished file, and trim down the edges to the crop marks positioned in all four corners.
10. Pop your save the dates in envelopes, address to your guests and send them out!
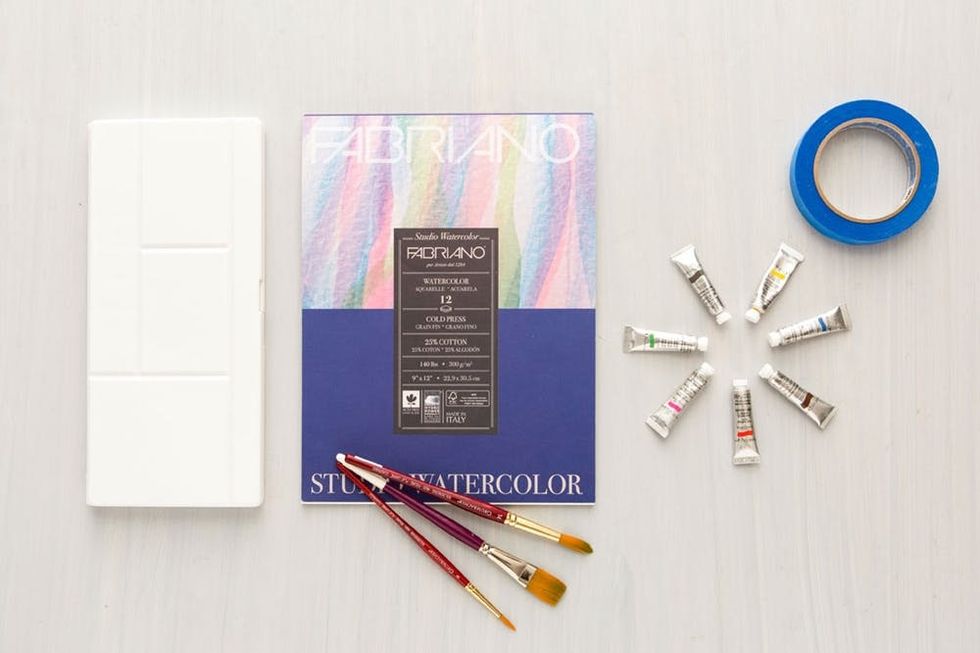
Grab your watercolor supplies, start downloading your free trial of Adobe Illustrator and you’re good to go!

Watercolor Wash + Lettering
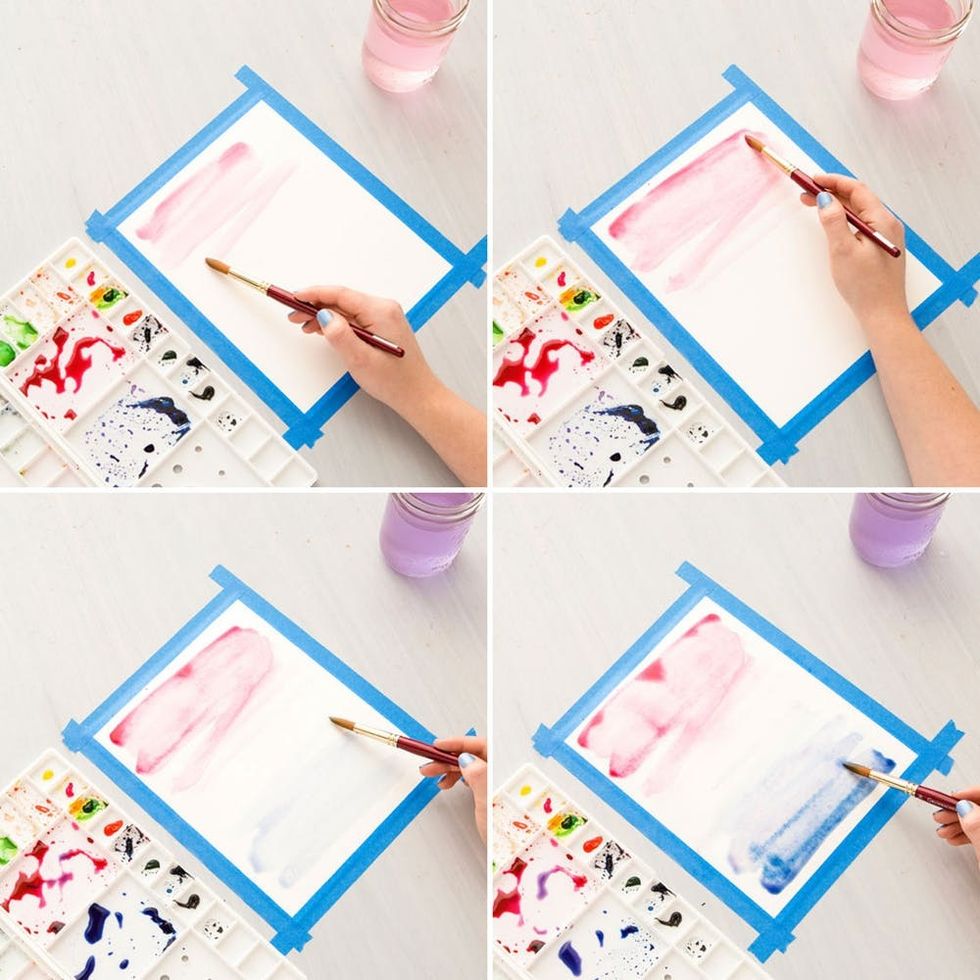
First up is the watercolor wash. Tape down the edges of a piece of watercolor paper using painter’s tape, and mix up some paint in your chosen colors. For the first wash, you’ll want to use a very light, watery version of your first color, and quickly swipe it across the top of your page with a large brush. While the paint is still wet, layer on slightly darker and darker versions of that color until you get a nice gradient. Repeat with a second color on the bottom edge of your page, and work up to the middle. Blend the lightest versions of your two colors together in the center to tie everything together. Note: This takes a LOT more water than you’d think, so start light and build up darker colors as you go.

Now for the lettering portion! Take your thinnest brush, dip it into a more saturated color than you were working with previously and start practicing your lettering. Here we’re practicing on one sheet of paper, but feel free to keep practicing on multiple sheets until you get it down. Nervous about lettering? You guessed it — we’ve got a class for that. Check out our Brush Calligraphy online class and get the low-down on creating pretty painted phrases.
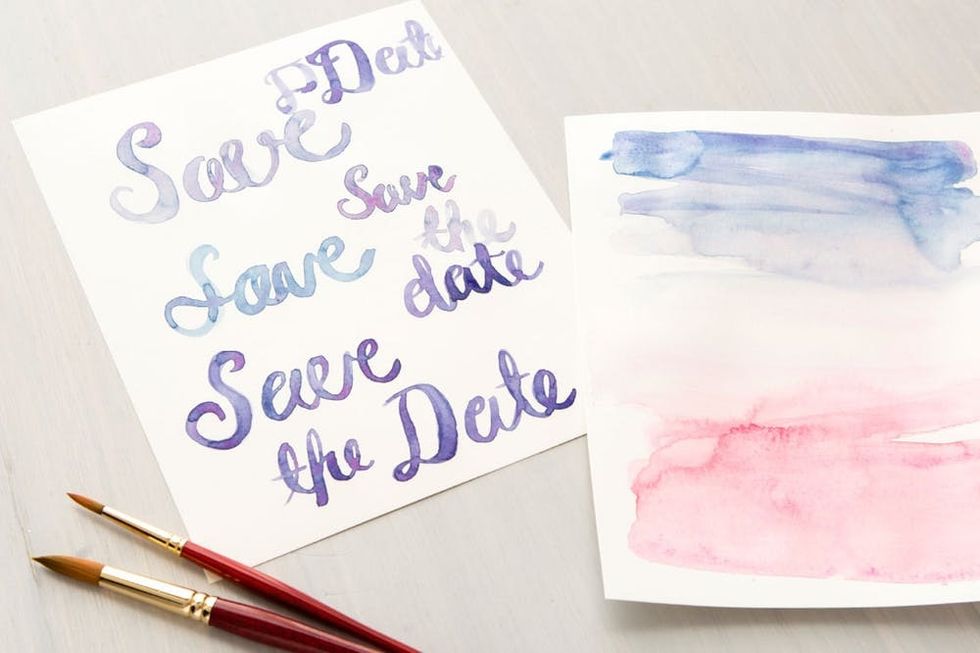
If, like us, you practiced on a few pages behind the scenes, pick out your faves and let them dry completely before starting part two of this DIY.
Layout in Illustrator
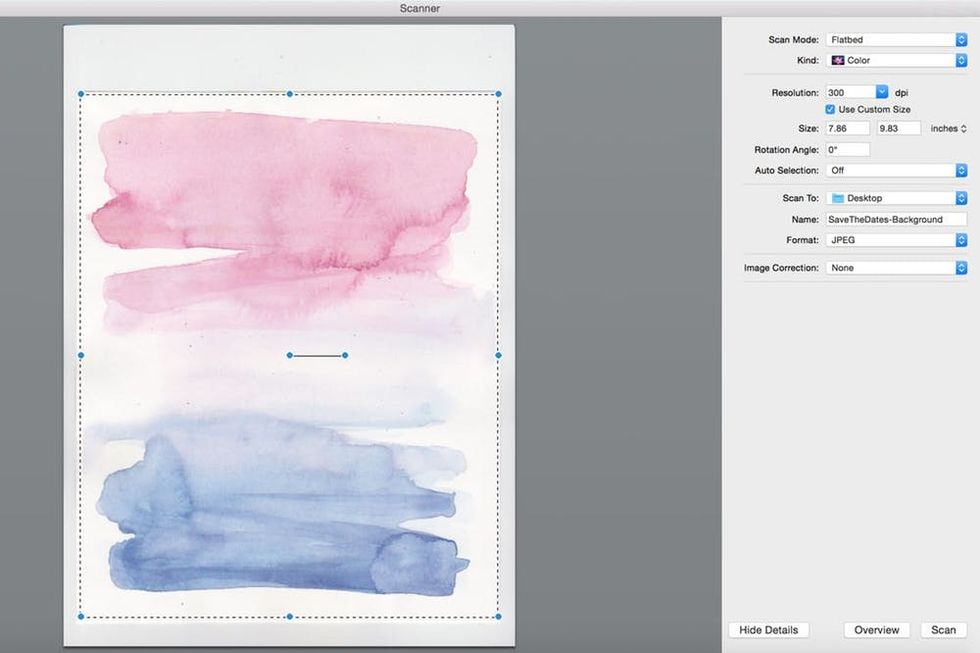
Once your hand-painted pieces are totally dry, go ahead and scan them in. Make sure to select “Color” and “300 dpi” in your scan settings and save as a JPEG. This means that your artwork will be print quality when you go to print out your final designs!
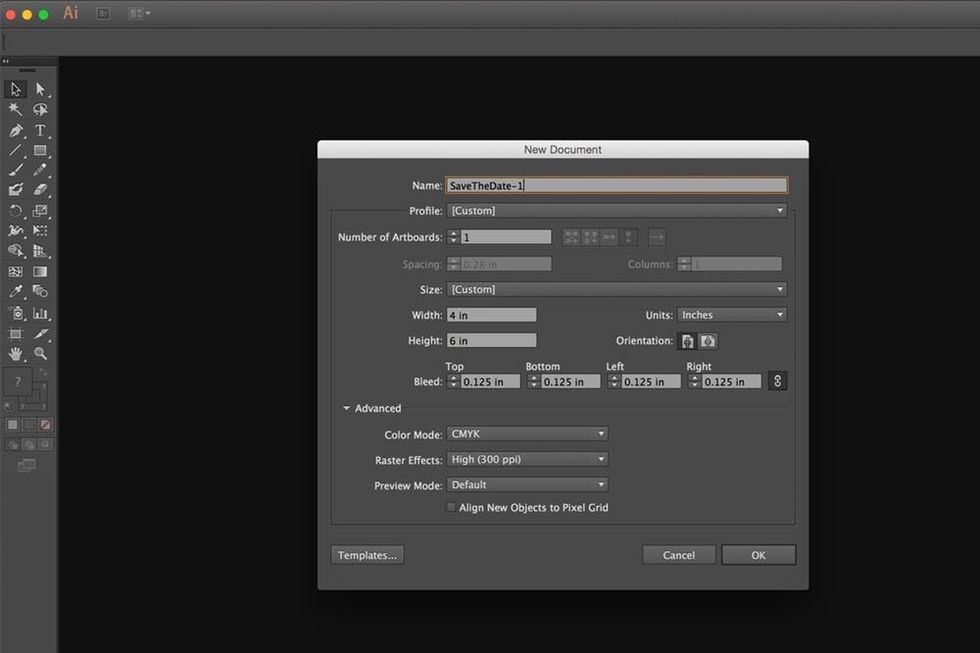
Open up Adobe Illustrator and start a new document. Set the dimensions to whatever size you prefer (we chose 4 x 6 inches, standard postcard size), and set your bleed to 0.125 inches on all sides. Lastly, since you’ll be printing this out at the end, set your color mode to “CMYK” and click “OK.”

Now open your scanned JPEGs of both the watercolor wash and the brush lettering, and drag the wash image over to your newly created document. Take the time to position and resize your watercolor wash image on your art board until you’re happy with it.
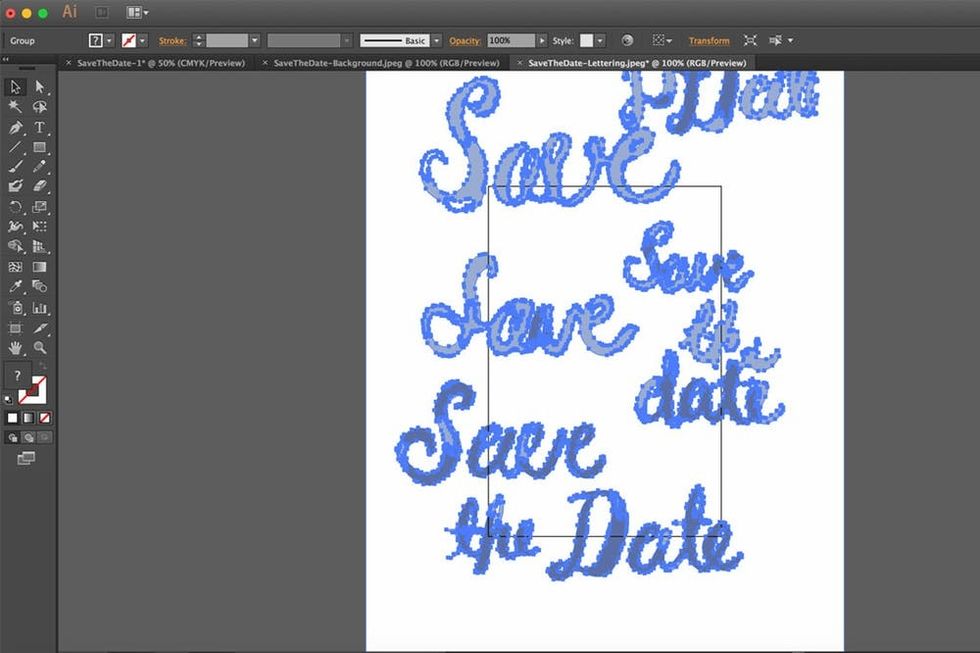
Next up, we’ll go ahead and vectorize your scanned brush lettering. On the JPEG file, select the whole page of lettering and select “Image Trace.” The image trace function allows you to select “3-color” from a dropdown list, which will give your lettering more exact definition than the default setting. Next, click “Expand” to create your vector lettering.
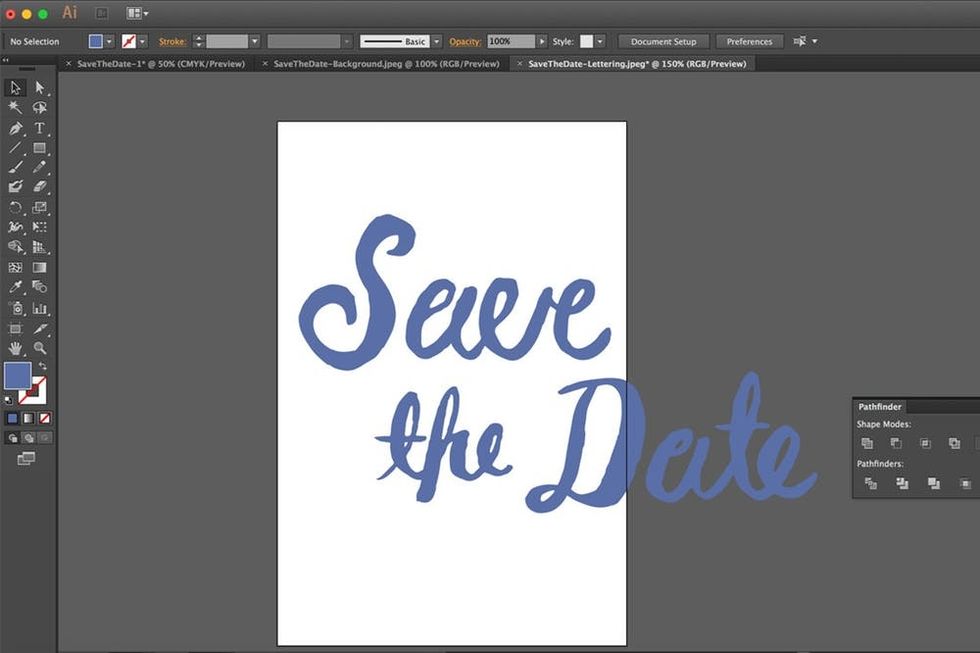
Now it’s time to clean house. Pick out your favorite version of your phrase and delete all the other versions around it. Select all pieces of your final phrase and click on “Unite” in your “Pathfinder” window to make it all one color.
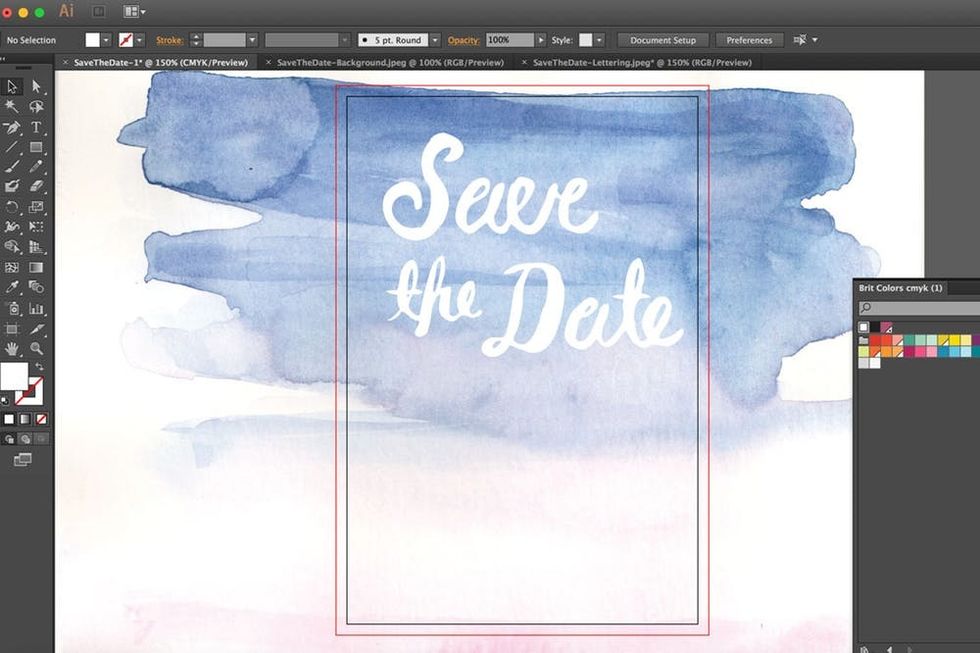
Select and drag your phrase over to the new document, and lay it on top of your watercolor background. We turned the phrase to white to make it really pop against the blue wash (and to hide any imperfections ;)
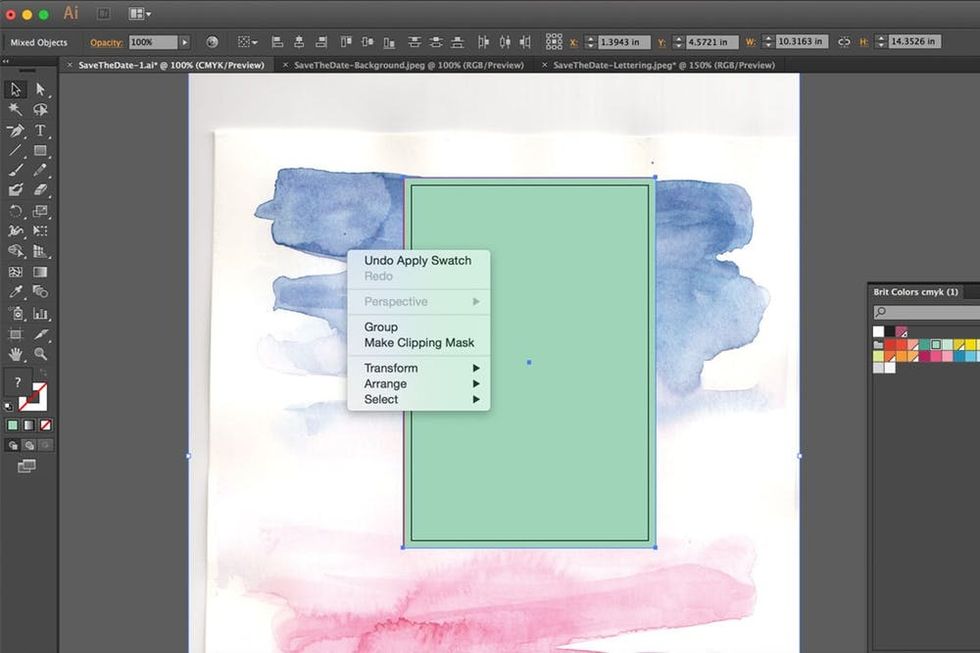
Now this part isn’t totally necessary, but it will help you see what your final design will look like once it’s done. Draw a rectangle the size of your document (including that 0.125-inch bleed) and select both the rectangle and your watercolor background. With both items selected, right click and select “Make Clipping Mask” to trim down your background.
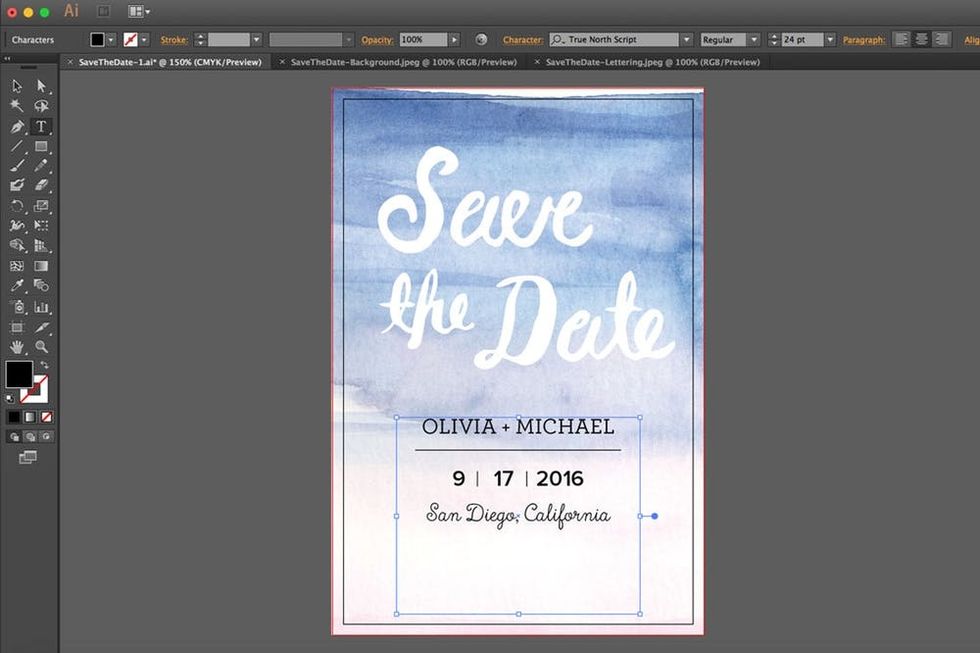
Add a text box on top of your layout and fill in the important details of your save the date or invitation. Play around with a few different fonts, and see what you like!
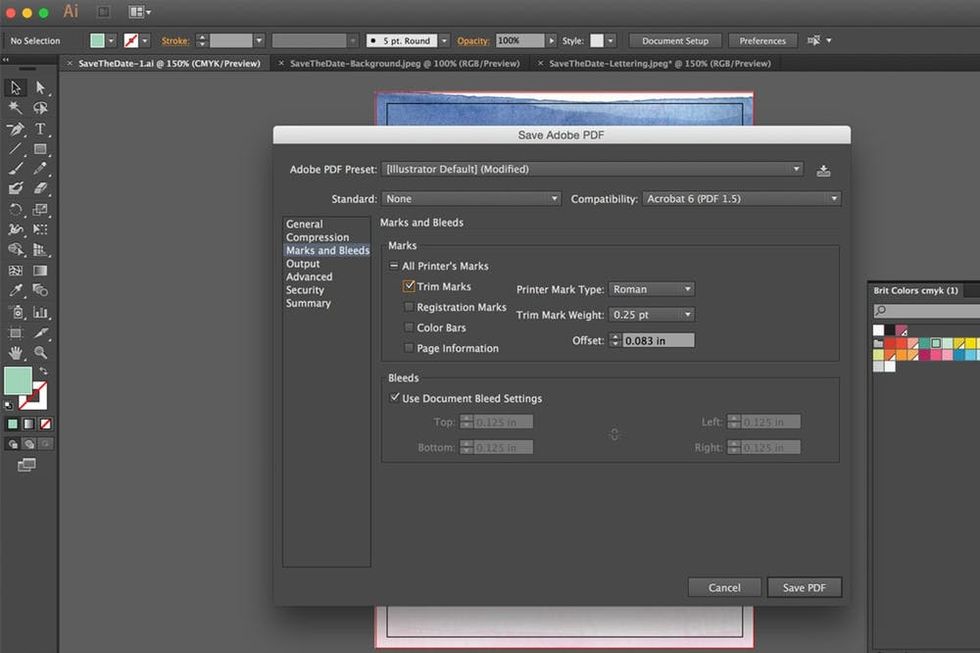
Once you’re happy with your design, it’s time to get your file print-ready. Save your file as a “PDF,” and select “Trim Marks” and “Use Document Bleed Settings” in the “Marks and Bleeds” section. Click on “Save PDF,” and you’re ready to print!
The Final Product

Print out your save the dates at home on high quality card stock, or take your .PDF file to a professional printer. Make sure to ask them for a printed proof to make sure the colors look right to you before you ask them to print the whole job. Use those little crop marks in the four corners of your print to trim off the eighth of an inch color bleed with an X-ACTO knife.
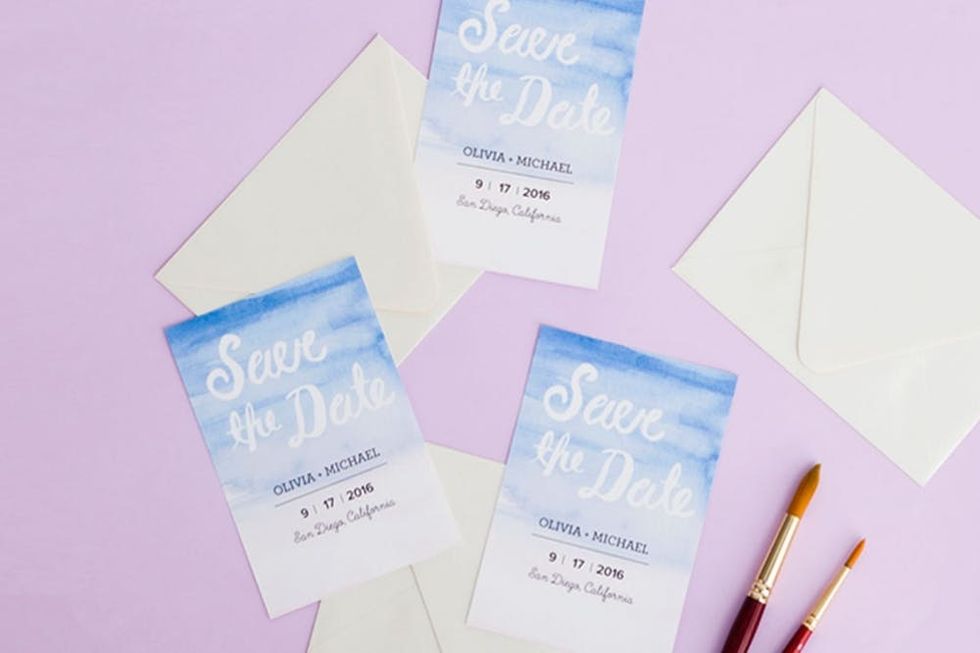
Match your save the dates to some envelopes and send ’em out!
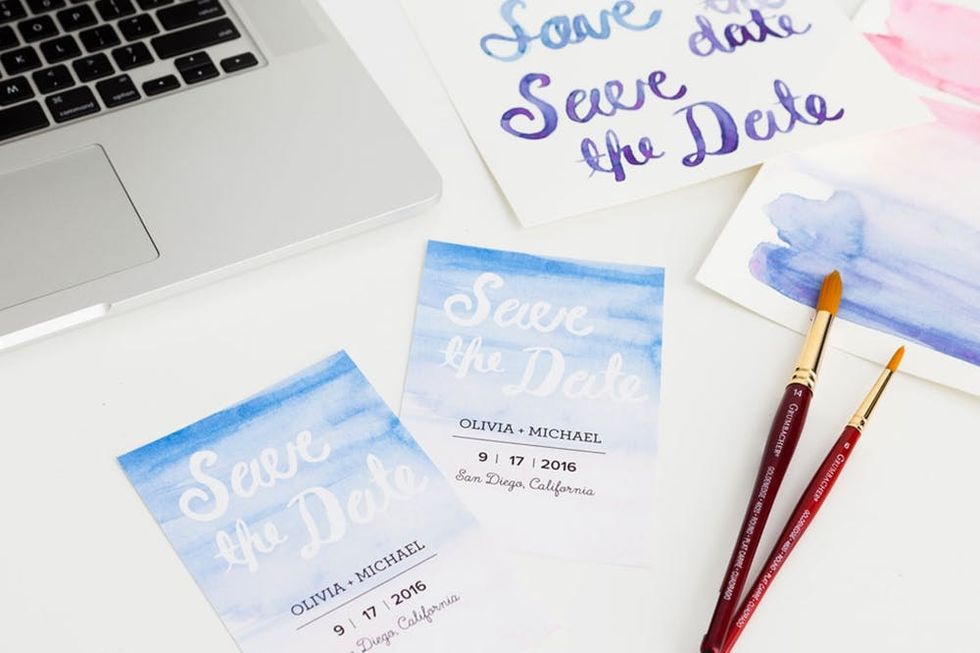

How will you mix hand painting and digital design to make something unique? Show us your project by tagging us on Instagram and using hashtag #iamcreative!


