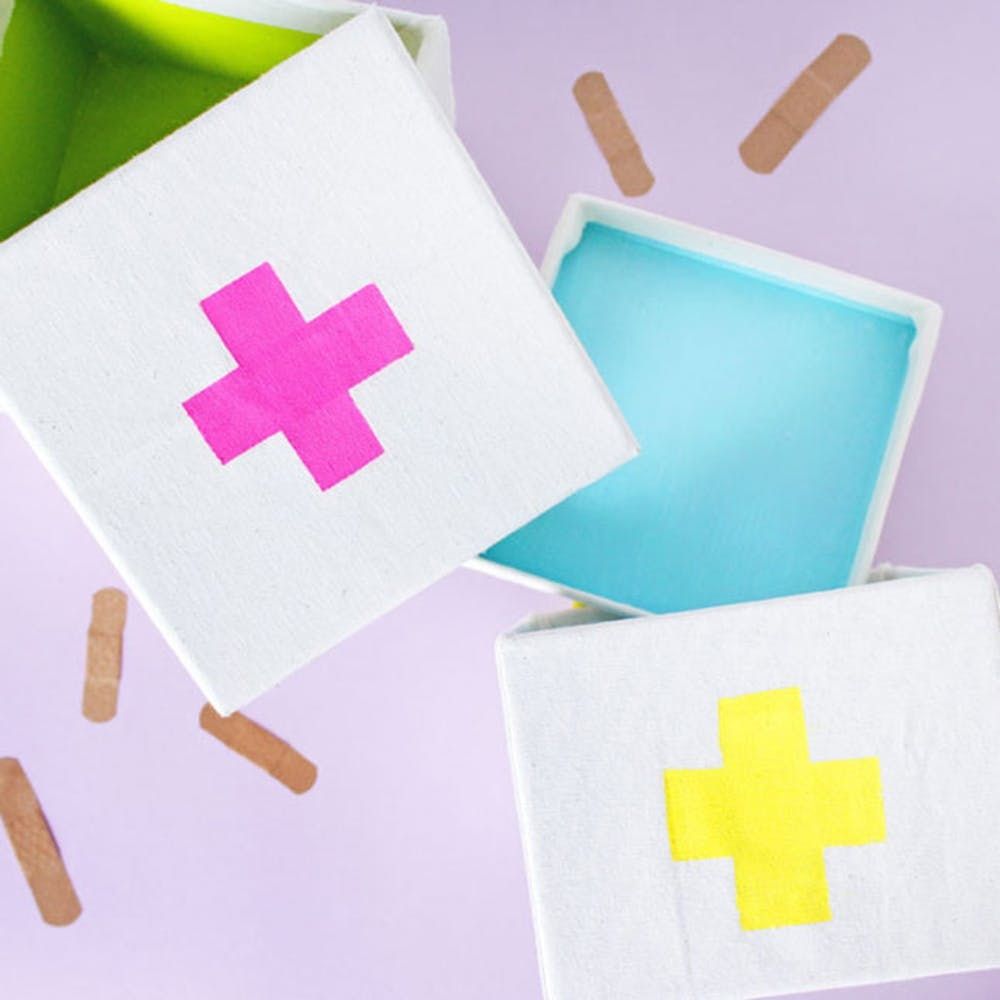
You know it’s officially winter when your cheeks are rosy and your nose runs like a leaky faucet. With the chilly weather upon us, we can start to feel a little rundown and sneezy. Ain’t nobody got time for that! A DIY Winter First Aid Kit can be a life saver when you just can’t deal. With a quick little roundup of sick-day essentials, you can skip a last-minute dash to the drugstore and stay healthy. Our DIY Winter First Aid Kit is packed with our favorite flu busters, like immune boosting vitamin C drops, lozenges, soft tissues, herbal tea and other goodies. If you have a friend that’s fighting the sniffles, give them a winter first aid kit to share the love.

Materials:
— cardboard box
— fabric, canvas or cotton
— spray adhesive
— primer or gesso (optional)
— acrylic paint
— masking tape
Tools:
— scissors
— ruler
— pencil
— paintbrushes, one medium and one small
Instructions:
1. Paint the interior of your box with primer first.
2. Then paint one or two thin layers of acrylic paint on top in your chosen color. Let your paint dry.
3. With a ruler, measure the bottom and sides of the box. Mark and cut your fabric, adding one extra inch of fabric to each side for overlapping.
4. In a well-ventilated area, spray the bottom of the box with spray adhesive. Center the box on top of the fabric and glue together.
5. Now line up your ruler with one edge of the box and mark a straight line on the fabric with your pencil. Do this for all sides of the box.
6. For two opposite sides of the fabric, mark one inch out from the line you already have. When you cut along this line, you’ll use the extra inch of fabric to fold over the side.
7. Spray the sides of your box starting with the sides where you have extra fabric and glue the fabric in place.
8. Once you’ve attached fabric to the two sides of the box, spray the other two sides. First, glue down the overlapping fabric from the other sides, then adhere the last two panels of fabric.
9. Wrap the remaining fabric over the top of the box and inside and spray down.
10. For a Swiss cross, use masking tape to mask off a vertical rectangle and paint it. Add another layer of tape to create a horizontal rectangle this time and paint again.
11. Repeat steps to cover the lid of your box.
If you have gift boxes left over from the holiday season, use them for this kit. The interior of your box may have a dark color or pattern, so paint it with primer first. This will create a light colored, solid background so the final color that you paint on top looks awesome.
Once your primer has dried, paint one or two thin layers of acrylic paint on top in your chosen color. The edges of the box don’t have to be painted perfectly — they’ll be covered with an inch of fabric. Let your paint dry.
With a ruler, measure the bottom and sides of the box. Mark your fabric and add one extra inch of fabric to each side for overlapping. Cut your fabric.
In a well-ventilated area, spray the bottom of the box with spray adhesive. Center the box on top of the fabric and glue together. Smooth out any wrinkles.
Now we will trim off excess fabric so the box is smooth and the lid can fit on top. Line up your ruler with one edge of the box and mark a line on the fabric with your pencil. Do this for all sides of the box.
For two opposite sides of the fabric, mark one inch out from the line you already have. (If you have a rectangular box, do this for the two short sides.) When you cut along this line, you’ll use the extra inch of fabric to fold over the side.
Spray the sides of your box starting with the sides where you have extra fabric. Attach the fabric and smooth out with your hand.
Once you’ve attached fabric to the two sides of the box (the short side on a rectangular box), spray the other sides. First glue down the overlapping fabric from the other sides. Then adhere the last two panels of fabric.
Wrap the remaining fabric over the top of the box and inside and spray down.
To paint a Swiss cross on your fabric, use masking tape to mask off a vertical rectangle. Paint the rectangle with acrylic paint (no primer required!). Add another layer of tape to create a horizontal rectangle this time and paint again. Remove the masking tape and you have a Swiss cross!
Repeat these steps to cover the lid of your box.
To really prepare for the winter, we filled another emergency kit with chocolate and candy, because you shouldn’t have to brave the snow for a little treat. Now you’ll never have to leave the house!
We’re ready for whatever winter throws at us!
Share photos of your creative winter projects with us on Instagram using the hashtag #iamcreative.


