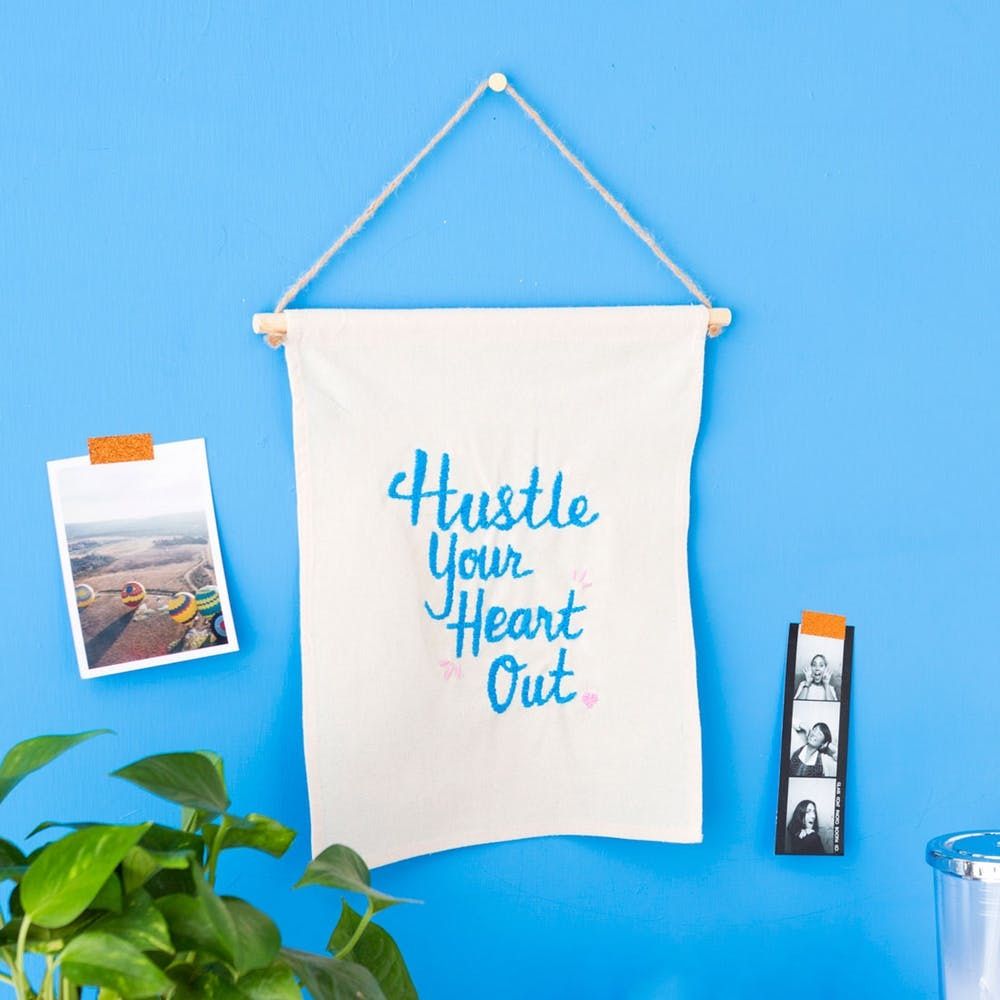
Let’s be real — building creative confidence can be a challenging endeavor. Even as an expert in the creative field, I still experience creative mental blocks every so often, which often leave me paralyzed and unsure of my creative decisions. Today, we’re going to relieve you of those anxieties and bring your embroidered wall hangings to the *next* level with the help of our Embroider a Wall Hanging Kit and *free* printable iron-on designs. Scroll below to see the decked out versions!

Neat, huh?
To get started, you’ll need the Embroider a Wall Hanging Kit. The kit is perfect for ALL levels of embroidery fanatics! It includes everything that you’ll need to get started: an embroidery hoop, various colors of embroidery thread, an 11-in x 14-in canvas banner, six crewel needles, a pair of curved scissors, a needle threader, a fabric marker, and a booklet of step-by-step instructions.
PSST! Our full DIY Kit Collection is available at nearly all Target stores and on Target.com. Pick up a DIY kit — like the Embroider a Wall Hanging Kit featured here — ASAP, before they disappear!
Additional Materials:
If you need a little nudge to get started, use one of our free printable iron-on designs. Instead of asking yourself “What should I embroider?” for countless hours, you can just jump right in and sew away! The designs are color coded and mapped out with stitch legends. Otherwise, step up to the plate and create your own design!
- free iron-on printable design (download here!)
- iron-on transfer paper
- tape
- scissors
- iron
Print out your favorite design on the iron-on transfer paper. Trim at least 1/4 of an inch around the design to minimize the halo effect from the transfer paper. Lay your design faced down, cover with a towel cloth, and iron according to directions from the iron-on paper package. To avoid burning your canvas banner, move the iron in circular motions and lift up the towel periodically to check on the design.
Let the canvas cool down before gently peeling off the transfer paper backing. As long as the transfer paper backing has not been completely lifted off, you can always go over the design with the iron again if you notice any parts that did not fully transfer.
Now for the fun part… Place your canvas banner into the embroidery hoop and begin stitching! You can follow along using the colors suggested or mix it up according to your preference or materials. Be patient — it may take a few hours to complete.
Pro Tip: Tape down the jute twine to the canvas banner to avoid accidentally threading through the loop.
Voilà — the hard work has paid off. Time to hang it up!
If you’re feeling up to the challenge, make all three designs. Best saved for those much-needed therapeutic nights in ;)
Will you be picking up any Brit + Co Kits during your next Target run? Let us know on Twitter at @britandco AND share your fave items using the hashtag #BritxTarget across your social media channels!
Production + Styling: Karen Pham
Photography: Chris Andre, Kurt Andre


