Essential tips to streamlining your getting-ready routine.
Base Makeup: 4 Steps to Getting a Flawless Face
Before you sweep on that gorgeous cat eye and blot the statement color onto your lips, you have to prep your face. While it’s not the most exciting part of your pampering routine, applying your base makeup is the best way to smooth out blemishes and even out your overall appearance so that your face is fully primed for the fun stuff — in other words, it’s necessary. Below we’re breaking down the process to four essential steps that will help you create a flawless foundation. Use it as your go-to guide for getting ready, whether you’re getting polished for any old day (heck, sweep on a little mascara at the end and you’re set with a no-makeup makeup look!) or building your party face.
Step 1: Hydrate + Foundation
Hydrate Your Skin: We can’t stress the importance of taking care of your skin, because the better skin you have, the less makeup you’ll actually need. Besides drinking lots of H20 (because what you eat/drink affects your skin), invest in skin care products like serums and SPF-rich moisturizers that work with your skin type — applying them after cleansing will always be your first step with base makeup. Be sure to apply in sweeping, upward motions to promote tight + taught skin.
Apply Foundation: There are so many types of foundation out there: mousse, powder, matte, tinted moisturizers, gel, liquid… not to mention the myriad neutral-toned shades. I’ve known some women to compare finding the perfect foundation to the search for the perfect boyfriend, so here’s a tip on finding The One: Match your foundation to your neck and décolleté so that it will blend better on your face. Once you have one that fits the bill, apply across your face with your fingers, a foundation brush, makeup sponge or any way that makes it easier to blend while preserving product. I always like to pull a little of the foundation down onto my neck to make sure that funny makeup line (you know the one I am talking about!) does not exist.
Step 2: Apply Concealer
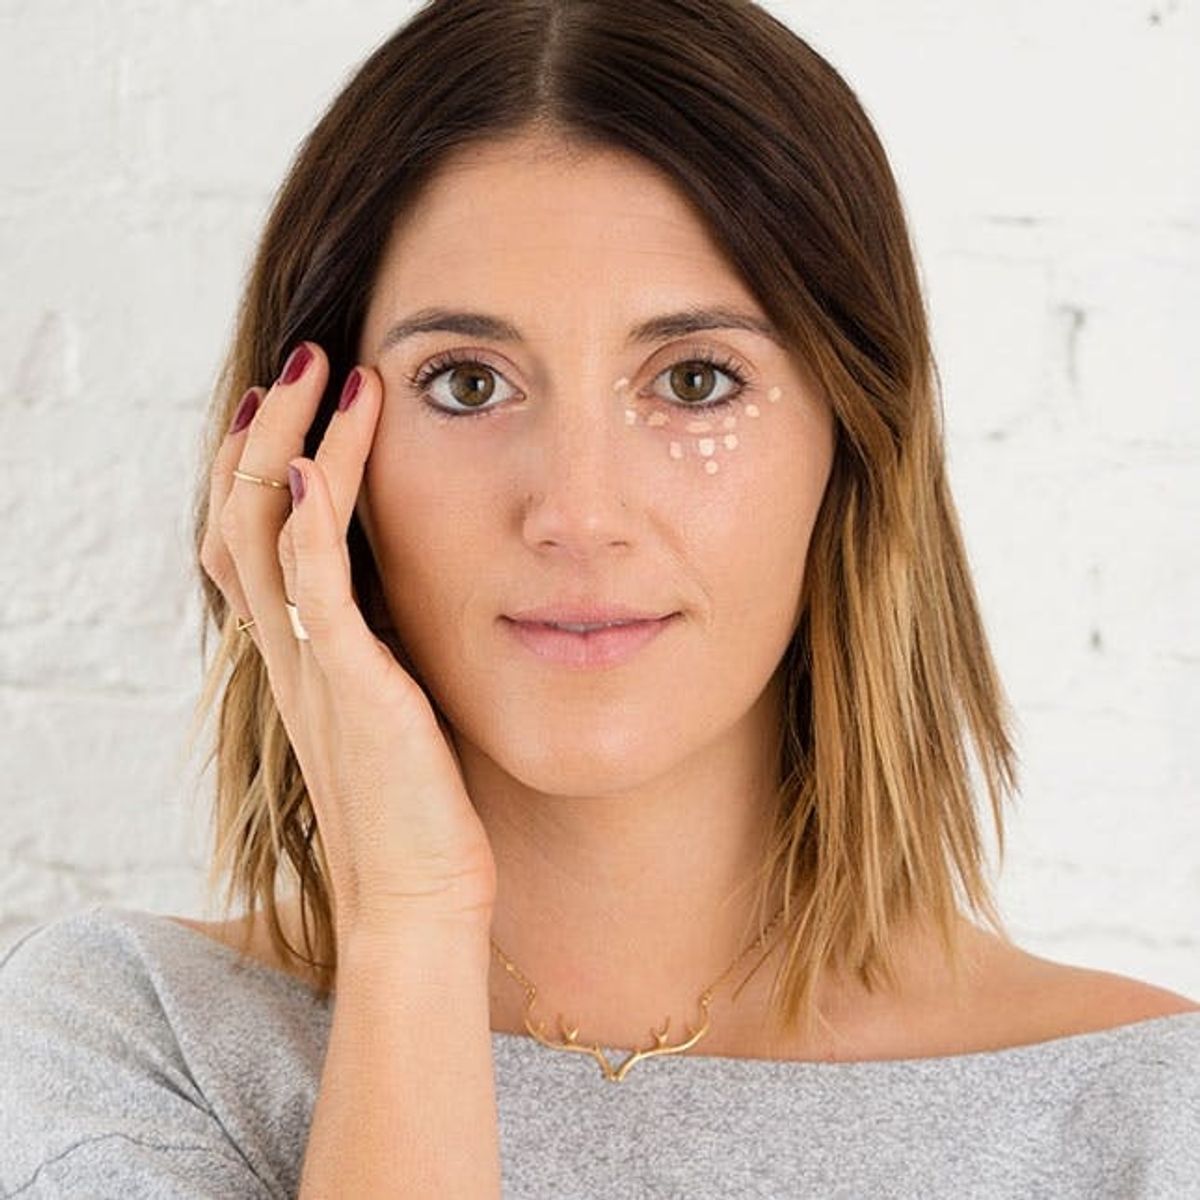
Apply your concealer completely under the eye and down toward the center of your face in an upside-down pyramid shape and blend it by tapping your ring finger over the product and pressing into your skin. The heat from your fingers will help melt the product and blend more naturally with your foundation. Your concealer should always be a shade or two lighter than your foundation. The lightness is going to smooth and brighten the appearance of your skin and lift your entire face.
Step 3: Contour + Highlight
Contour: When you apply foundation, you take away all of the natural shadows and tones in your skin, making your face appear flat and unnatural. This is how you put them back. You can do this in a Kardashian-like fashion to completely reshape your face – a killer technique for major events like weddings or any event where you’re snapped in the spotlight — or you can go for a more natural contour that will fit right in with your everyday look. The best way to achieve a basic contour is to apply your bronzer in two shapes on your face; an “E” (or number “3” depending on what side of your face you are working on) and a “W.” Do the following on both sides of your face:
“E” or “3”
– Start in the center of your forehead at your hairline.
– Sweep your bronzer in a crescent half circle along your hairline down to your temple and into the hollows of your cheeks (First timers: Make a fish face — the hollows of your cheeks are the part that’s sucked in).
– Pull the brush back to your hairline and down onto your jawline and blend the brush down onto your neck.“W”
– Start at the hinge of your jaw.
– Brush down onto your lower cheekbone and up onto the side bridge of your nose.
– Without touching the center of your nose, bring your brush to the opposite side of your nose, brush down onto your lower cheekbone and up onto the opposite hinge of your jaw.Highlight: Apply highlighter (or concealer if you want a more matte finish) to the center of your brows, along the bridge of your nose, on your upper and lower lip and on an angle along the top of your cheekbones. Gently tap the brush over the highlighter to blend gently over your contour — sweeping the brush will smudge it. Remember, not all highlighters are created equal. If you have lighter skin, look for one that’s opalescent, if you have darker skin, look for a golden highlighter, or if you want to up the drama — no matter what your skin tone — go for a shimmering or pearlescent highlighter.
Set It: Using powder over any form of liquid makeup is going to keep your makeup in place. Work this step into your routine if you want a long-lasting look, but skip it if you’re going for a dewy finish.
Step 4: Blush
Blush: Finish your base makeup by adding a flush of color to your cheeks with blush. Find the right place to sweep it on for your face shape in our Blush 101 tutorial and be sure to blend!
This entire process could be done in around five to 10 minutes after you practice a few times. Then open up that “DIY Makeup” bookmark tab and let the fun begin!
Love the necklace and rings? Shop them here: Padgett Holke Antler Necklace ($36) + Gigglosophy Wide and Extra Wide Band Rings ($12 each)
What is your simple beauty regimen? Do you have any good tips or tricks to get your base face on for the day? Tell us in the comments below.


