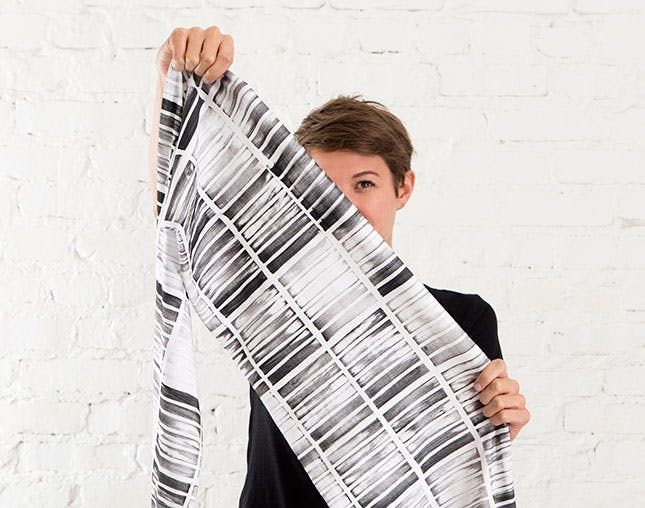
Lately we’re loving the natural feel of hand-printed textiles. From patterned dresses to stamped linens, there’s something really nice about these carefully hand-made designs. So, we decided to bring you TWO hand-stamped DIYs in the form of scarves and napkins.
We partnered up with Almost Makes Perfect to make these two sister kits — the Hand-Stamped Napkins Kit and Hand-Stamped Scarf Kit — available for $25 each in our online shop. The best part about these projects are how easily you can create your own custom stamps and change them out for multiple designs. Both of these kits are part of our pilot collection of Brit Kit Collabs, and we’re super excited to share them with you!
What are Brit Kit Collabs? Glad you asked! We teamed up with eight of our favorite makers, bloggers and designers to create a brand new set of nine exclusive Brit Kits, just in time for the holidays. Head to the shop to check ’em all out, and follow along to learn how to create your own hand-stamped textiles.
Learn more about Molly Madfis of Almost Makes Perfect by checking out her maker profile right here. Now, time to get stamping.
Materials + Tools:
– cotton napkins OR jersey scarf
– fabric paint
– sticky back foam
– wood block
– foam brush
Additional Tools (not included):
– scissors
– pencil
Instructions:
1. Trace around the wood block onto the back side of your sticky foam sheet.
2. Cut out your desired shapes.
3. Peel off the paper backing and stick foam shapes onto one side of the wood block.
4. Brush fabric paint onto your stamp using the foam brush.
6. Press stamp down firmly onto your napkins or scarf and reload with paint to create a repeating pattern.
7. Let air dry for 4 hours before wearing and 72 hours before machine washing.
Let’s get stamping!
Trace the wood block shape onto the back side of your sticky foam sheets using a pencil.
Cut out strips, triangles or any other custom shapes with a pair of scissors while staying within the size limits of the wood block.
Peel off the paper backing and stick your foam shapes onto one side of the wood block.
Brush a thin layer of fabric paint onto your foam stamp using the paintbrush. Leave some of the stamp dry for a nice brush stroke effect.
Press your stamp down firmly onto your napkins or scarf to transfer the fabric paint. Continue stamping until you have reached your desired effect. For the napkins, we loaded up the stamp with new paint for every section, for a consistent print.
So simple, but so good! Once you’ve finished stamping, let the fabric paint air dry for 4 hours before use and 72 hours before throwing in the washing machine.
Don’t forget you can make all sorts of shapes with your leftover sticky back foam. Simply peel away the old shapes, cut out new ones and stick them on for design #2!
Take a look at those nicely stamped napkins sets, available in three colors – Dusty Blue, Poppy and Lavender.
For the scarves, we tried out a slightly different technique, only loading up new paint every other section, giving the pattern a nice contrast. You can also play with a bit of a gradient, loading up more paint at the top of your stamp and less paint near the bottom.
Take your pick from four colors available for the Hand-Stamped Scarf Kit — Navy, Turquoise, Magenta and Black.
How cute does this look against a solid black tee and sharp blazer? No one will believe you made it yourself!
Sew, safety pin, or tie the ends together to turn it into an infinity scarf, or simply tuck the ends in to give the same effect.
Show that baby off, you’ve earned it!
What other projects would you use this stamping technique for? Tell us in the comments below!
