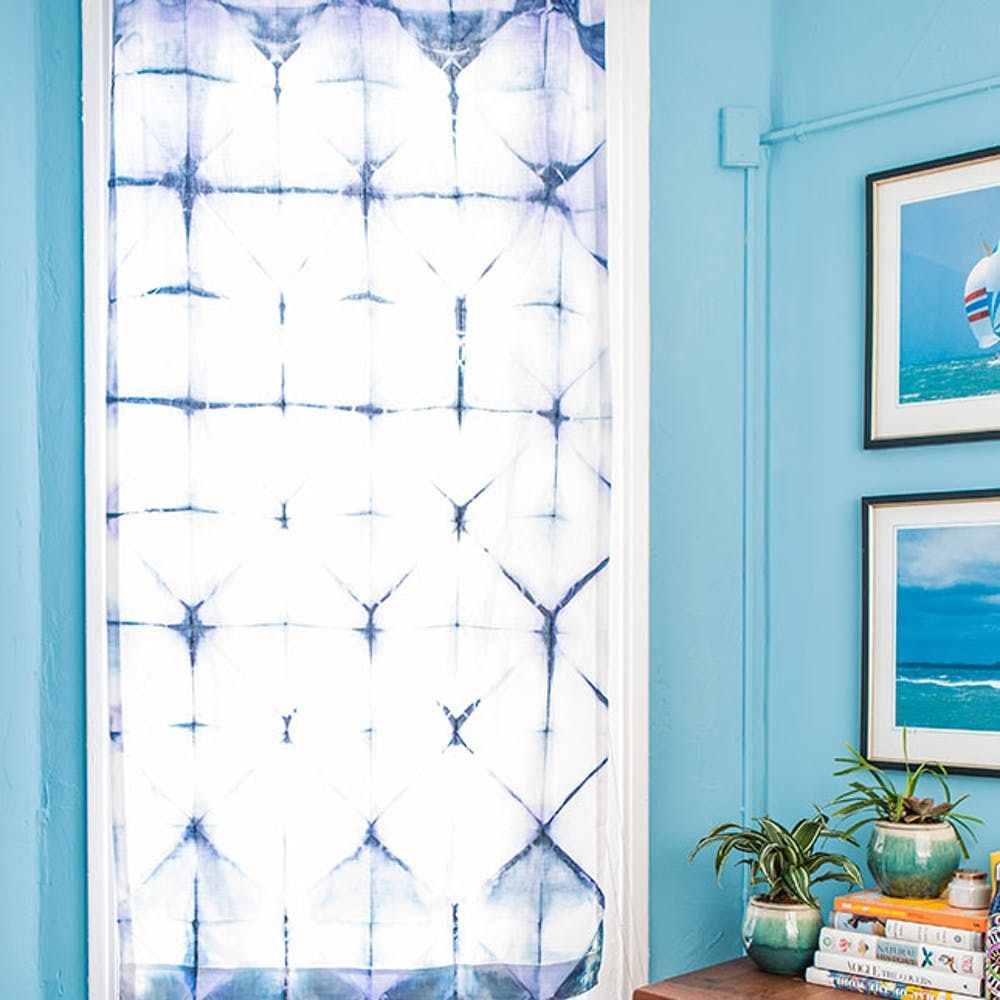
Ever tried indigo dye or tie dye and come out looking like a smurf? Yeah, we’ve all been there, but now there’s an even easier and less messy way to dye anything your heart desires with this Indigo Blue Textile Kit from Yellow Owl Workshop. There’s less cleanup time and a steady applicator that allows you to create the exact shibori dye we all know and love. So don’t hesitate to turn your home into an indigo haven with quite possibly one of the easiest DIYs ever.
Materials:
- Indigo Blue Textile Kit
- rubber bands
- aluminum foil
- curtain
Materials in Kit:
– instruction booklet
– Indigo Blue textile ink
– protective gloves
Instructions:
1. Lay the curtain out flat.
2. Fold curtain longways, alternating every other fold.
3. Take the long fold and fold one corner in to create a triangle shape.
4. Fold the triangle every other way until the curtain is a complete triangle.
5. Add rubber bands at each corner to hold the curtain in place.
6. Dip sides of folded curtain into a bucket of water.
7. Press the indigo dye applicator onto the wet sides of the triangle.
8. Continue until most of the sides are covered in indigo dye.
9. Allow the curtain to dry for at least 24 hours or until it is thoroughly dry.
10. Unfold curtain and put it on a curtain rod and allow the sun to shine through.
Time to get folding. Lay out the curtain completely flat on a flat surface and begin folding the long side every other way until you get an accordion-style fold the length of the curtain.
Once the length of the curtain is folded, take one corner and fold it up to create a triangle shape. Continue this fold in the accordion style (see above) until the curtain is a complete triangle shape.
Folding is finished! Now just make sure there aren’t any curtain pieces peeking out too much.
Add rubber bands to the corners of the triangle. The thicker your curtain is, the more the rubber bands like to pop off. To ensure they don’t, stretch the rubber bands from corner to corner to keep the curtain in place.
Dip the sides of the triangle into a bin of water, making sure to not let the water get all over the whole thing. This is important so that the dye doesn’t bleed into the the middle of the triangle.
A little bit of water goes a long way, so be sure to squeeze out any excess.
Now you’re ready to dye. Put on the gloves, open up the applicator and begin adding dye to the wet areas of the curtain.
Make sure to get the sides and bottom of the triangle, not just the top. Continue to coat the wet portions of the curtain until most of the sides are dyed.
That’s it. Let the curtain dry for at least 24 hours give or take, depending on how thick the curtain is. After the curtain is dry, unfold it, put it on a curtain rod and flaunt your new statement piece for your room.
One of the best things about your new curtain is that it can also double as a shower curtain. Just add a liner and you’ve got a beautiful new piece for your bathroom.
How great does this look in our creative director Anj’s new bedroom? Check out her ongoing home makeover with Lowe’s.
DIY Production: Brittany Griffin
Photography: Kurt Andre and Chris Andre
What will you try dyeing with this indigo dye kit? Share it on Instagram using the hashtag #iamcreative.
