20 Printables to Update Your iPhone Case
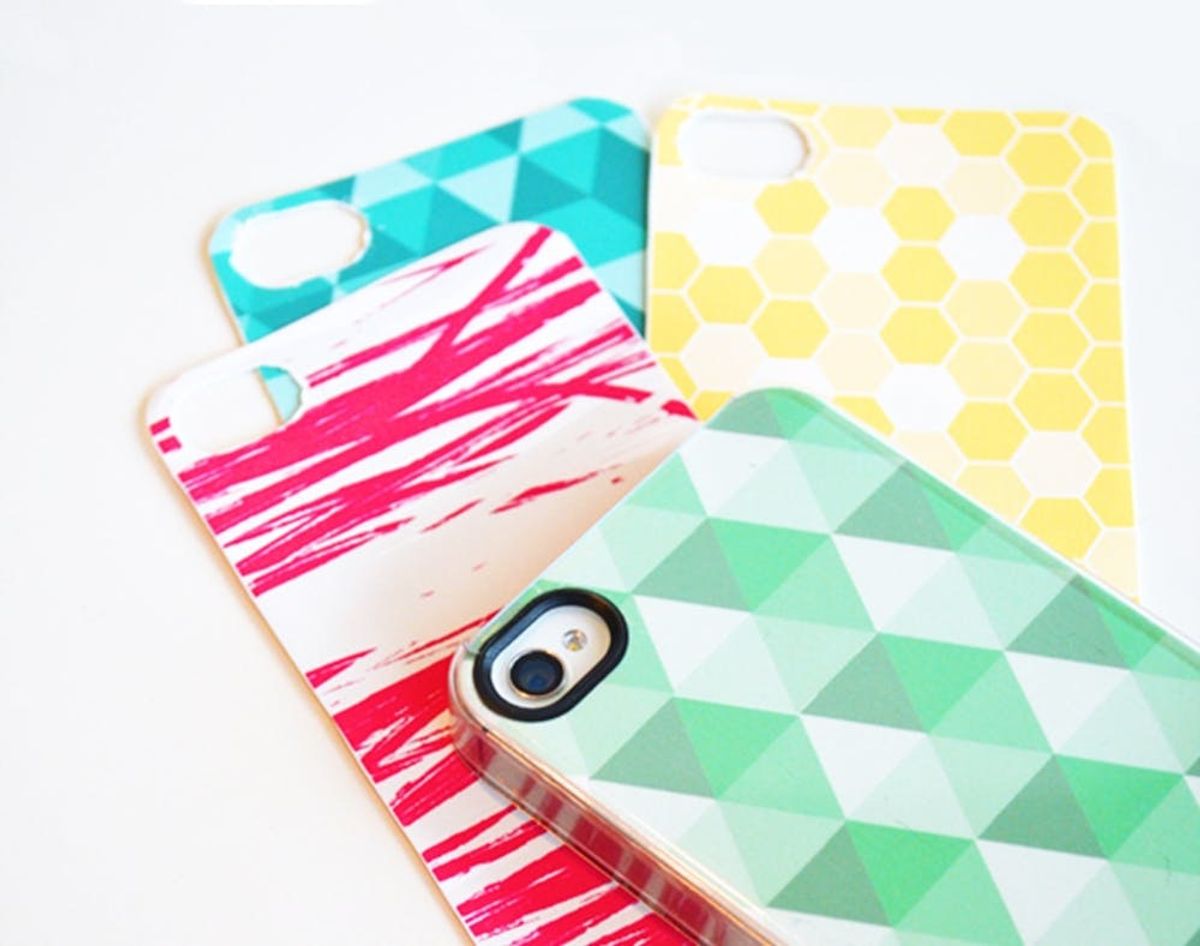
We look at our phone for countless minutes out of the day. Naturally, it’s pretty easy to get bored of your iPhone case, no matter how much you love it when you buy it. So instead of shelling out more cash every time you’re in the mood for change, try this super easy DIY! Just grab a clear plastic phone case, and print out a temporary cover to stick inside. It’s that easy! We rounded up 20 printable covers from around the web to get you started, but feel free to get creative and make your own.

1. Pretty Patterns: We’re loving these monochromatic patterns. Just pick your favorite color and go! (via See That There)

2. Bright Watercolors: These watercolors are insanely bright and fun. All your friends and coworkers will be begging to know where you got your unique artwork :) (via Dabbles and Babbles)

3. Geometric Patterns: Geometric patterns are all the rage these days and it’s easy to see why: they make a bold statement, especially this abstract color blocked version. (via See That There)

4. Whimsical Covers: What does the fox say? Whatever you want — it’s on your phone, after all. (via Being Geek Chic)

5. Repeating Patterns: These unique patterns may not perfectly match anything you wear, but they’re a perfect candidate for combining with your fave patterned dress! (via Love Design Life)

6. Various Interchangeable Patterns: Got patterns on the brain? From polka dots to plaid, these covers have you… well, covered. (via Dabbles and Babbles)

7. Wood and Colors: This look combines several of our favorite trends: woodgrain, stripes and color blocking. We might be in love. (via See That There)

8. Black and White: Looking to go the simple route? Hit up this black and white chevron and go ahead and add your monogram. (via Design Editor)

9. Colorblocked Patterns: This color palette is simply to die for. The empty white spaces really make the vibrant colors pop. (via Jones Design Company)

10. Wedding Cases: Perfect for the whole bridal party, these phone cases are a fun and practical gift, especially if the bride needs to pass off her phone during the prep. (via Something Turquoise)

11. Faux Wood: Wood tech-accessories are gorgeous, but they can get a little pricey. Try out the look for cheap with this printable! (via The 36th Avenue)

12. Watercolors: This sophisticated look would add a pop of color to a simple white or black outfit. (via See That There)

13. Autumn Designs: These are technically fall designs, but we’re loving the subtle colors all year long. Although they do make us crave a pumpkin spice latte… (via Jones Design Company)

14. Quirky Cases: Um, how great is that Teenage Mutant Ninja Turtles reference? We definitely know some ’90s girls who would love this one. (via Being Geek Chic)

15. Nautical Covers: It’s summertime and the living is easy. Let your phone get in on the water-y fun without having to replace it :) (via Jones Design Company)

16. Geo Skull: This might be the chic-est skull we’ve ever seen. We’re totally digging the color vibes here. (via Maiko Nagao)

17. Geeky Cases: Of course we had to throw a little retro tech into the mix. After all, who doesn’t want to relive their Game Boy days? (via The Stylish Geek)

18. Bright Patterns: Gorgeous colors? Check. Interesting patterns? Of course. These definitely deserve a double take. (via See That There)

19. Tribal Patterns: These tribal-inspired patterns are totally on trend and insanely gorgeous. Don’t go to your next music festival without one of these! (via Maiko Nagao)

20. Yellow Retro Phone: Gotta love the mix of retro graphics on your new school tech. The softness of the yellow just adds to the vintage feel. (via Jones Design Company)

How do you upgrade your phone case without breaking the bank? Share your DIY ideas in the comments below and your best pics over on Facebook.

Can you believe that there is actually a whole holiday dedicated to eating as many beignets, King Cakes, and loaves of rainbow bread as you want?! Mardi Gras, we love you, but our bodies are glad you’re just a one-day holiday and not a week long ;) Inspired by the beautiful rainbow bagels made by the Bagel Store, this loaf also has some purple, gold and green hues to amp up the Mardi Gras spirit. Hand letter your own printable bread wrap to give it as a gift, or slice it up and top it with cream cheese and sprinkles. This recipe will yield three loaves of bread, but you may want to make more, because once it’s adorned with sprinkles, this fairy bread will have everyone coming back for more.

Ingredients:

  • 10 1/2 cups all-purpose flour
  • 3 Tablespoons sugar
  • 3 packets rapid rise yeast
  • 3 teaspoons salt
  • 3 Tablespoons butter
  • 1 1/4 cups water
  • 3/4 cup milk
  • purple, yellow and green food coloring (we used a mix of McCormick neon and assorted food coloring)
  • plastic wrap
  • dish towel
  • printable bread label

Instructions:

  1. Mix one cup of flour, one tablespoon of sugar, one teaspoon of salt and one packet of rapid rise yeast in a mixing bowl.
  2. In a microwaveable bowl, mix 3/4 cup of water, 1/4 cup of milk, one Tablespoon of butter and about 10 drops of food coloring. Microwave on high for 45 seconds.
  3. Pour liquid mixture into the dry mixture and mix throughly. Once mixed, slowly add another 2 1/2 cups of flour.
  4. Repeat steps 1-3 for each color of dye.
  5. Rip apart the colorful dough into small pellets and twist together to form a rainbow marbled effect.
  6. Cover the dough with plastic wrap and a dish towel and let it rise for one hour.
  7. Cut the risen dough into three equal loaves, place into greased pans and bake at 400 degrees Fahrenheit for 30 minutes.

This bread will yield three loaves of Mardi Gras goodness, so make sure you have enough of all the ingredients. Grab a mixing bowl and mix 1/3 of the dry ingredients together — one cup flour, one Tablespoon of sugar, one teaspoon of salt and one packet of yeast.

Grab a microwaveable bowl and mix 1/3 of the wet ingredients together — 3/4 cup of water, 1/4 cup of milk, one Tablespoon of butter and about 10 drops of food coloring. Microwave for 45 seconds on high.

Pour the wet ingredients into the dry ingredients. Let’s also just call attention to that awesome purple color :)

Mix the wet and dry ingredients together, and then start slowly adding in another two and a half cups of flour. Mix it all the way until it forms one huge ball of dough.

Repeat the first set of steps for each color. Each will yield one loaf but we will be mixing the colors together to form rainbow magicalness.

Last but not least — the green! Don’t be afraid to try other colors. This is a great recipe to create any holiday loaf. (Don’t be surprised if we do it for Fourth of July too!)

Once you have all three loaves, pull apart each color into little pellets. Layer the colors when you put them in the bowl to get maximum color variation.

Use your hands to give this mega loaf a good couple of twists.

Cover with plastic wrap and a dish towel and let the dough rise for at least one hour.

Divide your loaf into three sections and place into a greased pan. If you don’t have a loaf pan, you can totally make a rounded loaf in a cake pan or on top of a cookie sheet. Bake for 30 mins at 400 degrees Fahrenheit.

Wait for the bread to cool and then slice into magical rainbow bread.

If you’re nice enough to gift one of these loaves, we suggest printing out a bread wrap printable and hand-lettering a fun saying. Tie up with some baker’s twine or embroidery floss.

Sadly, there is no baby inside of this sweet dessert. But hey, we’re totally all for you continuing the King Cake tradition and adding the little trinket into your sweet loaves. Just remember to warn your guests ;)

Add sprinkles and enjoy!

Show us your rainbow bread on on Instagram and check out our email newsletter for more recipes!

DIY Production and Styling: Kelly Bryden
Photography: Brittany Griffin

This post has been updated.

Major spoilers for the last two episodes of Only Murders in the Building season 4!!

Only Murders in the Building season 4 has finally unmasked its killer...and it's the one character I never suspected. After last week's reveal that Marshall was Sazz's stunt protégé, stole her script for theOnly Murders movie, and is behind her death as well as Glen's, the Only Murders in the Building season 4 finale opens with Marshall holding Mabel captive — and somehow it only gets crazier from there.

  • In the Only Murders season 4 finale, Charles and Oliver have to rescue Mabel from Marshall.
  • Marshall was Sazz's stunt protégé, then stole Sazz's script and passed it off as his own.
  • The Only Murders in the Building season 4 ending kills off a beloved character.

The 'Only Murders in the Building' Season 4 Ending, Explained

Patrick Harbron/Disney

After learning Marshall is the killer they've been looking for, Charles is determined to save Mabel, especially since he didn't get to save Sazz. Realizing Marshall has scaled the apartment building in the past, Charles and Oliver wind up on the building's ledge so they can get to her window. And just like the rest of the season, Martin Short absolutely steals the show. One of my favorite lines is, "Charles, you're my ride or die. And my strong preference is to ride." Icon!!

Our favorite comedy duo jumps into Mabel's apartment and starts to fend Marshall off with Eva Longoria's Lady Longoria-19 in 1 Multi-Tool, but it doesn't take long for him to gain the upper hand. Right when he's about to kill the trio, they're saved by Jan of all people, who shoots him in the back from the empty apartment across the courtyard...then reveals she's been hiding in Charles' apartment since we last saw her. (Feel free to take a deep breath to help process that information. I did.)

Patrick Harbron/Disney

With the threat taken care of, Mabel, Oliver, and Charles return to the Only Murders in the Building movie set — which Mabel says now has "mercifully low" cringe levels. Seeing Eugene Levy, Eva Longoria, and Zach Galifianakis in their element, and our podcast trio getting to honor Sazz's memory is such a well-earned moment for the season. We also get to see the first page of Sazz's script (which features her monologue from the beginning of the episode), on which she says, "When you take your hero on a journey, get him in all kinds of trouble, but land him home safely? Nothing better than that." It looks like our leads have finally landed safely!

The Only Murders in the Building ending features Oliver and Loretta finally getting married before she leaves to film in New Zealand, and Charles and Mabel joining Oliver at the altar. Loretta's walked down the aisle by her son Dickie and Oliver's son Will, which made me WEEPY. Considering Martin Short as Oliver is one of my favorite casting choices of the 21st Century, I am just so happy to see him happy.

Patrick Harbron/Disney

But, like all the seasons before, the finale takes a turn when Sofia Caccimelio tries to hire the trio to find her husband Nicky, a Caputo crime family member who episode 9 tells us is missing. They deny her request, but considering actress Téa Leoni just joined season 5, it looks like she won't be taking no for an answer.

And in the final moments of the Only Murders in the Building season 4 ending, Mabel, Charles, and Oliver finds Lester dead in the fountain! Lester is such a kind and comforting presence in every episode, I can't believe it! (How could you Hulu, HOW COULD YOU?!).

Who's the killer in season 4 of Only Murders in the Building?

Patrick Harbron/Disney

The Only Murders in the Building season 4 killer is Marshall P. Pope (whose real name is Rex Bailey), supposed screenwriter on the Only Murders movie. He reveals that his dreams of being a writer were always being squashed, and that Sazz was the first person who was ever kind to him.

But when Sazz shows him the only copy of her Only Murders movie, and he realizes just how good it is, he decides to take things into his own hands. He sends the script to Bev Melon at Paramount, and it ends up getting greenlit immediately (which explains why Charles, Oliver, and Mabel are contacted about the movie so abruptly).

When Sazz finds out, she confronts him and says she's going to tell Charles about the stolen script after his Broadway debut. Desperate and suffering a bit of a meltdown, Rex flies to New York and kills her, then puts her body in the incinerator.

Where can I watch Only Murders in the Building?

Patrick Harbron/Disney

All episodes of Only Murders in the Building season 4 are available to stream on Hulu!

Here's everything you need to know about Only Murders In The Building season 5!

It's that time of year again, when apples are ripening, days are getting shorter and school is starting up. So if you're obsessed with all things back-to-school, then check out these awesome (and free!) printables. This year, we're saying hello to bright agenda stickers, fruit-themed designs and chic book covers. Even adults will want to try these. Scroll through and download a couple of these 17 super fun back-to-school printables.

1. Composition Book Covers: Back in the day, all our notebooks were splattered with a cartoon unicorn at best. These emoji-inspired book covers will have you hitting the download button immediately. (via Damask Love)

2. Fill-in-the-Blank Lunchbox Notes: Leave cute love notes for your kids or partner that will have them smiling each time they open up their lunchbox. Everyone loves a fun reminder of just how great they truly are. (via Five Mari Golds)

3. Paper Pencil Tube Printable: Skip the traditional pencil cup and try your hand at these fresh and unique paper pencil tubes. They’re perfect for holding markers, pens and, of course, pencils. (via Hello Wonderful)

4. Book Covers: Instantly update your textbooks with these undeniably classic, modern-inspired book covers. Aside from their stylish exterior, they might even protect your books from an accidental coffee spill. (via Better After)

5. Lunch Notes: Inspire your loved ones to do and be their best. These cute lunch notes are sure to brighten anyone’s day — even yours! (via Living Locurto)

6. Daily Checklist: If writing in a boring planner every day sounds like your worst nightmare, this is the printable set for you. You'll get tons of cute pages that are full of motivation and personality. (via The Sarah Johnson)

7. Lunchbox Jokes: If you'd rather write a funny one-liner than a sentimental note, then these lunchbox joke printables are just what you need. Google some kid-safe jokes for inspiration. (via Paging Supermom)

8. Have a Bright School Year: Present your favorite student with this year's highlighter set by binding it with a cheery and colorful printable tag. Or attach the tag to a pencil cup to remind yourself where you keep your markers. (via The TomKat Studio)

9. Colorful Monthly Prints: If you need a calendar in under 30 minutes, we've got the printables for you. Be prepared for lots of colors and fun fonts. (via Short Stop Designs)

10. First Day of School Signs: Kids are never too old for a first-day frame to mark those back-to-school pictures. It works for kindergarten, high school or even college. (via Mother's Niche)

11. First Day Signs: This is another great first-day-of-school printable to capture that morning full of possibilities. The classic design has the advantage of being black and white, so it'll save you color ink. (via Remodelaholic)

12. Food Sticker Printables: Get ready to take class head on with these adorable stickers featuring food-inspired prints. Plus, these can double as both agenda and binder decor stickers. (via Design Eat Repeat)

13. Motivating Lunchbox Stickers: There's nothing better than going to school with a positive mindset and feeling like someone truly believes in you. Make your loved ones feel special with these motivating lunchbox stickers. (via The Crafted Sparrow)

14. Summer Printables: Back-to-school printables don’t just have to be about calendars and stickers. These, for example, are the perfect touch for adorning a fun keychain or binder cover. (via Oh Happy Day)

15. Planner Stickers: Planner stickers should be fun, sassy and full of color. These printable labels are just what you need to stay organized and plan out your weekdays. (via Craftsposure)

16. Watercolor Binders: Watercolor inspired notebooks are a perfect way to start each and every morning. Check out these fun and motivational journals that you can DIY. (via Eighteen25)


Want more organization inspo? Follow us on Pinterest!

This article has been update from a previous post.

We love Halloween here at Brit + Co, I mean really love it. And we also embrace the celebrations in all of their forms, from IRL blow-out bashes to WFH office parties. If you've got a virtual Halloween party to attend on Zoom with your remote team or friends across the country, here's how to get dolled up for the best costuming and celebrating from a Zoom-y distance. Keep reading for fun ways to dress up with wigs, makeup, and festive tops without having to worry about what you've got on the bottom — basically, the costume version of a mullet. Happy Halloween!

Brit + Co

Pirate

Ahoy, matey! Just grab a red scarf, eyepatch, striped shirt and a fishtail side braid for this classic and super easy costume.

Brit + Co

Flamingo

This makeup is on point. Here's how to DIY this feathery look.

Brit + Co

Unicorn

Fulfill your magical dreams with this DIY unicorn costume.

Brit + Co

Cleopatra

Stand out with a costume that's part-Ancient Egyptian, part-badass babe. With some eyeliner and well-chosen accessories, you'll be able to craft up a Queen-of-Egypt-inspired Halloween costume that's sure to blow your Zoom party guests away.

Brit + Co

Rosie the Riveter

White button down and red polka dot headscarf, easy peasy. For the hair, pin up half of your hair and twist it up into a bun. Then take the rest of your hair and create another bun a little lower on your head. Top the look off with the scarf, and you'll be riveting in no time. :)

Brit + Co

Princess Leia

Best buns on the planet! Create this iconic hairdo with this easy hair hack.

Brit + Co

Elsa

Does Frozen still melt your heart? Be everyone's favorite snow queen with this DIY costume.

Brit + Co

Holly Golightly

Top off your top knot with a tiara, then add a LBD, pearls, coffee and sunnies.

Brit + Co

Angry Bird

We've seen this costume before, but this look is too dang cute to pass up. Especially when all you need is a yellow wig and some craft supplies. Draw out the face onto felt and cut it out, then glue the head piece to a headband. Everything else can be taped to the wig.

Brit + Co

Creepy Clown

Whether you're going for a clown or a mime vibe, this kinda creepy, kinda cute look will achieve all of your Halloween dreams.

Brit + Co

Day of the Dead

Dress up as a Dia de los Muertos sugar skull with this easy DIY tutorial.

Brit + Co

Lady Gaga

It's been quite some time since Gaga donned her signature bow, but we'll never get enough of it. Head to our Hair Bow tutorial here for the full how-to.

Brit + Co

Pumpkin

Okay, this may be really, really basic, but it is a Halloween staple. Plus, it's the one time of year you can wear all orange, all the time. Grab an orange wigand go!

Brit + Co

Queen of Hearts

Ace this Queen of Hearts costume with ared wig or red spray dye!

Brit + Co

Frenchie From Grease

Here's an excuse to break out that cute pink wig in your closet. Add a Pink Ladies jacket and bubble gum and you're ready for beauty school!

Brit + Co

Strawberry Shortcake

You can go with the full Strawberry Shortcake costume or just order a pink wig and bonnet— then add freckles and a pink top and you're Zoom ready!

Brit + Co

Pop Art

If you are looking to really up your costume game and stand out on Zoom, go for this pop art makeup look. Pop on some comic leggings (totally WFH-friendly!) and yellow wig too.

Brit + Co

Vampire

Don a black lip and eye makeup, then use that same eye makeup or black face paint to create a faux widow's peak. Spooky!

Brit + Co

Jem

We are as obsessed with our '80s cartoon characters as we are with wig costumes. For bright pink tresses, Jem is an absolute must!

Brit + Co

Cruella de Vil

This fierce villain oozes style, even if she is totally evil. Use spray hair dye on half of your head, then top off the look with red gloves, a faux fur coat, cigarette holder and a little Dalmatian. Oh, and that evil cackle is essential.

Brit + Co

Kitty

Every girl's backup costume is also the perfect Zoom costume. We made our ears by attaching black foam ears to a headband, but you can easily find a readymade option at just about any store this time of year. Get the full Black Cat makeup tutorial right here.

Brit + Co

Witch

Don a black witch hat and follow this makeup tutorial for this spooky cool green witch.

Brit + Co

Black Swan

The hair hack here is that slick top knot and the crowning tiara, though the key to the whole scene is obviously those crazy eyes. Here's a great tutorial right herefor gals who want to go all out.

Brit + Co

Minion

Learn how to get the look of the cutest minion costume ever!

Brit + Co

Katy Perry circa 2014

Or go for any of Katy Perry's Dark Horse video costumes with these Brit + Co DIYs.

\

Brit + Co

Mad Hatter

This Mad Hatter costume is pretty easy to replicate. Grab a brown jacket from your closet, orange wig and top hat. The thread holster is made by stringing thread spools onto yarn and draping it over the shoulder. The makeup is an understated version inspired by the original, but really easy to recreate. And yes, those are fake eyelashes as eyebrows!

Brit + Co

Mime

You can just stay on mute!

Brit + Co

Pippy Longstocking

Recreate Pippy's completely insane pig tails with this easy DIY trick.

Brit + Co

Barbie

Your co-workers will immediately get the idea once you show up with your pink visor, watercolor swimsuit and bike shorts outfit! They may even get a little jealous!

Brit + Co

Poison Ivy

"That girl is poison" best describes former botanist turned green seductress Poison Ivy. See how you can DIY this costume here!

Brit + Co

Gamora from Guardians of the Galaxy

Maybe you prefer to be a bada**, take no prisoners green goddess like Gamora from the Guardians of the Galaxy franchise. For fun, you can try your hand at method acting by acting like her during your virtual Halloween party. Just try to keep the sarcasm on the lighter side.

Brit + Co

Minions

To make things more fun, you and a few co-workers can dress up as Minions! It's a DIY-costume that's inexpensive and funny.

Brit + Co

The Sanderson Sisters

Hocus Pocus is basically life for the Brit + Co team so it only makes sense to show up to your virtual Halloween party wearing one of the above costumes!

Planning any virtual Halloween gatherings? Share your costumes with us @BritandCo!

Brit + Co may at times use affiliate links to promote products sold by others, but always offers genuine editorial

After revealing her breast cancer diagnosis on Pod Meets World in August, Danielle Fishel continues to prove she won't let the disease hold her back. The actress and director took the red carpet for the Wizards Beyond Waverly Place premiere, and she opened up to PEOPLE magazine about how this disease continues to impact her. Here's what she had to say!

At the premiere, Danielle Fishel shared with PEOPLE that she was actually "back and forth" about showing up to the premiere. She said, "I obviously wanted to come tonight because I absolutely love this show. I'm so honored to have been able to direct a couple of episodes of it."

Still, there was something holding her back. She shared, "At the same time, everything I wanted to put on, I was like, 'I can see my scars in that. Oh, I can see my scars in that.'"

Instead of letting that hold her back, though, Danielle decided to push herself. "I was like, 'Why am I going to let that be a factor in deciding to live my life?'" she said. "I got dressed and I had my makeup artist do her magic and I feel fine." Ultimately, she said she was "happy" to be there — which is all you can ask for when you're facing down your fears!

Fishel told PEOPLE that her "whole life has changed" since her diagnosis. She explained that her life consists of "many doctor's appointments," check-ups, and side effects. She said, "It's not fun, but it is what it is. And with all that said, I'm very fortunate and I'm going to live, which is the most important thing."

Back in August, the star explained to Rider Strong and Will Friedle that was diagnosed with DCIS — ductal carcinoma in situ — which she described as "a rare form of breast cancer." Even though she discovered the disease at "technically stage zero," she underwent surgery to remove the cancer, as well as follow-up treatments.

When she announced her diagnosis, Danielle explained that she thought she would "would suffer in silence" and "not tell anyone." However, it's clear she's made the conscious effort to not only lean on her community, share her story, and brave the aftermath — surgery scars included.

Fishel's brave red carpet move comes after another fellow breast cancer survivor, Olivia Munn spoke out earlier in October about how her own scars. Munn bared her scars for a SKIMS campaign, after deciding she didn't wanna cover them up anymore. We're so proud of all these strong women for telling their stories and fully embracing themselves, scars and all!

Looking for more inspiring news? Be sure to sign up for our weekly newsletter so you never miss a thing!