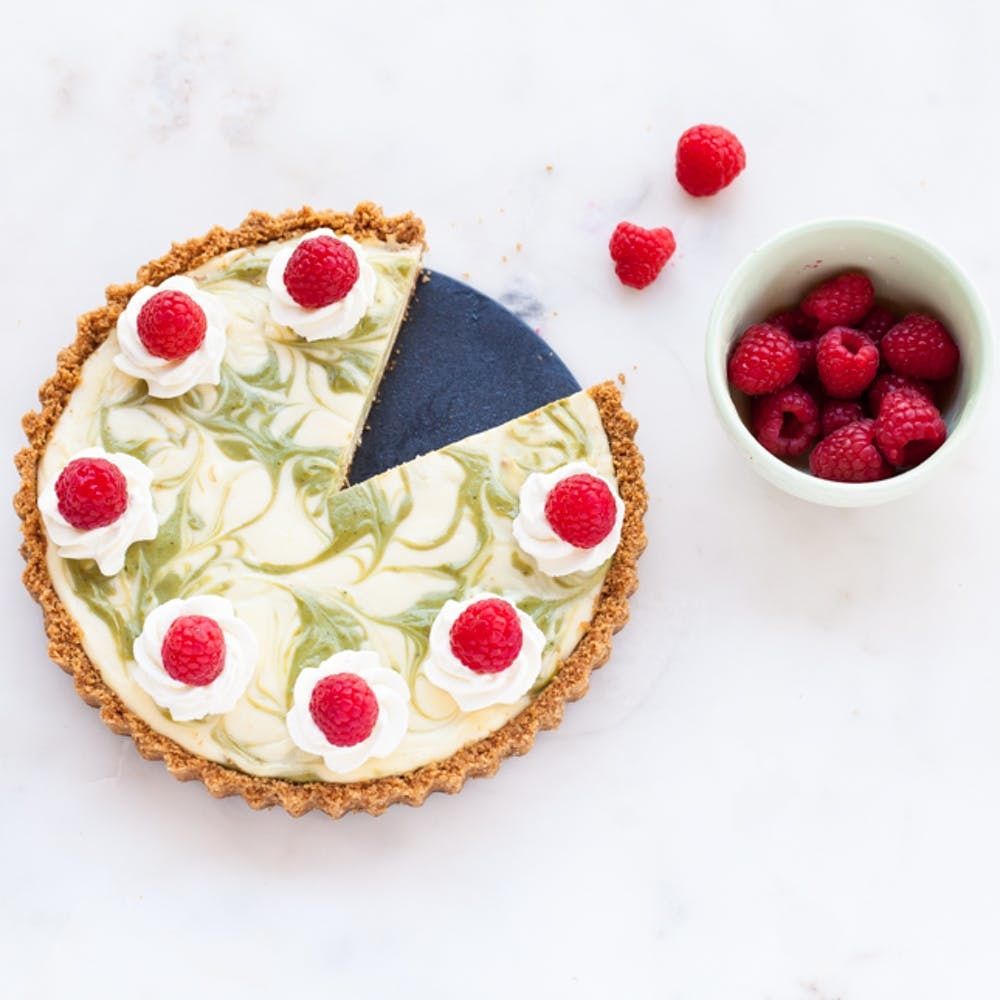
We’ve seen matcha in a tea latte and matcha used as a health food, but why not matcha baked in a creamy, dreamy dessert?! Whether you prefer to sip it or eat it, matcha is here to stay. This finely ground, high-grade green tea not only adds a beautiful pop of color to your recipes, but it pairs extremely well with baked goods too! This Marbled Matcha Cheesecake does just that. Swirls of vibrant green atop a luscious cheesecake? Sign us up! Paired with a simple graham cracker crust, a few dollops of whipped cream and fresh raspberries, this cheesecake makes the perfect tea time (or any time) treat.
Ingredients:
For the Cheesecake:
— 16 ounces cream cheese, softened
— 2/3 cup granulated sugar
— 1/3 cup sour cream
— 2 large eggs, at room temperature
— 1 teaspoon vanilla extract
— 1 1/2 teaspoons cornstarch
— 1 to 2 teaspoons matcha green tea
For the Crust:
— 2 cups graham cracker crumbs (from about 6 sheets of graham crackers)
— 5 Tablespoons melted butter, cooled
Instructions:
For the Crust:
1. Pre-heat oven to 325 degrees Fahrenheit.
2. Using a food processor, crush grahams into medium-fine crumbs (or use store-bought crumbs).
3. Combine the graham crumbs with the melted butter. It should feel like wet sand.
4. Butter the inside of an eight-inch tart pan (with a removable bottom) or spring-form pan. Tightly wrap the outside of the pan in foil.
5. Dump the graham-butter mixture inside the pan. Using the bottom of a drinking glass or measuring cup, firmly press the crust into place.
6. Bake for 8-10 minutes and cool before filling with the cheesecake mixture.
For the Cheesecake:
1. Using an electric mixer, beat together the softened cream cheese and sugar until extremely smooth.
2. In a separate bowl or measuring cup, whisk together the sour cream, eggs, vanilla and cornstarch. Try to mix together any lumps that may form.
3. With the mixer running on low, slowly and gradually add in the egg mixture to the cream cheese mixture. Mix until creamy and smooth.
4. Remove about 1/3 of the mixture and place in a separate bowl. Stir in the matcha powder until combined.
5. Begin spooning the mixture into the cooled crust. Start by alternating layers of the vanilla and matcha cheesecake fillings, gently swirling throughout.
6. For the top layer, dollop small tablespoons of the matcha on top of the vanilla cheesecake filling and use a toothpick, wooden skewer or the tip of a knife to swirl it together.
7. Transfer the foil-covered pan into a large baking dish (or sheet pan) and fill with about 3/4 inch of boiling water. Carefully transfer both pans into the pre-heated oven.
8. Bake for 30-40 minutes, or until the edges are puffed but the center still jiggles slightly.
9. Cool on a cooling rack for at least 30 minutes before transferring the cheesecake to the refrigerator.
10. Continue to cool in the refrigerator for at least two hours before serving.
11. To decorate, use dollops of whipped cream and raspberries if you like!
Begin with softened cream cheese to prevent clumps from forming. However, if small lumps do appear in the batter, it will still taste great.
Whisk together the cornstarch and eggs as smoothly as possible. Quickly bring eggs to room temperature by placing them in a bowl covered with room temperature water while you gather the rest of your ingredients.
Slowly mix the cream cheese and egg mixtures together to prevent clumping.
Depending on the brand of matcha and your personal preference for the flavor, add in 1-2 teaspoons of matcha powder.
Baking the cheesecake in a water bath will cook it more gently and may prevent cracks on the top. Be very careful of the boiling water when removing the pans from the oven. If a bit of water leaks through the foil and onto the crust, don’t stress — it will (most likely) still be okay!
A little browning on top of the cheesecake is okay, but try not to over-bake it. If the top cracks (sometimes due to over-baking), don’t worry! Cover any blunders with whipped cream and raspberries!
What are your favorite ways to enjoy matcha? Be sure to tag your creations on Instagram using the hashtag #iamcreative.
