Mikaila Ulmer Is Making the Business World a Little Bit Sweeter
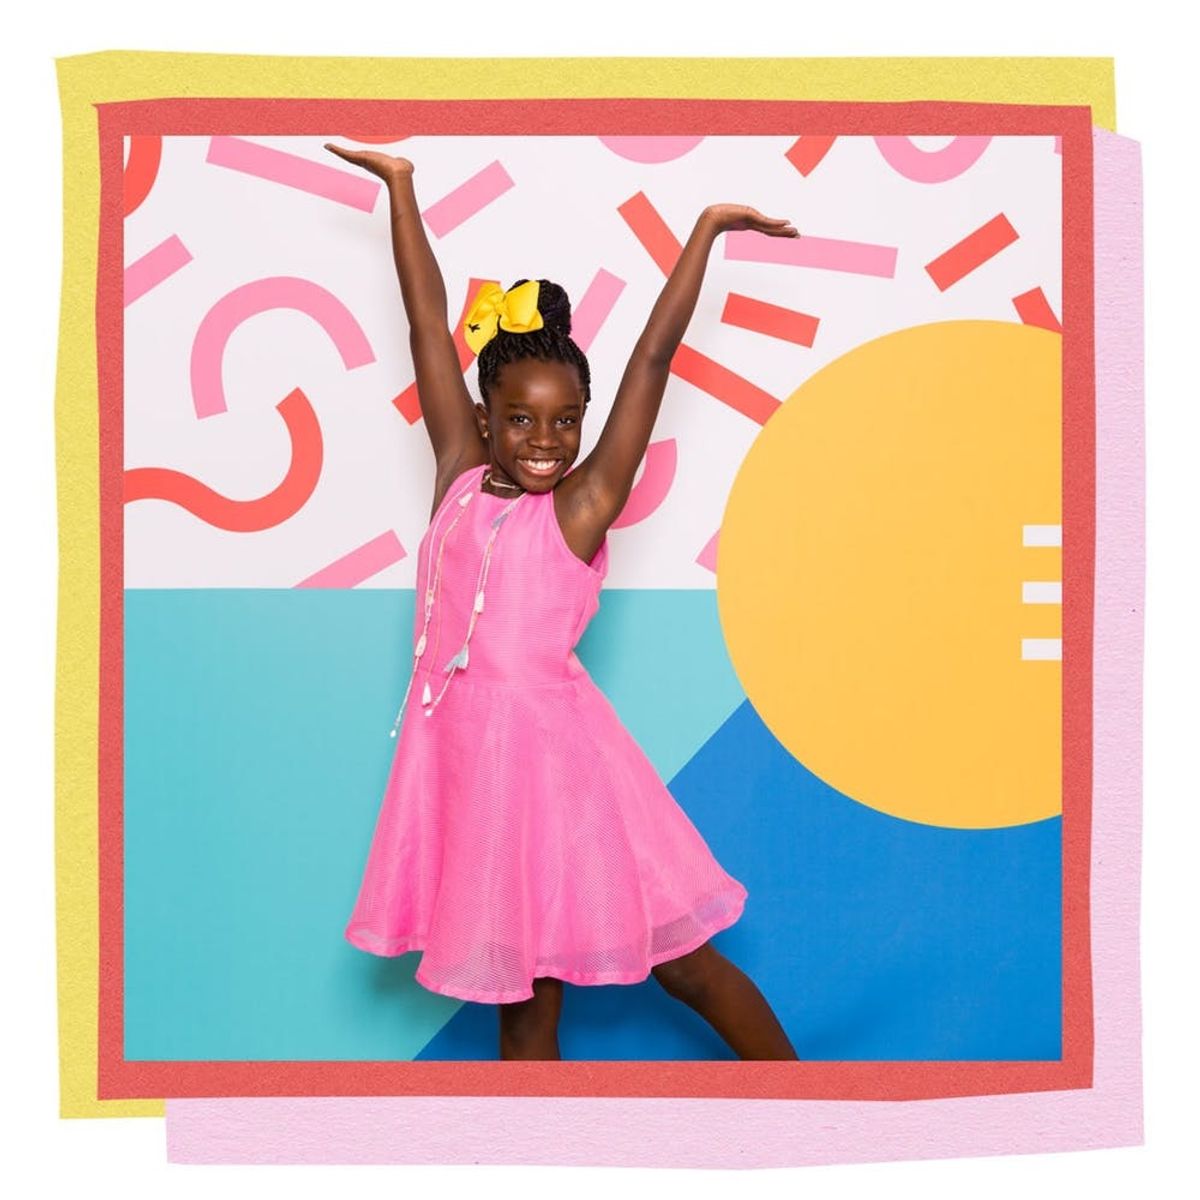
Mikaila Ulmer Is Making the Business World a Little Bit Sweeter

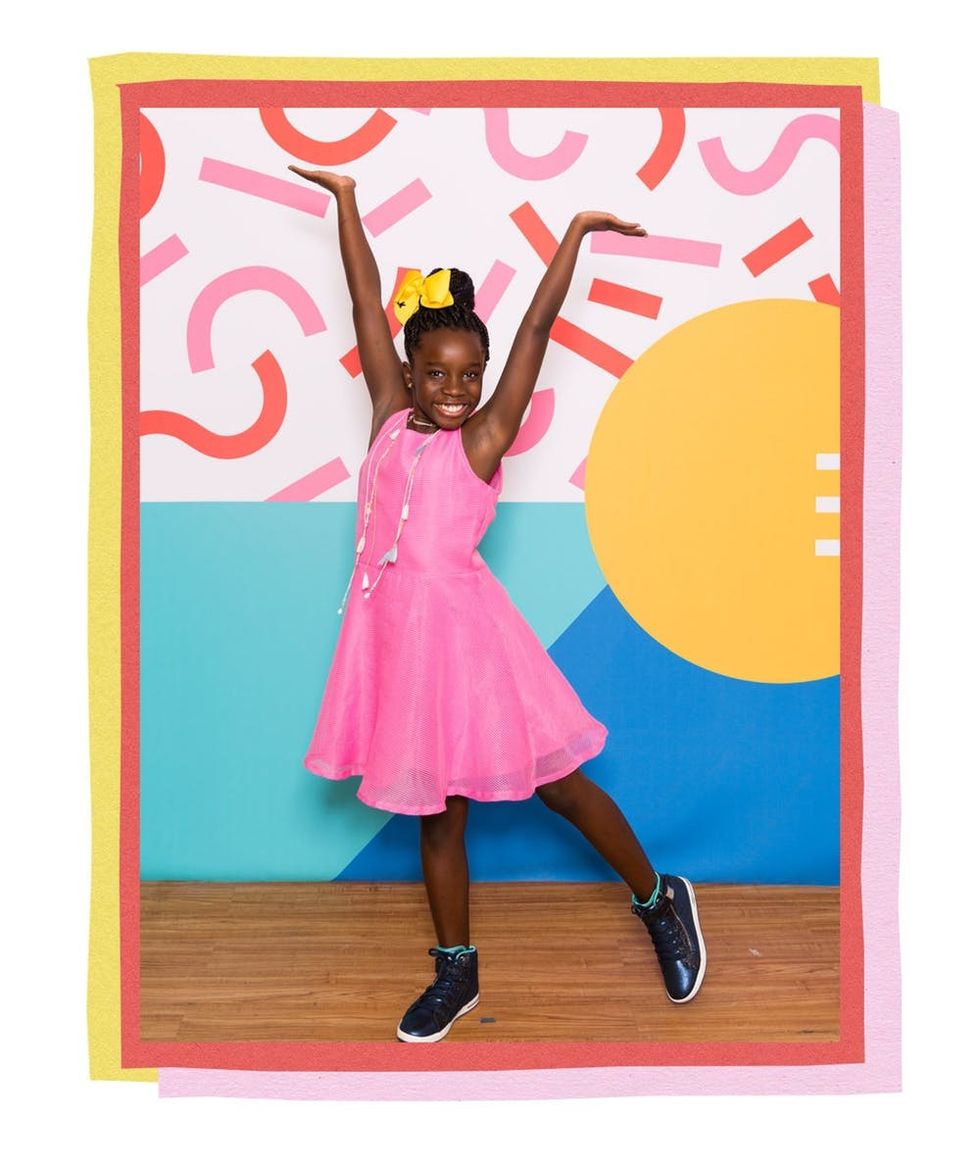
Mikaila Ulmer’s business started with two bee stings. When she was just four years old, Ulmer was stung twice in one week. With a little encouragement from her parents, she turned fear into curiosity by doing some research on the little ecosystem balancers. Around the same time, Ulmer opened a lemonade stand using a recipe from her great-granny Helen’s 1940s cookbook. Cue that classic light bulb moment. Ulmer decided to use honey to sweeten the lemonade, and just like that, her company Me & the Bees was born.

In 2015, Ulmer and her dad went on ABC’s Shark Tank to pitch Me & the Bees. They received an investment from “Shark” Daymond Garfield John, who has become a mentor to the young businesswoman. “[He always tells me] you have to grind, you have to work hard,” she says. Her grind has paid off. Since making an appearance on the show, Ulmer’s lemonade can now be found in more than 400 Whole Foods stores across the US. Here, we talk with Ulmer about the ins and outs of being a young business owner, how she handles being underestimated on the regular, and what she’s learned from her Shark Tank mentor Daymond Garfield John.
B+C: As a new high school student and a business owner, what does a normal day usually look like for you?

Ulmer: I’ll wake up at six, get ready, and go to school. I might do an interview after school. I’m going to do volleyball after school as well. I’ll eat dinner with my family, have a little fun, do homework, and then do it again. Sometimes I’ll skip a couple of days to travel and do a presentation. I might use some of my time to send out purchase orders, to check the website, or to read some articles about the bees. My days are always really different!

B+C: What part of your business do you enjoy the most?

Ulmer: My favorite part is probably traveling and going to places like South Africa, Toronto, and New York to teach workshops at schools and churches about the bees. I also love getting letters that are like, “You inspired me to start my own company and now I’ve just gotten into my first store.” I just got a letter this week from a person named Jayden. He lives in Hong Kong and there’s a project at his school called “Most Impactful Teen” or something like that. He said he chose to use me and my company as that teen, which is amazing. He wrote, “I loved being able to work with you and your company because I had so much evidence to support my thesis. I got an A+ on it.”

B+C: Being a socially-minded businesswoman is really important to you. Can you tell us a little bit about the nonprofit you started?

Ulmer: Yeah! It’s called Healthy Hive Foundation and we help save the bees. It encourages entrepreneurship through research, protection, and education. We are researching and funding important honey bee research, like why they’re dying, how we can save them, and what are some alternatives to pesticides. We’re also traveling the world teaching other kids about how we can save them and why we need to save them and then we’re putting action to that by using technology and having other large corporations donate portions of their land to the bees.

B+C: When you introduced former President Barack Obama at the UN Women’s Summit in 2016, he said he “hopes you’re hiring.” If Obama came to Me & the Bees looking for work, what job title would you give him?

Ulmer: That’s a hard one! I would probably give him head of strategic partnering because he can use his influential status to make different partnerships for the company and encourage other people to join the mission.

B+C: Since you made a deal with Shark Tank’s Daymond Garfield John, the two of you have remained close. What business lessons have you learned from him?

Ulmer: Well, one of the big ones is something he mentions in his book Rise and Grind. Basically, you can’t expect great things to happen if you don’t work for them. He keeps on mentioning that with every presentation that he does and with every book he writes. You have to grind, you have to work hard. That’s probably the biggest lesson I’ve learned from Mr. Daymond.

B+C: Speaking of Shark Tank, what changed after you went on the show and secured a deal?

Ulmer: Well, the show gave us national marketing. We had so many people coming to the website asking where to buy it. We told them, “Go to your local Whole Foods and ask them to carry the product because we’re already in their warehouses.” We were able to get into even more Whole Foods right after we went on Shark Tank. We grew 400 percent, which is huge because we’re a small company.
B+C: Do you often feel like you’re underestimated because of your age in the business world?

Ulmer: I’ve been underestimated plenty of times. I’ll be like, “Yeah, I have my own lemonade company.” They’ll say, “Keep on doing that, you should also participate in business fairs, and things like that.” Then, I have to say, “No, I actually have my own lemonade company. I’ve graduated from selling it out of my lemonade stand in front of my house and doing it at business fairs. It’s in 28 stores, and we’ve been on Shark Tank.” Usually, they’ll be like, “Oh, you actually have a lemonade company. Well, here’s my business card, and let me know if you need an investment.” I have to help them realize that I’m actually an entrepreneur. I do that by being as professional as I can be, like making sure I have my handshake right and my introduction right. Everything like that matters when you’re making a partner.

B+C: Lemonade stands are still a popular pop-up business model for young kids looking to make a quick buck. What’s your business advice to them?

Ulmer: I would say, lemonade stands are great, but find a way to leverage that. Maybe go downtown and figure out if you’re able to sell your lemonade in front of restaurants — which is what I did sometimes instead of just selling it in front of my house in the neighborhood. Or sign up for things like Lemonade Day in the business fair. You’ll get a lot more traffic at your lemonade stand and hopefully make even more profit. Do something more than just a lemonade stand. Find a way to make it unique and different!

B+C: What’s the big dream for you? Do you want to be running Me & the Bees forever?

Ulmer: I definitely want to keep running it, make it more successful, and have an even bigger impact. But in the future, like, there’s only so much lemonade that one person can have, so I possibly want to sell it and use the experiences that I’ve learned with this company to start other companies. But before I sell it, I might want to grow it to $20 million in revenue or even more, and do that in a socially conscious way. I also want to be able to invest in other kid-entrepreneurs, and other women-run companies, as well.

Written by: Cortney Clift and Kat Armstrong

Design by: Yising Chou

Photos via: Photo by Jim Bennett/Getty Images

“Future Women of America” is a multimedia project spotlighting 15 young women under 20 who are making bold moves. Click here to see all the trailblazing women and girls featured.

Before youth poet laureate Amanda Gorman recited her breathtaking poem, "The Hill We Climb," at the inauguration of President Joe Biden on January 20, 2021, Brit + Co featured her as part of our "Future Women of America," a multimedia project spotlighting 15 young women under 20 who were making bold moves. Click here to see all the trailblazing women and girls featured.

In November of 2017, Amanda Gorman went on MTV to deliver her “State of the Union" address. Standing at a podium in a sparkly, coral dress, Gorman leaned into the mic and began reciting her poem: “History doesn't wait / It doesn't reach out / Change only comes to those who speak out / So I did." Gorman wasn't addressing the nation as president (although she does plan to run in 2036), but rather as the nation's first-ever youth poet laureate. The title, awarded to Gorman in April 2017, wasa trailblazing role and one that Gorman seemed born to play.

As a spoken word poet, she's used to taking center stage and using her work to speak out on topics like oppression, feminism, race, and marginalization. But in this new role, she made a point to take some time to sit back and listen to America's youth. During her year as youth poet laureate of the U.S., she went on a summer tour to visit libraries and schools across the country. She also focused on bringing poetry into places (like MTV) where it isn't typically seen.

Gorman has now passed the year-long tenure to another talented young poet, but her career has only just begun. A student at Harvard, Gorman still performs frequently across the country, all while maintaining a 4.0 GPA (she has since graduated cum laude). Here we talk with Gorman about what it was like to be the first-ever youth poet laureate, what inspires her as a writer, and what happened when she finally met her hero, Lin-Manuel Miranda.

B+C: What was your greatest accomplishment of the last year?

Gorman: I got to meet Lin-Manuel Miranda last month, and I'm sorry, it doesn't get much better than that! I was asked if I wanted to perform a poem honoring him and also Dick Van Dyke — they were both receiving an award — and it was kind of like, “Duh," with a capital D-U-H, exclamation mark! I didn't bring world peace. I didn't find a cure for cancer. But I have to say, getting to meet Lin-freakin'-Manuel Miranda literally makes me feel like I have an armored shield on my chest. He is such an idol, especially with what he did with Hamilton, really revolutionizing the way in which stories can be told. That is always what I'm aspiring to with my own work as a poet.

B+C: Speaking of celebrity run-ins, back in 2016 you were invited to the White House to meet Michelle Obama. What was that like?

Gorman: When I got there, I was looking out and I saw the White House lawn. I remembered Michelle Obama's Democratic National Convention speech, where she mentions looking out at that lawn and seeing her daughters play in the house that was built by slaves. I'm the descendant of slaves, particularly one further up the line whose name was Amanda as well, and I was just having a full-circle moment. Meeting with the first black First Lady as a descendant of slaves, being honored for writing when my ancestors would be prosecuted for doing the same thing, I was literally about to faint from just the majesty of it.

B+C: There's often this idea that poetry is archaic and boring. What do you think of the relationship between young people and poetry today?

Gorman: I think there's something in the way in which poetry is taught in the classroom that gives it a characteristic of being old and this kind of medieval form that only has one shape and one voice. Growing up, I wasn't always really deeply exposed to young writers, writers of color, or writers that were women. What's really exciting, especially now with technology and the digital age, is there's a lot of access and exposure that instantly happens when you have spoken word poets who can get millions of views online. You have poets posting their work on Instagram, and that becomes shareable and accessible. So poetry is no longer just siphoned to an exclusive realm, but it really can be by anyone, for anyone. It's really the art of the people, and I think younger generations are really the ones who are taking that, running with it, and doing really phenomenal things.


B+C: How do you think poetry and performing have affected your confidence and your self-esteem?

Gorman: You know, I think it's a dual relationship. My poetry is all the more self-assured and profound when it's coming from a place of security rather than a place of doubt. That's not to say that I don't question myself, but being a performance poet, being a spoken word poet is 80 percent about body language. It's about convincing people that my words deserve to be heard before they even hear my voice. If I'm going to pursue my art, if I'm going to continue doing that which I love, then I have to love myself. I have to be confident enough in myself that I can compel other people to love my work as well.

B+C: What do you do when the writer's block hits?

Gorman: My game plan changes depending on the situation, but what I've been doing recently is reading memoirs, letters, or essays by mostly women writers who struggled with the same thing. I read about how they knocked down those barriers. There's this one essay I've been reading and rereading. It's called “Thoughts on Writing: A Diary," by Susan Griffin, in the collection The Writer on Her Work. There's a line where she says, “This experience renders a precise meaning," and I just repeat that to myself. This experience of having writer's block, this experience of suffering, this experience of doubt, has a precise meaning through my writing. I might not see it yet, but over time and with work and with perseverance, that meaning will make itself clear to me.

B+C: What is the biggest struggle for you in your work?

Gorman: Being a full-time student [at Harvard]. I'll be traveling to Colorado, California, New York City… but I also have a paper due that's not going to write itself. I hope that challenge doesn't sound too self-centered, but I'm trying to be honest about it because I don't like to pretend I'm someone I'm not. What I can say is that I'm someone who's in love with poetry and sharing it with others, and I'm also someone who's in love with learning and being a student.


B+C: What's on the horizon for you?

Gorman: Finishing my last two years at Harvard and graduating. My life is a mosaic of many different things. I'm really taking the time to focus on my writing. I'm working on some book ideas, and I'm hoping that I can turn those out before I go back to school and have more essays due. That's definitely something that's on the horizon for me. Also, probably stalking Lin-Manuel Miranda.

B+C: What do you say to other young women who are your age or maybe your age when you started, who have big career dreams but aren't sure how to go about achieving them?

Gorman: I don't believe in an aspiring anything. I don't believe in an aspiring writer, an aspiring director… If you want to go do it, go out there and do it. If you want to lead your community, if you want to be a scientist, that's something you can desire to do, but it's also something that you can get started on right now. Don't hesitate, don't wait. Don't aspire. I'm trying to find something that rhymes with this to make it sound cooler. Oh, maybe like, “Don't aspire, achieve!"

Written by: Cortney Clift

Design by: Yising Chou

Photos courtesy of Anna Zhang and Amanda Gorman

This article has been updated from a 2018 post.

This edible crescent-roll cornucopia is our way of making a normal cheese boardmore festive — and definitely more fun — during the holiday season. Our go-to this time of year is a massive cheese plate that can stand alone and be the main attraction, or the starter for a larger meal. Press on for the surprisingly easy steps to braid a breaded cornucopia.

Chris Andre

Materials + Tools:

  • 1 roll of tin foil
  • 2 packages of crescent rolls
  • 1 egg (for egg wash before cornucopia goes into the oven), optional

Chris Andre

Instructions:

Start by sculpting tin foil into the shape of a cornucopia (it looks like a cone with an upturned tail). Pro tip: Lightly pack tin foil so it's easier to remove later from your baked cornucopia. Crescent rolls should be buttery enough that this shouldn't be difficult.

Chris Andre

Your tin foil mold should look a little something like this.

Chris Andre

Pop open the crescent rolls and cut the triangles into strips. Pinch together the ends of strips to make strips longer.

Chris Andre

Braid crescent roll strips. You can make these as fancy as you want. Not a braiding pro? Skip this step and leave those strips alone.

Chris Andre

Wrap tin foil cornucopia with braids/strips. Make sure you cover all the tin foil. Leave a little wiggle room at the opening of the cornucopia, so that when you’re done baking you can pull some of that tin foil out.

Chris Andre

Use any extra dough to cover the bottom of your cornucopia. Pinch the sides and anchor those braids/strips in.

Chris Andre

Brush on egg wash before placing your cornucopia in the oven. Bake at 350 degrees Fahrenheit for 20 minutes. Take out of oven and cover spots of cornucopia that are already golden brown with extra tin foil. Bake for another 20 minutes at 250 degrees Fahrenheit.

Chris Andre

Let it cool down until it’s easy to handle. Remove tin foil.

Chris Andre

Place cornucopia in corner of your cheese plate. Arrange cheese on your serving tray.

Chris Andre

Add crackers — we like to have two or three options.

Chris Andre

Don’t forget to fill up your cornucopia. It's called "the horn of plenty" for a reason. Fill with fresh fruit like grapes, apples, and pears.

Chris Andre

Add nuts like walnuts and pistachios to fill in any empty spaces. Garnish with fresh herbs like rosemary and sage to finish it off.

Chris Andre

Voilà! Invite over your friends, open a bottle of wine, and dig in!

Chris Andre

A cornucopia cheese board will become your new favorite holiday tradition.

Show us your crescent-roll cornucopias on Instagram and check out our baking classes (and our Easy Thanksgiving Desserts piece) for more holiday food inspo!

DIY Production and Styling: Paris Fried

Paris Fried: Paris loves any excuse to celebrate and throw a themed party. She loves experimenting in the kitchen and has a terrible sweet tooth. When she's not crafting in her studio, she's at the farmers' market buying seasonal produce or at her favorite local theater watching double features.

This post has been updated.


Brit + Co's 'Grammable Holiday Cookie Guide

As long as Rudolph’s nose is red and wintry wonderlands are white, the holidays and cookies will go hand in hand (or, preferably, in both hands). We teamed up with cookie artists Ashley McNeal and Vickie Liu to help you create some of the prettiest cookies on the block! Get ready for serious inspiration, whether you're a total cookie newbie or a next-level baker.

Cookie Decorating Essentials

Cookie Decorating Essentials

Must-have tools and equipment

Half the battle of whipping up the perfect batch of cookies is having the right equipment. Here are all the essential tools you'll need in the kitchen to help master any recipe.

FOR MAKING DOUGH

Stand Mixer

FOR ROLLING OUT DOUGH

FOR BAKING COOKIES

FOR DECORATING

Mixing Bowls

Piping Bags

FOR FINISHING TOUCHES

Succulent Cookies

Succulent Cookies

Homegrown… well, homemade!

Create a Christmas succulent garden on top of a round cookie for an on-trend treat. We used a peanut butter sugar cookie as the base and vanilla buttercream for the cactus effect, but you could always go with your fave flavors and apply the same decorating technique.

(Makes 24 cookies)

Ingredients:

  • 1 batch peanut butter cookie dough
  • 1 batch buttercream frosting
  • gel food colors: green, black, brown, terracotta, lime green
  • pearl sprinkles: red, white, gold

Equipment:

Directions:

1. Bake the cookies. Roll out the cookie dough, cut it using a round cookie cutter, and bake until golden brown. Allow the cookies to cool completely before decorating.

2. Dye the buttercream frosting. Divide frosting into five bowls and use the coloring to create varying shades of green plus terracotta. Bowl one: Dye with black and green food gels, beginning with just a drop until you create a dark green. Bowl two: Add drops of green and brown to achieve a less-dark green. Bowl three: Dye with black and green to form darkest color green. Bowl four: Dye with terracotta. Bowl five: Dye with lime green.

3. Transfer frosting into piping bags. Bowl one goes into a piping bag fitted with tip #243. Bowl two is fitted with tip #62, and Bowl three is fitted with tip #2. Bowl four and five go into the bag together (one on each side), fitted with tip #21.

4. Pipe on details with buttercream icing. Use tip fitted with #61 to pipe on a large succulent on the cookie. Pipe a cone-shaped base for the center, then pipe arch-shaped rows from top to bottom as you turn the cookie. Then use a medium rosette piping tip #243 to create smaller succulents. Pipe multi-color spikes for filler succulents with #21 piping tip. Lastly, apply small green pearls for final filler with #2 piping tip.

5. Sprinkle on those pearls. After icing each cookie, quickly sprinkle a few pearls. Allow to dry.


Get the Recipes

Galaxy Snowflake Cookies

Galaxy Snowflake Cookies

Hello, cosmic creation

These starry night snowflake cookies look pretty stellar, don’t they? There are various icing techniques used in this intermediate recipe. You can make them simpler by skipping some of the decorative piping and focusing on the mirror glaze. The results will still be out of this world.

(Makes 24 cookies)

Ingredients:

  • 1 batch peanut butter cookie dough
  • 1 batch royal icing
  • gel food colors: purple, blue, black
  • edible silver stars
  • edible gold luster dust (mixed with vodka to create a gold paint)
  • white pearl sprinkles
  • white sanding sugar

Equipment:

Directions:

1. Bake the cookies. Roll cookie dough out, cut it using a snowflake cookie cutter, and bake until golden brown. Allow cookies to cool completely before decorating.

2. Dye the royal frosting. Divide it into four bowls. Bowl one: Dye with enough purple food gel to create a vibrant color. Bowl two: Do the same with the blue drops. Bowl three: Dye with black, beginning with one drop and adding more as needed. Bowl four: Leave white.

3. Transfer frosting into piping bags. Fill the purple, blue, and half of the black royal icings into a bag fitted with tip #2. Put the remaining black icing from bowl three into a piping bag fitted with a #1 tip. White icing goes into a bag fitted with tip #1.

4. Line and fill each cookie. Use the black icing bag and outline each snowflake to create a dam for flooding with icing (AKA filling the entire cookie with icing). Flood with the purple, blue, and black mixture. Drizzle in a little white. Use a toothpick or chopstick to lightly swirl the frosting to the outside edges.

5. Add galactic touches. Sprinkle on stars, and splatter on the edible gold luster dust with the paint brush. Let royal icing dry until hardened.

6. Pipe on the snowflake. Pipe on a snowflake design on the tops of each cookie using the white icing. Add a pearl sprinkle to the center. Coat with sanding sugar and shake off excess. Allow to dry.


Get the Recipes

Candy Cane Sloth Cookies

Candy Cane Sloth Cookies

Slow things down

We're always rush-rush-rushing during the holidays, so why not take after the sloth and slow things down. Bake cookies and meticulously ice them, sloth-like, so every detail is perfectly placed. We created our own custom cookie cutter! Download our cookie cutter printable, take it to your local baking supply shop, and have them 3D print the cutter for you. Or, in a pinch, print the doc, cut out the shape, and use it to trace around the dough.

(Makes 24 cookies)

Ingredients:

  • 1 batch peanut butter cookie dough
  • 1 batch royal icing
  • gel food colors: brown, black, red, pink, green
  • edible black pen

Equipment:

Directions:

1. Bake the cookies. Roll out the dough out, cut it using a candy cane sloth cookie cutter, and bake until golden brown. Allow the cookies to cool completely before decorating.

2. Dye the royal frosting. Divide it into six bowls. Bowl one: Adding one drop at a time, create a light brown color with brown food gel. Bowl two: Dye black, using one drop and adding more as needed. Bowl three: Dye red, using those drops a few at a time. Bowl four: Do the same with the pink gel. Bowl five: Leave white. Bowl 6: Dye green using those drops, a few at a time.

3. Transfer frosting into piping bags. The green icing goes into a piping bag fitted with a #1 tip. The remaining icings go in separate piping bags fitted with tip #2.

4. Sketch on your design. Use the edible black pen to draw out your design.

5. Pipe on the icing. Line the candy cane with white and red. Flood the candy cane with white and red icing, and allow for dry time. Line the scarf with green icing, the Santa hat with red and white icing, and the sloth body with brown. Flood the scarf and hat with green, red and white icing. Repeat for the sloth body and add the eye detail with light and dark brown. Allow dry time.

6. Add final details. Draw on a mouth and nose with the edible marker. Add eyes and toenails with black icing in piping tip. Line the scarf and hat. Add face details by dotting eyes with white, and adding pink cheeks with #2 piping tips.


Get the Recipes

Grinch Linzer Cookies

Grinch Linzer Cookies

Hearts that are two sizes too small

Linzers get a Grinch make-over for this beginner decorative cookie recipe. Start with animal cracker cookie dough, dye it Grinch green, and cut out tiny hearts in the center of each cookie. Then, sandwich the cookies in-between bright red raspberry rosé jam. You can’t help but get in the spirit of Christmas after one bite of these cookies.

(Makes 12 cookies)

Ingredients:

Equipment:

  • ruffle-edged round cookie cutter
  • mini heart cookie cutter

Directions:

1. Make the jam and Santa hats the day before decorating. Allow jam to cool completely and chocolate hats to firm up (pop them in the fridge or freezer to speed up time).

2. Bake the cookies. Using a stand or hand mixer, dye the cookie dough Grinch green with green food gel (use 2 drops or more as needed.). Roll out the dough, cut it with ruffle-edge round cookie cutter, and bake it according to directions.

3. Cut out the hearts. Once out of the oven, on half of the cookies, cut out a small heart in the center of the cookies using the mini heart cookie cutter. Allow the cookies to cool completely.

4. Assemble the sandwiches. Spread a dollop of jam on each solid cookie. Carefully sandwich with the heart cut-out cookie. Use a little bit of leftover melted compound chocolate to glue the hats (directions below) to the top side of each cookie.

GET THE CHOCOLATE SANTA HAT RECIPE


GET THE RECIPES

Blue Ombré Pinwheel Cookies

Blue Ombré Pinwheel Cookies

Hypnotically colorful

Although these look complicated, the recipe and technique is quite simple. The trickiest part is all the refrigeration needed. In total, these cookies will take about seven to eight hours to complete, so plan to divide the labor into two days. The best part, of course, is rolling the dough in the sprinkles of your choice. Just be sure they won't melt! We found sanding sugar and jimmies work best.

(Makes 12 cookies)

Ingredients:

  • 1 batch animal cracker cookie dough
  • blue food gel
  • sprinkles: dark and light blue jimmies, white and silver sanding sugars

Directions:


Get the Recipes

Rudolph Corgi

Rudolph Corgi

Fluff-tastic

Surely nothing is cuter than a corgi tush, so of course, we had to create our own custom cookie cutter. Just like with the sloth, download our cookie cutter printable, and either have the custom cutter made or print and cut it out.

(Makes 24 cookies)

Ingredients:

Equipment:

Directions:

1. Bake the cookies. Roll it out, cut it using the corgi cookie cutter, and bake according to directions. Allow the cookies to cool completely before icing.

2. Dye the royal frosting. Divide it into six bowls. Bowl one: Dye light tan with food gel, beginning with just a drop until you achieve the desired shade. Bowl two: Dye red, using those drops a few at a time. Bowl three: Dye black, starting with just one drop at a time. Bowl four: Repeat with the pink dye. Bowl five: Leave white. Bowl six: Dye brown, using a few drops at a time.

3. Transfer frosting into piping bags. The brown icing goes into a piping bag fitted with a #7 tip. The remaining icings go in separate piping bags fitted with #2 tips.

4. Pipe on details with royal icing. Line the rump and feet using skin tone, and line the tail and fur with the same icing. Allow to dry completely.

5. Ice the body and ears. Flood the top part of the rump with light brown, and the bottom part with white. Add a small dollop of pink on each ear, and lightly spread with an offset spatula. Allow to dry.

6. Create the face. Line the head and ears with skin tone. Line the center of the face with white. Flood the cheeks with light brown and the center of the face with white, and allow for dry time.

7. Add the finishing details. Add antlers with brown icing. Allow to dry. Use an edible marker for the mouth. Add eyes with black and nose with red. Re-line the rump with skin tone.


Get the Recipes

Millennial Pink Ornament Cookies

Millennial Pink Ornament Cookies

Sweet, simple, and of-the-moment

Just because you're new to the baking game, doesn't mean you can't wow in the cookie swap. Cut out these simple ornament shapes, and replace those standard reds and greens with of-the-moment millennial pink icing and decoration.

(Makes ~40 cookies)

Ingredients:

  • 1 batch sugar cookie dough
  • white compound chocolate or candy melts
  • pink and white hard candy or candy canes (crushed)
  • pink oil-based food coloring

Equipment:

  • ornament cookie cutters
  • pink or white ribbons/string

Directions:

1. Bake the cookies. Roll out the cookie dough, cut it using an ornament cutters. Cut a hole in the top of the ornament with a straw before baking to put the ribbon through. Chill, then bake according to directions. Cool the cookies for 30 minutes minimum.

2. Melt the chocolate according to package directions. Divide into three bowls. Set aside one bowl. In a second bowl, add 1-2 drops of pink dye and stir to form a light shade of pink. In another bowl, add 3-5 drops of dye and stir for a darker shade of pink.

3. Dip the cookies into various shades of melted chocolate. You can dip multiple layers to create an ombre effect. Sprinkle with crushed candy. Allow to dry completely.

4. Attach ribbons/string to cookies. Hang them up to show off your work!


Get the Recipe

Reindeer Jolly Rancher Cookies

Reindeer Jolly Rancher Cookies

Brighten up your cookie tray with these little Rudolphs.

Ready to step it up a bit? Grab a standard gingerbread-man cutter, and invert these guys to create reindeer — voila! Rudolph’s red nose gets a sleek upgrade thanks to melted candies.

(Makes ~40 cookies)

Ingredients:

  • 1 batch sugar cookie dough
  • hard red candy like Jolly Ranchers (crushed)
  • 1 batch royal icing
  • gel food colors: brown, black

Equipment:

Directions:

1. Bake the cookies. Roll the cookie dough out and cut it using gingerbread-man cutter. Cut round hole in head of the cut-out men to make space for the red nose. Transfer to baking sheets, and chill in freezer for 15 minutes. Bake for approximately 10 minutes.

2. Remove from oven and fill nose holes with crushed hard candy. Bake for an extra few minutes (until candy has melted). Cool cookies for 30 minutes minimum.

3. Dye the royal icing. Divide it into three bowls. Bowl one: Dye light brown with brown food gel. Bowl two: Dye darker brown with brown food gel. Bowl three: Dye black with black food gel.

4. Pipe on details with royal frosting. Outline the reindeer's face with light brown royal icing. Fill in, then use a toothpick to swirl the icing to fill in any gaps. This also helps it dry in an even layer. Allow to dry completely.

5. Use dark brown to pipe on the antlers and ear detailing and black to dot on the eyes. Allow to dry completely.


Get the Recipes

Holiday Llama Sugar Cookies

Holiday Llama Sugar Cookies

Fa-la-la-la llamas

Now things get a bit more challenging and a lot more adorable. Decked out in scarves, hats, and holiday decor, these almost too-cute-to-eat cookies will have you singing fa-la-la-la-llama.

(Makes ~25 cookies)

Ingredients:

  • 1 batch orange-spiced Christmas cookie dough
  • 1 batch royal icing
  • gel food colors: pink, green, red, black, blue, yellow
  • Christmas-themed candies: Red Hots and holly

Equipment:

Directions:

1. Bake cookies. Roll out cookie dough, and cut it using llama cutter. For some of the cookies, cut out hats with a small triangle cookie cutter to give your llamas a tiny holiday hat. Chill and bake according to instructions. Cool for 30 minutes minimum.

2. Dye the royal icing. Divide it into seven bowls. For bowl 1: leave white. Remaining bowls, dye light pink, green, red, black, blue, and yellow with gel food colors.

3. Transfer icing into piping bags. Fit each icing into a separate piping bag, fitted with a #2 Wilton icing tip.

4. Pipe on details. Outline the llama's body with light pink royal icing. Fill in, then use a toothpick to swirl the icing to fill in any gaps. This also helps it dry on in an even layer. Dry for 30 minutes.

5. With the same technique, use the white icing to ice on the second layer (the face and feet of the llama). Dry for 30 minutes.

6. Ice the third layers (green scarf, red Santa's hat, black strings of the lights). Dry for 30 minutes.

7. Ice on final details (face with black icing, lights with different colors, white fluff of Santa's hat, etc.). Add any candies. Allow to dry completely.


Get the Recipes

Snuggly and Pugly Gingerbread Sweaters

Snuggly and Pugly Gingerbread Sweaters

Warms you up on a cold day

Kick your sweater cookies up a notch by sketching out adorable furry fondant friends, and attach them to the front of your sweater creations.

(Makes ~24 cookies)

Ingredients:

  • 1 batch royal icing
  • gel food colors: orange, brown, black, red, green
  • 1 batch gingerbread cookie dough
  • fondant (white, dyed red and green, rolled and cut out into sweater shapes)

Equipment:

Directions:

1. Make royal icing, dye it, and transfer into piping bags: Divide icing into six bowls. Bowl one, leave white. Remaining bowls, dye orange, brown, black, red, and green. Transfer each into separate piping bags fitted with a #1 tip.

2. Pipe on the royal icing transfers. On a parchment sheet, pipe on the transfers like the pug with Santa hat on parchment paper. Allow to set overnight, then carefully peel off once totally try. Set aside.

3. Bake the cookies. Roll out cookie dough, and cut it using sweater cookie cutters. Bake according to instructions. Cool for 30 minutes minimum.

4. Decorate the fondant base layer. Pipe on sweater decoration with white royal icing. Dry for 1-2 hours. "Glue" on pre-made royal icing transfers with royal icing. Add any final touches and allow to dry completely.

5. Attach the fondant layers to the cookies. Outline each cookie with white royal icing, and carefully attach fondant base layer. Allow to dry completely before serving.


Get the Recipes

Palm Springs Gingerbread House

Palm Springs Gingerbread House

Spice up your cookie display

Sure, anyone can make the standard gingerbread house, but if you're looking for a real challenge, you'll love our Palm Springs variety. Mid-century design enthusiasts — and edible house aficionados — will salivate at this reimagined version of the classic gingerbread construction.

(Makes 1 gingerbread house)

Ingredients:

  • pre-baked sugar cookies: cacti, pool, plus crushed cookies (for sand)
  • 1 batch gingerbread cookie dough
  • fondant: dyed in light pink, light grey, and dark grey
  • gel food colors: pink, black, green, blue
  • clear piping gel
  • royal icing
  • compound white chocolate or white candy melt
  • pastel Jordan almonds
  • green sprinkles (for grass) — enough to fill base
  • white chocolate blocks (steps)
  • small chocolate pebbles (if possible) — can be replaced with crushed chocolate cookies for dirt
  • green taffy candy (palm tree leaves)
  • long rolled wafer biscuit (palm tree)

Equipment:

Directions:

1. Make the cactus and pool decorations. Roll out the dough, cut it in various shapes, and bake. Decorate with fondant and piping gel dyed blue with gel food coloring. Crush some baked cookies for sand.

2. Bake the gingerbread. Refrigerate the dough for 1-2 hours. Preheat the oven, and roll out the dough. Cut out the cookies according to templated shapes and bake. Cool the cookies for at least 30 minutes.

3. Construct the gingerbread house. Place a large white foam board on a flat surface and construct the house on top of it, using royal icing as the mortar between the cookie pieces. Decorate house with fondant/royal icing.

4. Finish with surrounding decorations. Glue on the pool, fondant driveway, cookie palm trees, sprinkle grass with royal icing. Allow it to dry completely.


Get the Recipes

Pastel Chocolate Tree Cookies

Pastel Chocolate Tree Cookies

So simple and lovely

When it comes to giving your tree-shaped Christmas cookies some added personality, you won't want to rely on the typical red and green icing. Instead, give your trees a chocolatey base and some pastel shades on top.

(Makes 12-24 tree cookies, depending on size)

Ingredients:

  • 1 batch chocolate cookie dough
  • 1 batch royal icing
  • gel food colors: blue, pink
  • pearl sprinkles
  • white sanding sugar

Equipment:

Directions:

1. Bake the cookies. Roll out the cookie dough, cut out using tree cutters, chill, and bake according to instructions. Cool the cookies for 30 minutes minimum.

2. Dye the royal frosting. Divide it into three bowls. Bowl one: Dye Tiffany blue with blue food gel. Bowl two: Dye light pink. Bowl three: Leave white.

3. Transfer into piping bags. Each color goes into a piping bag fitted with a #2 tip.

4. Line and fill the cookie. Pipe a border of royal icing on each tree using pink or blue royal icing. Fill in (AKA flood) with more frosting, then use a toothpick to swirl the icing to fill in any gaps. This also helps it dry on in an even layer. Allow to dry completely.

5. Add final touches. Pipe on white royal icing details and sprinkle on sanding sugar and position pearl sprinkles. Allow to dry completely.


Get the Recipes

Peppermint Penguin Sandwich Cookies

Peppermint Penguin Sandwich Cookies

Almost too adorable to eat

If you've got an Oreo lover on your list of loved ones to treat, these adorable peppermint-filled penguins are perfect. Our DIY version pairs just as flawlessly with a glass of milk as the classic store-bought cookie.

(Makes ~6 cookie sandwiches)

Ingredients:

  • 1 batch chocolate cookie dough
  • 1 batch royal icing
  • gel food colors: orange, black, red
  • peppermint candy, red Skittles, mini marshmallows, mini red heart sprinkles
  • fondant: white, red
  • water

Filling:

  • 3/4 cup unsalted butter
  • 3 cups powdered sugar
  • 3 tablespoons of milk
  • 1 teaspoon of peppermint extract
  • red gel food coloring (optional)

Equipment:

Directions:

1. Bake the cookies. Refrigerate dough for 30 minutes to 1 hour. Preheat oven, then roll out dough. Cut it with round cookie cutters, and freeze/chill for 15 minutes. Bake for 12-14 minutes. Cool the cookies for 30 minutes minimum. Allow to cool completely.

2. Make the filling. Beat butter until light and creamy. Slowly beat in 1 cup powdered sugar, followed by 1 tablespoon milk. Alternate until all is added. Beat in peppermint extract. Lastly, stir in red gel food coloring until swirls are formed (don’t beat in).

3. Assemble the sandwiches. Add small dab of filling to cookies and sandwich them together.

4. Dye the royal frosting and transfer it into piping bags. Divide it into four bowls. Leave one bowl filled with white icing. Dye the remaining icing in each bowl orange, black, red with gel food colors. Transfer each into a separate piping bag fitted with a #1 tip.

5. Decorate. Glue on white fondant belly to top of sandwich cookie with royal icing. Pipe on details of penguin's face, bow tie, etc. Make hats out of peppermint candy with a mini marshmallow glued on top using royal icing. Allow to dry completely.


Get the Recipes

Hot Cocoa Cookie Cup Cookies

Hot Cocoa Cookie Cup Cookies

Cocoa and cookie in one

From hot chocolate to peppermint schnapps, the holiday season is filled with festive beverages. Add your favorite to these edible jiggers that have a chocolate coating to prevent them from getting too soggy before you can say, “Bottoms up!”

(Makes ~6 cookie shots)

Ingredients:

  • 1 batch chocolate cookie dough
  • compound chocolate: milk and white
  • shortening or coconut oil (to thin the chocolate if necessary)
  • candy canes (for the handles)
  • sprinkles in Christmas colors
  • 1 batch royal icing
  • gel food color: black
  • white sanding sugar
  • pretzels
  • red M&Ms
  • whipped cream, marshmallows, and cocoa dusting (for garnishing)

Equipment:

Directions:

1. Bake the cookies.Roll out the cookie dough, and cut it into shapes similar to a shot glass. Prep the cookie shot mold with non-stick cooking spray, and press dough into molds. Cut off any excess. Preheat oven. Chill dough in molds for 15 minutes. Bake for 15-18 minutes. Cool completely for 30 minutes minimum before you unmold them from the shot glass mold.

2. Melt chocolate. Thin out with shortening or coconut oil, if necessary. Coat the inside of cookie cup by swirling melted chocolate inside, and leave to set. Glue on candy cane handle with white chocolate. Dip cups in white or milk chocolate followed by a plate of sprinkles to create a sprinkle rim.

3. Add extra decoration. Pipe on holiday designs with royal icing and white sanding sugar, or transform your cup into Rudolph faces using candy and royal icing "glue."

4. Fill with desired drink and top with whipped cream, marshmallows, and cocoa dusting.


Get the Recipes

Disney Holiday Cookies

Disney Holiday Cookies

These are pure magic.

Every Disney fan at your cookie party is going to to go nuts for these beauties. We teamed up with Disney Freeform and cookie artist Aime Pope to craft six magically frosted goodies from across the Disney and Freeform holiday lineup. Check them out!

Disney Holiday Castle Cookie

Every Disneyland fan will love this cookie version of their favorite theme park's central landmark.

Mickey Clause Cookie

You really can't have a proper Disney cookie display without the Mouse himself. Watch our tutorial on how to create this classic version of Mickey Claus.

Buddy the Elf Cookie

We all know the main food groups are candy,candy canes, candy corns, and syrup. But did you know the fifth is holiday cookies? They are when they're Elf cookies!

Olaf the Snowman Cookie

Do you want to build a snowman...cookie? This Frozen buddy will definitely bring huge smiles to even the the smallest faces.

The Grinch Who Stole This Cookie

If your fam's favorite holiday character is actually more green than red and has a heart two sizes too small, this cookie is a perfect pick for your next gathering.

More Holiday Cookie Inspo

More Holiday Cookie Inspo

Winter themes for your cookie platter

You know you want even *more* ideas for amazing holiday cookies. Well, we've got 'em! We teamed up with cookie artist Aime Pope to create four more adorable winter-themed treats that are simple and stunning.

Jolly Ol' Santa Cookie

Nothing goes better with milk than this Santa cookie. Leaving this one out for Kris Kringle should definitely get you some extra goodies in your stocking.

Bright Little Snowflakes

Inject some technicolor into your cookie game with these gorgeous colorful snowflakes, laced with delicate white royal icing.

Chillin' With the Snowmen

Take a basic snowman cookie to the next level by adding earmuffs, mittens, scarves, and even sunglasses. These frosty friends are too cool and too cute to eat.

Share your cookie creations with us @BritandCo!

This article has been updated from a previous post.

Brit + Co may at times use affiliate links to promote products sold by others, but always offers genuine editorial recommendations.

Though Black Friday is traditionally the official start of the holiday shopping season, we argue that it’s been kicking since mid-October. We know, we know: it still feels extremely early to start thinking about the holidays, but they’ll be here before you know it! Plus, many brands and retailers are already promoting their holiday goodies with plenty of sales and discounts available right now.

If you’re ready to embark on your holiday shopping journey, but still need answers to questions like ‘when’s the best time to shop?’ and ‘where should I shop for gifts?’ and even ‘how the heck do I save money this season?’, you’ve come to the right place. Consider this your go-to guide for holiday shopping in 2024.

Scroll on for our best guidance on navigating this busy time of year and finding the best gifts possible!

When's the best time to do holiday shopping?

Kaboompics / PEXELS

The best time to do holiday shopping really all depends on your personal shopping goals. Do you want to get a jump on items you know will sell out soon? Do you want to save the most money possible? Do you want to focus on handmade, personalized gifts? These factors will undoubtedly influence your holiday shopping schedule.

Cottonbro Studio / PEXELS

Shopping early can be advantageous for all of the aforementioned goals. A lot of retailers start promoting their holiday products early on, giving you ample time to snatch up that limited-time lip kit or fancy water bottle you’ve been eyeing way before the holidays.

Plus, some of the best deals for holiday shopping happen ahead of Black Friday and Cyber Monday – in 2023, Experian observed a surge in early spending in October, thanks to early discounts, a trend likely to continue in 2024.

Finally, shopping early can be especially helpful if your plan is to focus on handmade or personalized gifts, giving the artisan you buy from (or yourself, if you’re DIY-ing your gifts) plenty of time to craft the item with love and care.

Gallup reported in 2023 that one in four shoppers start shopping as early as September, a trend likely to continue in 2024 – so you might already be embarking on your shopping spree!

Mikhail Nilov / PEXELS

If right now is just still too darn early for you to start holiday shopping, Black Friday and Cyber Monday are some of the best times to shop since so many retailers offer their largest discounts of the entire year. Plus, the late November-early December timeline can feel a bit more appropriate for the gifting season opposed to late October-early November, when everyone’s still recovering from Halloween.

The only thing to consider during this time is the shipping timelines for the items you purchase – but most retailers will typically advise their specific shipping schedules, so you don’t risk your goodies arriving late.

Where should I shop for gifts?

Ron Lach / PEXELS

You have three main options when it comes to where to shop for holiday gifts: online, in-store, and via our amazing gift guides. Of course, each method has its advantages and disadvantages.

Shopping in-store offers a tangible experience: the opportunity to hold specific items in your hands and gauge exactly what they’ll be like when you give them as a gift. The pitfall with shopping in-person is that it typically requires a commute and journeys through potentially very busy malls and shopping strips, which can add to the already-stressful holiday experience.

In-store shopping can be more physically exhausting, but it’s all about preference! Sometimes strolling through the stores that get all dolled up for Christmas is the best part of the season.

Andrea Piacquadio / PEXELS

Per Google, 65% of those planning to shop for the holidays say they will shop online more. Shopping for gifts online can be super helpful since you can centralize your findings in your browser’s bookmark tab or via virtual cart(s). Plus, shopping online can pose more opportunities for saving some money: lots of retailers typically offer discount codes for online users, especially if you sign up for their digital marketing channels (like email and text) and make a purchase.

Shopping online isn’t just shopping, either. The internet can be a stellar research tool to help you vet whether certain products are worth it, where they can be bought, and when they’ll be available. In fact, Google reported that more than half of U.S. holiday shoppers who went into a store last year say they looked up product reviews online and/or located an item in-store by checking it online.

Kaboompics / PEXELS

Last but not least, scrolling gift guides has to be our favorite place to shop for gifts – and not just because we write and publish them.

At their very core, gift guides help streamline the holiday shopping process, alleviating the stress that bubbles up when you’re wondering what the heck to shop for in the first place. Our gift guides are backed by real people, real experiences, and real opinions from our editorial team. We only promote products that we really love and believe in, oftentimes ones we’ve tested and reviewed ourselves.

We have gift guides for just about everyone on your list, with more on the way! Check ‘em out:

What are the best kinds of gifts to give?

Kaboompics / PEXELS

The best kinds of gifts to give are thoughtful gifts that consider the giftee’s interests, wants, and needs. These gifts can be sentimental, practical, or both simultaneously. What matters most in a gift is that it’ll be meaningful to them past just the holiday season, whether it’s helping them get through daily tasks, reminding them of a memorable trip or event, or giving them small doses of joy.

“Shoppers are increasingly looking for personalized and unique gifts that reflect the recipient's personality and interests,” says Mia Anderson, Owner of ChicSew. “With the rise of online shopping, many consumers are opting for curated gift boxes or experiences that add a special touch.”

Cottonbro Studio / PEXELS

Gift boxes, personalized items, books of interest, self-care goodies, and even gift cards can all be thoughtful gifts depending on the recipient. If you have no clue what your giftee is into, it’s not a bad idea to ask them what they want the most!

“My idea of a great gift is something that is in tandem with the recipient's interest and offers something new to the person, be it learning a new skill, enjoying a calming activity, or simply spending quality time with the family,” says Alfred Christ, Sales Manager & Marketer at Robotime. “This season, we encourage shoppers to shift their focus on quality and the memories their gifts will create and not just merely material aspects.”

When is Black Friday?

Sora Shimazaki / PEXELS

Black Friday is always the Friday after Thanksgiving. This year, Black Friday lands on November 29.

When is Cyber Monday?

Kindel Media / PEXELS

Cyber Monday is typcally the Monday after Thanksgiving. This year, Cyber Monday will land on December 2. Oftentimes, retailers and brands extend their online offers through the week (coined Cyber Week) after the event. Salesforce reported that 67% of shoppers in 2024 plan on shopping during Cyber Week!

Subscribe to our newsletter to stay up-to-date on our best 2024 gift guides, shopping advice, and all things holiday!

The holidays at Starbucks are creeping up on us, people! Peppermint Mocha season will return on November 7. If you’re a die-hard Starbucks fan, you know Red Cup Day is a whole holiday in itself – the frenzy for a free reusable cup is truly no joke. There’s even an entire website dedicated to counting down the madness! Even though there’s no official word on when Red Cup Day 2024 will be, there are several clues that cue us into the annual event. Scroll on for details!

What is Red Cup Day?

Starbucks

Red Cup Day is Starbucks’ highly-awaited annual event that marks the start of holiday beverage season at the coffee chain. For one day only (and while supplies last), customers who order any of Starbucks’ holiday drinks will receive a reusable red cup that features a bespoke design for the respective year.

Starbucks

Here’s a list of all the drinks rumored to be available on the Starbucks holiday menu starting November 7:

  • Peppermint Mocha
  • Peppermint White Chocolate Mocha
  • Caramel Brûlée Latte
  • Sugar Cookie Almondmilk Latte
  • Chestnut Praline Latte
  • Salted Pecan Crunch Cold Brew
  • Iced Gingerbread Oatmilk Chai

What do the red cups look like for 2024?

Starbucks

Starbucks hasn’t officially announced when Red Cup Day will be for 2024, let alone what the famed red cups will look like this go-around. The one obvious point is that the cups will be red! They’ll also likely feature some festive motifs that echo the holiday season. Last year’s red cups boasted playful white and green stars and ornament-like shapes.

Why should I participate in Red Cup Day?

Starbucks

Red Cup Day = freebies, which can feel really rewarding if you’re really into receiving free goodies. Plus, it’s just a fun way to lean into the holiday spirit. The red reusable cup keeps giving beyond Red Cup Day, though! Every time you use the reusable cup for future Starbucks orders, you get a 10-cent discount as well as 25 bonus stars toward your Starbucks Rewards account to save up for more discounts on drinks, food, and merchandise.

When is Starbucks' Red Cup Day 2024?

Starbucks

Again, Starbucks hasn’t alerted us on when Red Cup Day will be for 2024, but based on previous Red Cup Days, we can infer it’ll land on the third Thursday of November. In 2022, Red Cup Day happened on November 17, and for 2023, it was November 16. The third Thursday of November in 2024 hits on November 21, so mark your calendars, everyone!

Additionally, check back here for official info as Red Cup Day approaches.

Subscribe to our newsletter for more food news!

This post has been updated.