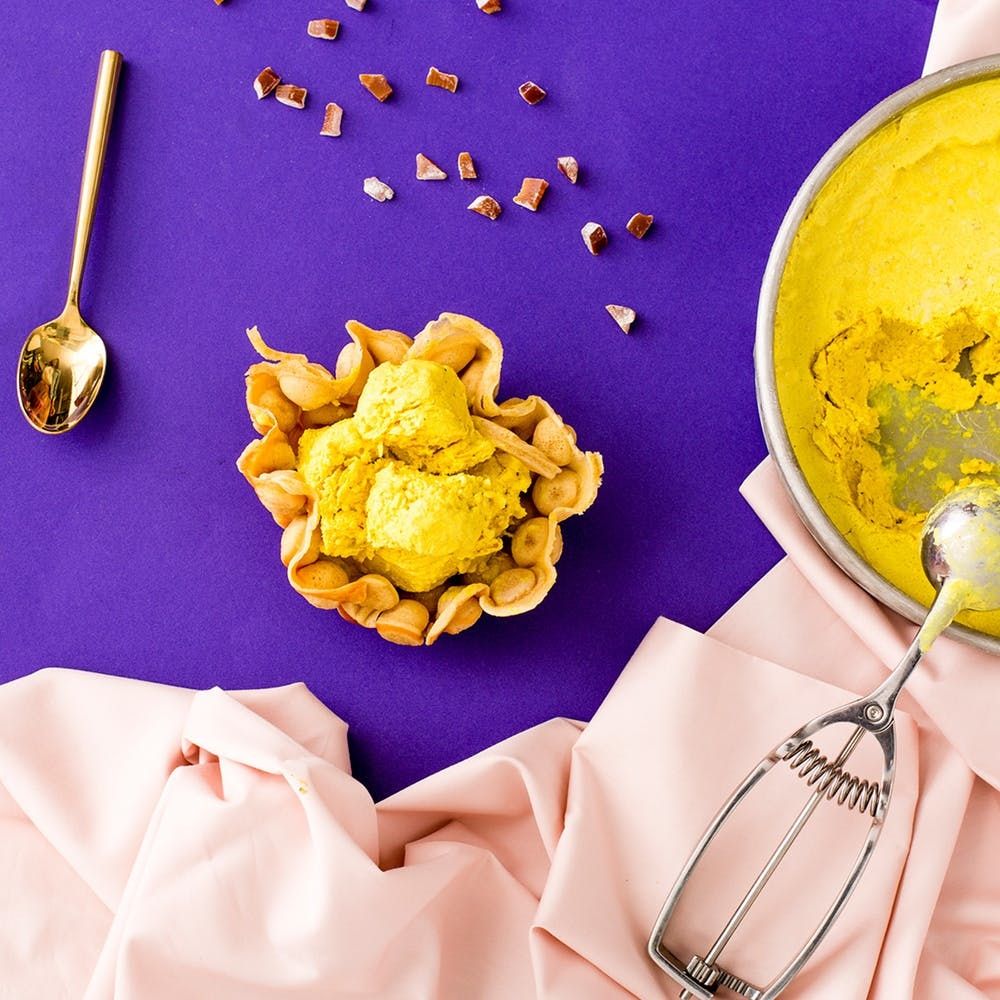
Yo, we love ice cream just as much as the next girl, but sometimes all that cream and sugar makes us feel a little queasy. So how does one guiltlessly celebrate National Ice Cream day? With golden milk, obviously. We gave this healthy drink a try, and it lived up to the hype. It’s DELICIOUS. We scouted this adapted vegan Golden Milk Ice Cream recipe from the Minimalist Baker, and my oh my, it is insanely good. With ingredients like coconut cream, turmeric, ginger, cinnamon and black pepper, we’ve been eating scoops on scoops on scoops.
But hold up. Where did we put this heavenly ice cream? Another obvious answer: in a bubble waffle bowl. We’re obsessed with these edible receptacles which elevate this golden milk ice cream dessert to the crème de la crème.
VEGAN GOLDEN MILK NO-CHURN ICE CREAM
One of the many amazing things about this recipe is that you don’t need an ice cream maker. Scroll on to see how this no-churn golden goodie is made.
Ingredients:
— (2) 14-ounce cans full-fat coconut milk, or ~3 1/2 cups or 840 ml | sub coconut cream for even creamier ice cream!
— 2 teaspoons ground ginger
— 1/4 cup (60 ml) maple syrup (sub up to half with organic cane sugar), plus more to taste
— 2 teaspoons ground turmeric
— 1/2 teaspoon ground cinnamon
— 1/8 teaspoon black pepper
— 1 teaspoon pure vanilla extract
— pinch of sea salt
Tools:
— large sauce pan
— whisk
— freezer safe container or pan
— plastic wrap
1. Whisk together coconut milk, fresh ginger, maple syrup, sea salt, turmeric, cinnamon and pepper in a large saucepan over medium heat.
2. Continue whisking ingredients and bring to a simmer (not a boil). Then remove from heat and add vanilla extract. Whisk once more to combine.
3. Transfer mixture to a freezer-safe container and let cool to room temperature. Then cover with plastic wrap and place in freezer overnight. Remove from freezer every 1-2 hours and stir vigorously to incorporate air.
Mix together all the ingredients except the vanilla extract into a large saucepan. Heat over medium heat, but do not bring to a boil.
Remove from heat and add the vanilla extract. Taste test! Adjust flavor by either adding in more turmeric, cinnamon, maple syrup or salt to balance the flavors.
Pour mixture into a freezer-safe pan and let it cool to room temperature. Cover with plastic wrap and place in your freezer overnight.
BUBBLE EGG WAFFLE BOWL
One of the best purchases we’ve ever made is a bubble waffle iron, which we found on Amazon. This recipe is adapted from Brunch Bites and is so simple and easy!
Ingredients:
— 1 cup flour
— 2 Tablespoons tapioca starch
— ¼ teaspoon sea salt
— 2 eggs
— ¾ cup sugar
— 2 Tablespoons evaporated milk
— ½ cup water
— 1 teaspoon cornstarch
— 2 teaspoons vanilla
— 2 Tablespoons vegetable oil
Tools:
— large mixing bowl
— plastic wrap
— whisk
Instructions:
1. Mix all of the ingredients in a bowl and whisk to combine — the texture should be smooth and runny.
2. Cover the mixture and refrigerate for an hour.
3. Heat the egg waffle iron and pour about ¾ cup of batter on one plate. Fold down the top plate and close until ready; most machines will have a green light.
4. Carefully remove from iron and either place into a bowl to create the shape of a bowl or wrap in a cone shape and place the seam side down for it to mold its shape. Let sit or place in refrigerator to set.
Combine all the ingredients until your mixture is smooth. Heat up your bubble waffle iron.
Refrigerate your batter for one hour. Spray your bubble waffle iron with nonstick spray and then pour your batter into the waffle iron. Close to cook.
Place in bowl to form shape and place in the refrigerator for 15 minutes to set. Ice cream time!
Pro Tip: Use a hot ice cream scoop (warmed in hot water) to ease scooping.
We’re really coming around to healthy desserts. When they taste this good, why wouldn’t we!
DIY Production and Styling: Anita Yung
Photography: Chris Andre


