40 Organization Hacks To Tidy Up Your Messiest Spaces

organization hacks

Spring cleaning time is just around the corner, but why wait until spring? After all, the last thing you want to do when the weather warms up is stay indoors and clean! Get started now by decluttering, donating, and organizing your messiest spaces. Create a regular cleaning routine to keep your home organized and tidy and store seasonal items such as clothing, decorations, or sports equipment in labeled containers. You might already have the things you need to start getting organized. Here are 40 organization hacks to repurpose, sort, store, and tidy, all in the name of organization. Get creative with our DIY organization projects too!

Desk Drawer Organizer

Use this set of 32 containers in your desk, cabinets, closets, and more to organize all the little necessities in your life, from pencils and pens to makeup and hair accessories.

Get a Grip Mop and Broom Organizer

Install shelves, hooks, and racks on walls to make use of all your vertical space for storage. This can free up floor space and make your small space feel less cluttered.

Wall-Mounted Mail Organizer

Add this to your entry area for incoming mail, bills, and all the things you need outside, like keys and bags.

Mobile Filing Cabinet

Declutter your digital space by organizing files into folders, unsubscribing from unnecessary emails, and deleting old or unused apps.This filing cabinet doesn't look like your typical cabinet and can store all your tech, like your printer and charging station.

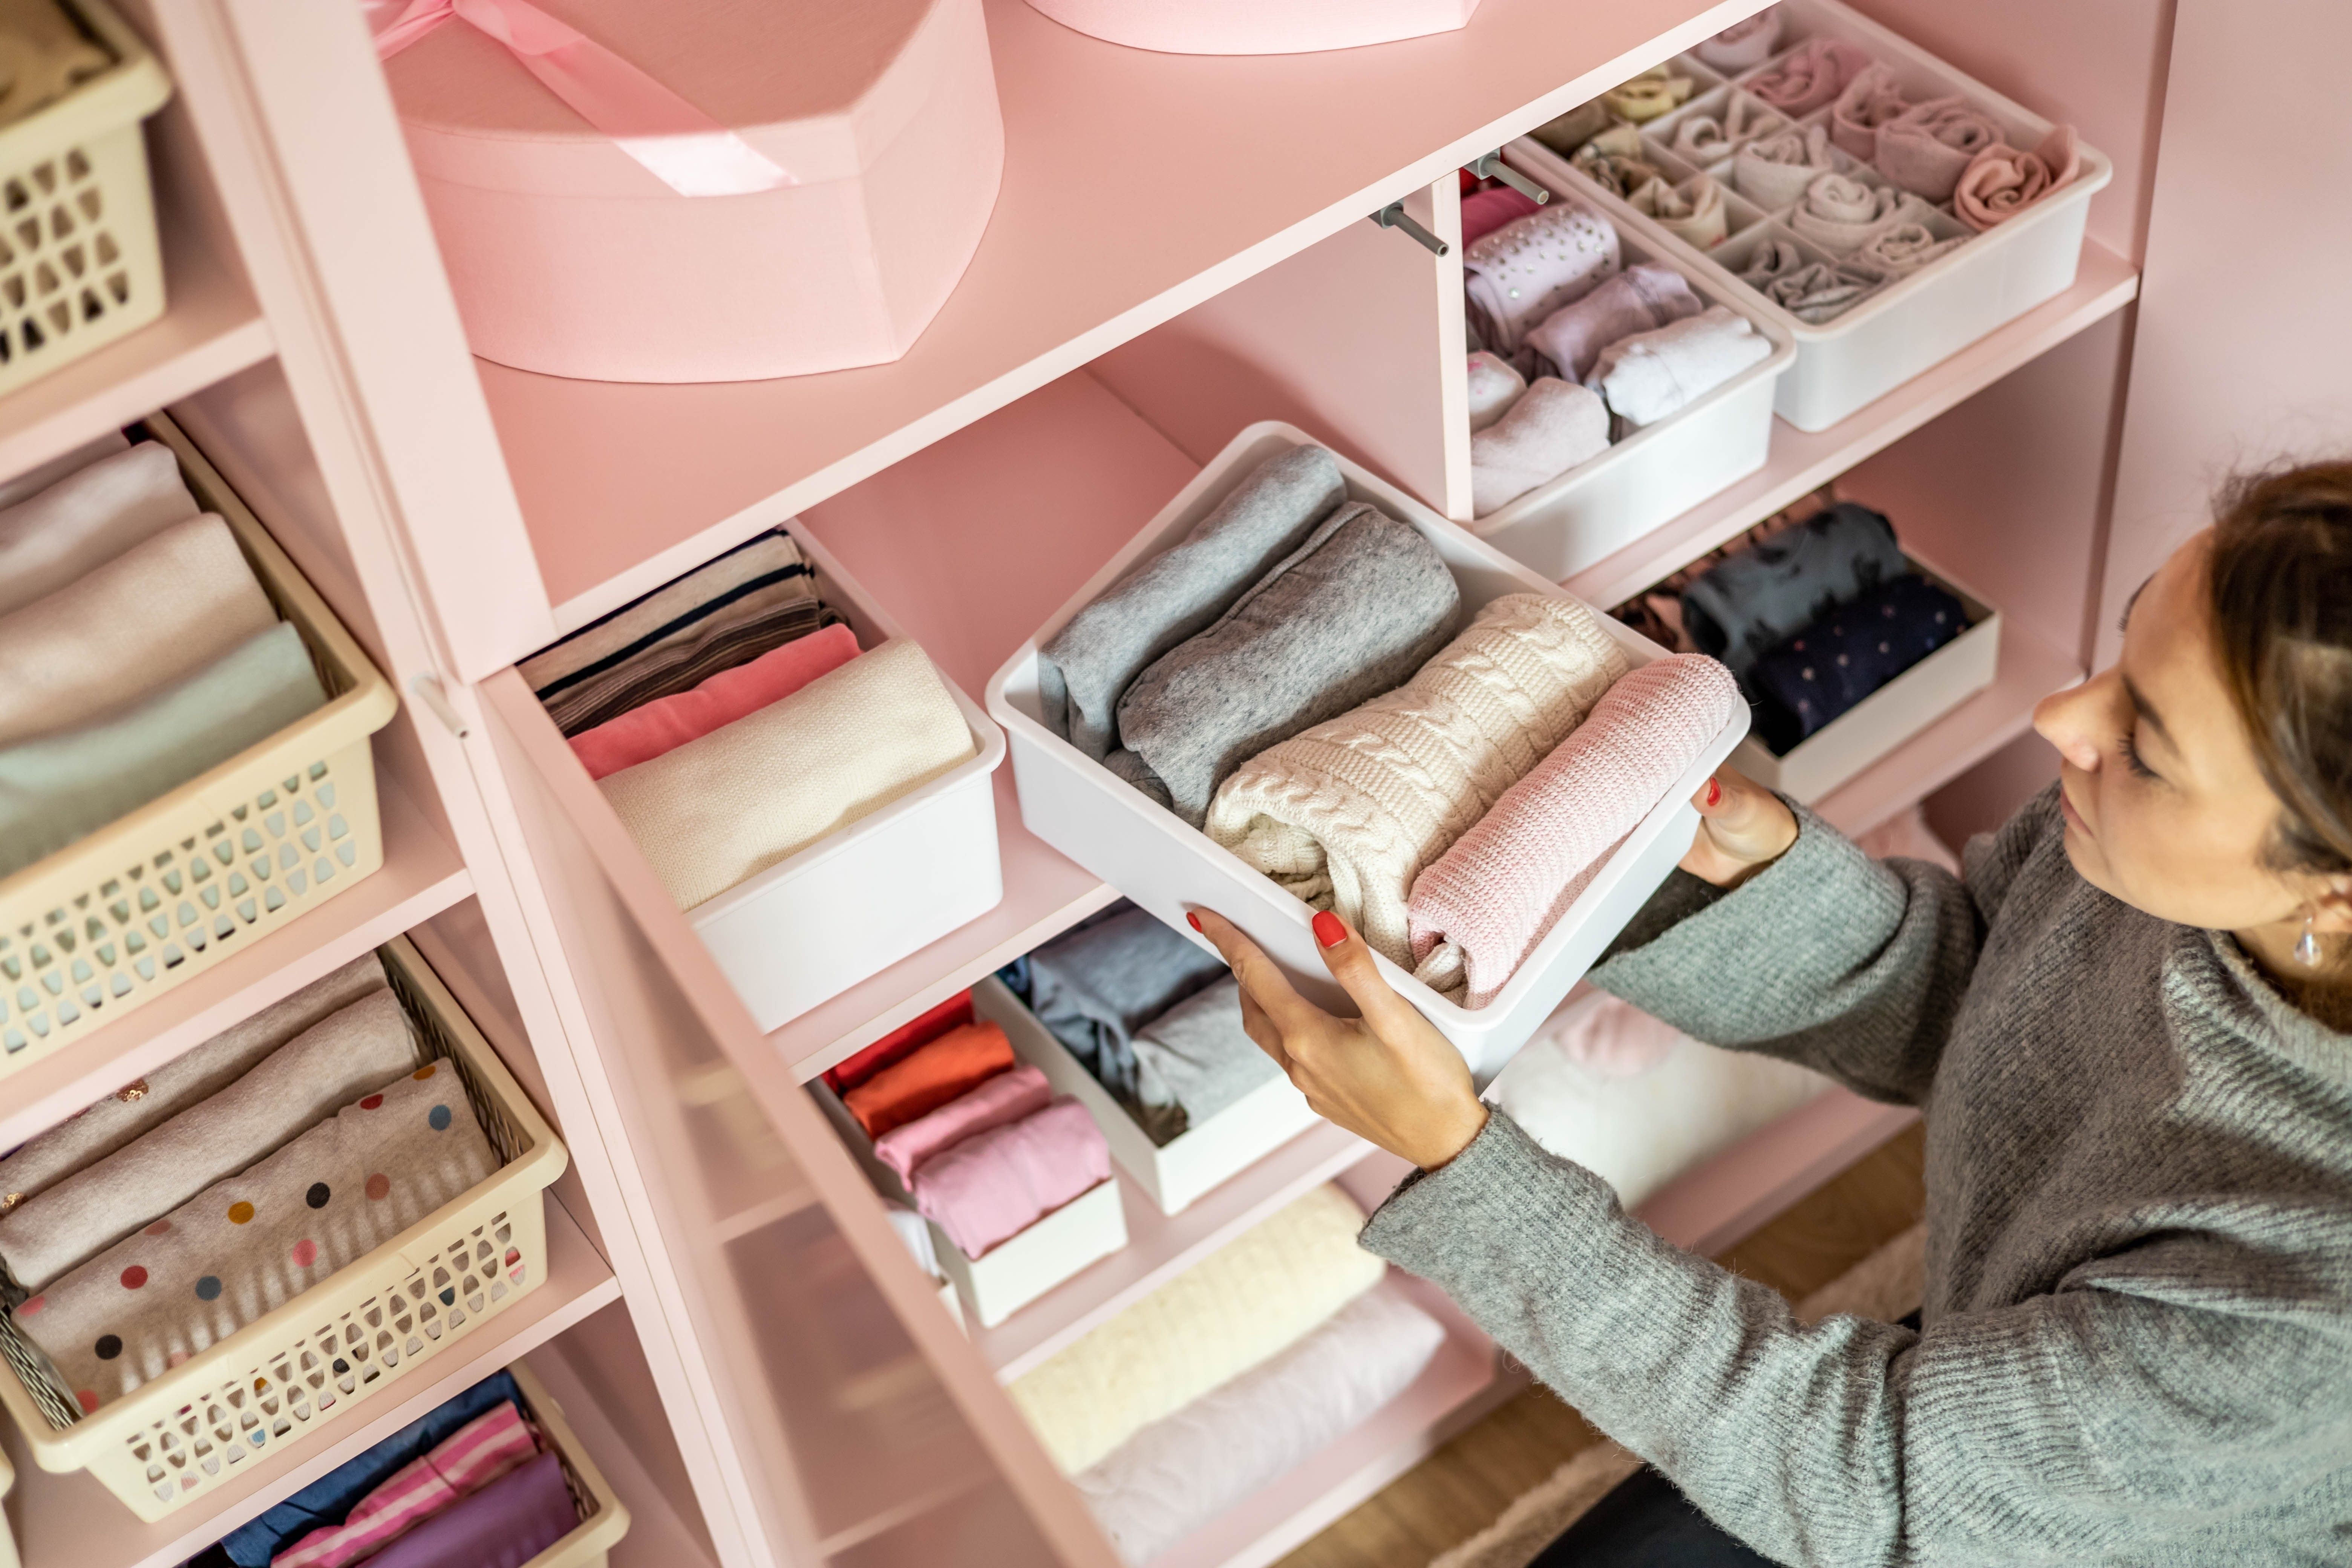
12-Pack Storage Bins

You can never have too many storage bins. This colorful 12-piece set can be used for art supplies, pantry items, socks, nursery items and more.

Backseat Organizer

Got kids? Car messes are a given. Create a backseat organizing station to keep messes at bay.

Makeup and Nail Polish Organizer

Makeup can make a mess in your bathroom. Store it all away in this neat caddy.

Art Supply Organizer

Stow away art supplies, from yarn to paint to kids art supplies, in this colorful rolling organizer.

16 Pair Shoe Storage Cabinet

Keep shoes organized and your floors clear with this 16-pair cabinet.

Pant Hangers

Use slimline hangers to maximize closet space. You can also hang multiple items like scarves, belts, or ties on a single hanger using shower curtain rings.

Shelf Dividers

Keep sweaters, blankets, scarves and more tidy with these handy shelf dividers.

Sweater Organizer

Store seasonal items in these containers for when winter fades away.

Yamazaki Purse Organizer

Keep your favorite bags organized in your closet for easy reach.

6-Shelf Hanging Closet Organizer

Take advantage of vertical space with two three-shelf hanging shelves with three drawers for the perfectly organized closet on a budget!

Etsy Personalized Earring Holder

Organize your earrings with these sweet holders you can personalize. They make great gifts!

Try DIY

DIY Dreamcatcher Earring Caddy

Prefer to DIY? Check out this throwback project that gives your earrings good vibes and keeps them easily within view. (via Brit + Co.)

Jewelry Organizer With Earring Tray

Organize your necklaces, bracelets and earrings with this minimal jewelry organizer.

Try DIY

The Ultimate DIY Accessory Organizer

If all your jewelry won't fit on this huge organizer, you might have a hoarding problem. (Guilty!) (via Brit + Co.)

LED Light Jewelry Organizer

Keep your jewerly hidden in this vanity-style box with LED light.

Try DIY

DIY Wall Jewelry Organizer With Frame Front

We love the look of this for earrings and necklaces, and we could slide a few love notes in the picture frame front. (via House Full of Handmade)

Etsy Wipeable Weekly Planner

Let's not forget mental organization — it's just as important as home organization.

Try DIY

DIY Magnetic Whiteboard Calendar

Get your life organized with a weekly planner that's in clear view. Update every week! (via Damask Love)

Canvas Half-Wall Organizer

This elegant wall organizer is perfect for crafts, gardening, desk and art supplies -- all the little things you need in life.

Try DIY

DIY Wooden Bungee Organizer

Why settle for a boring shelf when you can easily make these? (via Brit + Co.)

Boho Printed Laundry Hamper

Brighten your laundry day with this boho-painted hamper.

Try DIY

Painted Laundry Basket

We're not sure if all the wash would actually get put away if we had one of these, but we'd still like to try it out and see if it solves our laundry pile issues. (via Brit + Co)

Filerix Portfolio Organizer with Clipboard

This organizer keeps your wallet, notes, calendar, receipts, and more organized in one pretty place.

Try DIY

DIY Notebook Organizer with Envelopes

This is genius! We're always tucking notes and receipts and business cards and who knows what into our notebooks, and now there is a great way to keep it all in there. (via Simple As That)

Skip Hop Grab & Go Stackable Food Container Set

Keep kid snacks organized for lunch and on the go with this stackable food container.

Try DIY

Repurpose Easter Eggs as Snack Containers

Does anyone else have a ton of plastic eggs lying around post-Easter? Now we for sure won't be throwing ours out. Yay for upcycling! (via A Kailo Chic Life)

World Market Natural Seagrass Utility Basket

Use these storage bins to store items in closets, under beds, or in cabinets.

Try DIY

DIY Storage Basket Centerpiece

It's amazing what you can do with some crates and paint. (via Brit + Co)

H&M Rainbow Hanger Rack

This adorable hanger rack is perfect for baby or kid rooms.

Try DIY

DIY Rainbow Hook Organizer Rack

This ivory rainbow organizer is a total DIY masterpiece. Consider hanging it by the front door for keys. (via A Bubbly Life)

Scout Regalia Wall Rack

Make a statement with this colorful wall rack in the kitchen, bedroom, or entry.

Try DIY

DIY Accessory Organizer

Admire your accessories with this simple shelf organizer, which is a total upgrade for any entryway. (via Brit + Co)

Wayfair Ladder Bookcase

Available in more than 10 colors, this ladder bookcase is the perfect addition to your living room.

Try DIY

DIY Ladder Shelf

Add some storage to that neglected corner with this easy to DIY ladder shelf. (via Brit + Co)

Storage Rack Boltless Shelving

Easy to assemble, these five adjustable shelves will keep your books and things organized and within reach.

Try DIY

DIY Modular Crate Bookcase

What a cute way to turn old crates into a colorful storage unit. Try a mix of colors for a mod effect. (via Brit + Co)

Follow us on Pinterest for more design inspo!

This post has been updated.

Now that we're nearing the end of winter, it'll soon be time for spring cleaning. But in addition to just breaking out your duster, wiping down your baseboards, or finally tackling that soap scum in your shower, why not organize as well?

Think about it: as you go about your spring cleaning checklist this year, you're probably going to move from one room to another. While you're already getting down and dirty, it can be super helpful to streamline each area of your home.

Not only will you feel fully refreshed (and not like you're simply straightening up clutter), but you'll also make your life easier for all those "Sunday resets" to come this year.

So, whether you choose to start in your bedroom or kitchen, here are our top organizing tips for organizing every room of your house.

Scroll to find out how to best organize every room in your house!

1. Entryway

Max Vakhtbovycn

From work commutes to errand runs, you're probably on the go a lot. Why waste time getting out the door by dealing with a disorganized entryway every single day?

Think of your front door as a "launching pad." In other words, whatever you need to help make leaving and arriving home easier should be right there for simple access.

If you have a closet to work with, that's great. Otherwise, cubbies or even a utility shelf will work. Make sure your most used shoes, coats, and other accessories are neatly stacked, hung, or put away. You can take those heels you only wear for date nights or random extra scarves back to your bedroom.

Then, set up a space for your personal items, like your purse, keys, sunglasses, and any mail you grab on the way in. You'll know exactly where they are the next time you're running late, and you can add personal touches like greenery or artwork to make your launch pad more aesthetically pleasing.

2. Living Room

Martin Lang

Next up is the living room, where you probably spent the bulk of your time with family and friends. This fact means it tends to naturally become the most cluttered room in everyone's home.

If you feel like you're lacking storage, don't forget to utilize vertical space. You can install shelving, for instance, or buy tall open-shelving cabinets that look like built-ins.

Either way, by adding decor pieces, books, or other commonly used items, like speakers and games, you'll infuse the room with more character and dimension while saving floor space.

Don't underestimate the functionality of baskets, either. They're great for holding everything from pet toys to blankets and even magazines or photo albums.

Plus, if you have kids and constantly feel inundated by their toys, say goodbye to the typical storage container solution. Even though it may work for some parents, these containers are still an eyesore and never really leave your line of sight in the living room.

Instead, you can transform an old or thrifted dresser into a toy storage area. Select one that matches your interior design style to keep your space looking clean and uncluttered while allowing your kids to easily grab whatever they want to play with.

3. Bedroom & Closet

Shared or not, the bedroom has a way of collecting clutter like nobody's business. That's why we have to get creative to save space and make our lives easier.

One of the most overlooked areas is right under your bed. You can store anything from hobby items, like art supplies, to seasonal clothing and less frequently worn shoes.

Search for storage containers with wheels under the bed. Or, if your bedframe needs an upgrade, look for one that has drawers!

Anastasia Shuraeva

Then, in your closet, make sure your clothing and accessories are arranged in a way that makes sense.

For example, if you work a corporate job, group all of your business attire, like slacks, blazers, and loafers, in one section to quickly get dressed and go in the morning. The same goes for casual wear, workout attire, and evening wear or pajamas.

Finally, if you have shelving, add labeled bins to store clunkier garments like sweaters and sweatshirts. Any remaining room can be used to hold extra clutter that you clear off horizontal surfaces, like your desk, vanity, or dresser, to make your bedroom feel more light.

4. Bathroom

Kaboompics.com

Last but not least is the dreaded bathroom. This room of the house can become a dumping ground for all sorts of products and beauty tools.

Just like in your living room, you should use any empty wall space to your advantage. Hang up hooks to hold your towels and clothing while you bathe, or use an over-the-door organizer to give your extra towels and robes a home.

Also, if you live with multiple people, it can be helpful to give each family member their own designated cabinet. This will keep everyone's products separate and prevent any from becoming a "junk drawer."

Last but not least, our top tip for keeping your bathroom fresh and organized is to get rid of your personal items on a regular basis. Stop holding onto that old tube of toothpaste that's practically flat or accumulating multiple bottles of face wash.

Rather, go through your products once a month to purge anything that's expired or no longer used. This simple act alone will make a real difference.

Looking for more home & organization tips? Be sure to sign up for our newsletter so you never miss a thing!

I've been floating in the pop cultural abyss because I was clueless about how amazing Netflix's latest comedy Survival of the Thickest is! I just finished Season 2 and it's the funniest and rawest TV series I've watched since being persuaded to binge The White Lotus. But, that's not the show it actually reminds me of.

No, Survival of the Thickest feels like Insecure and And Just Like That had a comedic baby we get to watch grow in real time. There's the familiar supportive friend group, burgeoning careers, and passionate love stories that make you want to call your bestie to complain or scream in excitement.

I genuinely can't stop watching it and can't wait to share why you should be watching it too!

Scroll to learn everything about Survival of the Thickest and why you should watch it this week!

What is 'Survival of the Thickest' about?

Vanessa Clifton/Netflix

What happens when you face the worst breakup ever? You cry and find a way to revamp your life, according to Mavis from Survival of the Thickest.

The series revolves around her getting acclimated with being single again while juggling her floundering stylist career. She's got a supportive village, but that doesn't mean she's not prone to making mistakes or facing situations worth cackling about outside of her group chat.

Where does filming take place?

The show is primarily filmed in New York, but parts of Season 2 take place in Italy (via IMDB)!

Who's a part of the cast?

Vanessa Clifton/Netflix

Survival of the Thickest has a sprawling cast that features some new and familiar faces. According to Marie Claire, here are the main characters who've appeared in Seasons 1 and 2:

1. Michelle Buteau as Mavis Beaumont

Vanessa Clifton/Netflix

Mavis Beaumont may have started off as a heartbroken stylist's assistant in Season 1 of Survival of the Thickest, but she's since gone on to build a name for herself in Season 2. She's also trying to figure out if she's going to stick with her new love interest Luca or go back to her familiar ex Jacque.

2. Taylor Selé as Jacque

Vanessa Clifton/Netflix

Jacque is a talented fashion photographer who seems to know what to say to uplift Mavis. Though he starts off saying and doing all the right things, Mavis catches him cheating on her and it leaves her devastated. Interestingly enough, Jacque appears to be remorseful over his huge transgression and tries to prove that he won't make the same mistake again.

3. Tasha Smith as Marley

Vanessa Clifton/Netflix

Marley's one of Mavis' no-nonsense besties who applies the same tenacity to her career as a finance executive. Her inspirational quips may come across as 'funny,' but she doesn't lie when she encourages those around her to move in excellence.

4. Tone Bell as Khalil

Vanessa Clifton/Netflix

Mavis is surrounded by even more love with the addition of the creative Khalil by her side. He has a softer approach than Marley, but he still wants the best for Mavis and has no problem helping redirect her when she's ready to throw pity parties. If only he could apply the same principles to his own love life...

5. Liza Treyger as Jade

Vanessa Clifton/Netflix

If you've ever had a roommate who triggered you at every turn, you probably had someone like Jade in your life. She's the kind of person who seems like she has good intentions, but always finds a way to do something that feels toxic. Whether it's ignoring boundaries or saying the wrong thing at the worst time, Jade's going to do it.

6. Garcelle Beauvais as Natasha Karina

Vanessa Clifton/Netflix

Garcelle Beauvais may have left The Real Housewives of Beverly Hills, but you can watch her break necks and hurt feelings in Season 2 of Survival of the Thickest. She plays former '90s supermodel Natasha Karina who becomes Mavis' client after an initial period of misunderstandings.

7. Anthony Michael Lopez as Bruce

Vanessa Clifton/Netflix

Bruce has been on a mission to be the best assistant to Natasha Karina for as long as he can remember, so he takes it personally when Mavis doesn't seem to understand her new client in the beginning. Though he warms up to her too, his Type-A personality still follows closely behind.

8. Marouane Zotti as Luca

Vanessa Clifton/Netflix

Luca's all about Mavis and that's the I like it. Not only is he eye candy, but he's got enough passion stored in his body that makes me feel he's the obvious choice for our love-worn protagonist. However, only time will tell if Mavis thinks she and him are endgame or not.

9. Peppermint as Herself 

Vanessa Clifton/Netflix

Survival of the Thickest is all about making sure all voices, storylines and identities are championed. Having Peppermint as another close friend of Mavis rounds out her supportive village because she's big on bringing her fun-loving energy wherever she goes. And when Peppermint takes a brief break from performing to get married, Mavis is right there rooting for her.

10. Alecsys Proctor-Turner as Nala

Vanessa Clifton/Netflix

My, how the tables have turned! In Season 2 of Survival of the Thickest, Mavis gets her own assistant in the form of the fashion-obsessed Nala. Though she has moments where her naive nature shines through, she helps provide even more comedic relief and moments of clarity.

How many seasons does 'Survival of the Thickest' have?

Vanessa Clifton/Netflix

Right now, Survival of the Thickest has two hilarious seasons that are on my weekend binge-watch list.

Season 1's Episodes 

  1. Keep Your Plants Watered, Bitch.
  2. Be a Bad Boss Bitch, Bitch!
  3. You Did What in Public, Bitch?
  4. Are You Crying, Bitch?
  5. It's Any Given Sunday, Bitch!
  6. Do the Right Thang, Bitch.
  7. Let it Out, Bitch!
  8. For a Bigger Purpose, Bitch.

Season 2's Episodes

  1. When in Rome, Bitch!
  2. Dreams Do Come True at Afropunk, Bitch.
  3. You Can Heaux Your Own Way, Bitch.
  4. Mind Ya Business, Bitch!
  5. A Change Gon' Come, Bitch?
  6. The Category is Love, Bitch.
  7. You Best Come Correct, Bitch.
  8. It's Not a Mo'Ment, It's A Movement, Bitch!

Where can I watch it?

Vanessa Clifton/Netflix

You can watch Seasons 1 and 2 of Survival of the Thickest on Netflix. Unlike shows like Severanceor Paradise, you don't have to wait a full week to see a new episode!

Watch The Season 2 Trailer For 'Survival Of The Thickest' 

www.youtube.com

- YouTube

The bottom line is that Survival of the Thickest is a relatable comedy that'll have you laughing, crying, punching the air, and kicking your feet in delight. So, get your charcuterie board and wine together because you won't want to budge once press play.

Listen to our podcastYap City to see what else we've been watching!

This post has been updated.

If you know me, you know how much I love Taylor Swift. Something about hearing music written by someone while they experience the same life stages feels so personal, and there's a good chance that almost every emotion I feel can be summed up by a Taylor Swift song. In short: I just love her.

Taylor frequently drops merchandise when a holiday rolls around and for Valentine's Dayin 2022, she released a collection inspired by her 2019 album Lover. I fell in love with a pair of fuzzy dice inspired by her hit song "Cruel Summer," and apparently so did everyone else because the next time I visited the website, they were sold out! So, I decided to make a simplified version of them with my sewing machine for a fun V-Day activity and to add some extra pink to my space. Check out our online sewing class to brush up on your skills and keep reading for a low stakes tutorial on how to make your own!

Here's how to make your own Taylor Swift "Cruel Summer"-inspired dice for Valentine's Day.

Supplies For Your Own "Cruel Summer" Taylor Swift Fuzzy Dice:

Chloe Williams/Brit + Co

  • Sewing machine
  • Pink fleece fabric
  • Pink thread
  • Pink felt
  • Scissors
  • Blue rope/cord (I took mine off a loofah)
  • Needle + pins
  • A copy of Lover to listen to while you sew ;)
  • Poly-Fil Stuffing (not pictured)
  • Ruler (optional)
  • Glue gun + glue gun sticks (optional, use it to touch up your seams if you need)

Instructions:

Chloe Williams/Brit + Co

Start by marking your fleece with the measurements for your squares. Since the size of the dice on Taylor's official website was listed as 3.5", I marked them just above 3.5" so I could leave room for a hem. You'll need 12 squares total.

Chloe Williams/Brit + Co

Next, cut out your squares. I used the first square as a template for the others, then went back in and cleaned up the edges where necessary.

Chloe Williams/Brit + Co

The first image I made was a sun, and I started by drawing a circle on my felt. I used the rim of my thread spool to make sure I had a perfect circle but you can also free hand if you want the circle to be a different size.

Chloe Williams/Brit + Co

Pin your felt to the center of a fleece square.

Chloe Williams/Brit + Co

Sew the circle to the fleece using a regular straight stitch.

Chloe Williams/Brit + Co

Next, move your sewing machine from a straight stitch to a zigzag stitch and decrease your stitch length to a lower number like 0 or 1. This will allow your art to have more of a filled-in border, instead of a messier, chevron finish.

Go back over the rim of your circle with the zigzag stitch to give it that embroidered look. I did this with the fabric right side up, then I did it again with the fabric flipped upside down just to be extra thorough.

Chloe Williams/Brit + Co

After your circle is complete, it's time for the sun rays! Use the same zigzag stitch and 0 stitch length to move from the circle outward. This is where you'll want to add another element: stitch width.

To give the sun rays their triangular shape, adjust your stitch width as you move out from the heart of the sun. While the stitch length ensures your sewing won't have empty spaces, the width will let you move from a wider sunbeam base to a thinner point. I just decreased the width every few stitches as I went along.

Chloe Williams/Brit + Co

Your finished sun will look something like this! I went back in with a needle to clean up loose threads by hand. I waited to trim them until I had threaded them to the back so that the front image had a more polished look.

Chloe Williams/Brit + Co

Repeat the above steps for your devil and angel hearts. There are only a few differences between these and the sun; you'll cut the felt into hearts instead of circles, and to fill in the horns and the wings, I used a straight stitch to give it a colored-in look, reserving the zigzag stitching for the borders.

I know the original dice had "Cruel Summer" lyrics stitched onto these squares, but I ended up leaving them off. It makes the design more minimal and easier to work with.

One thing to note about this step: beware of bunched fabric! Filling in the angel wings brought the edges of the squares in a bit, but I wasn't too upset about it. I think flaws give a craft some personality!

Chloe Williams/Brit + Co

The "Lover" stitching got a little more complicated than the images. I first traced the word with my pen so that I would have some guide as to what the word should look like. Move the stitch width back down to one of the lower settings.

Then instead of just moving the fabric in a circle like I did for the sun, I moved it all around to follow the word I had written in marker. Repeat this a few times until you're satisfied with the thickness. I definitely tried this step a couple different times so don't worry if you don't get it on the first go!

Chloe Williams/Brit + Co

For my final embroidered square, I did a simple "TS," which of course stands for "Taylor Swift."

Chloe Williams/Brit + Co

Before you can sew your squares together, line the edges up and pin them. I used my ruler to mark how far I wanted my hem to go (I did 1/4" at every edge) for a sewing guideline.

I pinned the squares one at a time, checking at each step that they were pinned the right way (especially after I sewed two together incorrectly and had to pick out the stitches. Oops.)

Chloe Williams/Brit + Co

Arrange the images in a similar way to the official dice, or change it up however you'd like! I chose to arrange the squares so that there was a blank in between the images.

Chloe Williams/Brit + Co

Pin and sew your remaining three squares around the middle square so that you end up with a cross.

Chloe Williams/Brit + Co

I continued pinning and sewing the edges to one another until I had an inside-out cube. Here's a tutorial to help you better understand which edges should be sewn together.

I did one square at a time, making sure to focus on the corners and going back in to tighten them up once I was done. You only want one gap, which is where you'll flip the cube inside out and then stuff it.

Chloe Williams/Brit + Co

Once you have a cube, flip the fabric inside out. I used my pen to make sure all the corners and edges were good to go.

Chloe Williams/Brit + Co

Next, stuff your cube with whatever filling you prefer. I didn't stuff it super full because I didn't want it to have a rounded look when I was done.

Chloe Williams/Brit + Co

Ta-da! A little wonky but very cute :)

Chloe Williams/Brit + Co

When you have both dice, cut a small hole in the top for your cord. Knot the ends and stuff them into the holes, then use your needle and thread to attach the cord and the fleece together.

Chloe Williams/Brit + Co

Voilà!

Chloe Williams/Brit + Co

They're soft, fuzzy, and pink. What could be better than that?!

Chloe Williams/Brit + Co

If you don't want to hang these in your car, they also make excellent Valentine's (or Galentine's) decor.

Chloe Williams/Brit + Co

If you need me, I'll be blasting "Cruel Summer" for the rest of the month.

Loving these Taylor Swift fuzzy dice? Follow us on Pinterest and TikTok for more entertainment inspo, and don't forget to check out The Latest On Taylor Swift And Travis Kelce's Relationship!

Brit + Co may at times use affiliate links to promote products sold by others, but always offers genuine editorial recommendations.

This post has been updated.

Adding a quality protein like chicken to your meals is an easy way to boost flavor, nutrition, and please a picky crowd. Packed with lean protein, chicken helps keep you (and your kiddos) full longer and pairs perfectly with a variety of ingredients, whether you're whipping up a quick pasta, a hearty salad, or a cozy one-pan dish.

We put together two tasty chicken dinners, featuringPerdue® Fresh CutsNo Antibiotics Ever chicken, that will satisfy the whole family. Perdue’s unique packaging makes it easy to place chicken directly to the pan, keeps cleanup to a minimum (no cutting board needed), and the pre-cut strips or cubes cook in less than 15 minutes!

Nicole Hill Gerulat

Scroll for the recipes!

  • One-Pot Chicken Caesar Pasta
  • Chicken & Waffle Kebabs

Nicole Hill Gerulat

One-Pot Chicken Caesar Pasta

Serves 4-6

Here’s a quick, flavorful twist on the classic Caesar salad — comforting yet refreshingly light! Made with seasoned chicken breast strips, Caesar dressing, crunchy breadcrumbs, artichoke hearts, and a squeeze of lemon, this creamy, garlicky pasta is your new spring staple!

Nicole Hill Gerulat

Ingredients:

  • 1 cup caesar dressing, divided
  • 2 teaspoons Italian seasoning
  • 1/2 pkg Perdue® Fresh Cuts Chicken Breast Strips
  • 2 tablespoons olive oil
  • Salt and fresh pepper
  • 2 tablespoons garlic
  • 3 cloves garlic, minced
  • 1 1/2 cups milk
  • 2 cups chicken broth
  • 1 lb linguine or any type of pasta
  • 1/3 cup artichoke hearts, halved
  • 2 tablespoons capers, drained
  • 1/4 cup Parmesan cheese, finely grated
  • 1/4 cup toasted & salted breadcrumbs
  • Parsley, chopped
  • 1 lemon, cut in wedges

Nicole Hill Gerulat

Directions:

1. In a medium bowl, combine 3/4 cup caesar salad dressing, Italian seasoning and chicken breast strips to marinate for at least 30 minutes.

Nicole Hill Gerulat

2. In a large saucepan or dutch oven over medium heat, heat the oil until shimmering. Add the minced garlic and cook until fragrant, about 3 minutes.

3. With tongs, remove the chicken from the marinade and place directly into pan. Season with salt and pepper.

4. Cook for 3-4 minutes per side, not moving or flipping until well browned. Chicken is ready when an insta-read thermometer reads chicken at 165℉. Transfer grilled chicken to plate to rest while you make the pasta.

Nicole Hill Gerulat

5. In the same pan, combine milk, remaining 1/4 cup caesar dressing and chicken broth and bring to a low simmer. Add the pasta and stir until the pasta fits in the pan.

6. Cook according to pasta package timed instructions. Stir occasionally to keep pasta from sticking. Salt to taste.

Nicole Hill Gerulat

7. When pasta is al dente, remove from heat and carefully stir in artichoke hearts and capers. Top with chicken and any juices collected, parmesan cheese, breadcrumbs and parsley. Serve with lemon slices and enjoy!

Nicole Hill Gerulat

Chicken & Waffle Kebabs

Serves 4

This Chicken & Waffle dish is a fun, protein-packed twist that’s perfect for kids and crowds alike. Serve it up for breakfast, brunch, or even dinner. Simply bake or air-fry, and you’ll have a crispy, golden treat ready in under 15 minutes!

Nicole Hill Gerulat

Ingredients:

  • 1 teaspoon olive oil
  • 1 tablespoon cornstarch
  • 1/2 teaspoon smoked paprika
  • 1/2 teaspoon onion powder
  • 1/4 teaspoon garlic powder
  • 1/2 teaspoon salt
  • 1/2 pkg Perdue® Fresh Cuts Chicken Breast Diced
  • Avocado oil spray
  • Mini waffles, or waffles cut in quarters
  • Maple syrup

Nicole Hill Gerulat

Directions:

1. Preheat air fryer to 400ºF. (May also be baked in a 400ºF oven for 20 minutes on a greased sheet pan.)

2. In a medium bowl, combine all dry ingredients. Add diced chicken breast and toss to coat.

3. Spray air fryer basket with avocado oil and add chicken in a single layer. Multiple batches may be necessary. Air fry chicken bites for 10-12 minutes. Chicken is ready when an insta-read thermometer reads chicken at 165℉.

Nicole Hill Gerulat

4. Assemble kebabs by alternating chicken bites and waffles. Drizzle with maple syrup and enjoy!

When I moved into my home in the spring, the windows hadn’t been replaced in over 40 years! With a hot summer and rainy winter approaching, I was worried I’d be dealing with more than just a draft — so I swapped them out for double-pane, energy-efficient ones. Living in sunny California, solar panels were also a no-brainer. But making your home more energy efficient doesn’t have to mean major investments. Here are a few simple, budget-friendly ways to cut down on energy use without spending a fortune. Bonus: You'll save money on your energy bill too!


Here are low-cost ways to make your home more energy efficient.


Photo by cottonbro studio

1. Seal Drafty Doors and Windows

Use weatherstripping, caulk, or even a good old-fashioned draft stopper to prevent warm or cool air from escaping. It’s one of the quickest, cheapest ways to improve energy efficiency

Quince

2. Hang Thermal Curtains

Affordable and easy to install, thermal or blackout curtains help keep heat in during winter and block out the sun in summer, easing the load on your HVAC and reducing your heating and cooling costs. Plus, they add cozy style to a room!

Shutterstock

3. Swap in LED Bulbs

LEDs use a fraction of the energy of traditional bulbs and last way longer. They’re a small investment that pays off quickly— especially if you swap them out room by room.

Photo by Annie Spratt on Unsplash

4. Use Smart Power Strips

Even when turned off, devices like TVs and computers draw power. Smart power strips cut that “phantom energy” without you needing to remember to unplug anything.

Kaboompics.com

5. Install Low-Flow Showerheads and Faucet Aerators

Low-flow showerheads and faucet aerators are inexpensive, easy to install, and reduce water and energy use (since you’re heating less water).

Shutterstock

6. Clean (or Replace) Air Filters Regularly

Dirty filters make your heating and cooling systems work harder, using more energy. Replace filters every 3-6 months for peak efficiency.

Shutterstock

7. Wash Clothes in Cold Water

Most detergents are designed to work just as well in cold water, and heating water accounts for a big chunk of your washer’s energy use. Bonus: it’s gentler on your clothes, too so they'll look like new longer!

Subscribe to our newsletter for more affordable home hacks!

Brit + Co may at times use affiliate links to promote products sold by others, but always offers genuine editorial recommendations.