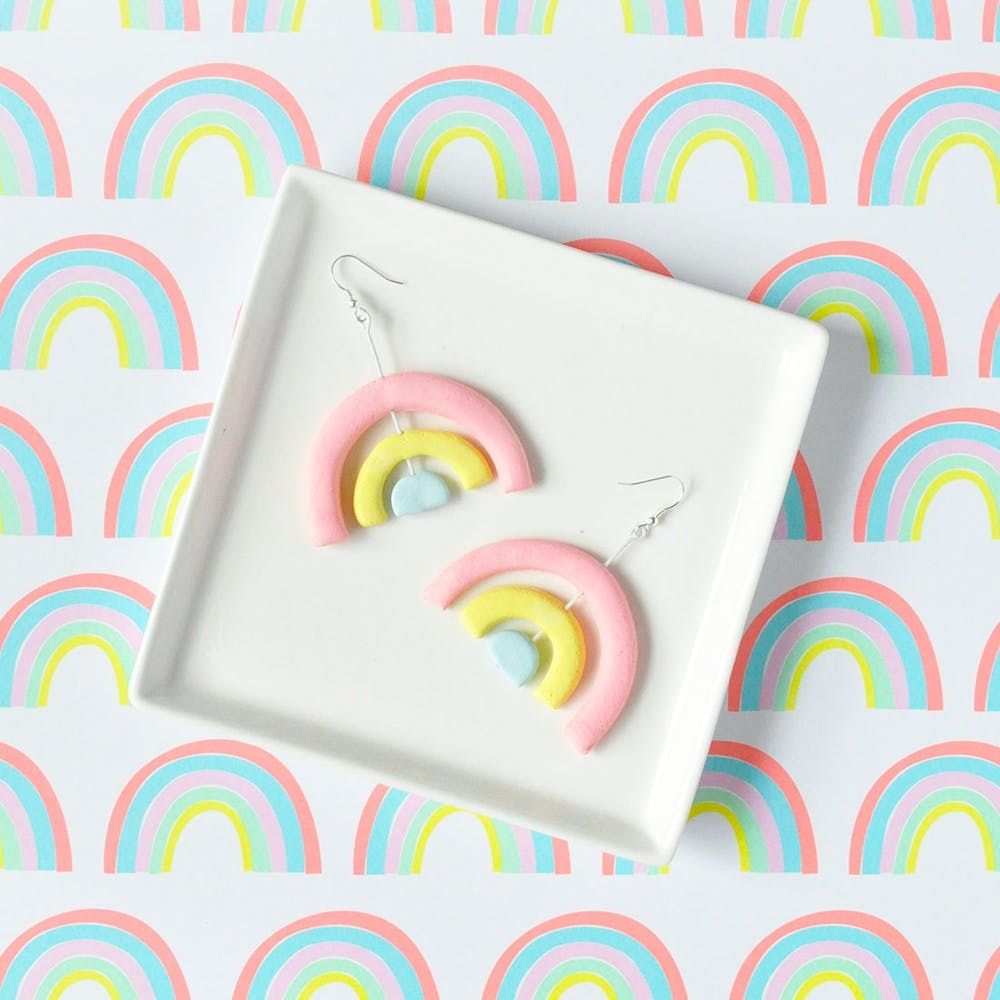
These DIY Rainbow Statement Earrings Are the Perfect St. Patrick’s Day Accessory
Rainbows are undeniably cute no matter the time of year, but we especially like to have them around for St. Patrick’s Day. Rainbows + the current statement earrings trend = a match made in heaven! Make your own rainbow statement earrings just in time for the big day. Plus, you can totally wear them again and again this spring and summer.
Materials and Tools:
- air-dry clay
- parchment paper
- wire
- wire cutters
- jewelry pliers
- wire earring hooks
- paint
- paintbrushes
- pin
- cotton swab
- white tacky glue
- knife
- round cookie cutters (various sizes)
- clay roller
Instructions:
- Cut a piece of parchment paper to cover your work surface. Put a piece of air-dry clay onto the parchment, fold the parchment over it, and then use the clay roller to flatten it to a thickness of just less than 1/4 inch.
- Use your largest cookie cutter (this one is about 2 inches across) to cut a circle out of the clay, and then use the knife to cut the circle in half.
- Use a slightly smaller cookie cutter to cut an arch out of each semi-circle. These will be the top arches for your two rainbows.
- In the same way, use a smaller cookie cutter to cut another circle. Cut it in half, and use an even smaller cookie cutter to cut arches into these semi-circles.
- For the final inner pieces of the rainbow, I rolled the clay into a little ball, flattened it with my finger until happy with the size, and then cut it in half. You should now have two mini rainbows.
- Use a pin to carefully poke a hole through the center top of each piece, as shown. Let the clay harden completely.
- Once the clay is dry, paint your rainbows. Let dry again.
- To assemble your rainbows, cut a piece of wire several inches long. Apply a bit of tacky white glue onto the bottom 1/4 inch of the wire, and then put this into the smallest piece of the rainbow so that the glue secures the wire to the clay.
- Do the same thing for the next pieces of the rainbow, applying glue onto the wire and putting the rainbow segments onto it to secure. If there are any globs of glue, use a cotton swab to wipe away the excess. Let dry.
- Cut off any excess wire at the top using wire cutters so that about 3/4 inch remains. Use jewelry pliers to shape the wire into a small loop and attach onto the earring hook.
Cut a piece of parchment paper to cover your work surface. Put a piece of air-dry clay (we used Crayola Model Magic because it’s super lightweight) onto the parchment, fold the parchment over it, and then use the clay roller to flatten it to a thickness of just less than 1/4 inch.
Use your largest cookie cutter (this one is about two inches across) to cut a circle out of the clay and then use the knife to cut the circle in half.
Use a slightly smaller cookie cutter to cut an arch out of each semi-circle. These will be the top arches for your two rainbows.
In the same way, use a smaller cookie cutter to cut another circle. Cut it in half, and use an even smaller cookie cutter to cut arches into these semi-circles. Hint: You don’t have to use actual cookie cutters for these steps — look around the house for lids, jars, etc that are the right size.
For the final inner pieces of the rainbow, I rolled the clay into a little ball, flattened it with my finger until happy with the size, and then cut it in half. You should now have two mini rainbows!
Use a pin to carefully poke a hole through the center top of each piece, as shown. Let the clay harden completely.
Once the clay is dry, paint your rainbows! Let dry again.
To assemble your rainbows, cut a piece of wire several inches long. Apply a bit of tacky white glue onto the bottom 1/4 inch of the wire, and then put this into the smallest piece of the rainbow so that the glue secures the wire to the clay.
Do the same thing for the next pieces of the rainbow, applying glue onto the wire and putting the rainbow segments onto it to secure. If there are any globs of glue, use a cotton swab to wipe away the excess. Let dry.
Cut off any excess wire at the top using wire cutters so that about 3/4 inch remains. Use jewelry pliers to shape the wire into a small loop and attach onto the earring hook.
You’ll have your lucky rainbows with you all day long!
How are you celebrating this St. Patrick’s Day? Follow us on Pinterest for more St. Paddy’s day inspo!
Brit + Co may at times use affiliate links to promote products sold by others, but always offers genuine editorial recommendations.
