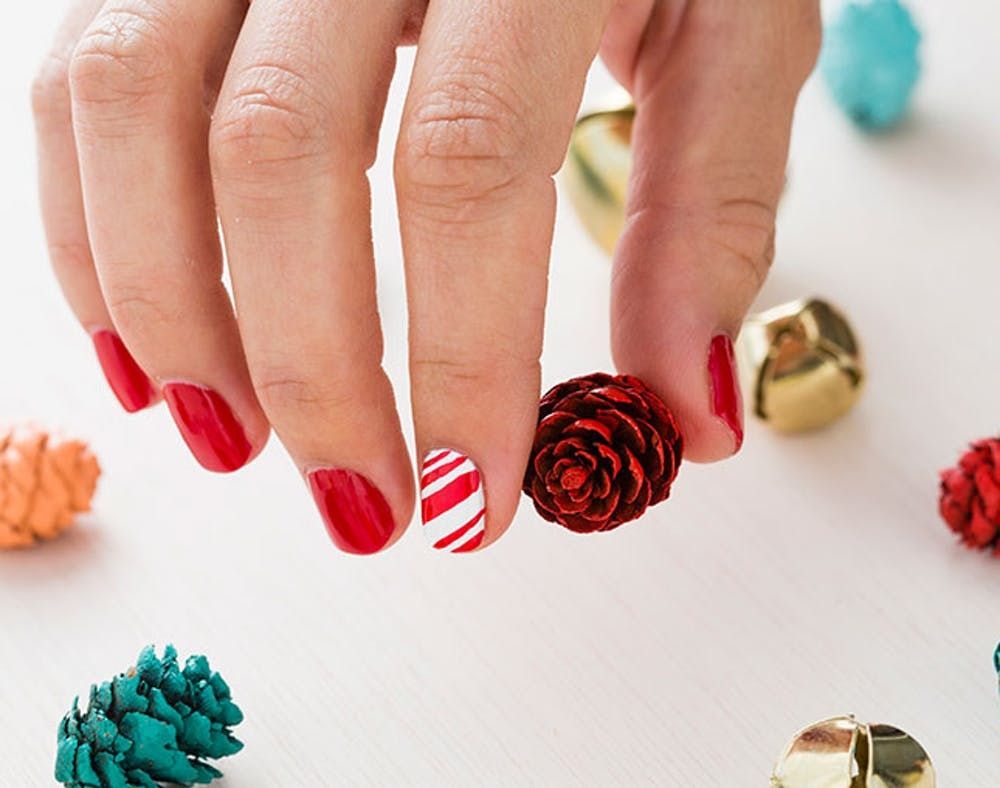
During the holidays, you’re probably used to decorating your home, a tree or a batch of cookies, but don’t forget about those nails! ‘Tis the season to bust out some colorful and festive nail art — and do it fast. We know in between hosting hot cocoa tastings and gift wrapping every last OMG-worthy goodie, you’re the kind of snow bunny looking to hack a set of party-ready nails. You could go with a one-and-done glitter polish, but if you’re anything like us, you’d miss that personal touch — the same kind of creative spin you put on your holiday photo. And so we created this holiday nail art DIY to show how you can use only *one* red polish to create three crazy cool holiday manis.
Other hues are welcome to the party, but classic red is the anchor that holds together each look. It’s probably the best way to add festive flair to your fingers without hunting down hundreds of products — c’mon, we know you have a bottle lying around! So bust out your favorite shade of red and let’s start painting.
Candy Cane Nails
This sweet design is simple and eye-catching. Since the candy cane nails are bright and bold, I like to do a few as accent nails and leave the rest a cheery red. You can even put a fashion-forward twist on candy canes by leaving the white stripes bare to give yourself a festive negative space mani.
– white polish (I used Alpine Snow by OPI)
Tools:
– nail art brush
1. Start by applying a base coat on your nails.
2. Apply your base color. Paint some nails plain red and the accent nails white.
3. Once your base color is dry, use your nail art brush to paint a thin red line that crosses your nail diagonally on the white nails. Paint an additional thicker line next to the first line.
4. Repeat the two lines (one thinner, one thicker) toward the tip of your nail.
5. Once dry, finish your design with top coat. Seche Vite is my all-time favorite.
We’re not sugar coating it: this nail design rules!
String of Lights Nails
We love designs that connect between all five nails. These playful string lights will definitely put you in a brighter mood ;) You’ll need a black striper brush (#nailartbasic) to draw on the strings, but all the lights could twinkle red if you should so choose!
Materials:
– base coat
– your favorite red polish (we used Big Apple Red by OPI)
– top coat
Tools:
– nail art brush
– black Stripe Rite striper brush
– blue Stripe Rite striper brush
– yellow Stripe Rite striper brush
– green Stripe Rite striper brush
1. Start by applying a base coat on your nails.
2. Apply your base color. I love the combination of a muted gold with bright colors, so I used Luxe, one of my favorite shades from Orly.
3. Once your base color is dry, use the black striper brush to create a string that loops and continues from nail to nail. I like to create diagonal lines on some nails, and adding a loop in the string on other nails. If creating loops seems too difficult, stick with straight lines!
4. Dip your nail art brush in your favorite red polish, and paint small ovals that just touch the black lines.
5. Continue to paint light designs in blue, yellow and green using your striper brush. Feel free to go all red or switch up the colors if you like!
6. Once dry, finish off your design with your favorite top coat.
So merry and bright, we don’t even need real lights.
Santa Hat Nails
Why run out looking for a Santa hat for your holiday party when you can wear one (or more!) on your nails? I love the balance between the Santa hat accent nails and the festive polka dots in this design, so grab your gold and white polish while you’re at it.
– nude polish (I used My Vampire is Buff by OPI)
– white polish (I used Alpine Snow by OPI)
– silver polish (I used My Signature is DC by OPI)
Tools:
– dotting tool
1. Start by applying a base coat on your nails.
2. Apply your nude polish on all of your nails. For this kind of design, I wanted to use a nude shade that was opaque rather than sheer.
3. Once your base polish is dry, use your dotting tool to create white, red, and silver dots on the nails that won’t have Santa hats. Here’s a tip — using less polish and using a lighter touch will create smaller dots, while more polish and a heavier touch will create larger dots. I like using a combination of large and small dots to create a more playful design.
4. Now use your favorite red polish brush to paint a triangle at the tip of the nail, with the point of the triangle reaching the middle of the nail.
5. Dip your dotting tool in the white polish and create and dab a few dots at the tip of the triangle to create the pom-pom of the Santa hat.
6. Use the same technique to dab white dots on the very tip of your nail to create the brim of the Santa hat.
7. Once dry, top with your favorite top coat.
*We’re* so jolly, but this deer is a little jeal that he doesn’t have a Santa hat of his own. Good thing it’s the season to spread love, cheer and lend an accent nail to a friend in need. Happy holidays!
What holiday nail hacks are you swearing by this season. Tell us about your holiday mani plans in the comments below.
