These Amazing Salted Tahini Butter Chocolate Chip Cookies Have a Healthy Twist

Chocolate Chip Cookie recipe

These are some of the best cookies… rich and decadent, but slightly healthier too. They're made with almond flour and honey and lightly sweetened. Every bite is slightly crisp on the edges, but soft and chewy in the center. So DELICIOUS. Absolutely nothing not to love about these salty, sweet tahini cookies (originally published on The Half Baked Harvest blog). Bonus? These cookies are easy to make, use simple ingredients, and are gluten-free too.
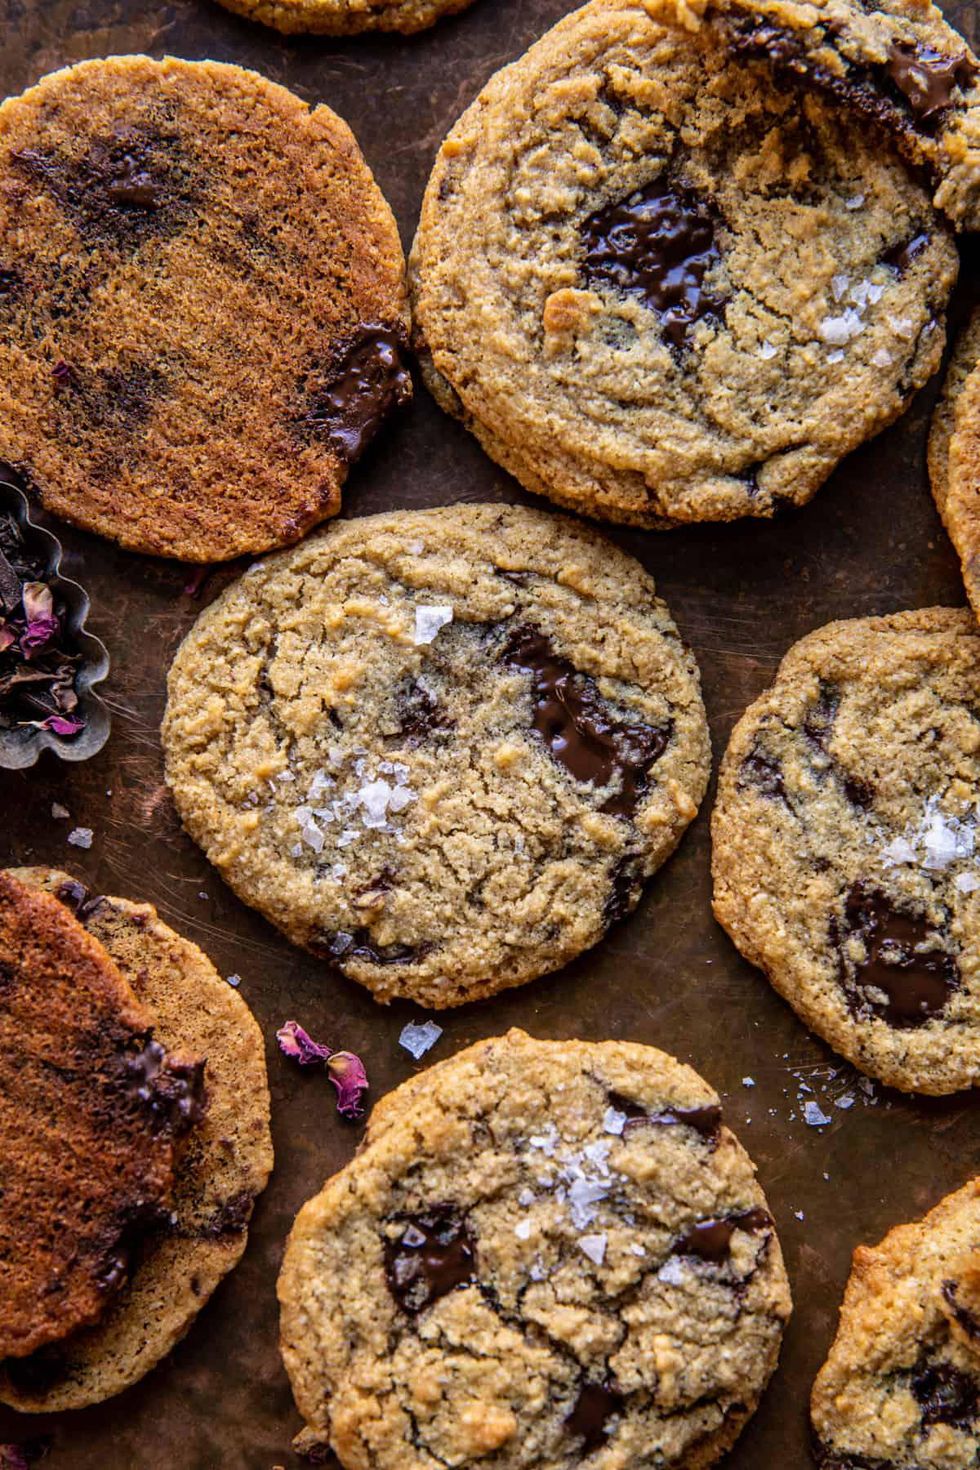

Photo by Half Baked Harvest

The process for baking up the perfect tahini cookie…

Honestly, these cookies are almost too good to be true. They're healthy AND they're the easiest to make.

First up, I like to use quality butter in my cookies. I think the butter, along with the tahini and honey, are the elements that really make these cookies GOOD! I use a lightly salted stick of organic European style butter and it makes all the difference.

You'll cream the butter with the smallest amount of brown sugar and honey to sweeten these cookies. Next, add the tahini. For anyone who is unfamiliar, tahini is simply ground sesame seeds. I know that using tahini to bake with might sound weird, but it's actually so delicious when baked up in a sweet way. It's used in a lot of Middle Eastern food, in both savory and sweet recipes.

Now add in a mix of almond flour and coconut flour. The mix of the two flours creates the perfect crispy edge, but soft in the center cookie. However, if you only have almond flour on hand, that can be used to replace the coconut flour in a pinch.

I usually buy Bob's Red Mill Almond and Coconut flour. You can find both in most major grocery stores, Whole Foods, and I believe Trader Joe's as well.

Now stir in lots of chocolate chips (or chocolate chunks) and bake away. No chilling required! Simple. Simple.
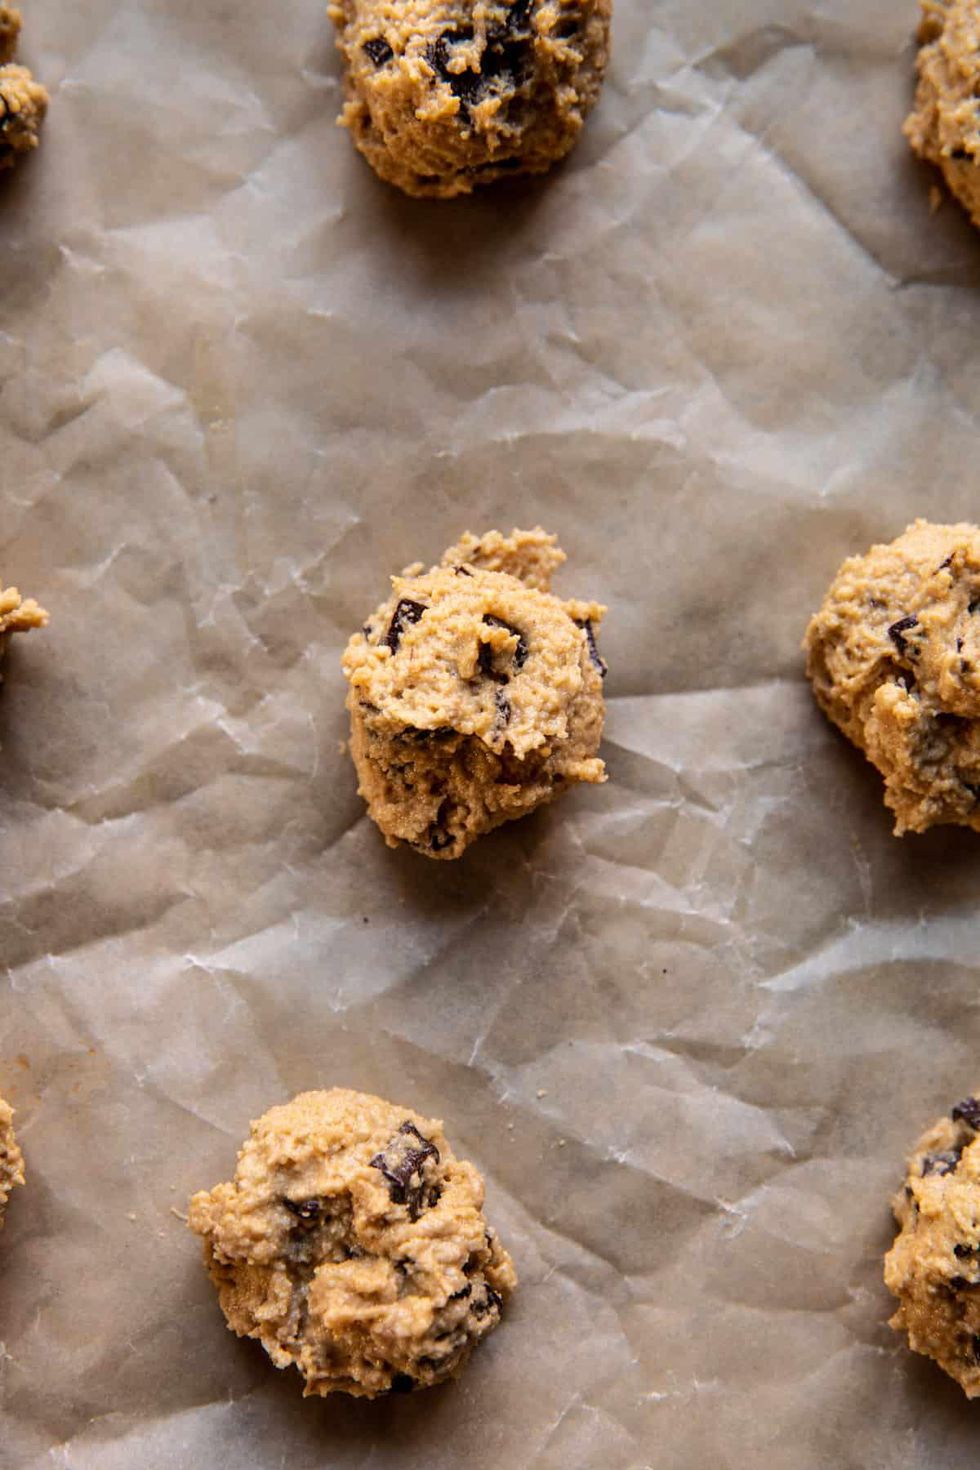
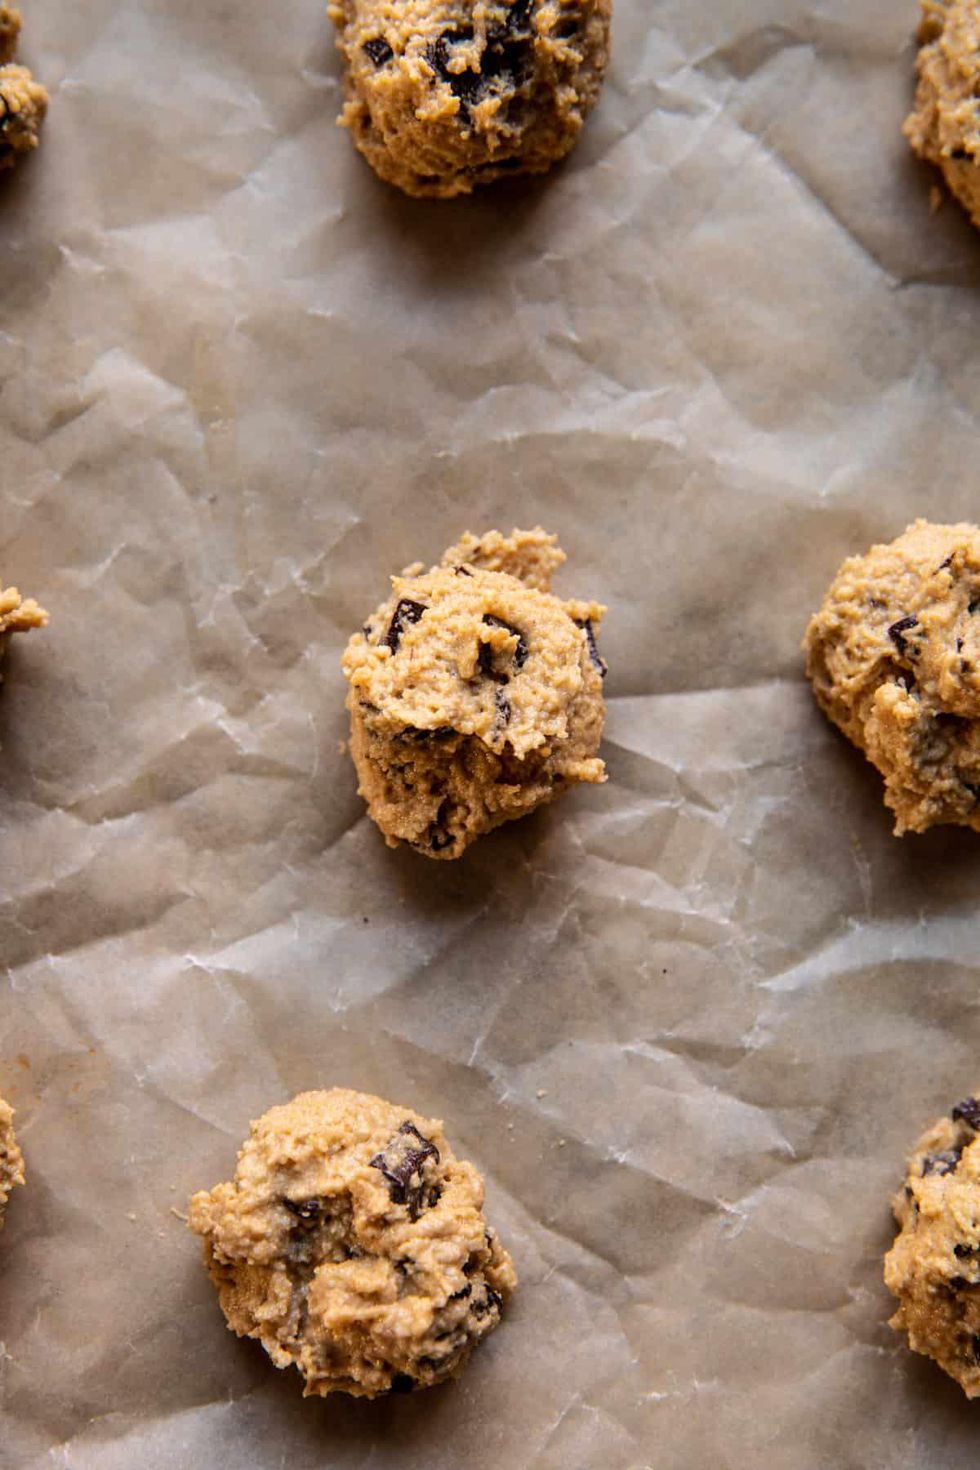
Photo by Half Baked Harvest

A couple of notes:

As with a lot of my cookie recipes, this one requires tapping that baking sheet on the counter midway through baking, then continue finish baking. When the cookies have completely finished baking, remove them from the oven, and tap the baking sheet once more. You guys, this step is KEY. It will ensure you have the least cakey tahini cookie. Instead, you'll get a cookie with crisp edges and a soft, chewy center. Tapping the baking pan on the counter deflates the center of the cookie, pushing the edges out.

I pretty much do this whenever I bake any cookies…because it works.

For the flours, I know some of you love to bake with almond flour, and I know some of you love to bake with good ole' all-purpose flour. These cookies are actually best with a mix of almond and coconut flour. But if you only bake with all-purpose flour, that will work just fine too. You'll get a slightly thicker, sturdier cookie and it will be delicious. So use what you love/have on hand.

What I love about these cookies is that they're easy to make, require no chilling, and take less than thirty minutes. And yes, they are even pretty healthy too! They also don't get hard once cooled.

My best advice? Bake these tonight…because everyone has thirty minutes to bake up cookies. Then eat a few warm, and welcome in the weekend…couldn't think of a better way to really welcome in the New Year!
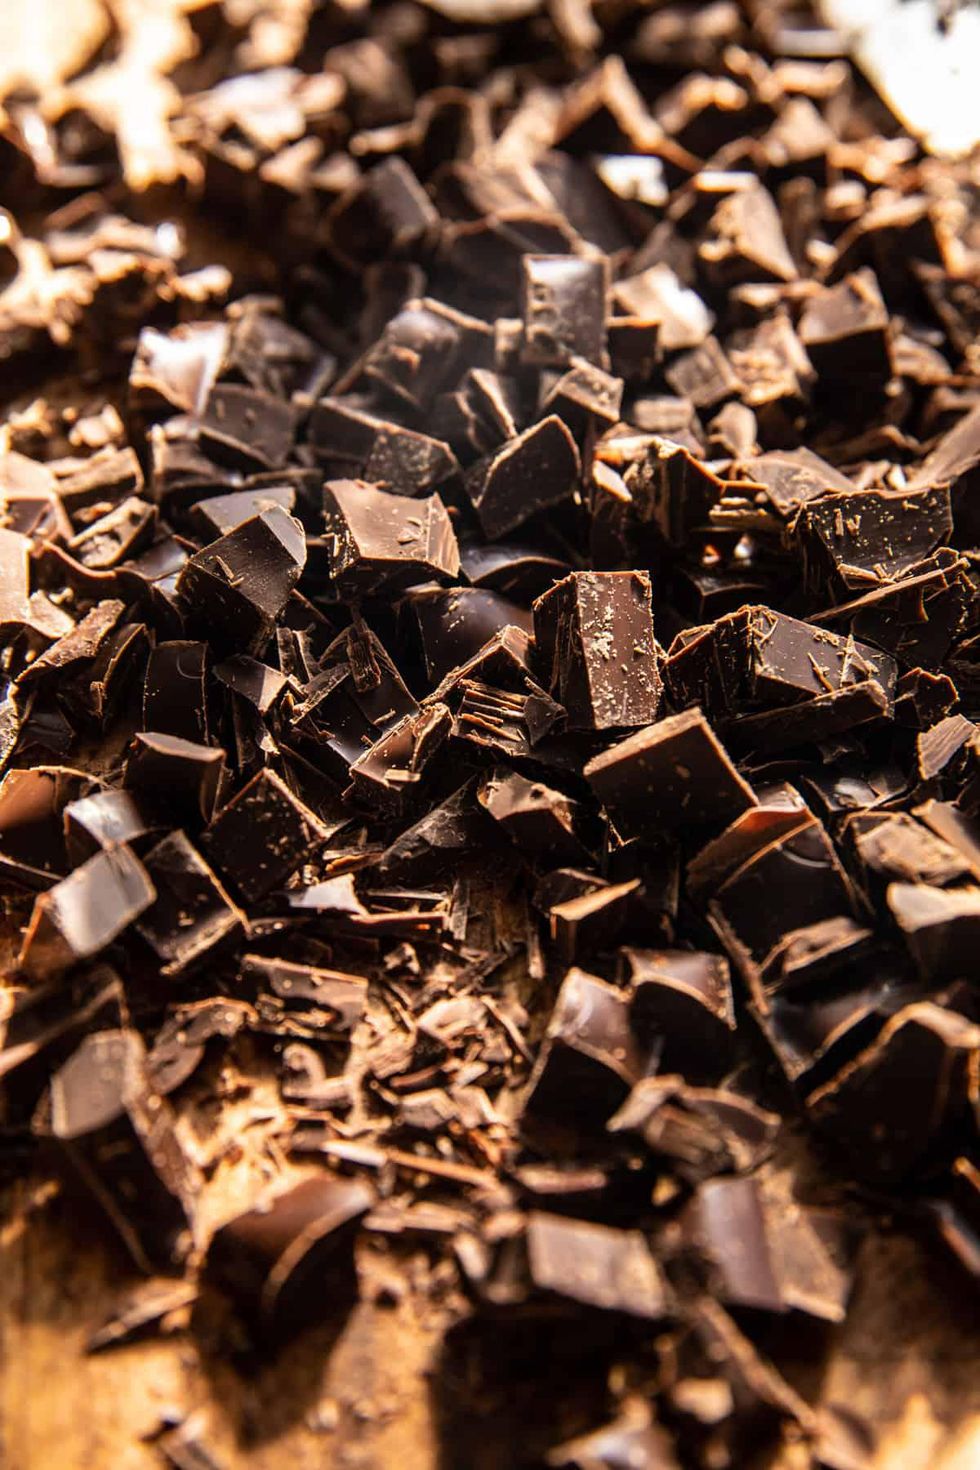

Photo by Half Baked Harvest

INGREDIENTS
INSTRUCTIONS
  1. Preheat the oven to 350° F. Line a baking sheet with parchment paper.
  2. In a mixing bowl, beat together the butter, brown sugar, honey, and tahini until combined. Beat in the egg and vanilla, beating until creamy. Add the almond flour, coconut flour, baking soda, cinnamon (if using), and salt. Fold in the chocolate chips/chunks.
  3. Scoop the dough out into rounded 1 tablespoon size balls, the dough will be a little wet. Place 2 inches apart on the prepared baking sheet.
  4. Bake 5 minutes. Remove the pan from the oven and tap the baking sheet on the counter 2 times to flatten them down. The cookies will have brown edges at this point, that is OK. Return to the oven and bake another 2-3 minutes, the cookies will be browning, but still doughy in the center. Remove from the oven and gently tap the baking sheet on the counter 1-2 times to flatten them down again.
  5. Let the cookies cool on the baking sheet. They're going to look weird, but as they cool, they'll set nicely. They will continue to cook slightly as they sit on the baking sheet. Sprinkle with flaky salt. Eat warm (highly recommended) or let cool and store in an airtight container for up to 4 days.
RECIPE NOTES

Alternate flour:if you prefer, you can bake these cookies using a total of 1 1/3 cups all-purpose flour. The cookies will come out a little thicker, but be just as delicious!

Honey Replacement: you can use an equal amount of brown sugar or granulated sugar in place of the honey.

Freezing:the cookie dough balls can be frozen for up to 3 months. Thaw, then bake as directed.

Want more food inspo? Check out Tieghan Gerard of Half Baked Harvest on Teach Me Something New with Brit Morin!

When it comes to prepping Thanksgiving dinner, we'll take any make-ahead ideas we can get. That's why we are *obsessed* with this insanely yummy mashed potato recipe from Half Baked Harvest. Easy to make, delicious to eat, and even better to check off your to-do-list, these mashed potatoes are rich and full of garlicky goodness. We'll let Tieghan Gerard take it from here!

Make Ahead Roasted Garlic Mashed Potatoes, the best holiday mashed potatoes. Made simply with sweet roasted garlic, fresh herbs, and salted butter. Each bite is perfectly smooth, creamy, and so delicious. The secret? Cooking the potatoes together with the milk and cream, then adding in roasted garlic cloves for a delicious garlic flavor that isn't overpowering. This method makes for the creamiest and most flavorful mashed potatoes. They're perfect for making ahead of time for easy entertaining!

What's the secret to these potatoes?

Half Baked Harvest

Two things… first, the roasted garlic. Roasting the garlic adds just the right amount of garlic flavor that's delicious but not over powering.

Second, cook the potatoes together with the milk and herbs. This means no boiling the potatoes, no extra steps, nothing fancy. It turns out that creating almost perfect mashed potatoes is actually really easy.

The Steps — Roast The Garlic

Half Baked Harvest

Start with the garlic since it takes time to roast in the oven. If you've never done it before it really adds a layer of deliciousness to your recipes.

Simply slice the top portion of the garlic head off to reveal the cloves. Then place the garlic on a small piece of foil, drizzle with olive oil, and wrap the garlic up. Roast for about forty minutes, until the garlic is deeply golden and soft.

Then simply squeeze the cloves out of the garlic skin.

Meanwhile, Make The Potatoes 

Half Baked Harvest

Combine the potatoes with the milk and cream in a large pot on the stove. Add the herbs, then cook until the potatoes are tender. This will take about twenty-five minutes or so. Once the potatoes are cooked, drain them, BUT, be sure to save the cream – you'll need it!

Now, the potato ricer…it's key to making ultra-smooth mashed potatoes. Do you have to have a potato ricer? No, a good ole masher works too. But if you want the smoothest mashed potatoes, a ricer works really well.

Half Baked Harvest

Take the mashed potatoes and those roasted garlic cloves and put them right back into the pot. Then add back the cream and also add some butter. Cook until the butter is melted…and that's it…the most perfectly flavored creamy mashed potatoes!

Honest these are the BEST – classic, but with amazing flavor and texture.

The added bonus is just how easy these are to make…and that you can make them ahead of time. Steps for warming in the oven, slow cooker, or on the stove are listed in the directions!

Make Ahead Roasted Garlic Mashed Potatoes

Half Baked Harvest

Ingredients:

Directions:

  1. Preheat the oven to 400° F.
  2. Slice off the top portion of the garlic head to expose some of the cloves. Place the garlic on a piece of foil. Drizzle with olive oil, wrap it up, and bake for 40-55 minutes, until deeply golden and very soft.
  3. Let the garlic cool, then squeeze out the cloves.
  4. Meanwhile, In a large dutch oven, combine the potatoes, heavy cream, milk, sage, and thyme. Bring to a gentle boil over medium heat and cook 20-25 minutes, until the potatoes are fork-tender.
  5. Drain the potatoes, reserving all of the cream. Discard the thyme and sage. Press the potatoes and roasted garlic cloves through a potato ricer. Then add them back to the warm pot. Alternately, you can add the potatoes back to the pot and mash with a potato masher.
  6. Over low heat, add 1 1/2 cups of the reserved cream and the butter. Continue to add more of the cream until your desired consistency is reached. Season the potatoes with salt and pepper.
  7. If desired, brown a little butter with sage or thyme and swirl into the potatoes before serving. Serve warm and creamy.

To Make Ahead:

  • In the Oven: Prepare the mashed potatoes as directed through step 6. Spoon the potatoes into a large baking dish. Cover and refrigerate for up to 3 days. To reheat in the oven, preheat the oven to 325° F. Pour 1/2 cup milk or cream over the potatoes and add 2 tablespoons butter, do not stir. Cover the potatoes tightly with foil and transfer to the oven. Cook for 20-25 minutes, or until the potatoes are warmed through. Stir before serving.
  • Slow Cooker: Prepare the mashed potatoes as directed through step 6. Spoon the potatoes into the slower cooker, cover, and keep on low for up to 4 hours. About 30 minutes before serving, turn the heat to low or high, add 1/2 cup heavy cream and 2 tablespoons butter, do not stir. Cover and let the cream warm and the butter melt. Stir before serving.
  • On the Stove: Prepare the mashed potatoes as directed through step 6. Add 1/2 cup cream and 2 tablespoons butter. Place the potatoes over low heat, gently stirring until warmed throughout.

Want more mashed potato recipes? Be sure to sign up for our email newsletter!

This post has been updated.

Eating out as a vegan can be a true challenge, especially if you don’t exactly know that what you’re ordering is 100% vegan. Fast food faves like McDonald’s and Taco Bell are secretly packed with vegan items, and Starbucks is no exception. From oat milk coffees to satisfyingly savory snacks, you’ve actually got plenty of plant-based choices when you pull up at your local Starbucks.

Scroll on to explore every vegan Starbucks drink and food item you can add to your order!

Vegan Starbucks Drinks

Starbucks

1. Brown Sugar Oatmilk Cortado

This new-to-the-menu espresso drink combines brown sugar syrup and oat milk to balance out the punchy coffee notes.

Starbucks

2. Latte (Iced + Hot)

You can totally enjoy a latte at Starbucks if you're vegan. Their oat, almond, coconut, and soy milks are vegan, plus many of their syrups qualify as vegan, too, if you want to flavor up your drink. According to this Starbucks supervisor, all of Starbucks "clear" syrups are vegan and dairy-free. Starbucks' regular and white mocha sauces and caramel drizzle are also vegan and dairy-free.

Starbucks

3. Americano (Iced + Hot)

Starbucks' Americanos are just water and espresso, so you don't have to worry about any dairy being in there. Optionally, you could ask for a splash of non-dairy milk and pumps of your fave syrup.

Starbucks

4. Brewed Coffee (Iced + Hot)

Same goes for their brewed coffees, including iced coffee. Easily ask your barista to add in some non-dairy milk and a few pumps of syrup if you desire!

Starbucks

5. Nondairy Salted Caramel Cream Cold Brew

This vegan cold brew drink is crafted with non-dairy cold foam that's flavored with salted caramel – and it's delish!

Starbucks

6. Nitro Cold Brew

A plain nitro cold brew from Starbucks is fully vegan and dairy-free. You can choose to add a splash of non-dairy milk, if you wish your sip to be a bit smoother and creamier.

Starbucks

7. Iced Brown Sugar Oatmilk Shaken Espresso

This one's a classic: shots of espresso get shaken up with ice and brown sugar syrup to create a frothy foam, then the drink is topped off with oat milk to cut the bitterness. It's quite a delectable order, even if you're not eating fully vegan.

Starbucks

8. Starbucks Refreshers

All of Starbucks' fruity Refreshers are vegan. Plus, you can can add lemonade, tea, other flavor inclusions like strawberry and peach to add some extra oomph.

Starbucks

9. Iced Black Tea

Their refreshing iced black tea is certifiably vegan, too.

Starbucks

10. Iced Green Tea

If you prefer green tea, Starbucks' offering is vegan-friendly. If you tend to take your tea a bit sweeter, just order it with however many packets of your preferred sweetener, and your barista will add it in.

Starbucks

11. Lemonade

You truly can't go wrong with a lemonade!

Starbucks

12. Hot Teas

Starbucks' hot teas are totally vegan, too. If you want to make them fancier, ask for an additional splash of your go-to non-dairy milk!

Vegan Starbucks Foods

Starbucks

1. Rolled & Steel-Cut Oatmeal

Now onto the food! First up is Starbucks' oatmeal, which you can fancy up with nuts, berries, and brown sugar. Make sure to order it with water to ensure it stays vegan.

Starbucks

2. Plain Bagel

Surprisingly, Starbucks' bagels are also vegan.

Starbucks

3. Everything Bagel

The plain and everything bagels will work for any vegan eater.

Starbucks

4. Avocado Spread

Plus, you can order your bagel with a side of this delicious avocado spread for a nutritious boost!

Starbucks

5. Spicy Falafel Pocket

This 100% vegan snack pocket is new to the Starbucks menu, but it's already become a fan-favorite amongst vegans and non-vegans alike.

Starbucks

6. Chipotle Almond Dip

You can order the Spicy Falafel Pocket with a side of this fully-vegan Chipotle Almond Dip (AKA Bitchin’ Sauce). Yum.

Subscribe to our newsletter to discover more amazing Starbucks orders!

All made in one bowl, with pantry staple ingredients, super quick to mix up, healthy, and SO DELICIOUS! Yes, that pretty much sums up this mini banana bread mug cake, and it's the perfect individual little cake to bake up this weekend. With over-ripe bananas, good honey, and your favorite chocolate bar, this is sure to become your favorite banana bread in minutes. Perfect for breakfast, as an afternoon snack, or a late-night dessert.

When you're looking for something sweet, but you still need something healthy and quick to bake up? Make these cute little mug cakes.

Half Baked Harvest

The quick details.

This banana bread cake comes together in five minutes tops, so the details are pretty darn quick.

Start with your wet ingredients. I like to use coconut oil for these cakes. Melt it in the microwave in a microwave-safe bowl. Once melted, add a very overripe banana and give it a good mashing with a fork. The key to any sweet banana recipe is to use bananas that are way past their prime and pretty black all over. Black bananas create the best sweet recipes due to their natural amount of sweetness.

When you have the banana all mashed up, whisk in a squeeze of honey, a single egg, and a splash of vanilla. I personally like to use honey as my sweetener as I've found it creates a perfectly soft, tender, and moist banana bread cake. But maple syrup works well too.

Once the wet ingredients are combined. Stir in the flour, baking soda, a pinch of cinnamon, and a pinch of salt. At this point, the cake is almost ready for "baking".

Half Baked Harvest

But I have a couple of secrets.

First, chocolate chunks…and a generous helping too. The chunks are a must and create the most luscious banana mug cake. You will fold them into the batter as the final ingredient. As the cake bakes, the chocolate sinks in, melting as it sinks. It leaves you with a puddle of warm melted chocolate throughout your cake. And with every bite, a little of that melted chocolate is scooped up.

And it is delicious.

Second, instead of mixing the batter in the mug you plan to "bake" in, mix the batter up in a small bowl, then transfer to a microwave-safe mug. Yes, it's one additional dish to dirty. However, I found this ensures that the batter is more easily mixed up and in turn bakes up nicer too.

But the real key to success?

Eat this mug of banana bread warm, just after cooking. This isn't a cake you want to eat leftover, it's meant as a quick chocolate fix. It should be eaten right away and preferably with a small pat of butter, a drizzle of honey, and a sprinkling of sea salt on top. Nothing is better.

I will say that that every microwave is different, so the cooking time is a little tricky. That said, I tested this on two different microwaves and found two minutes to be just the right amount of time. You may need to adjust slightly by fifteen seconds, give or take.

Soo, have I convinced you that you need a banana bread mug cake in your life tonight?

This is the best afternoon pick me up…warm after-dinner dessert…or late-night treat while cozied up by the fire. AND if you happen to have a snowy weekend in the forecast, you really need to bake this up. It's great any day, but it's best enjoyed on the coldest of days.

How To Make Your Own Chocolate Chip Banana Bread Recipe

Half Baked Harvest

INGREDIENTS

  • 1 medium overly ripe banana, mashed (about 1/3 cup mashed)
  • 1 tablespoon melted coconut oil (or butter)
  • 1 tablespoon honey or maple
  • 1 large egg
  • 1 teaspoon vanilla extract
  • 1/4 cup whole wheat pastry flour, or all-purpose flour
  • 1/2 teaspoon baking soda
  • 1/4 teaspoon ground cinnamon
  • 1/4 teaspoon kosher salt
  • 1/4 cup semi-sweet or dark chocolate chunks

Half Baked Harvest

INSTRUCTIONS

  1. In a bowl, stir together the mashed bananas, coconut oil, honey, egg, and vanilla until combined. Add the flour, baking soda, cinnamon, and salt, mix until just combined. Fold in the chocolate chunks.
  2. Pour the batter into a (10-12 ounce) microwave-safe mug. Microwave on full power for 1 minute and 35 seconds to 2 minutes (I always do 1 minute 35 seconds, but it's better to under "bake"). Eat warm with a smear of butter and a drizzle of honey (you should do this!). Enjoy!

RECIPE NOTES

To Oven Bake: Preheat the oven to 350 degrees F. Lightly grease a 2 cup oven safe ramekin/mug or 2 muffin tins. Add the batter and bake 22-25 minutes.

Microwave: every microwave is very different, so results may vary slightly. I have a 1200 watt microwave and found 2 minutes to be the perfect cooking time. You may need to cook 1 minute 45 seconds or 2 minutes 15 seconds. Start with 2 minutes.

Want more food inspo like this banana bread recipe? Check out Tieghan Gerard of Half Baked Harvest on Teach Me Something New with Brit Morin!

This post has been updated.

What is it about family sagas that seem to make book clubs more interesting? Maybe it's because we know interpersonal relationships can be a little dysfunctional. It could be that we still don't know how to communicate with the people we love the most. Even if we love our parents and siblings, reading about other families' fictional twists and turns gives us a rush of adrenaline.

So it's no wonder Jenna Bush Hager's January book club pick feels like something we can read without putting down. It's full of complicated relationship dynamics, love, and reconciling one's identity with their past. You can say it's the perfect read to kick off your 2025 reading goals!

Learn more about Jenna Bush Hager's 2025 book club pick and fall in love with one character's journey of self-discovery.

Amazon

The Life Cycle of the Common Octopus by Emma Knight

Penn should be excited about advancing her education at the University of Edinburgh, but she can't stop thinking about the secret her parents have been keeping from her. For some reason, she believes she'll uncover it while she's in Scotland because Lord Lennox — her father's friend — is in the area.

Her hunger for the truth leads her to Lord Lennox's estate where she she starts mingling with his family and even discovers love in this moving novel.

@readwithjenna/Instagram

Jenna Bush Hager's Thoughts About The Life Cycle of the Common Octopus

Jenna Bush Hager thinks readers will love The Life Cycle of the Common Octopus because "it's a rich novel" with themes of "friendship and motherhood" (via Instagram). It's so good, she's sure "it will sweep you off your feet (via Instagram).

We hope you enjoy reading about Penn's journey in The Life Cycle of the Common Octopus and encourage you to check out Reese Witherspoon's January book club pick next!

Trader Joe’s loves to keep us on our toes when it comes to their new arrivals. We’re constantly monitoring the aisles to discover all the new TJ’s sweet treats and savory snacks they launch – and these 7 new picks for January 2025 are not to be missed! All of these Trader Joe’s products will run you less than $5, which only makes sealing the deal on your grocery bill easier.

From delicious dips to a very enticing new frozen meal, these are the 7 best new Trader Joe’s finds you absolutely need to try in January 2025.

Trader Joe's

1. Teensy Candy Bars

These tiny little candy bar bites ($2.99) resemble Snickers in the best way possible: layers of nougat, caramel, and peanuts are enveloped in a delicious chocolate coating for maximum snackage. We're gonna have to resist eating the whole bag! TJ's even suggests using these bits as decoration for other desserts, like sprinkling some on a scoop of ice cream or baking them into some cookies.

Trader Joe's

2. Olive Tapenade Hummus

Trader Joe's array of dips is simply too good to resist, and this newcomer hummus ($3.49) is no exception! It's a tub of "smooth and nutty" hummus topped with a tapenade comprised of black olives, manzanilla olives, capers, and olive oil to give it a salty effect. It's gonna taste so great as a dip for crackers or as a spread on a Mediterranean pita wrap.

Trader Joe's

3. Organic Concord Grape Jelly

This squeezable grape jelly ($3.49) is nothing short of nostalgic. Trader Joe's says it's "super smooth, joyously juicy, and potently purple," which immediately has us sold on making PB&Js every day now.

Trader Joe's

4. Spicy Chicken Nuggets

Oh, yeah. Bring on the spice with these spicy nuggs ($3.99) that make the perfect easy meal no matter the time of day! Made from all-natural chicken breast and rib meat, breaded with wheat, rice and corn flours, then covered in hot sauce and lightly fried, TJ's has their texture down to a tee. You can easily cook 'em in the air fryer, oven, or microwave before chowing down!

Trader Joe's

5. Crispy Potato & Poblano Pepper Tacos

These halved and fried frozen tacos ($4.99) will totally crush your Taco Bell cravings, since they come together super quickly and contain flavors with mind-blowing authenticity! Each taco is filled with a blend of seasoned mashed potatoes and some "ever-so- slightly spicy" poblano peppers that'll work so well with any dipping sauce, from TJ's salsa to their creamy Jalapeño Sauce.

Trader Joe's

6. Strawberry Mini Hold The Cone!

Just in time for Valentine's Day, Trader Joe's is debuting a new flavor ($3.99) of their classic Hold The Cone! frozen dessert: strawberry! These tiny, chocolate-covered cones are lined with even more "rich" chocolate on the inside, then packed with strawberry ice cream, which TJ's says is crafted with plenty of strawberry purée.

Trader Joe's

7. Caesar Salad Dip

Trader Joe's shoppers have said this new Caesar Salad Dip ($3.69) makes a perfect girl dinner addition– which, if you get it, you get it! The tub starts with a "creamy" base that's then loaded up with Caesar-seasoned sour cream, mayo, anchovy paste, Parmesan, and finely shredded Romaine for the crunch. It's best enjoyed with crackers or veggie sticks to dip, but you could also smatter fried chicken or seared steak in it for some ahh-mazing flavor!

Subscribe to our newsletter to discover more of the best Trader Joe's new items!