Listen up chicas! Looking for a spring statement necklace now that the weather has turned for the better? We’ve got some advice: stop shopping, and start making! ‘Cause see this necklace right here? It can be made for under $15. We know… unreal, right? All it takes is the patience to follow a semi-intricate weaving pattern, and you’ll be ready to rock it in no time! But the best part about this jewelry DIY is that the color palette is totally customizable. Just buy whatever color seed beads vibe with your spring style. Coral and gold? Mint and white? Those combos all rule! We went with teal and grey—and we’re pretty obsessed. Y’all ready to get your weave on?
Make This Woven Bead Statement Necklace for Under $15!
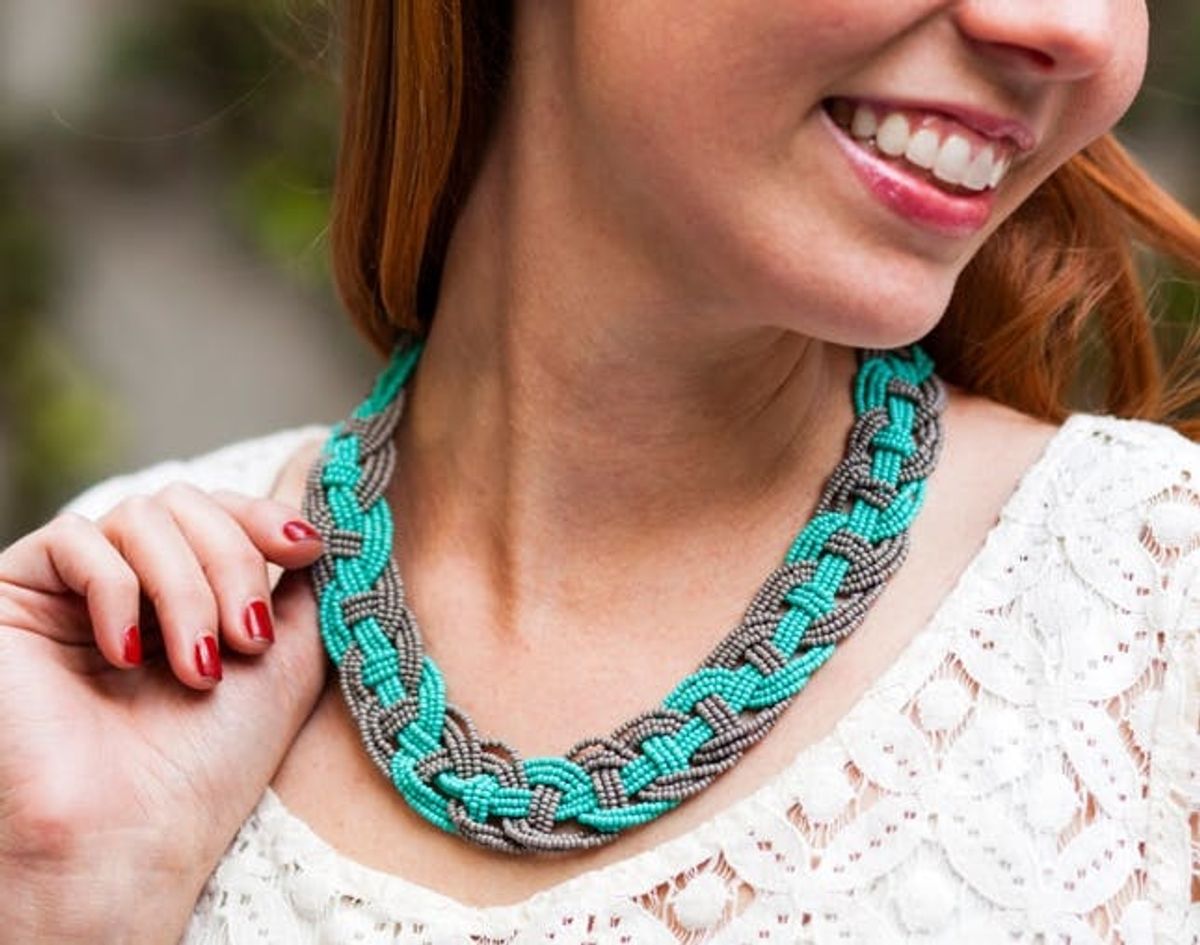
Listen up chicas! Looking for a spring statement necklace now that the weather has turned for the better? We’ve got some advice: stop shopping, and start making! ‘Cause see this necklace right here? It can be made for under $15. We know… unreal, right? All it takes is the patience to follow a semi-intricate weaving pattern, and you’ll be ready to rock it in no time!
But the best part about this jewelry DIY is that the color palette is totally customizable. Just buy whatever color seed beads vibe with your spring style. Coral and gold? Mint and white? Those combos all rule! We went with teal and grey—and we’re pretty obsessed. Y’all ready to get your weave on?
<br/>
 – seed beads (we chose two colors, but possibilities are endless!)
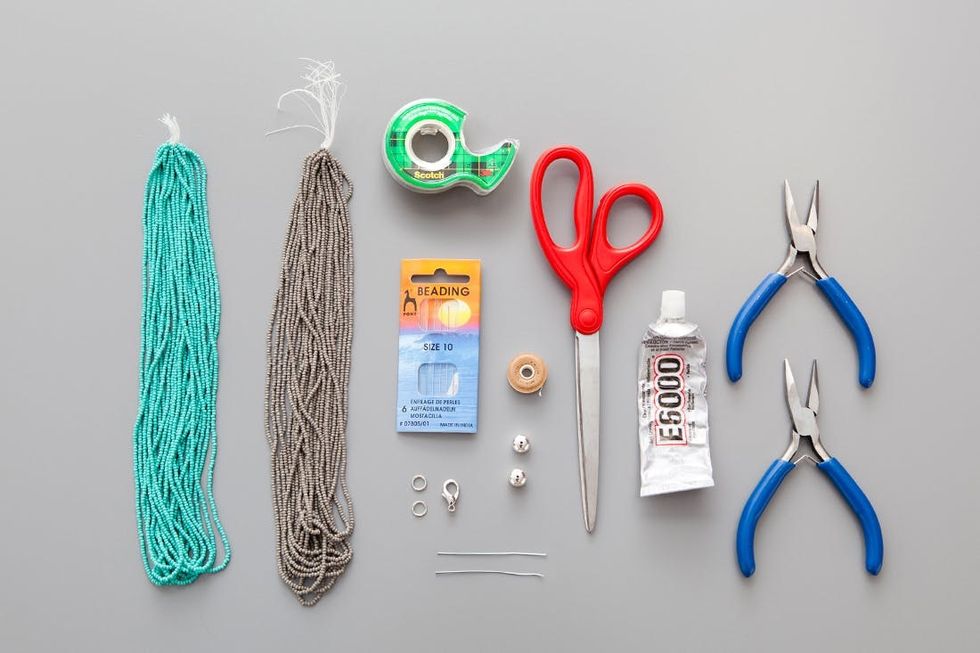
– jewelry thread
– 2 silver cones
– 2 silver jump rings
– silver lobster clasp
– E6000 glue
– 2 head pins
Tools:
– scissors
– 2 needle nose pliers
– jewelry needle
Instructions:
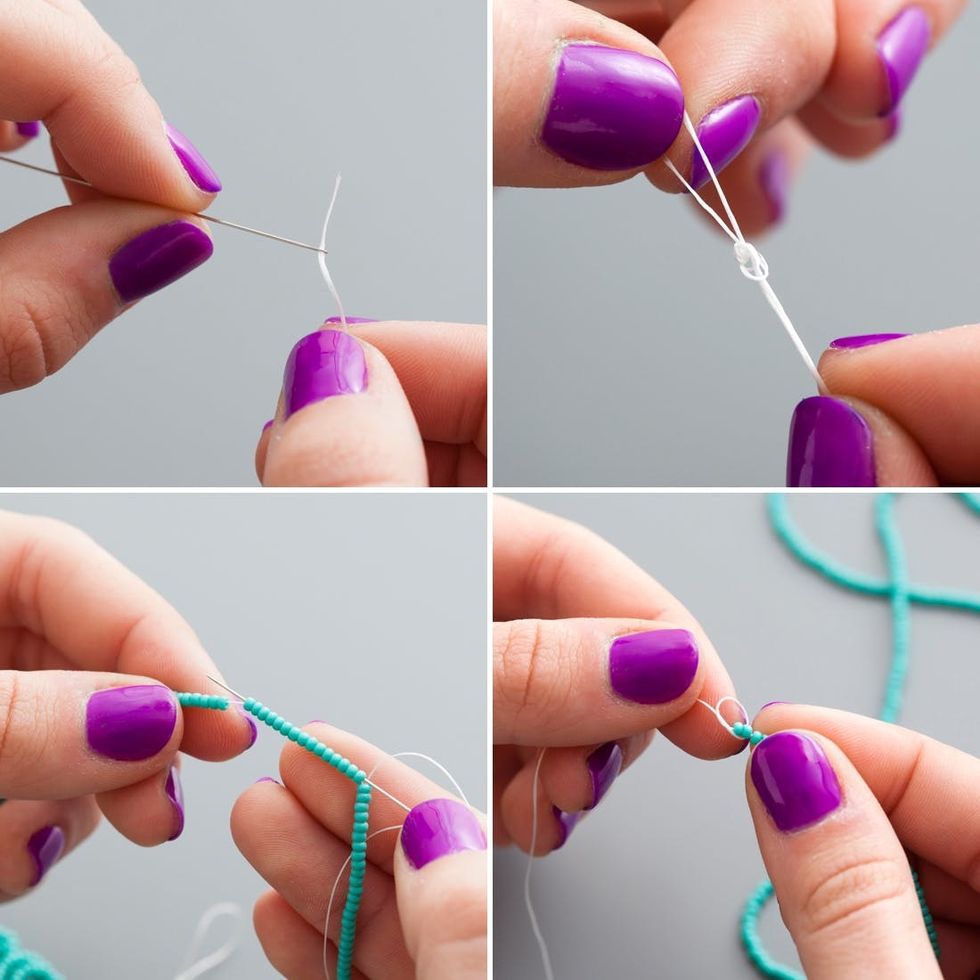
1. String seed beads onto jewelry thread. You will need four sets of three strands; two in each color. Each strand should be 30 inches long.
2. Tie strands together and tape to the table. Separate each set of three strands by color, in alternating colors.
3. Starting on the right and moving toward the left, take grouping one and weave it over grouping two, then under grouping three and over grouping four.
4. Now take the *new* group three weave it over group two and under group one.
5. Take the *new* group two and weave it under group three and over group four.
6. Repeat steps 4 and 5 until you are at the bottom of the necklace.
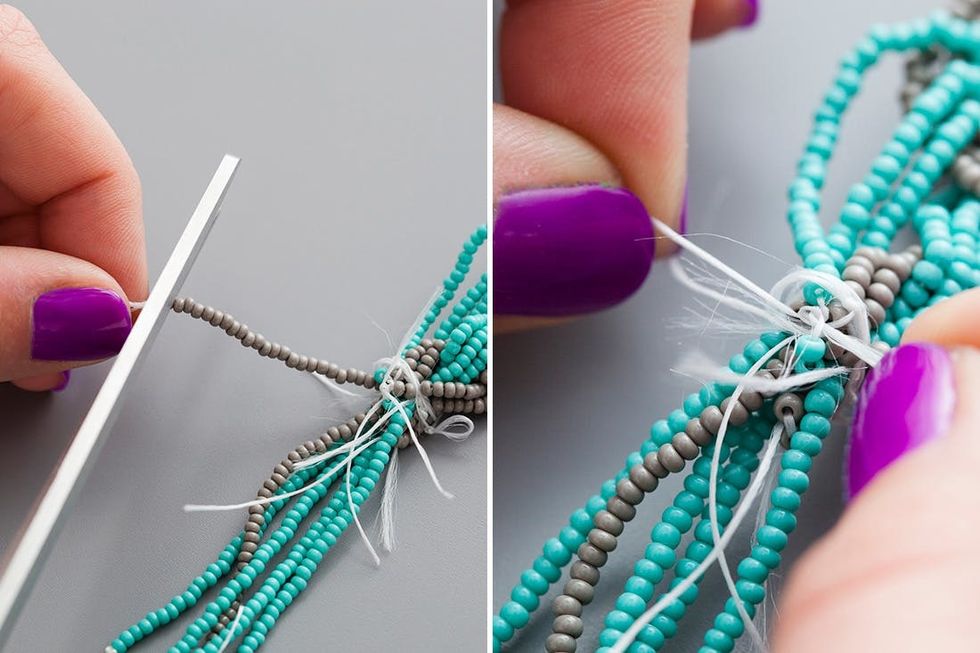
7. Once you’ve reached the bottom, wrap some thread around all the seed bead strands. This will keep everything in place while you adjust the beaded strands.
8. Carefully cut the ends and release the beads below the wrapped thread. Tie these threads to one another to prevent other beads from falling off. Once all strands are cut, tie them together in one big knot.
9. Assemble the ends by inserting a head pin into the silver cone. Cut the wire and create a loop. Make two of these.
10. Attach a jump ring to one silver cone and then a jump ring and lobster clasp to the other silver cone.
11. Cut the extra thread from the necklace, add E6000 super glue and glue the end into the silver cone. Wait one hour for the glue to dry.
If you have seed beads that are already strung we suggest you re-string them. We know, it’s super annoying but the thread that the seed beads are on is very fragile and is not meant to be used in projects. By using a jewelry needle you’ll have your pieces re-strung in no time!
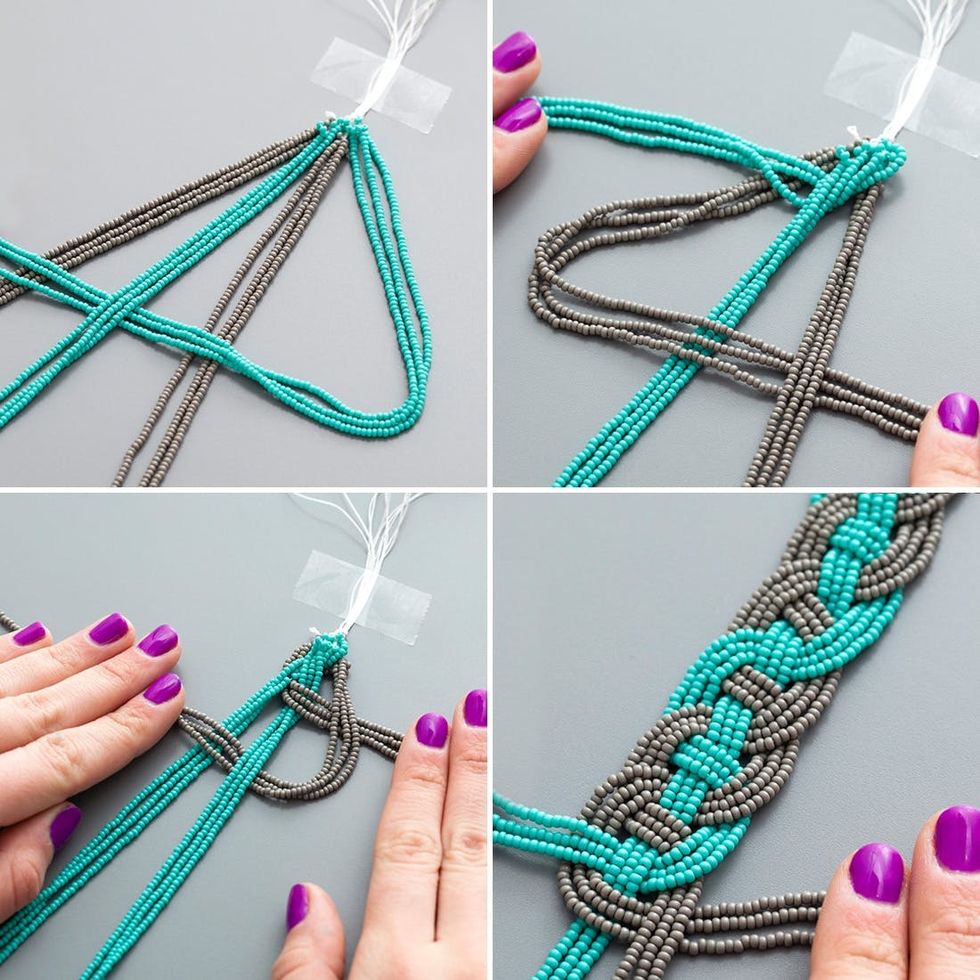
You are going to need 12 strands of beads total, all 30 inches long. We chose two springy colors but you can use as many as you want! Section your beads into four groups of three (keeping alike colors together), then tie all the ends together. Tape your beaded bundle down to a hard surface, separate your color strands, and take a deep breath, it’s time to weave!
The weaving pattern starts on the right side—we’ll call that outermost set of teal beads “group one.” So take group one and weave it over group two (the next grey set), then under group three (the next teal set) and finally, over group four (the last grey set). Then, push up group on so that the strands are tight to the top.
Now starting on the left hand side, take the new group three (now the grey set) and weave it over the new group two and under the new group one. Push the set of strands to the top, then back over to the right hand side, where you’ll take the new group two and weave it under the new group three and over the new group four. Push the strands to the top and repeat the pattern on the opposite side so that your pattern starts to look like this. If it does, then you are doing it right ;)
Yay! You reached the bottom. Now you need to remove the extra beads. Before cutting the ends, tie some extra string around the whole bundle. Tie it tight like a tourniquet. Cut each strand to remove the unwanted beads, then tie the strands to one another to prevent extra beads from falling off. Once all the unwanted beads are gone, tie all strands together in one big knot.
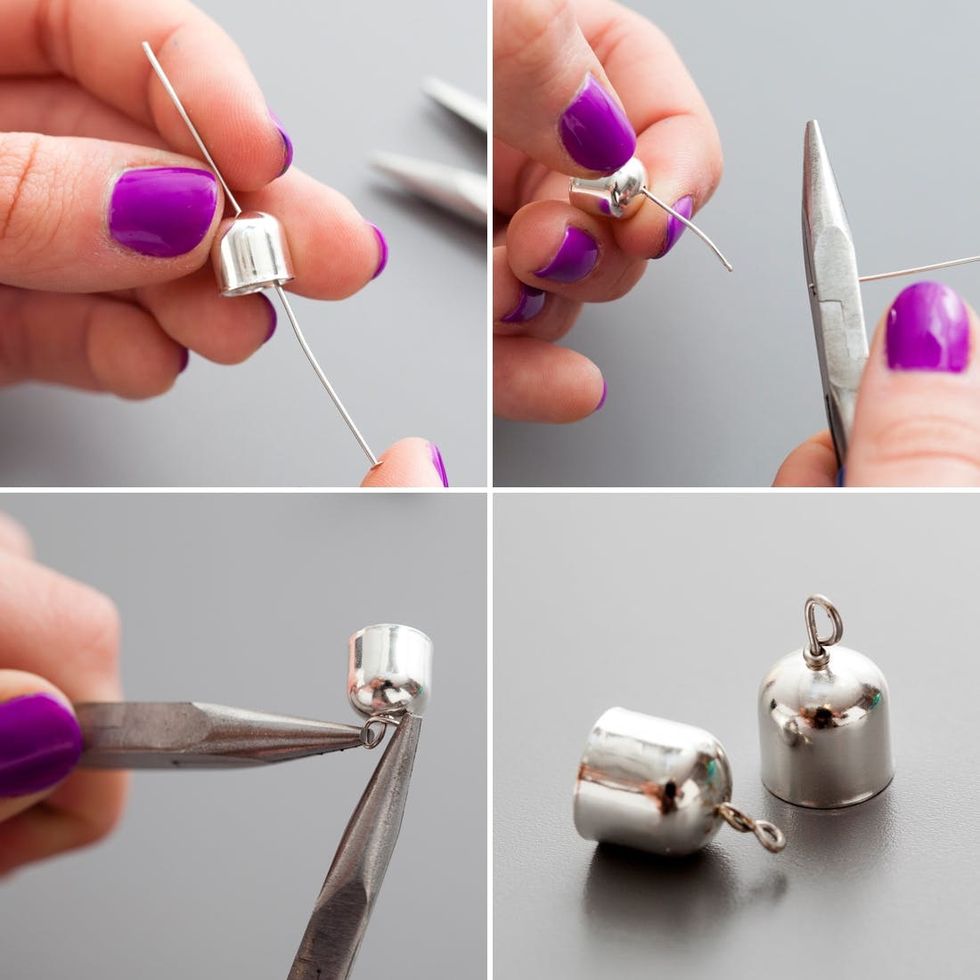
The hard part is over! Time to make cord ends. Insert the headpin into the silver cone, cut off extra wire and make a loop at the end.
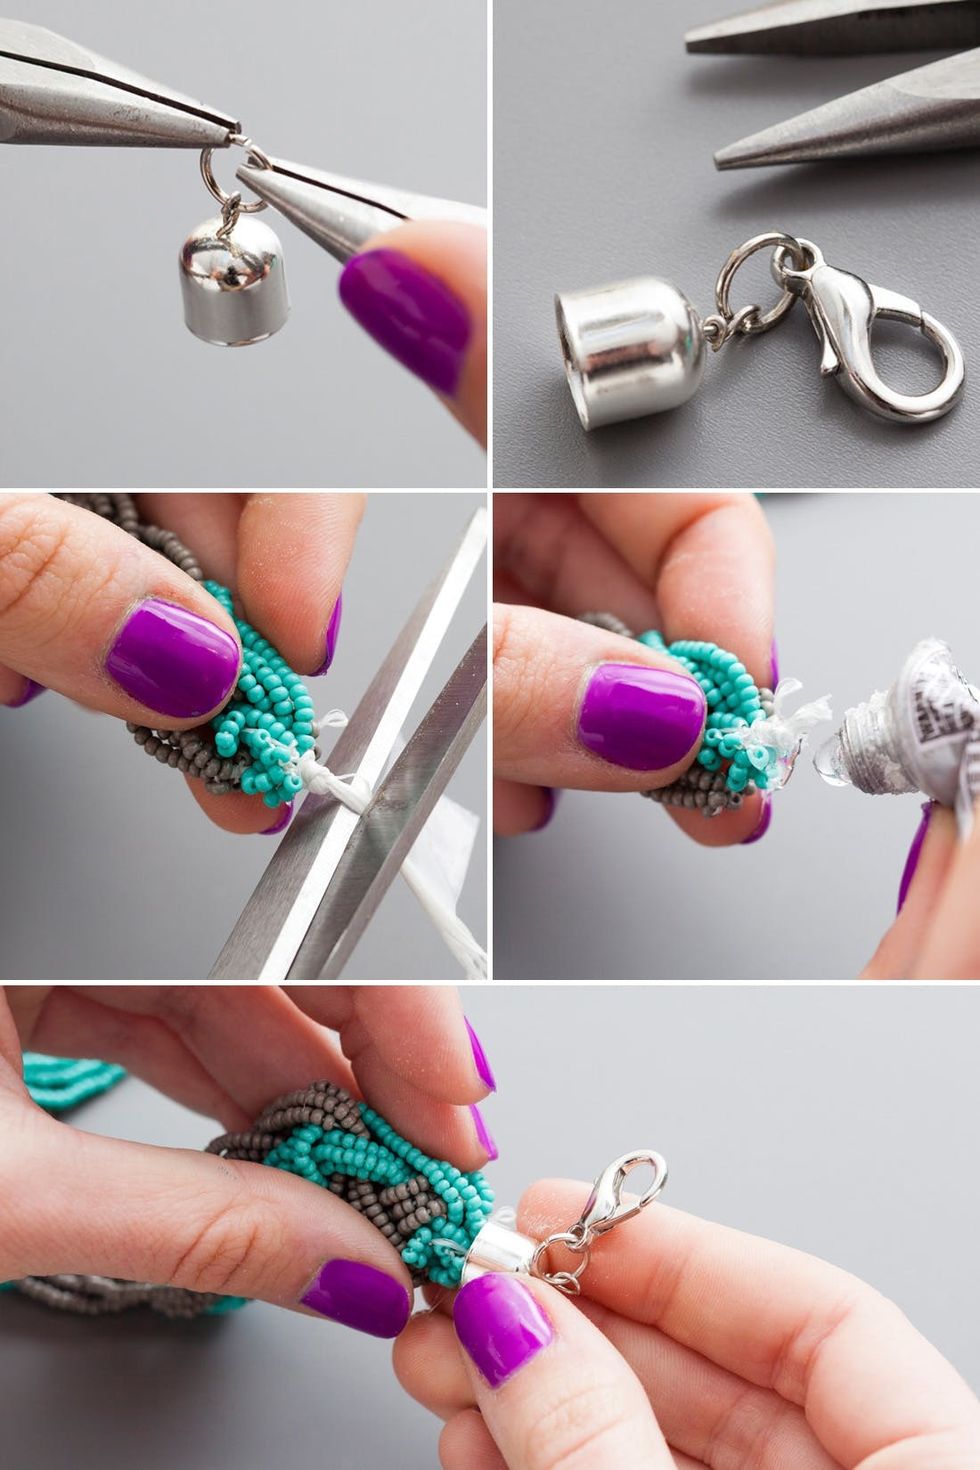
Attach a jump ring to one of the silver cones and a jump ring and lobster clasp to the other. Then, put the pieces together. Cut off the extra thread and put a dab of E6000 on the end of the knot. Slide the silver cone on top and wait for it to dry. We waited one hour before wearing—and yes, it was hard to resist.
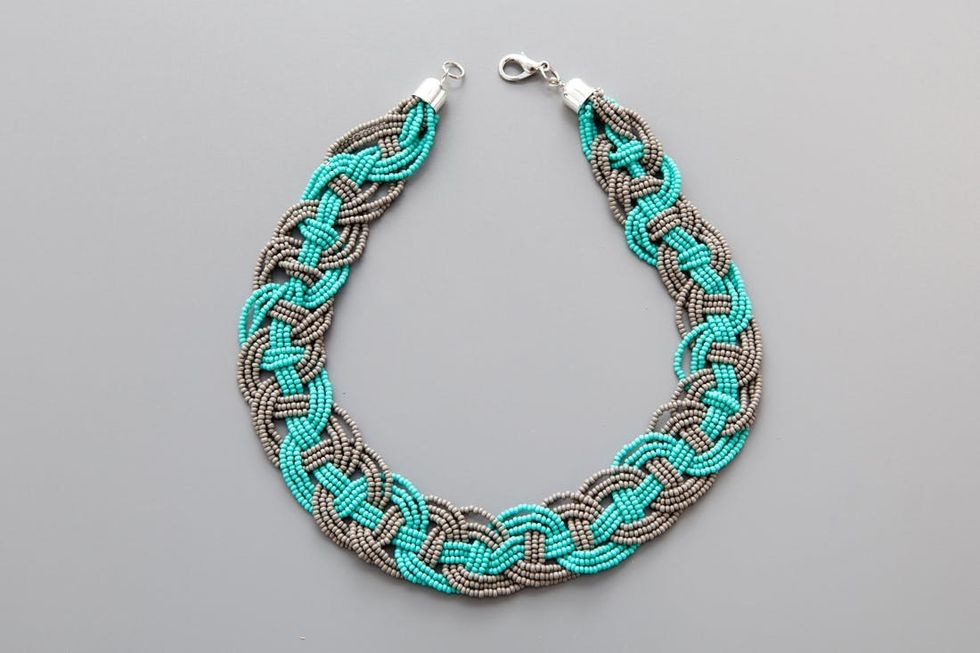
Okay, I might make this the background image of my computer. This necklace is so stunning! It’s definitely is a statement necklace that needs to be sported this spring, if not sooner.

Yup, super cute and perfect for spring!

Check out the weaving on this baby. Made 100 percent by hand!


