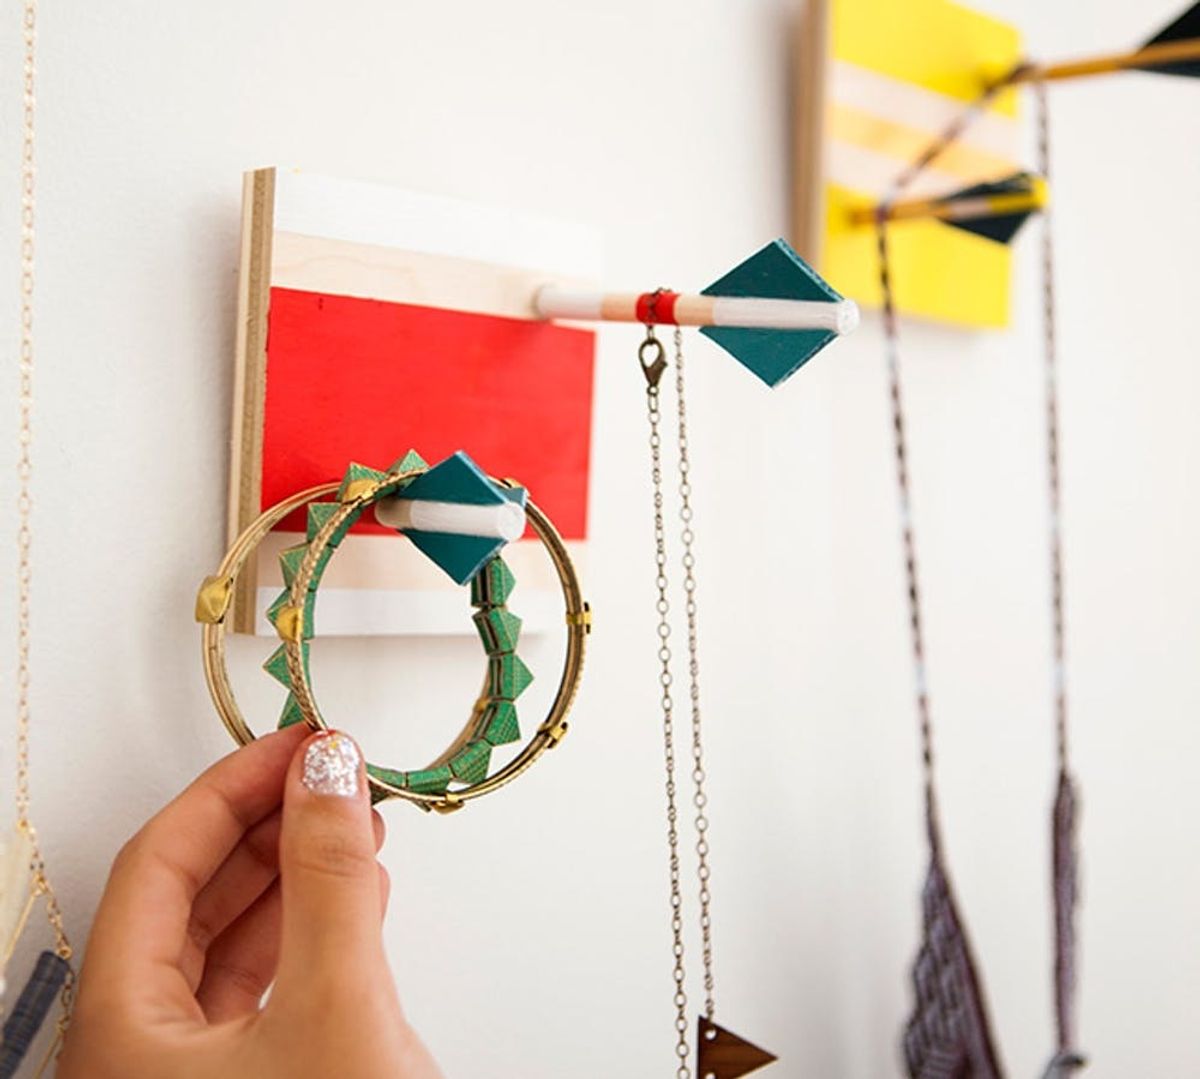
It’s no secret that we’re hooked on creative wall hooks. We’ve made ’em out of Jenga pieces, ogled other homemade hanging jewelry racks, and now we’re taking aim at making wooden arrow wall hooks. These sporty spokes are fresh, playful, and best off all, look just like they’re shooting through your wall!
Bullseye! These Arrow Wall Hooks Hit the Mark

It’s no secret that we’re hooked on creative wall hooks. We’ve made ’em out of Jenga pieces, ogled other homemade hanging jewelry racks, and now we’re taking aim at making wooden arrow wall hooks. These sporty spokes are fresh, playful, and best off all, look just like they’re shooting through your wall!
You can tell we’re trying to hang onto every last bit of summer with this camp-inspired DIY. Especially because our color inspiration came from these equally outdoorsy axes. Since we’re working with wood, a power drill and hacksaw are required, so you’ll need a bit of space to do this project. Ready to give it a shot?
Materials:
– 3 wooden dowels
– 4×4 artist’s wood panels
– faux leather scraps
– fabric scissors
– E-6000 glue
– acrylic paint
– painter’s tape
– permanent marker
– paintbrush
Tools:
– hacksaw
– power drill + drill bit
– sandpaper
– clamp
Instructions:
1. Mark and measure three wooden dowels at 4 1/2 inches and 7 inches, then saw at those marks. This should give you three large “arrows” at 4 1/2 inches long and three small “arrows” at 2 1/2 inches long. Sand any rough exposed edges.
2. Drill two holes in opposite corners of the wood panels. Be sure to not drill all the way through.
3. Tape off the wood panels and dowels in the pattern of your choice and paint. Let dry fully then slowly remove the tape.
4. To make the “feathers” for the arrows, cut a sample feather pattern out of fabric, one size for the large arrows, and one size for the small arrows.
5. Glue two pieces of faux leather together to make two finished sides. Press firmly to set.
6. Using the sample feather pattern, cut out three faux leather feathers per large arrow and three per small. Then glue each set of three onto the corresponding arrow and allow to dry fully.
7. Place a dab of glue in each drill hole and insert appropriate arrows. Allow to dry fully, then hang ‘em up on your wall!
Let’s start by cutting the long wooden dowels into more hook-appropriate sizes. How do 4 1/2 and 2 1/2 inches long sound? Once you’ve marked the dowel, carefully saw each piece with a hacksaw, then sand any uneven edges.
Now let’s rev up that power drill! You can eyeball each hole, but just be sure to line ’em up with the pre-drilled nail hole on the backs of these panels. Don’t drill all the way through! Those dowels need a place to rest their pegs. ;)
OK, it’s about time we add some color: gold with yellow, red with white, and orange with light blue to be exact! First, tape off the panels and dowels – we went with classic stripes in various thicknesses – then paint away. We don’t want to mask all of the wood though, so rest easy knowing that the taped pieces of wood will stay au natural.
An arrow needs its feathers, but we opted for a more durable material to mimic this embellishment: faux leather! To make each “feather” as even as the next, we freehanded one large and one small sample stencil. (We could tell the samples from the real pieces by marking them with an “S”). This will make cutting the final product quick and easy. Bow-nus!
Our faux leather only has one leathery side, so we’re gluing it together to fix that flaw. This way when we cut our feathers, they’ll be ready to go as is!
Once the glue sets, you should be able to cut a total of six feathers from each piece of faux leather scrap—that’s three large and three small of each color. They all look so uniform – aren’t you glad you had those stencils handy?
The paint dries so quickly on these wood pieces, which is great for us since we love the peel and reveal! Each color scheme looks incredibly modern, especially with the light wood peeking through the paint. We also love the contrasting colors of the faux leather feathers. Now let’s assemble!
Squeeze a bit of E-6000 onto a paper plate, slide the bottom of the feather through it, then fasten it to the dowel. Remember to add all three feathers to each arrow! Once every arrow is completely crowned, add a drip of glue into each hole on the panel and insert the arrows into their corresponding plaque.
Are you thinking of things to hang on these yet? We recommend keeping it light with jewelry, tote bags, or even windbreakers versus heavy hoodies and coats. Ready to see the wall hooks in all their finished glory?
Right on! We think these wall hooks really hit the mark. Plus if they’re this awesome on our work table, then they must be truly something else when their hanging in their natural state on a wall!
From far away, the patterns on the panels look so sleek. But we’re ready for an extreme close up!
Now we have a target for all of our geometric jewelry! ;)
Have you made any creative wall hooks? What could they withstand? Tell us about your DIY projects in the comments below!


