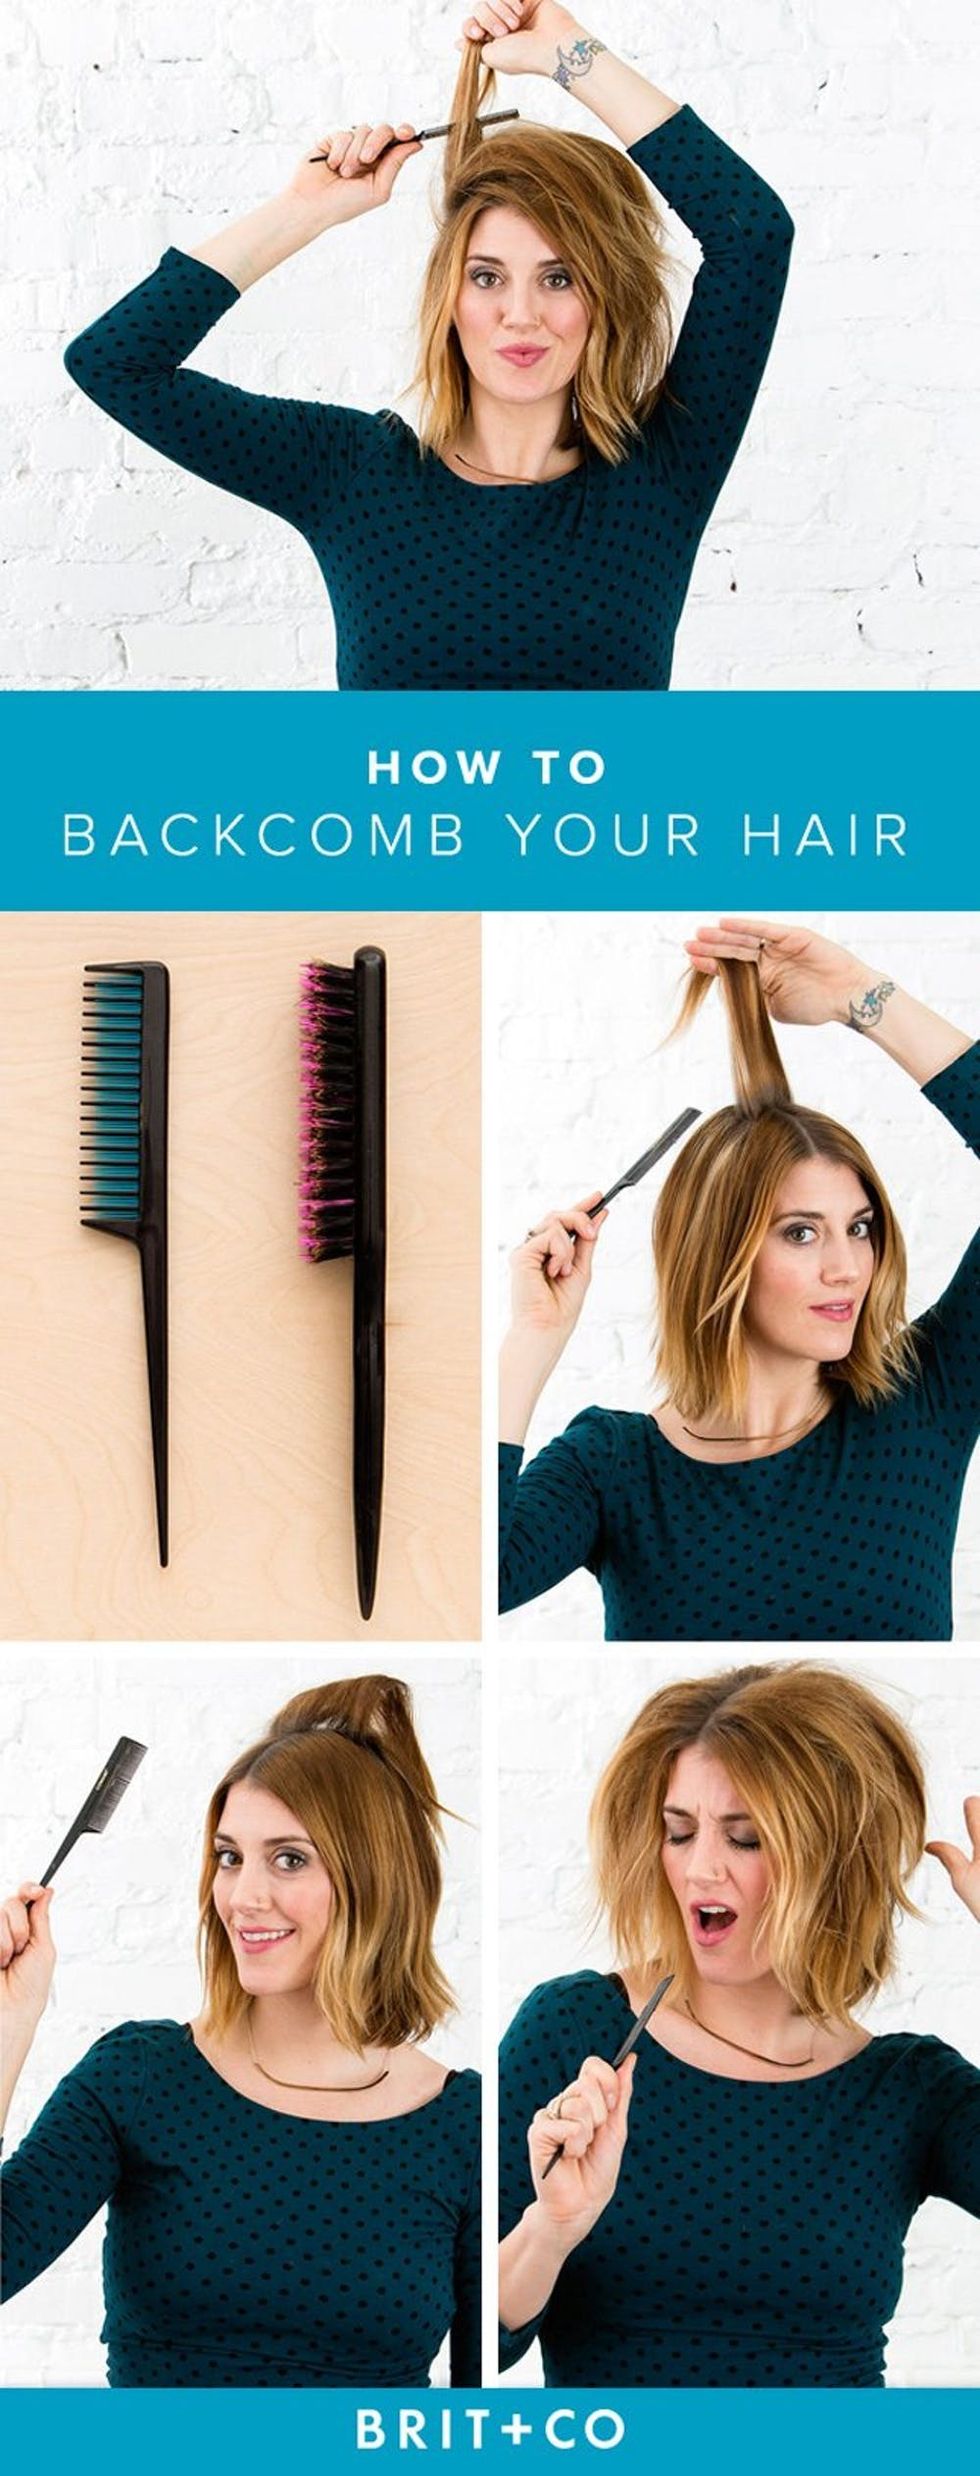
Give your hair the volume you’ve always wanted.
This Is the 1 Trick You Need to Make Every Hairstyle Look Better

Backcombing? Teasing? Isn’t this a thing of the past that retro women of the ’60s, ’70s and ’80s mastered in order to wear that larger-than-life costume hair?! Yes. But the reality is that having voluminous hair is still a thing, even though the finished styles have totally evolved, not to mention it’s the one trick you need to make any hairstyle better. After seeing girlfriends, coworkers and other women attempt to go there with a struggle that usually ends up with their hair in a bird’s nest, giving up and throwing their hair in a high bun, I wanted to share a step-by-step guide on how to give your hair the volume you’ve always wanted. The technique itself is actually quite simple and can be executed by anyone — just make sure to follow these easy tips.

The Tools: Rat Tail Comb
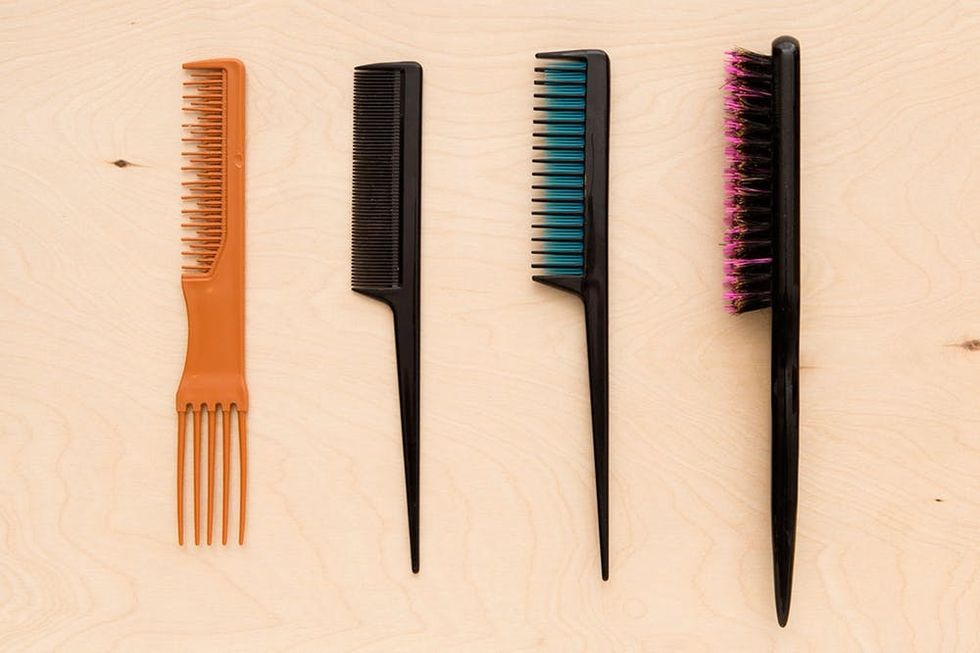
There’s one tool you need to make backcombing a possibility, and that’s the rat tail comb. There are various styles of the tool out there — to be honest, they all work fairly similarly, so you can buy any of them. I’m using a regular Sally #20 Rat Tail Comb ($3) without any fancy teeth or features to let you see that you can really use anything as long as your technique is on point.
Step 1: Section + Make Sure They’re Thin (Very Thin)
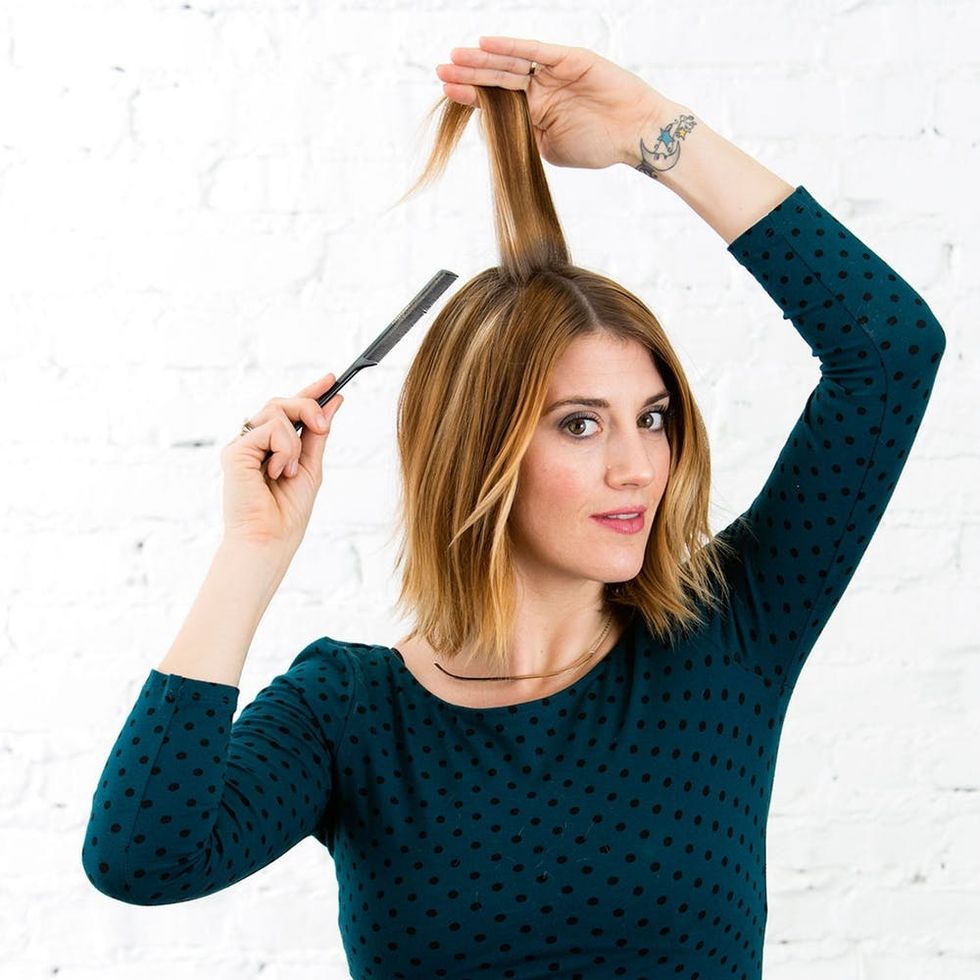
The number one trick to backcombing your hair without ending up with a nest is to work with extremely thin sections of hair. To do this, use the pointy end of the rat tail comb to trace along your scalp, grabbing the section of hair with your other hand. There are two main reasons for this: A) you’ll have an easier time smoothing the outer layer of your hair down to achieve the body without the ratty finish and B) the thinner sections of hair allow each section to build and lay over each other with a lightness to create the volume, where thicker sections would actually be too heavy and the backcombed part will be too big and will fall out of place.
Step 2: Back Comb Building
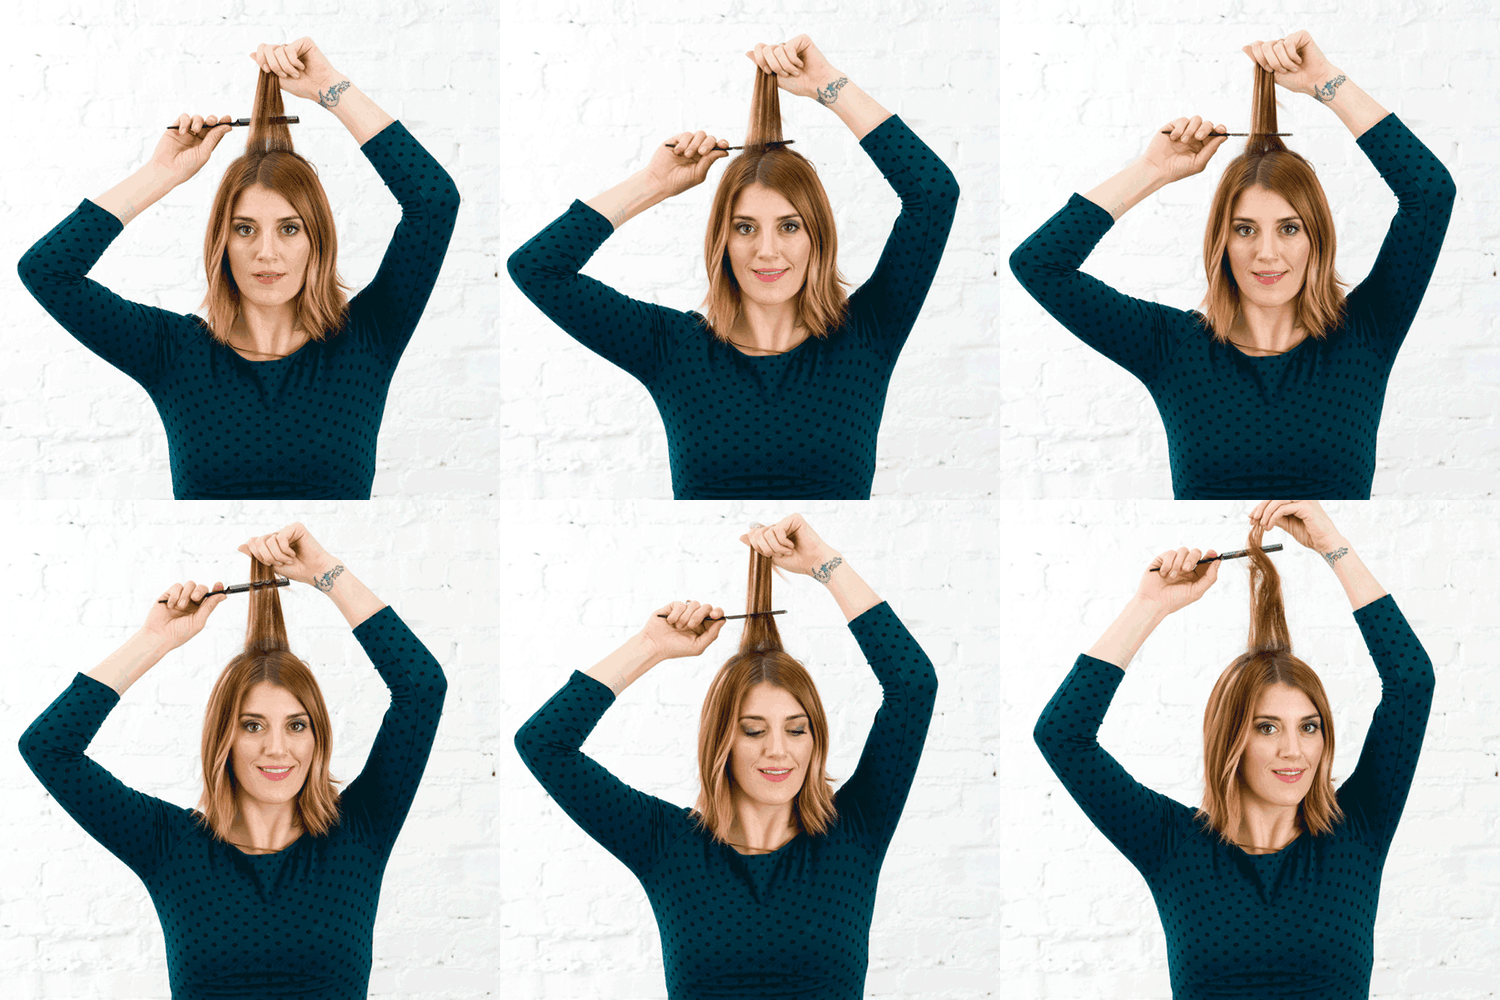
Start off by holding your first thin section of hair straight up into the air, then begin your back comb around two to three inches above your head, gently moving the comb in a downward motion toward your scalp. The fine teeth in the comb are going to pull down stands of your hair, creating a ratty finish. Continue to repeat this same motion, slightly moving the starting point further and further away from your head as you build the back comb effect toward the ends of your hair.
Check In Point: The Finished Section
You can see that your hair looks completely strange at this point and if you did the technique properly the section of hair will be sticking up off of your head quite a bit. Don’t worry: it will get even weirder before it gets better, it’s just part of the process :)

Step 3: Repeat + Work in Vertical Sections

Set the first section aside and then pick up an equally thin section of hair directly behind the first one and do the same technique. Do this until you reach the nape of your neck, then flip all of your hairs down. Wowza, look at that volume!
Step 4: New Sections on the Sides of Your Head

The next vertical section you’ll move to is on either side of your head. Start your first subsection where your part is and then work down the side of your head, creating all the thin subsections until you get to the nape of your neck. Then bring down all of your hair so you can move onto your final section: the other side.

Hold on: 80’s hair band moment please…

Step 5: The Smooth Down, AKA Fix Yo S#*!

A little before and after for ya:
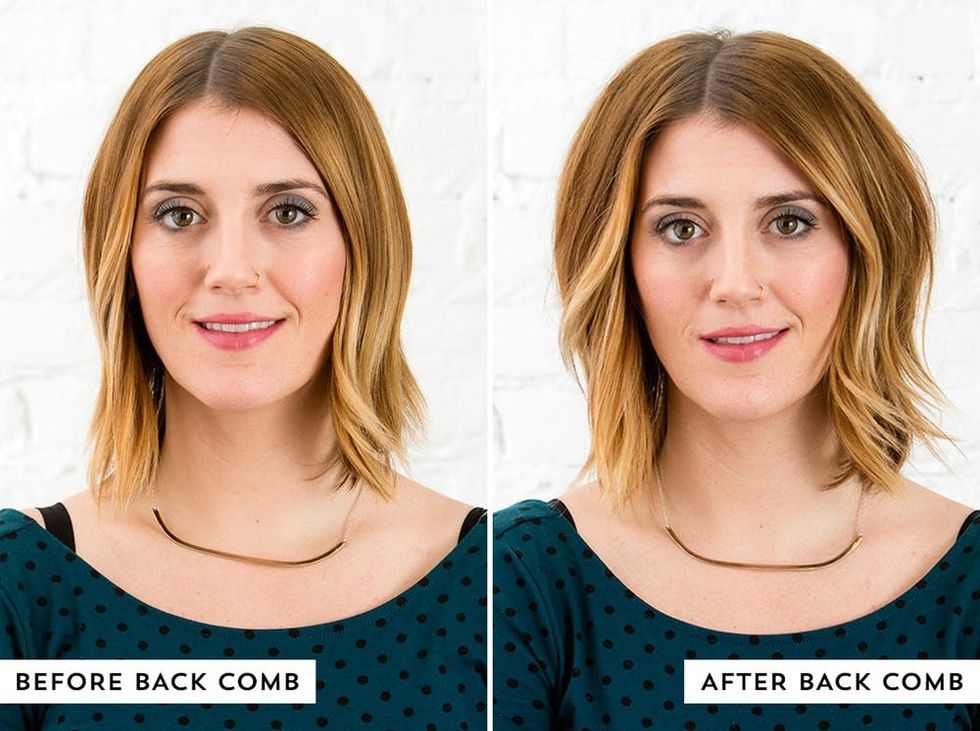
Total. Bombshell.

Although this technique is really simple, it does take practice to really get a feel for it. Remember to have fun and take it easy on yourself if it doesn’t come out as good as you’d like the first few times. Good news is, once you get this down, the possibilities for hairstyles you can create using it are endless and on a whole other level!
What hair hacks do you use to make your everyday ‘dos even better? Follow us on Pinterest for more easy tutorials and hair inspiration.
