Get on your feet!
Hate Crunches but Want Abs? Try These 10 Moves!
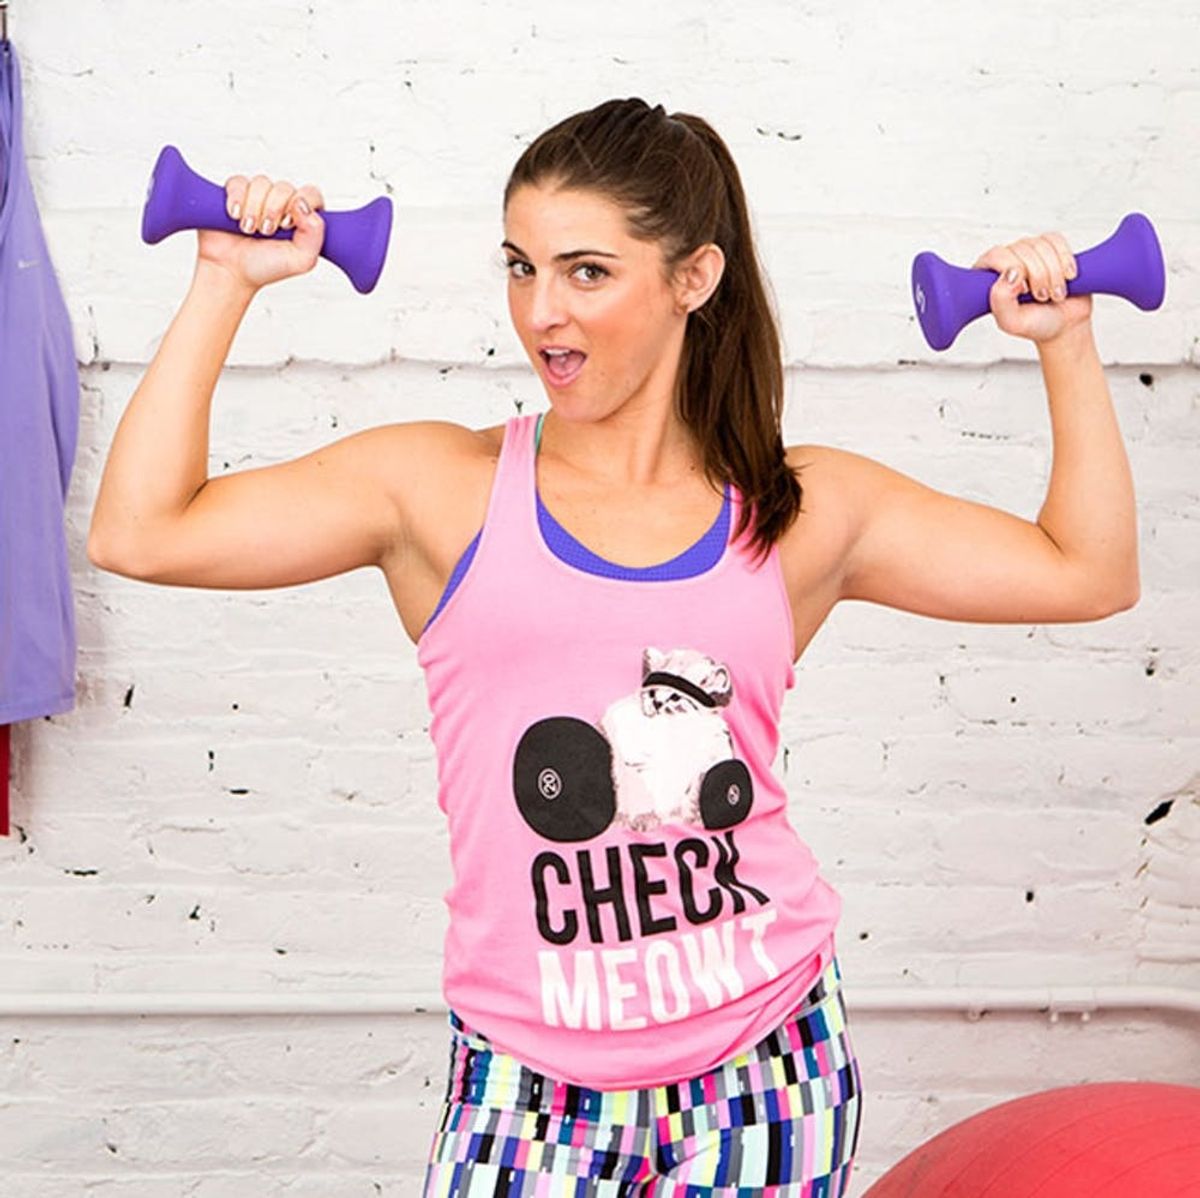
Hello, NY Rez keepers! As I told you guys in my last post on easy butt exercises, I’ve been playing soccer for the last 20+ years and know a thing or two about working out. Back in my college soccer days, we would have plank competitions to see who could hold it the longest. Being the super competitive person that I am, I would hold it until I thought I was going to pass out just so I could beat the person next to me. I remember after those competitions not being able to laugh, cough or cry for days because my abs were so sore. But it’s kind of a good hurt, because you know you worked them out and proved that they are actually in there.

A lot of people dread ab day because they only do sit-ups and crunches, which can be boring and repetitive. Newsflash, ppl: Regular crunches aren’t even the most effective way to tone your midsection!! You have to focus on your upper abdominals, lower abdominals AND your obliques to really work your abs. Core strength is a huge part of any physical activity, so by toning your abs, you’ll also be helping yourself with other exercises — even daily activities like sitting in a chair. So, whether you’re jumping back on the fitness train or you’re an exercise newbie, a solid core will increase your stability and balance, and help you perform better when working out other parts of your body.
Ready to get started? ABsolutely (sorry, I couldn’t resist).
All you need for the below exercises are a mat, hand weights and an exercise ball (optional)!
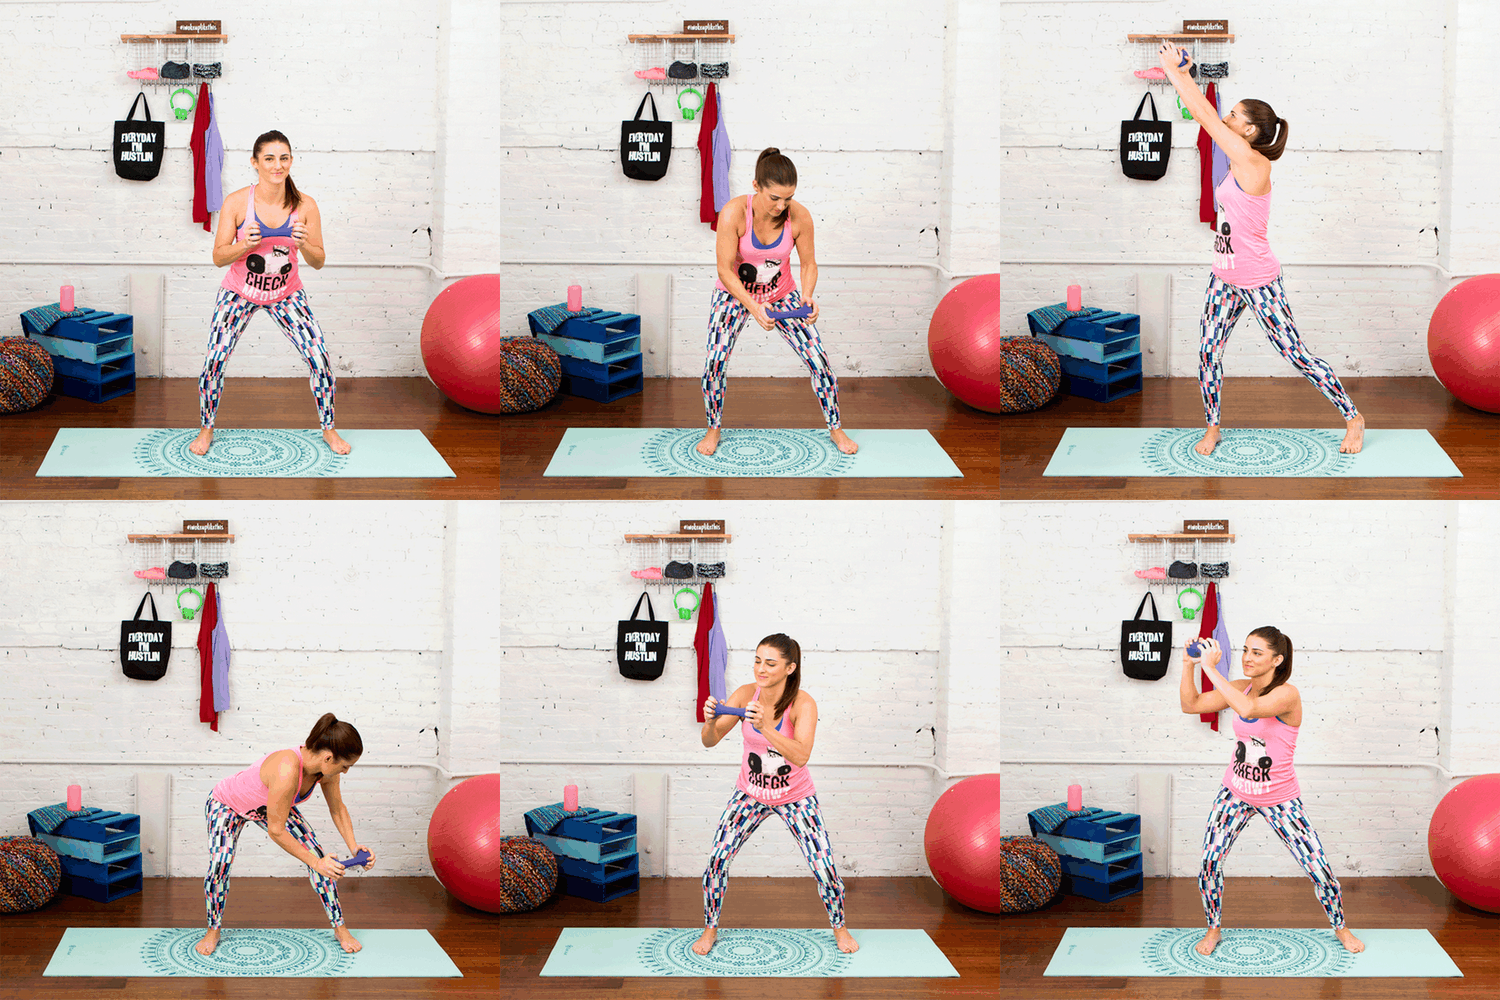
Exercise 1: Reverse Wood Chop
How much wood would a woodchuck chuck if a… oh, you get it. Chop it up!
1. Stand with your feet shoulder-width apart and grab a hand weight.
2. Hold the weight with both hands and slightly bend your knees, making sure your knees don’t pass your toes.
3. Squat down and keep your arms straight out in front of you.
4. Bring the hand weight down to the outside of your left ankle. Pause.
5. Engage your core as you stand up and simultaneously rotate your torso up to the right and extend the weight with both hands above your right shoulder.
6. It’s important to keep your core engaged and keep your weight over your heels throughout the exercise.
REPS: 15 on each side
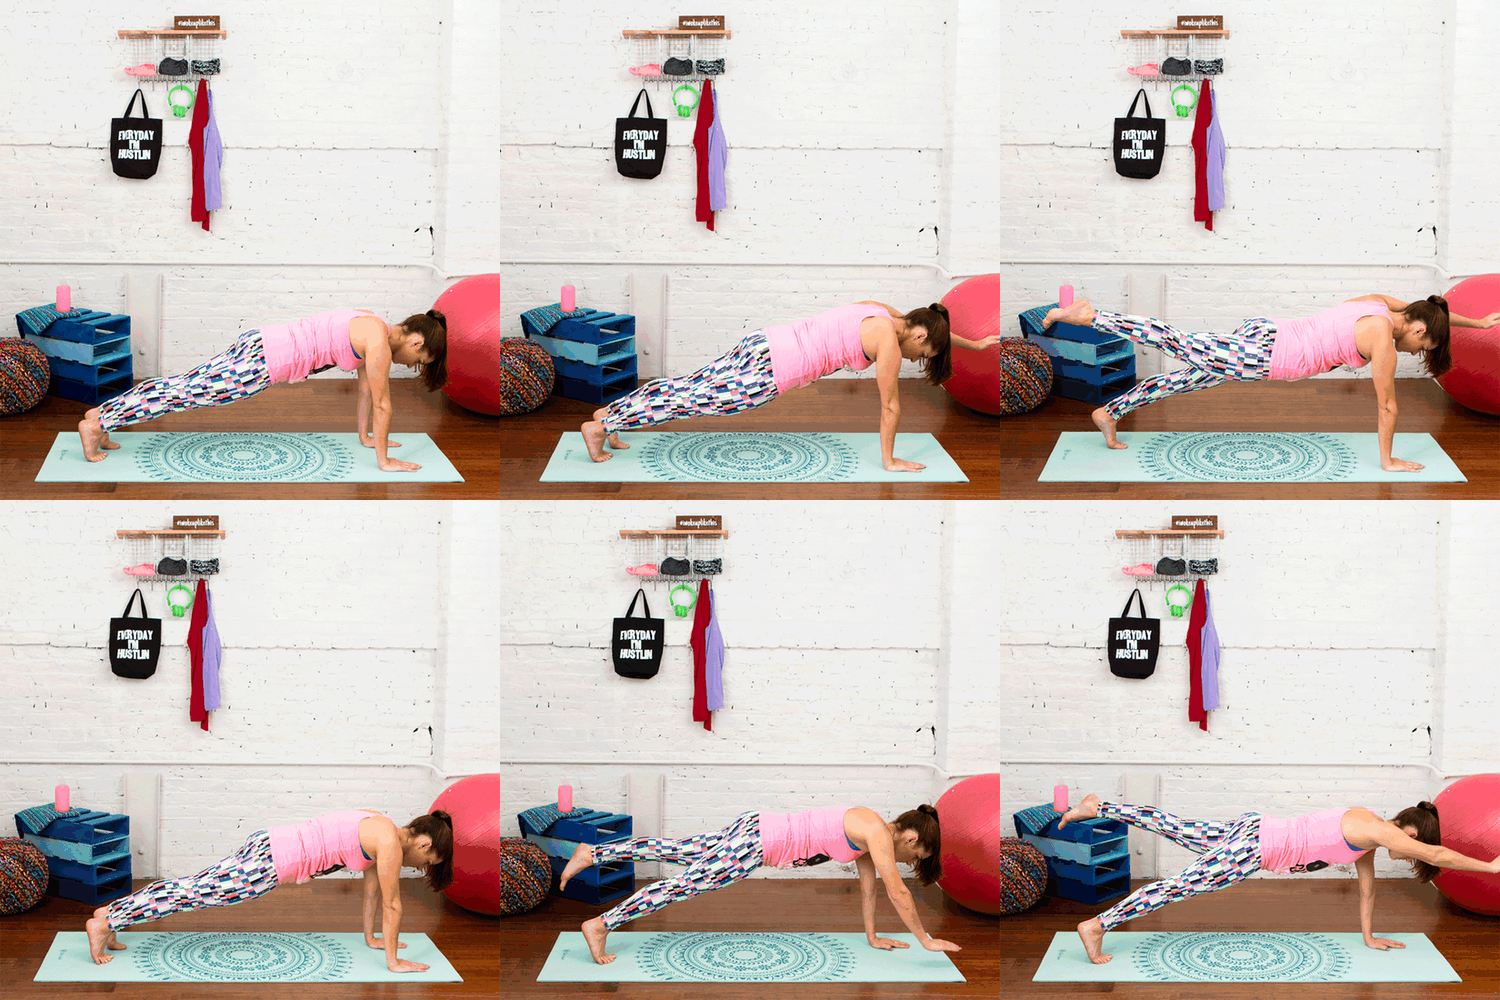
Exercise 2: Plank Lifts
Planking just took on a whole new meaning.
1. Start in the basic plank position, with your back straight and your shoulders in line with your wrists.
2. Hold the plank for 15 seconds to get your balance.
3. Lift and extend your right arm up to your ear and hold.
4. Release your arm and lift your left leg into the air and hold.
5. Now lift both your right arm and left leg at the same time while holding the straight plank. Hover and hold for a three count.
6. Switch to your left arm and right leg and repeat.
REPS: Eight on each side
Once you Have plank lifts down, you can attempt this one. Only took me one try… or maybe like 10. But who’s counting?
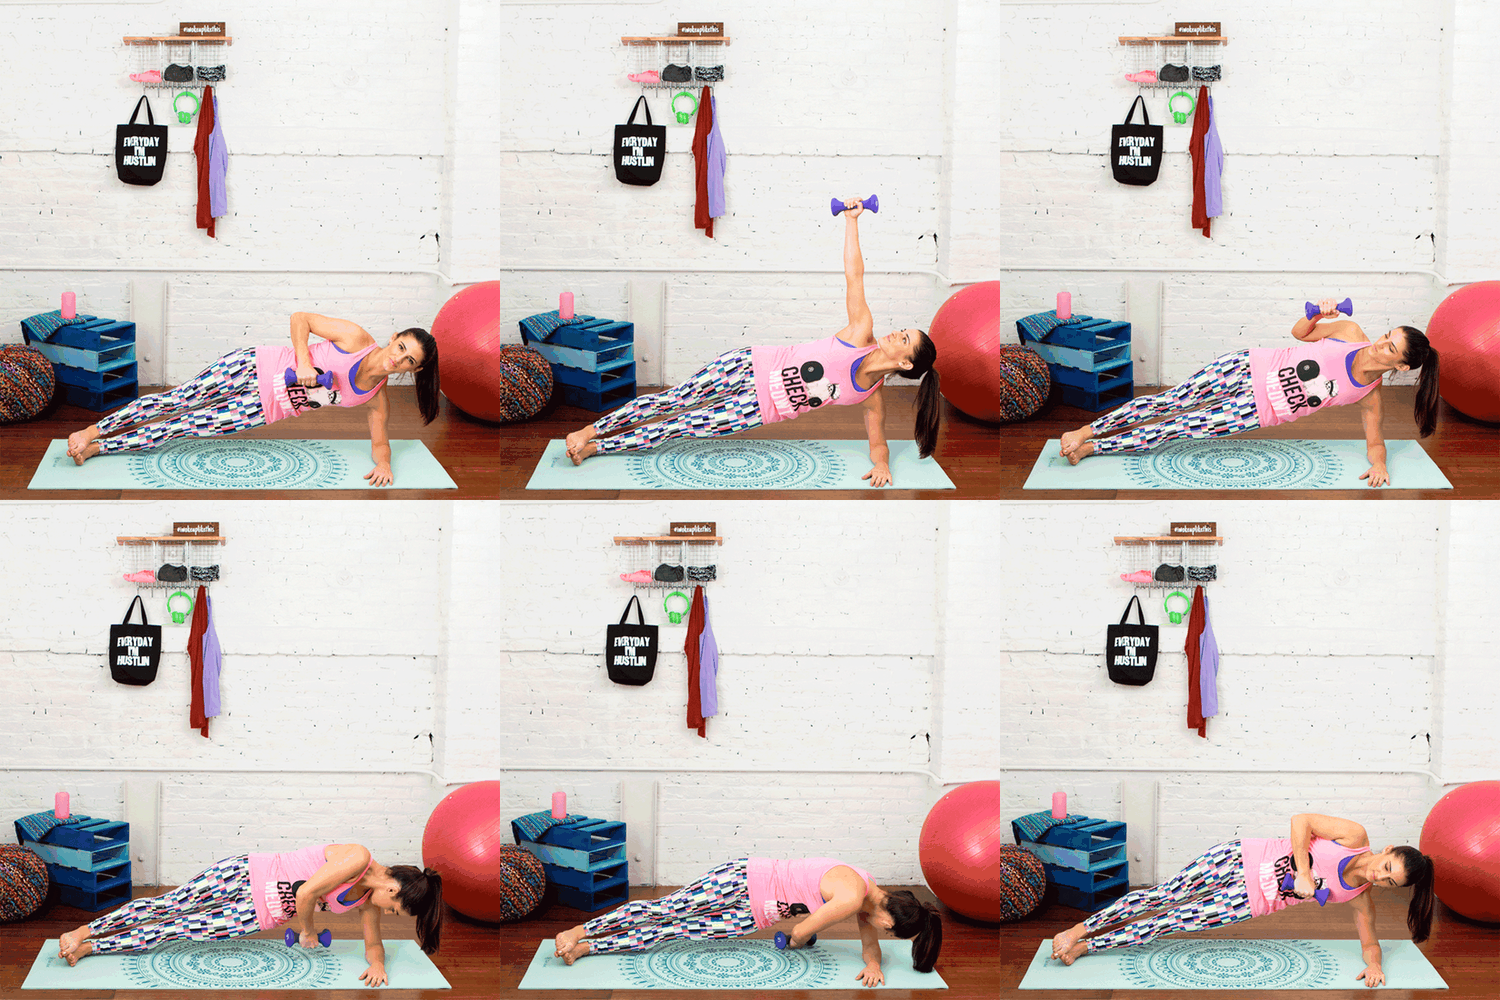
Exercise 3: Side Plank Reverse Fly
AKA love handle killers! These will hurt so bad but feel so good!
1. Start in a side plank on your left side holding your hand weight in your right hand.
2. Make sure your feet are stacked on top of each other, your hips are lifted and your shoulder is aligned with your elbow. Press down into your forearm to help lift your body.
3. Stabilize your core and spine and reach the hand weight up to the ceiling.
4. Bring the weight back down toward the floor and twist your body, bringing your hand weight under and behind you. The farther back you can bring the weight behind you, the more challenging it is on your oblique.
5. Bring the weight back up to starting position and repeat.
REPS: 10 on each side
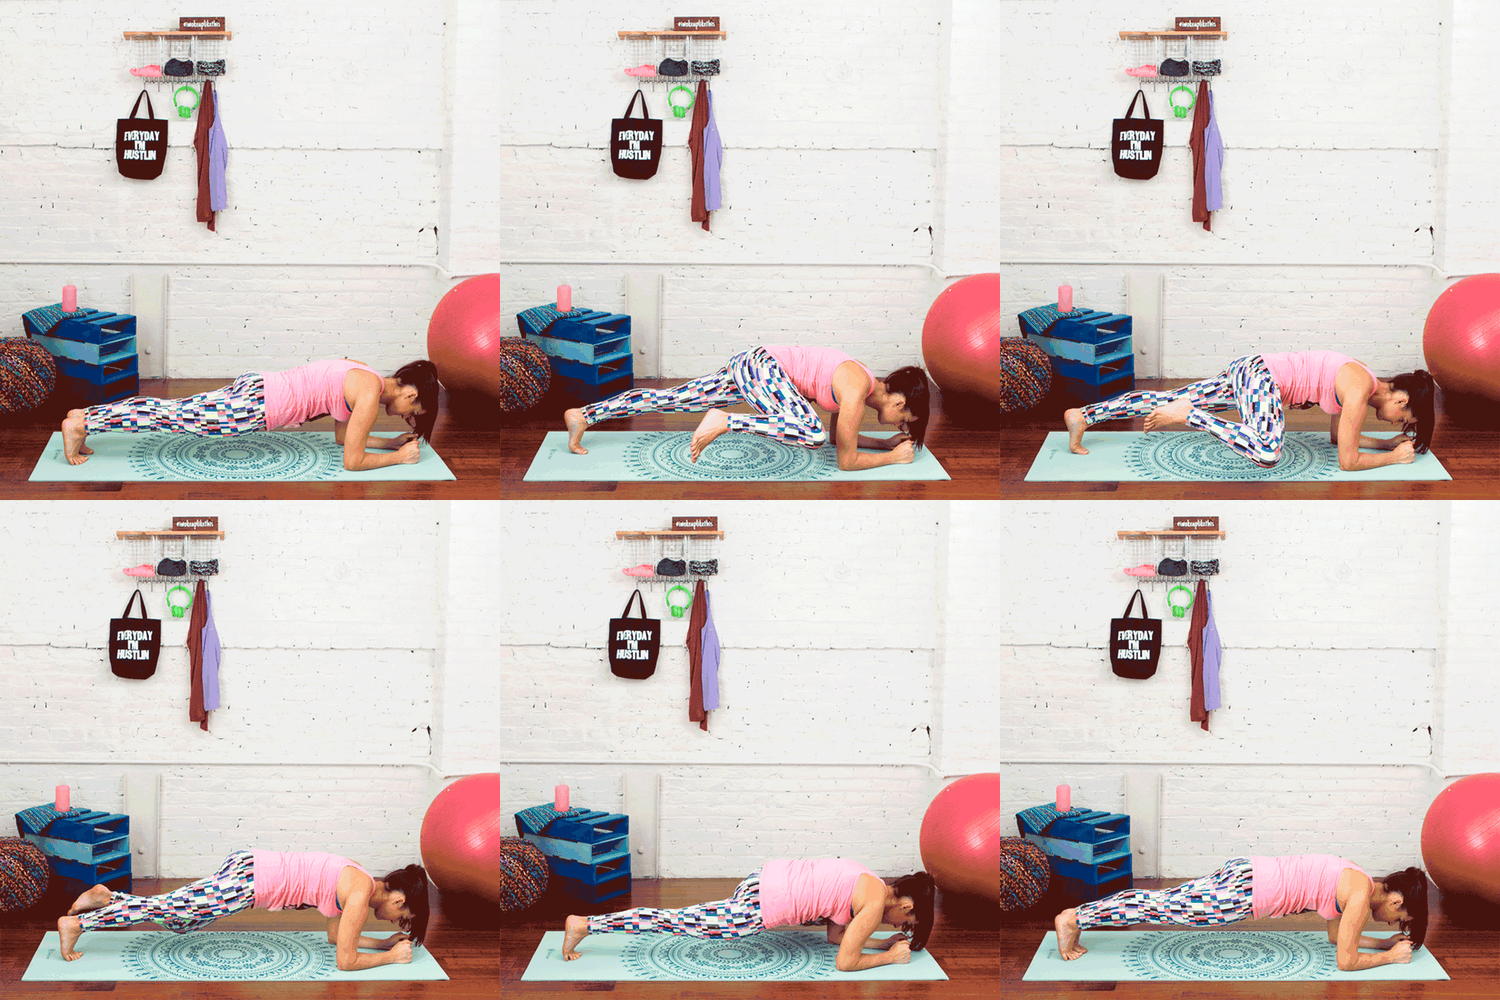
Exercise 4: Spiderman Plank
You may not be able to climb walls or shoot webs, but you’ll definitely feel like a hero after these babies.
1. Start in a traditional forearm plank position, making sure your booty and back are completely straight and your shoulders are in line with your elbows. Clasp or make fists with your hands.
2. Bring your right knee forward toward your right elbow and pause.
3. Release your knee back to starting position.
4. Repeat on the left side, bringing your left knee toward your left elbow.
5. The trick here is to keep your upper body straight and still throughout the movement.
REPS: Eight on each side
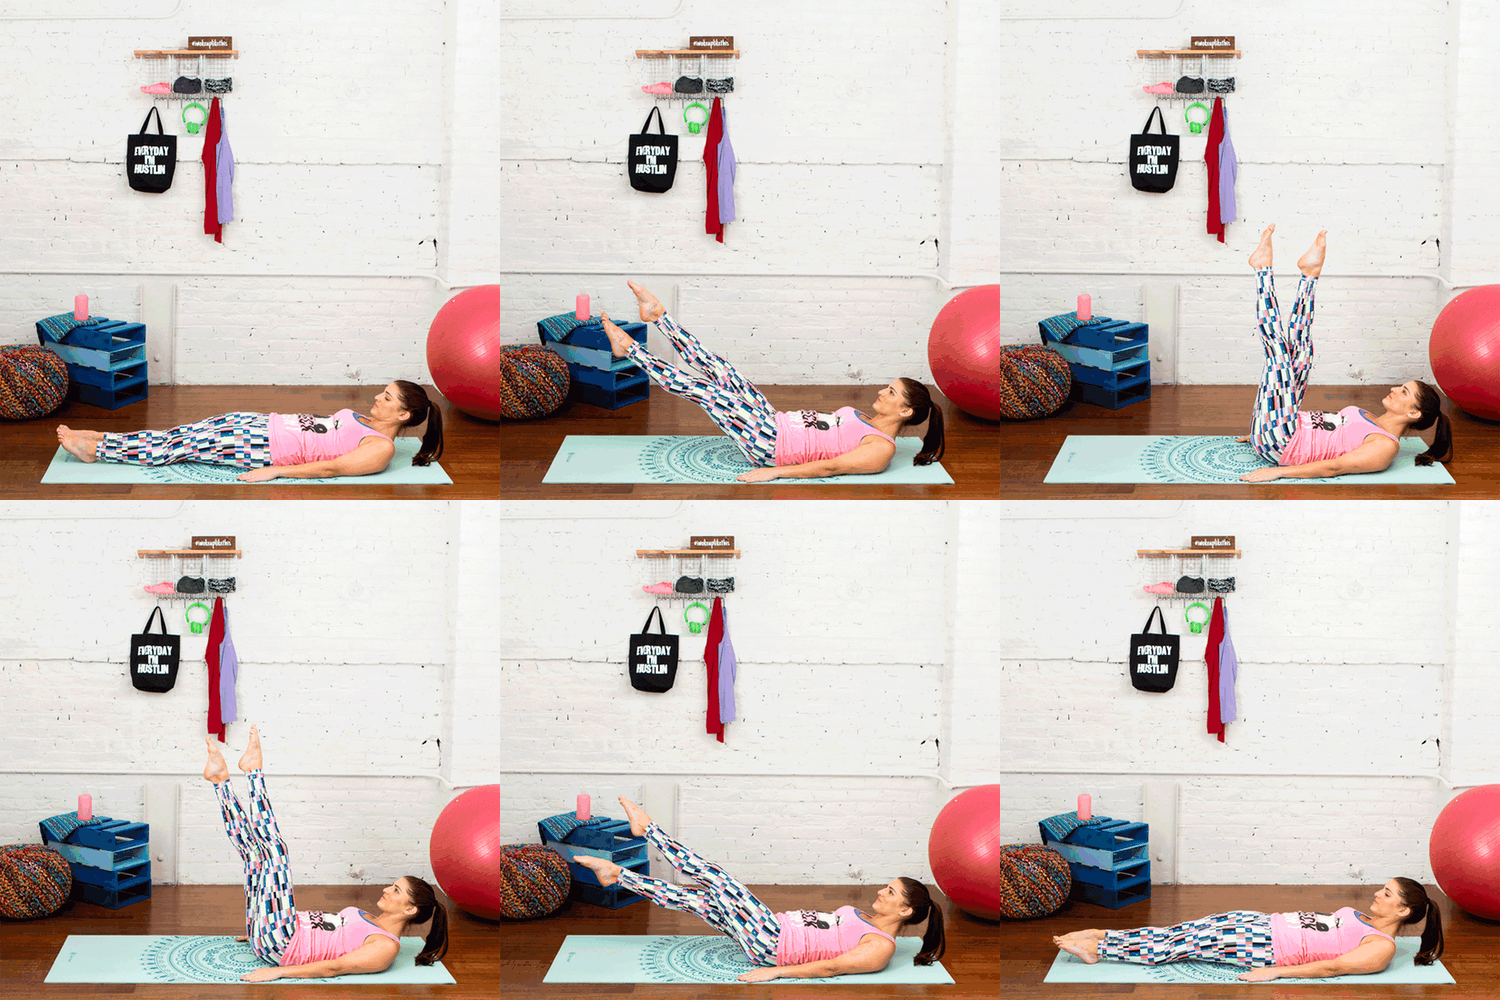
Exercise 5: Elevated Flutter Kicks
Just because you get to lay on the floor for this one doesn’t mean it’s nap time. Get kickin’!
1. Lay flat on your back with your arms at your sides, palms down and your head lifted.
2. Extend your legs fully out and point your toes to the wall.
3. Lift your heels about six inches off the floor and begin slowly criss crossing your legs over each other in a scissor-like motion.
4. Continue to lift your legs up six inches each time your legs cross.
5. Once your legs are at a 90-degree angle above you, switch your criss cross direction and go down six inches toward the floor every time your legs cross.
6. The key to this exercise is to focus on making your midsection do all the work and constantly keeping your abs contracted throughout.
REPS: Repeat five times
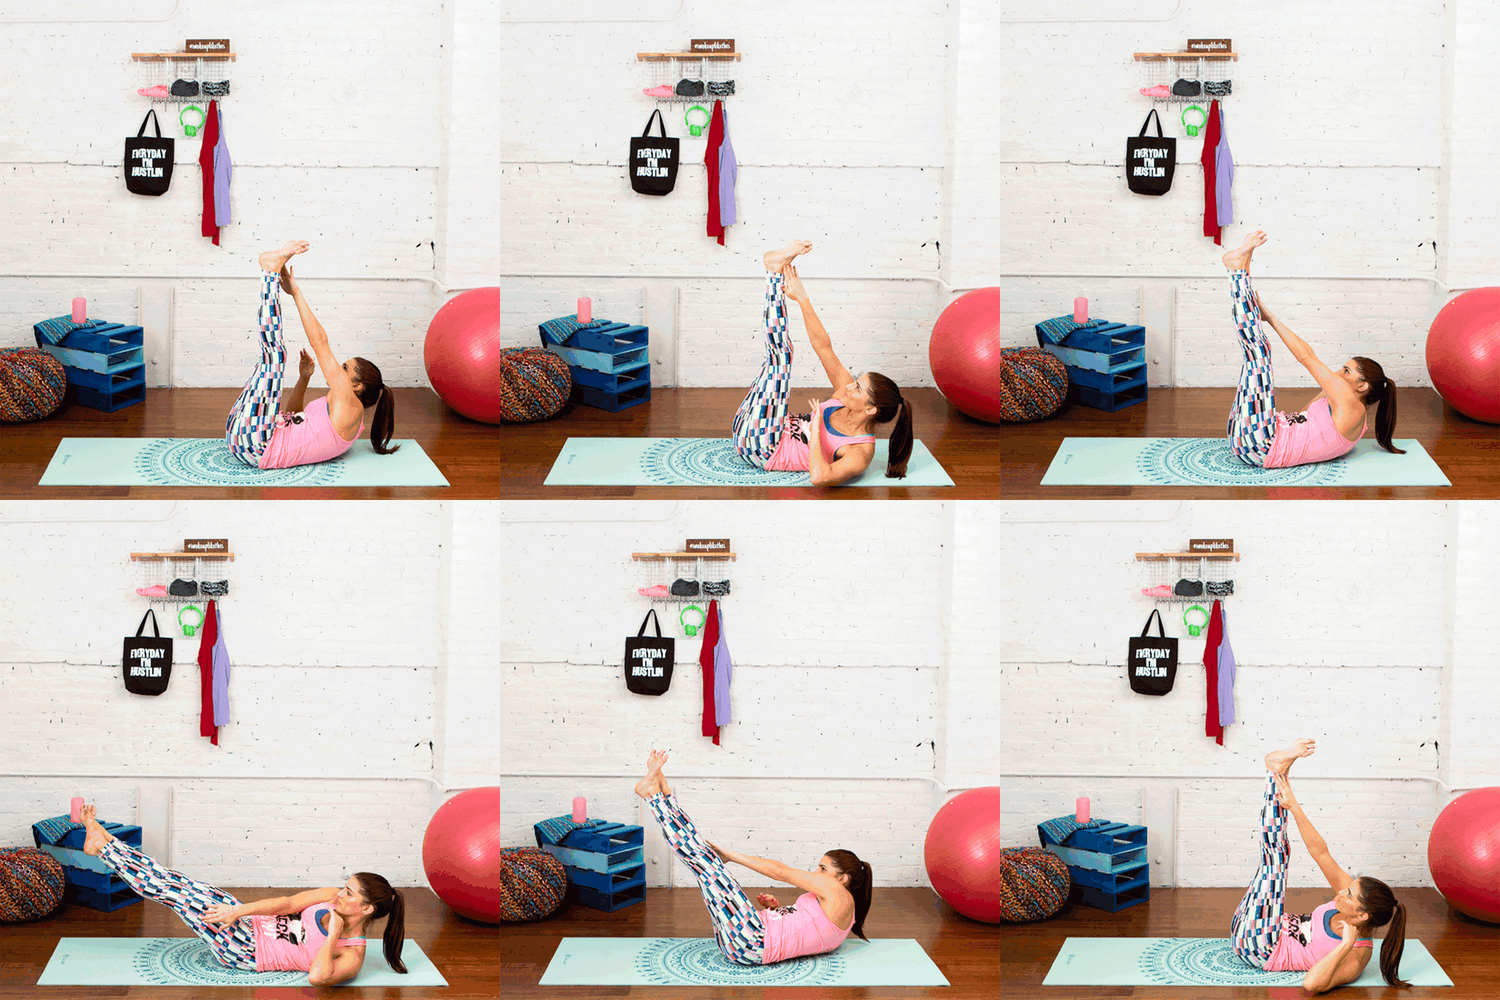
Exercise 6: Vertical Toe Touches
Reach for the stars and your goals on this one!
1. Lay on your back and lift your legs straight into the air.
2. Bring your shoulders off the ground and reach your right arm for your left foot.
3. Switch and reach your left arm for your right foot.
4. Try to keep your legs as straight as you can in the air and your shoulders off the ground the whole time.
5. For a challenge, start to lower your legs toward the ground as you reach your hand to your leg.
REPS: Two reps of one minute each
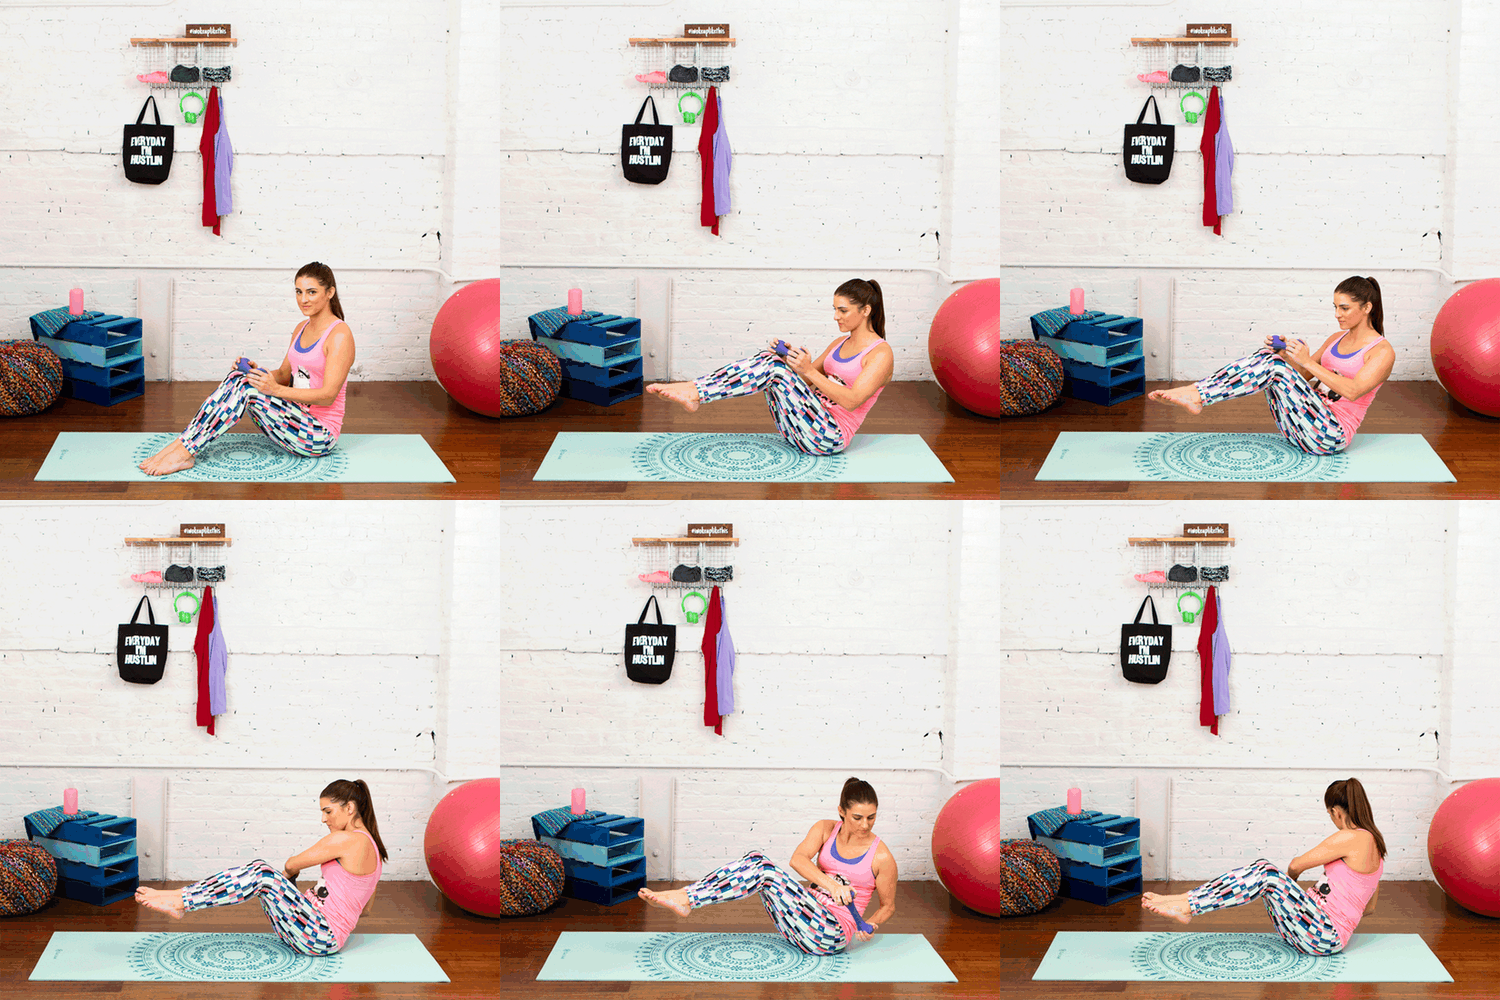
Exercise 7: Russian Twists
No, it’s not a dance unfortunately, but it may enhance your dance moves!
1. Sit on the floor with your knees bent and your feet flat on the ground.
2. Lean backwards and lift your legs to a 45-degree angle to the floor.
3. Hold the hand weight with both hands and move the weight from one hip to the other.
4. As you twist to each side, try and keep your legs still.
5. The key to this exercise is to really engage your core and make your abs do the work rather than your arms. The heavier the hand weight, the more challenging.
REPS: 20 on each side
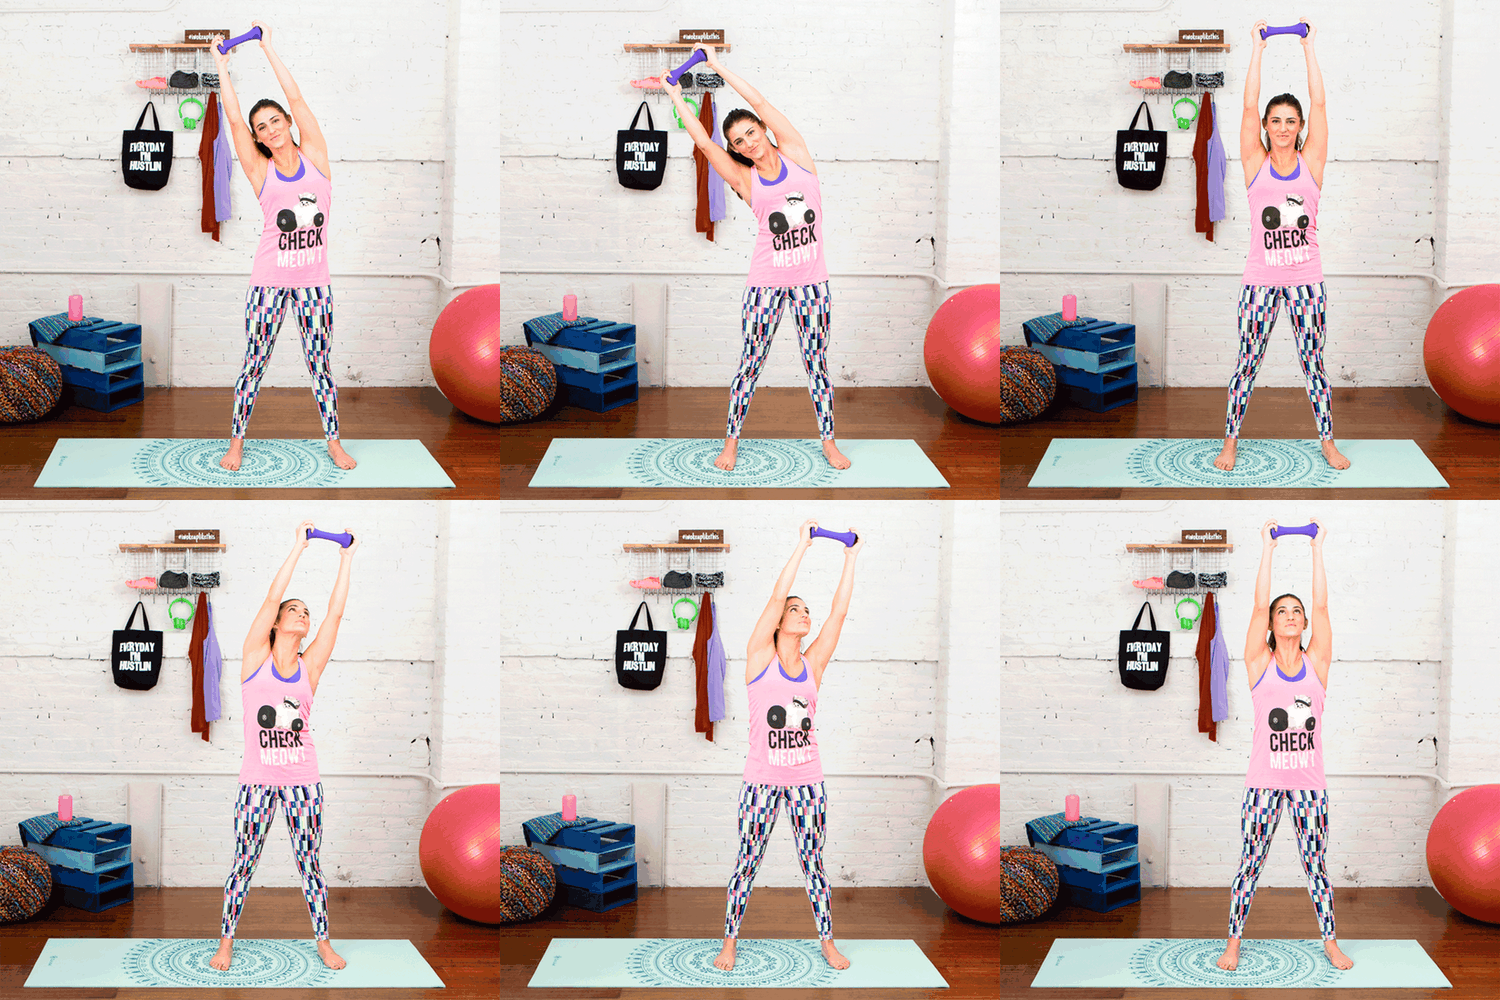
Exercise 8: Overhead Side Bend
This one is so easy you’ll think you’re just stretching. That is until you’re on rep 20 — then you’ll feel the burn!
1. Start with your feet a little wider than hip width.
2. Hold the hand weight with both hands and lift it above your head.
3. Keep both arms straight and lean over to your right side while keeping your lower body still.
4. Engage your left oblique to pull yourself up to standing position.
5. Repeat on the other side.
REPS: 20 times
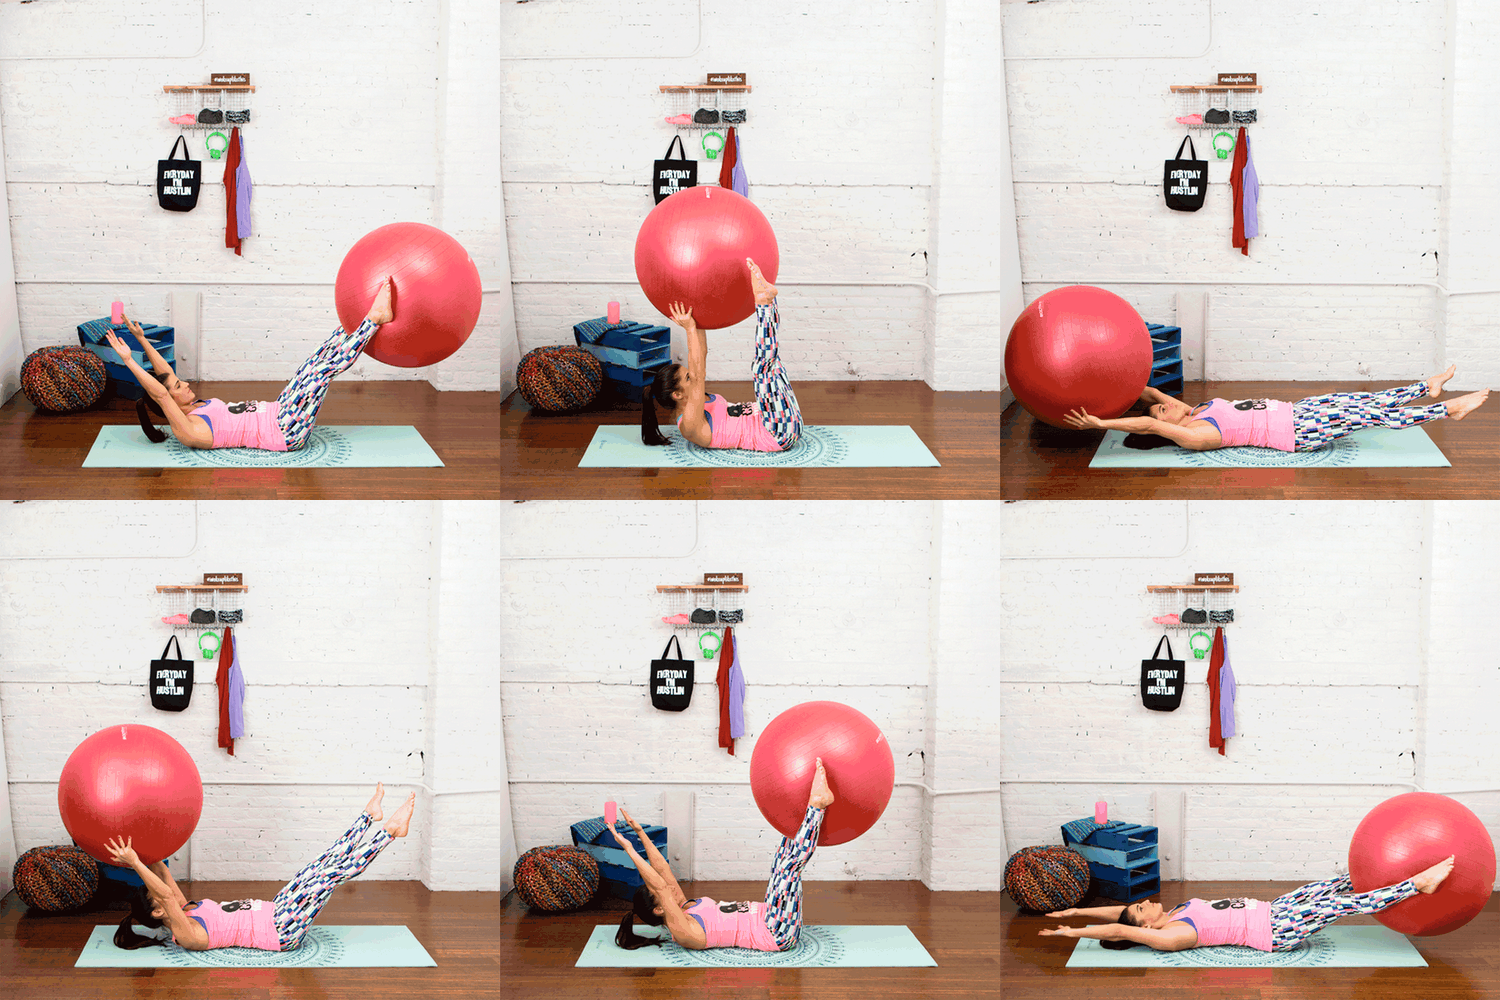
Exercise 9: Hand-to-Feet Ball Pass
This is one of my personal faves! Maybe because I sort of feel like I’m doing a circus trick.
1. Begin by lying on your back holding the ball in your hands with your arms extended overhead.
2. Lift your head and shoulders off the floor as you move the ball above your head towards the middle of your body.
3. At the same time, bring your legs straight up in the air toward the middle of your body.
4. Once your feet meet the ball in the middle above you, transfer the ball from your hands to your ankles. Your feet will mimic your hand placement and your ankles will be on either side of the ball.
5. Squeeze your ankles into the ball for a tight grip.
6. Lower your legs, still squeezing the ball down to the floor as far as you can without touching the floor.
7. While doing this, your hands will mimic the same motion and slowly drop toward the floor above your head.
8. Keeping straight arms and legs, lift them both up to the center, and again transfer the ball from your ankles to your hands.
9. Repeat this motion continuously.
REPS: Transfer the ball 10 times
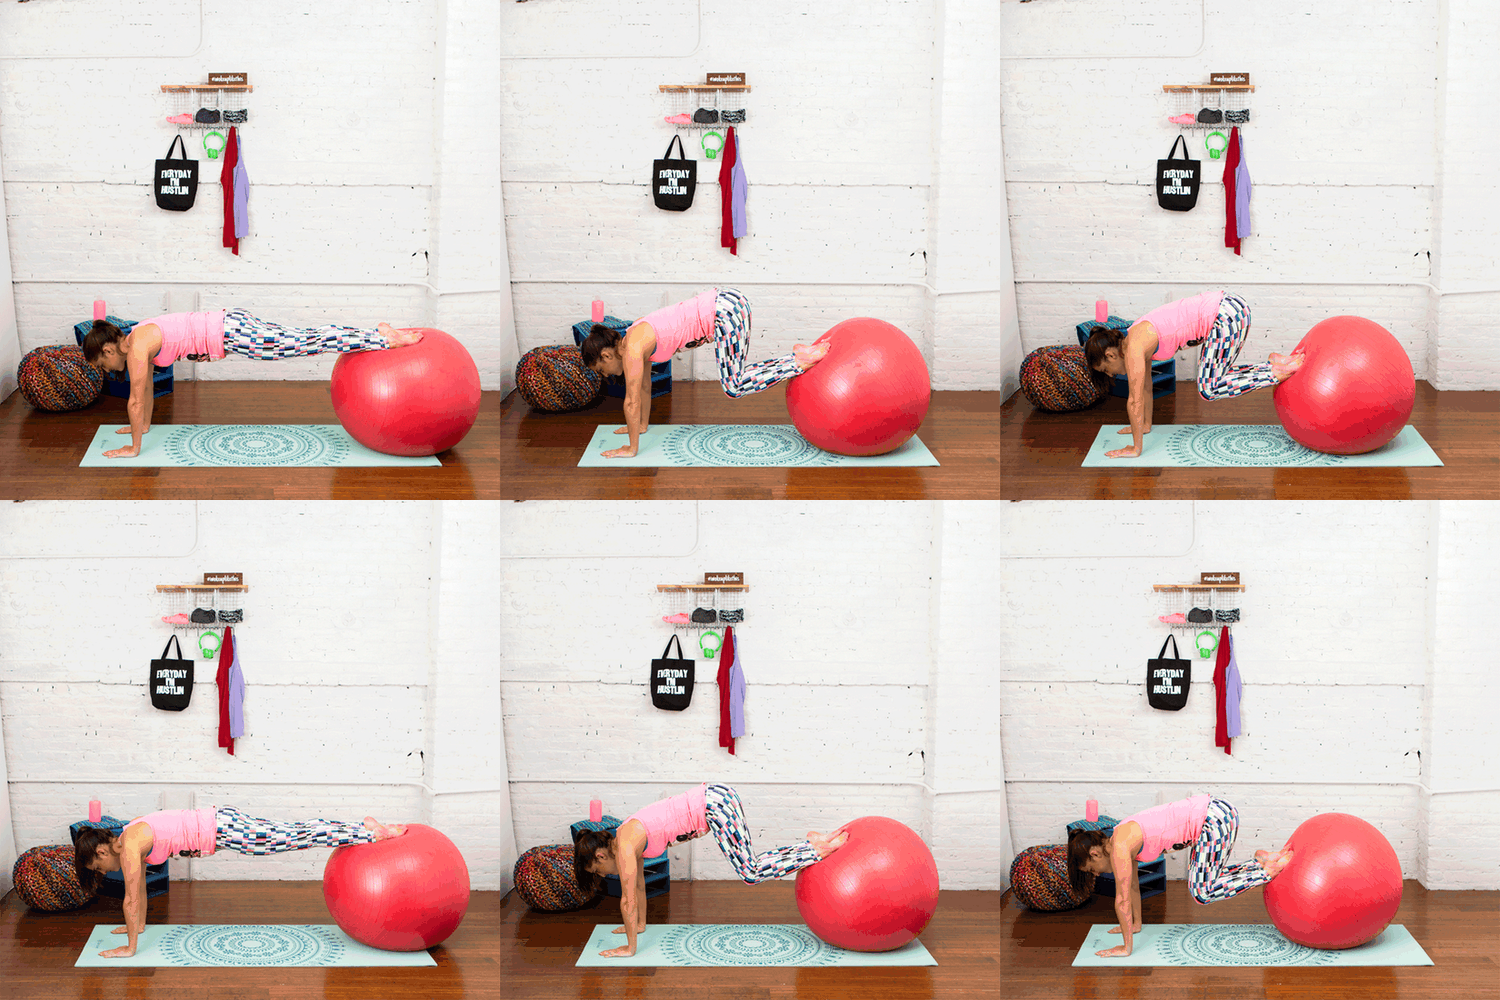
Exercise 10: Plank With Ball Curls
Yep, more planks, but this one will get you shaking. Best for last? Maybe the hardest? You got this!
1. Start in the basic plank position with your back straight, your booty down and your shoulders in line with your wrists.
2. Instead of your feet on the floor, place the tops of your feet on top of the middle of the ball.
3. Hold it for five seconds to get your balance and get situated.
4. Holding your arms and core still, drive the tops of your feet into the ball to get a good grip.
5. Pull your knees into your stomach and allow the ball to roll from the top of your feet to your toes. It’s normal for your booty to hike up a bit here.
6. Make sure you’re really using your abs here to pull the ball toward you.
7. Push your knees and feet toward the back wall to starting position and repeat.
8. If you have a smaller exercise ball, you can do this move in a forearm plank.
9. If you want to really challenge yourself, you can drive your knees to the left and right side of your body to focus on your obliques.
REPS: Do as many as you can; it’s your last ab exercise!
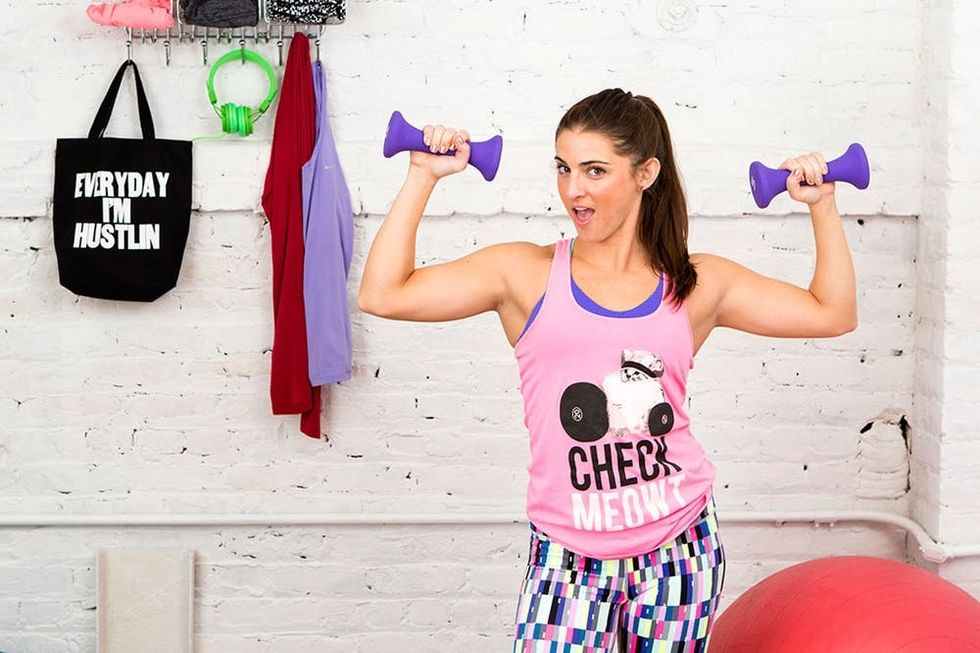
After those exercises, your abs must be screaming at you. Try cobra, backbends or cat-cow; any of those stretches will help alleviate the soreness that is inevitably coming tomorrow. Use the exercise ball to do side bends and other stretches. You’re probably grumbling at me now, but you’ll love me tomorrow :)
What other ab exercises do you do to tone your belly? Tweet us your moves @BritandCo.


