Last week we introduced you to the world of hair bows, in the form of ponytails, fishtail braids, and a top knot. Today, we’re gonna go ahead and reintroduce you to someone who probably know pretty well: The Bobby Pin. Forget about hiding those bobby pins of yours – these looks are all about showcasing them and using them to create creative designs in your ‘do!
3 New Ways to Add Bobby Pins to Your ‘Do
Last week we introduced you to the world of hair bows, in the form of ponytails, fishtail braids, and a top knot. Today, we’re gonna go ahead and reintroduce you to someone who probably know pretty well: The Bobby Pin. Forget about hiding those bobby pins of yours – these looks are all about showcasing them and using them to create creative designs in your ‘do!

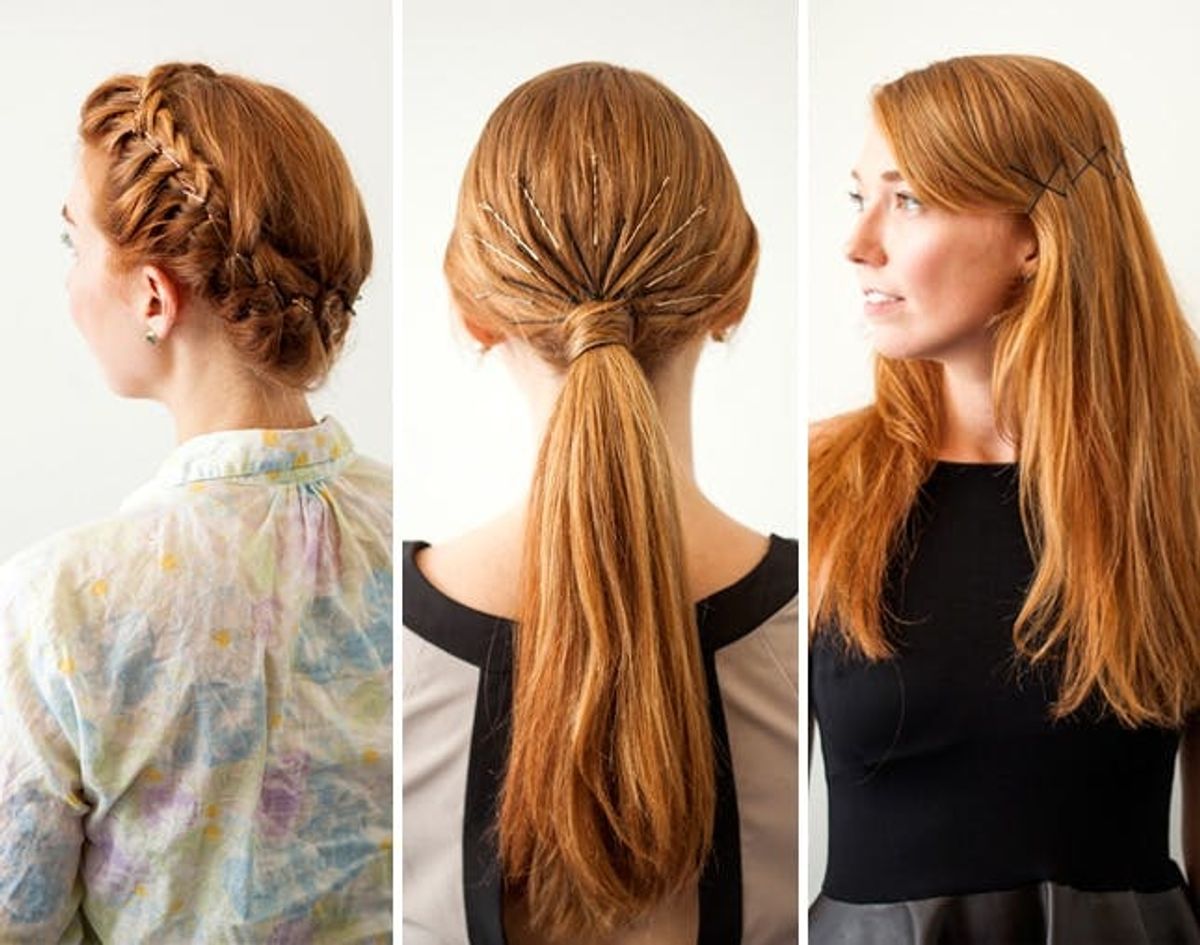
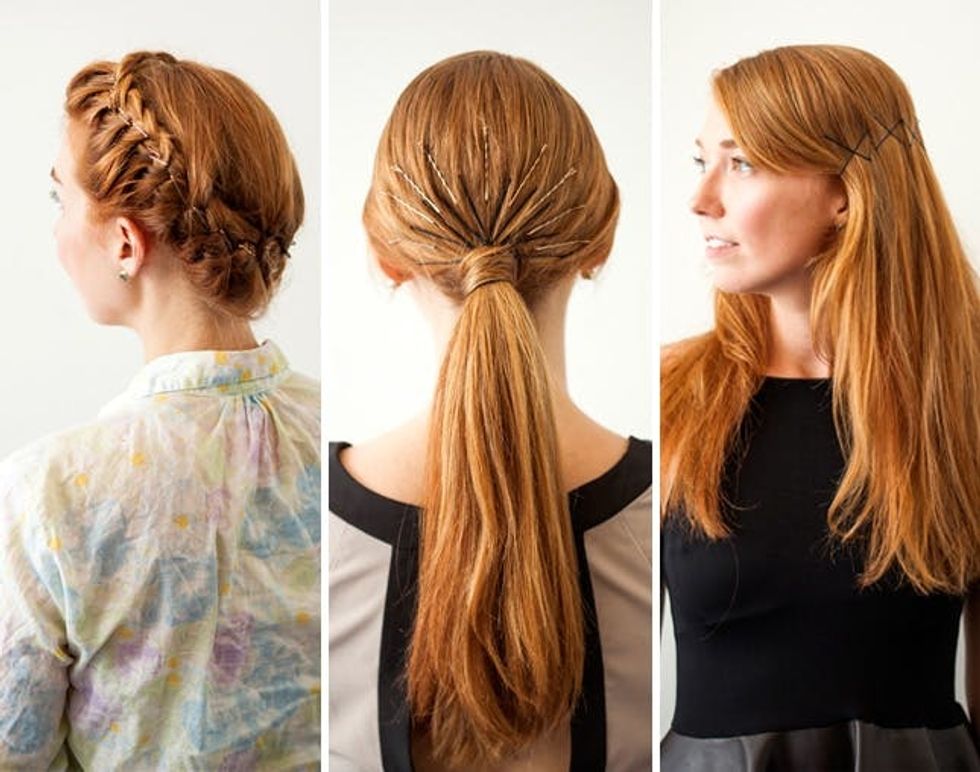
We’ll start with a crown braid, decorated with sparkly gold bobby pins. For all tutorials in this post, the photos correspond to the following steps starting with the upper left photo.
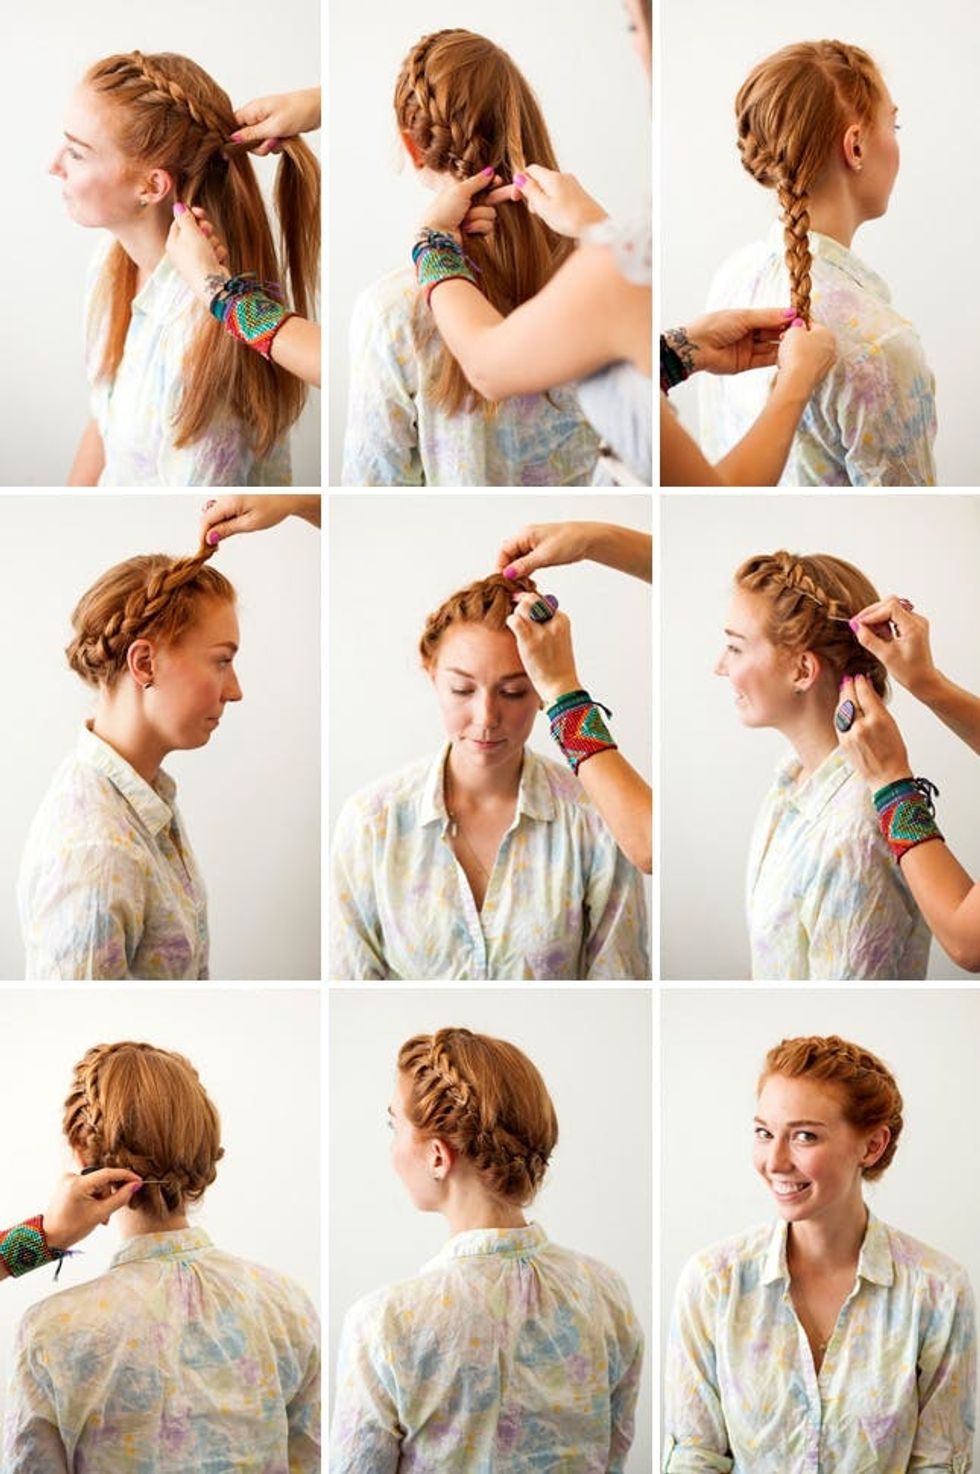
1. Start on one side of your head and begin to french braid.

2. Continue to braid along the perimeter of your hair line until you have reached the opposite side of your head.
3. Braid the remaining hair into a regular braid.
4. Wrap the braid up and behind the french braid and use bobby pins to secure.
5. Loosen the braid a little so it is less tight around your head.
6. Now, it’s time to add some bobby pins!
7. You can use pins that contrast with your hair, or ones that enhance it.
8. Don’t you love the little bit of glitz in this classic hairstyle?
9. We love the extra volume that happens naturally because of the bobby pins.
Next up, we’ll turn bobby pins into a sort of barbed wire inspired headband. But, as you can see, it’s more film noir than 21 Jump Street.
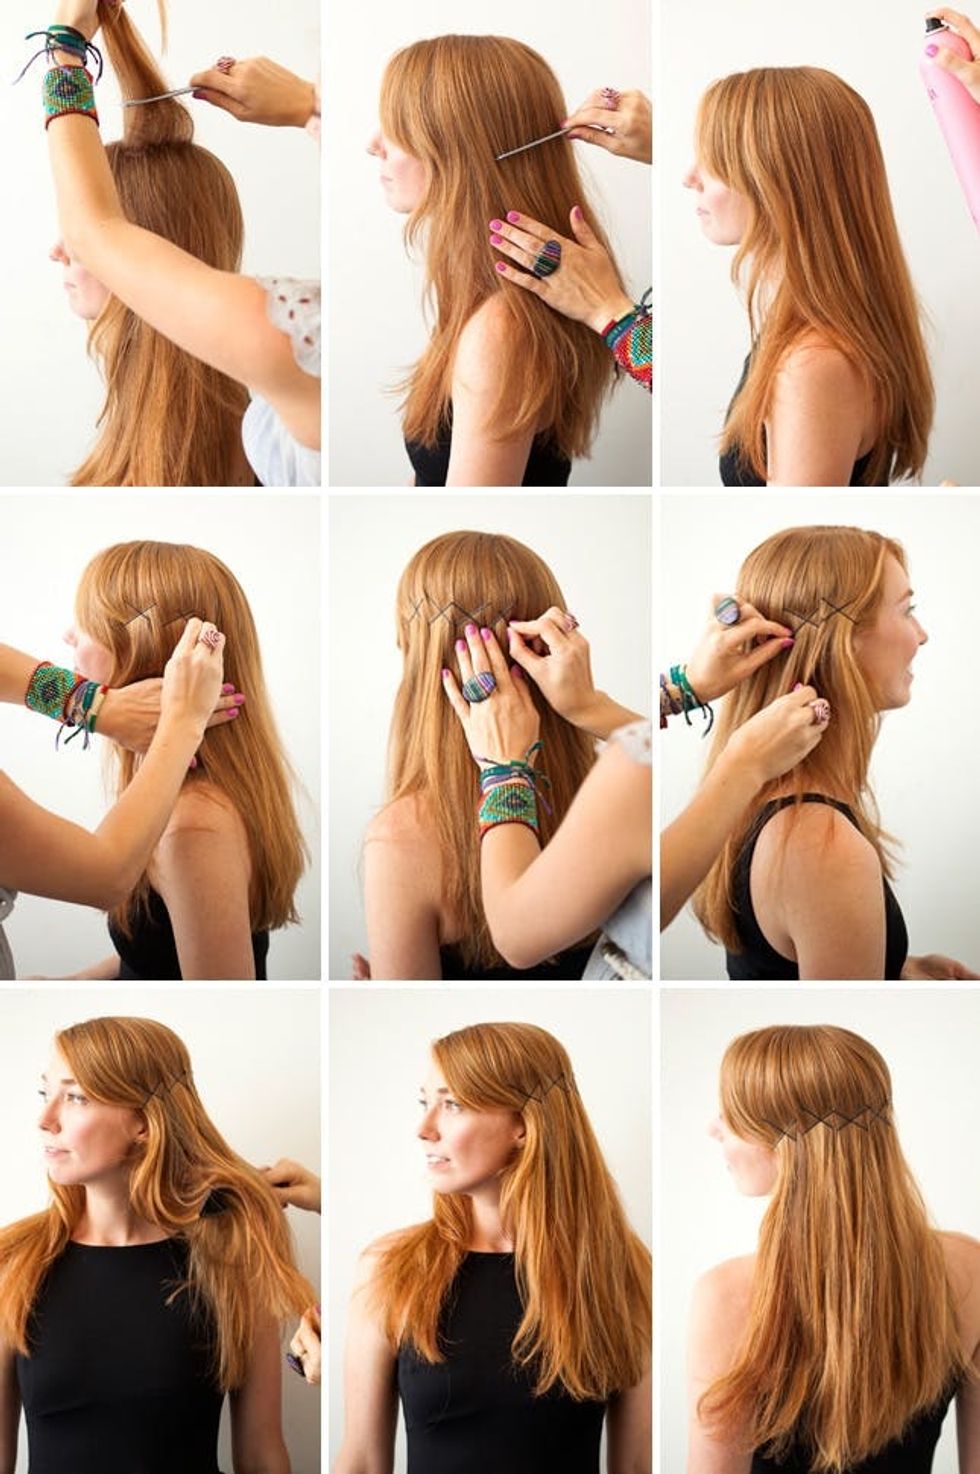
1. Start by back combing along the crown of your head to give volume and texture.

2. Smooth and comb down.
3. Use hairspray to prevent fly aways.
4. Start by pinning in a criss cross motion on one side.
5. Continue around the back.
6. Restart on the other side so that the pins meet in the middle.
7. Add a little more volume by back combing from bottom once your pins are in.
8. Doesn’t our darling model look like she’s from a totally different era?
9. We’re definitely digging the cross-hatched pattern.
Last, we’ll add a little pep to your standard ponytail.
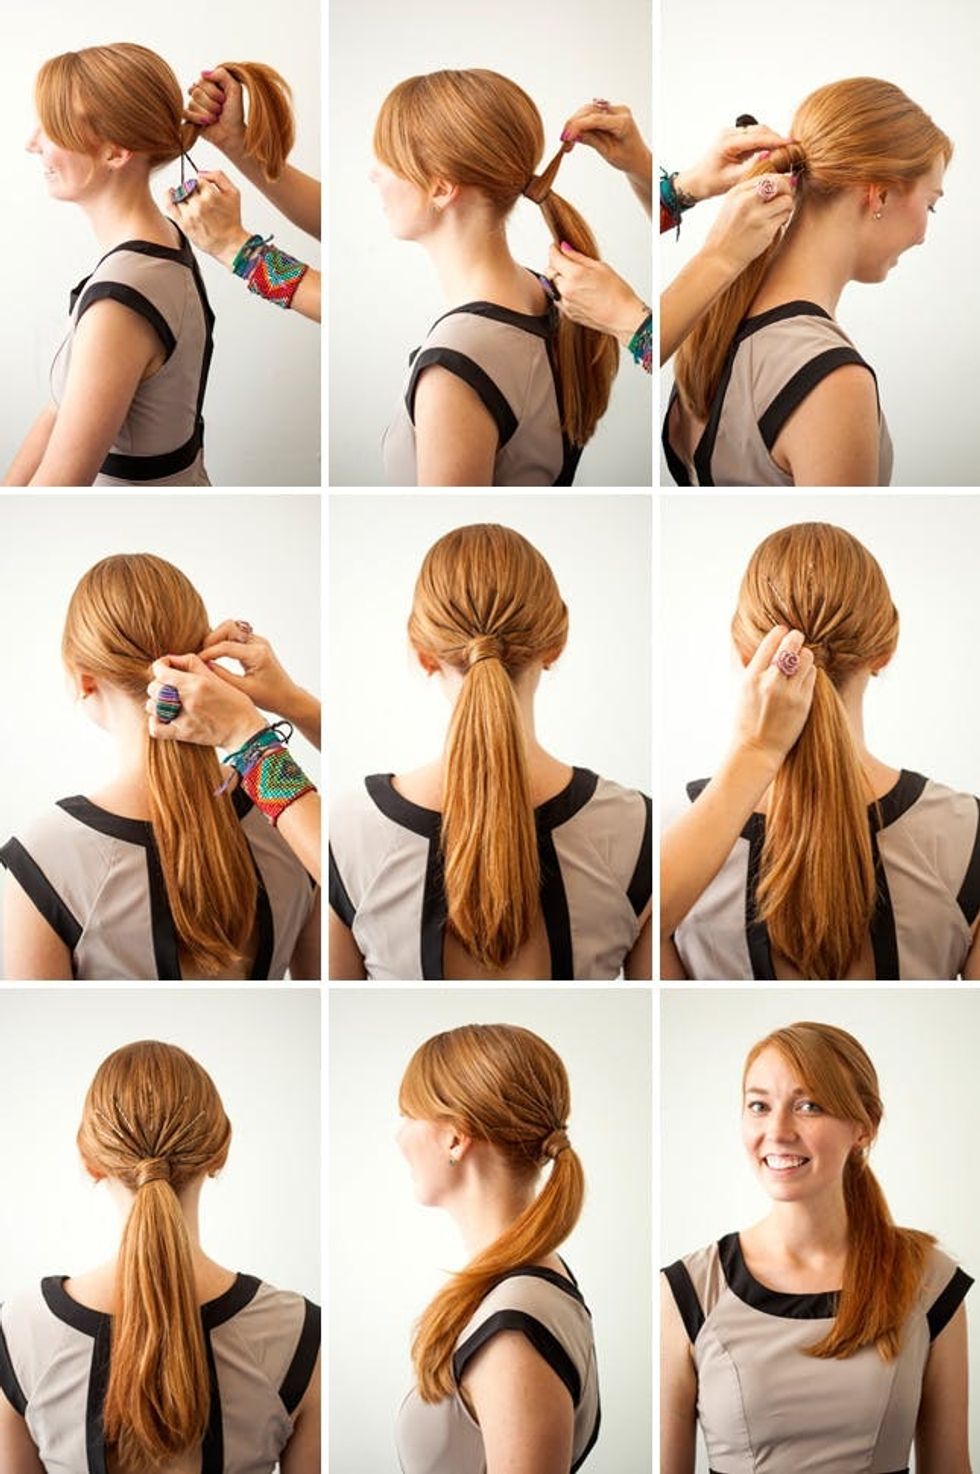
1. Pull your back into a tight, smooth ponytail.


