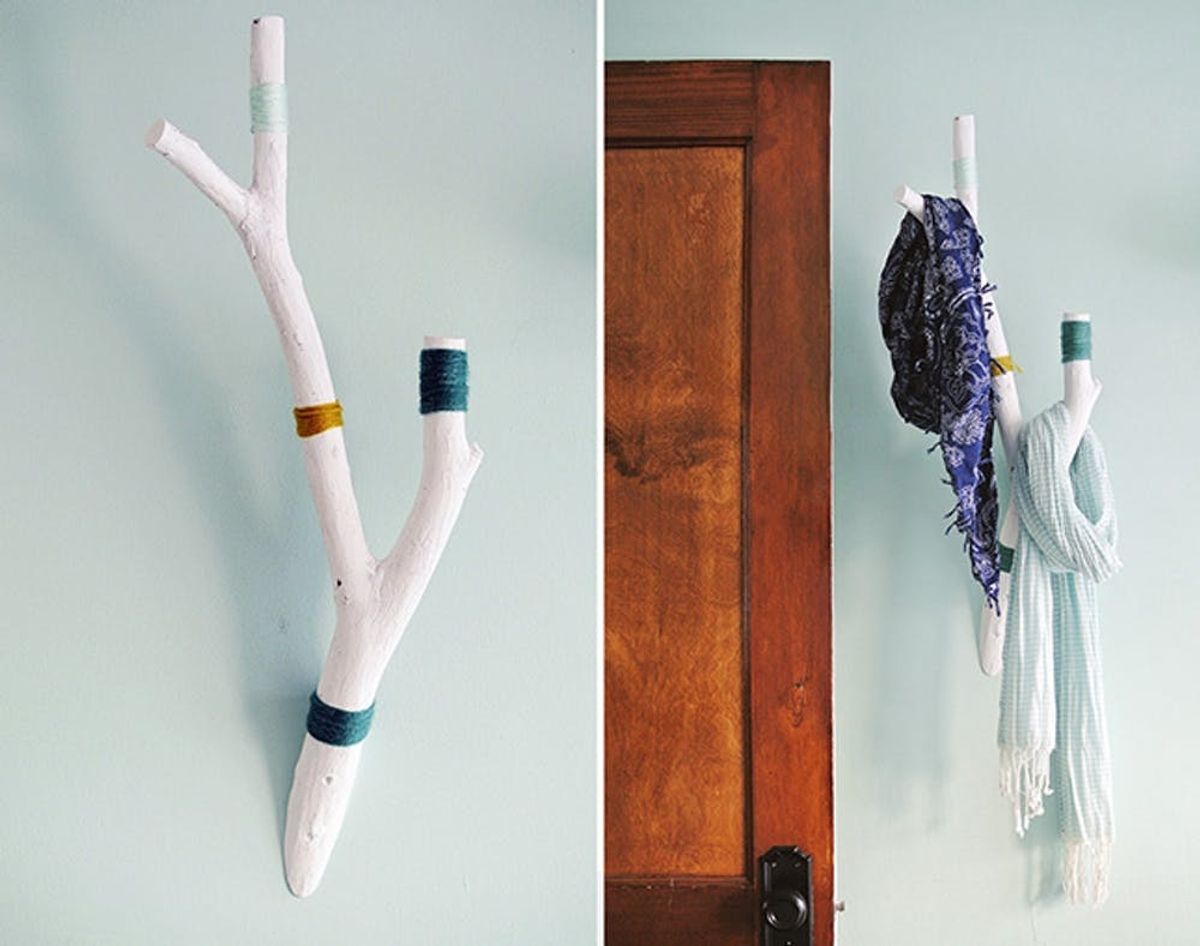
You’ve seen ‘em in the hippest home goods stores. They’ve made you stop and think twice about adding outdoor-sy decor to your pad—come on, they look like a work of art anyway! We’re talking about painted branch wall hooks. And if you haven’t pounced on purchasing this eye-catching piece of home decor yet, you’ll be happy to know it’s easy to get the look using nothing but a branch from your yard (wood scraps FTW!). Toss a few DIY staples into the mix, and you’re well on your way to making this trendy piece for next to nothing.
Turn a Backyard Branch into a Color Block Wall Hook

You’ve seen ‘em in the hippest home goods stores. They’ve made you stop and think twice about adding outdoor-sy decor to your pad—come on, they look like a work of art anyway! We’re talking about painted branch wall hooks. And if you haven’t pounced on purchasing this eye-catching piece of home decor yet, you’ll be happy to know it’s easy to get the look using nothing but a branch from your yard (wood scraps FTW!). Toss a few DIY staples into the mix, and you’re well on your way to making this trendy piece for next to nothing.
Materials:
– thick sturdy branch
– 2 screws
– white acrylic craft paint
– yarn in various colors
Tools:
– sanding block or sand paper
– paint brush
-bandsaw or hand saw
-drill with standard drill bit
Instructions:
1. Prep your branch by cutting off excess branches as desired.
2. Cut the bottom of your branch at angle so it can be easily anchored into the wall.
3. Paint the branch and let dry. Then, dress it up with your yarn in a color block pattern.
4. Drill two holes at the base of the branch, then screw to the wall.
5. Fill in the screw holes with white paint and let dry.
6. Hang and display your scarves, beanies, or hair accessories!
Start by finding the perfect branch, something sturdy with a few splits coming off the main stem. Knock off any excess bark or sticks and cut the bottom of your branch at a 10-15 degree angle to create a flat, angled surface that will lay flush against the wall. Then, sand around where you made your cut to smooth out the edges.
Using white acrylic craft paint, paint your branch and let dry. Easy! Apply a second coat if needed, then once it’s dry, onto the fun part: adding color blocks with yarn.
Fasten the yarn to the branch by tying it in a knot and tucking the ends under the other layers of string, or you could always use a dab of craft glue to keep it in place as you loop ‘round and ‘round.
Next, drill two holes through the angled base of the branch—this is where you’ll screw the branch into the wall. Pro tip: drilling guide holes will make it much easier to screw your branch to the wall. So don’t skip that step.
Now screw your branch to the wall using your drill and touch up the screw holes with white paint. Once it’s dry, you’re done!
Whoa, this painted branch looks so good on its own! It really livens up the wall even when it’s bare, especially with the yarn color blocks in such complimentary hues. You know, you always could make this more of a decor element, say if you hang two matching branches on either side of a fireplace—like in place of scones—or staggered up a thin beam. Though let’s be real, you’re gonna need somewhere cool to stash all those spring scarves!
Yeah, that’s not too bad either!
What clever ways have you turned nothing, like a loose branch, into something awesome, like this wall hook? Tell us about your DIY projects in the comments below.


